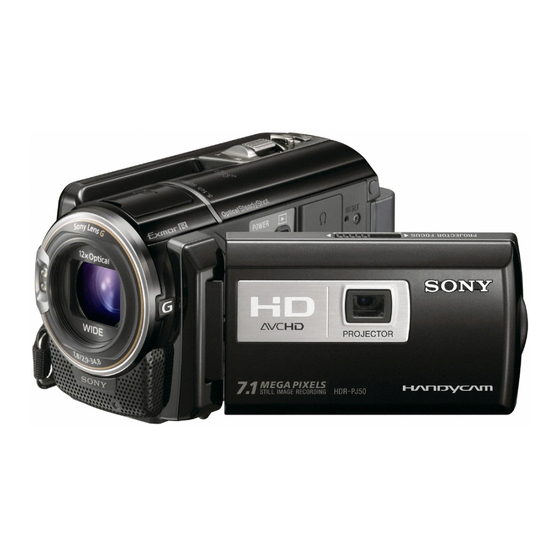
Sony Handycam HDR-XR160 Operating Manual
Digital hd video camera recorder
Hide thumbs
Also See for Handycam HDR-XR160:
- Operating manual (224 pages) ,
- Handbook (130 pages) ,
- Service manual (57 pages)
Advertisement
Quick Links
Digital HD Video
Camera Recorder
Operating Guide
US
Gufa de operaciones
ES
Additional information
on this product and
answers to frequently asked questions can be
found at our Customer Support Website.
Puede encontrar m_is infbrmaci6n sobre este
pmducto y respuestas alas preguntas m_is
frecuentes en nuestro sitio Web de atenci6n al
cliente.
htt p://www.so ny.net/
Printed
on 70% or more
recycled
paper.
Impreso
en papel
reciclado
en un 70% o mils.
© 2011 Sony Corporation
Printed
in China
III I IIII I I I II
4285335110
C
1/3
m
1]3
MAn
r__Arn
AVC H i]
H.--Im[
..................................
MEMI]RY SII[K
r,_
_1) I"f°LITHIUM _
_'_-'_J_
Advertisement

Related Manuals for Sony Handycam HDR-XR160


Summary of Contents for Sony Handycam HDR-XR160
- Page 1 H.--Im[ MEMI]RY SII[K Printed on 70% or more recycled paper........r__Arn Impreso en papel reciclado en un 70% o mils. III I IIII I I I II _1) I"f°LITHIUM _ _'_-'_J_ © 2011 Sony Corporation Printed in China 4285335110...
- Page 2 Record the serial number operating and maintenance in the space provided below. Refbr to these (servicing) instructions in numbers whenew, r you call upon your Sony the literature accompanying dealer regarding this product. the appliance. Model No. HDR- Serial No.
- Page 3 SAVE THESE INSTRUCTIONS. DANGER - TO REDUCE THE RISK OF FIRE OR ELECTRIC SHOCK, us iiii CAREFULLY FOLLOW THESE INSTRUCTIONS. • Read these instructions. • Keep these instructions. • Heed all warnings. • Follow all instructions. • Do not use this apparatus near water. •...
- Page 4 Representative plug of power supply cord of countries/regions around the world. A l_T,e B 'I_T,e BF l_T,e B3 'I?q_e C Type SE "I?q_e O "I_T,e (American (British Type) (British Type) (British'I?_pe) ((EE'I_,pe) (CEE'I_pe) (Ocean 'I_,pe) 133,e) The representatiw, supply voltage and plug type are described in this chart. Depend on an area, Diffbrent type of plug and supply voltage are used.
- Page 5 Countries/regions Voltage Frequency (Hz) Plugtype VietllalIl Oceania Countries/regions Voltage Frequency (Hz) Plugtype Australia New Zealand 230/240 North America Countries/regions Voltage Frequency (Hz) Plugtype Canada Central America Countries/regions Voltage Frequency (Hz) Plugtype Bahamas 120/240 Costa Rica Cuba 110/220 Dominican (rep) El Salvador Guatemala Honduras Jamaica...
- Page 6 A • Be sure to charge the battery pack using a charger or a device that genuine Sony battery can charge the battery pack. RECYCLING LITHIUM-IONBATTERIES pack out of the reach of small • Keep the battery children.
- Page 7 FCC Rules, Operation is subject to the Model No,: HDR-XR160 f_llowing two conditions: (1) This device Responsible Party: Sony Electronics Inc. may not cause harmful interf_,rence, Address: 16530 Via Esprillo, San Diego, (2) this device must accept any interf_,rence CA 92127 U.S.A.
- Page 8 - Connect the e quipment into a n outlet on • This camcorder has a built in software a circuit different ficom that to which the application called "PMB Portable" (p. 41). receiver is connected. • See page 22 fbr the memory card you can use - Consult the d ealer or an experienced...
- Page 9 the m anufacturing process and do not affect Unauthorized recording of such materials may recording inany way. be contrary to the copyright laws. * Use the camcorder in accordance with local regulations. Notes on playing back * You may not be able to play back normally images recorded on your camcorder with other devices.
- Page 10 • We recommend using genuine Sony accessories. - ejecting the memory cant when the access • Genuine Sony accessories may not be available lamp (p. 23) is lit or flashing in some countries/regions.
- Page 11 -removing the b attery pack or AC Adaptor from the camcorder, or applying mechanical shock or vibration to the camcorder when the (Movie)/O (Photo) lamps (p. 24) or the access lamp (p. 23) are lit or flashing • When using a shoulder belt (sold separately), do not crash the camcorder against an object.
- Page 12 Table of contents IMPORTANT SAFETY INSTRUCTIONS ............Read this first ..................Getting star'ted Step I : Charging the battery pack ............Charging the battery pack abroad ..........Step 2:Turning the power on, and setting the date and time ......Changing the language setting ............
- Page 13 Saving images with an external device Selecting a method for saving images with an external device ......Saving images on an external media device ..........Creating a disc with the DVD writer, DVDirect Express ........Creating a high definition image quality (HD) disc with a DVD writer, etc.,...
- Page 14 Step 1" Charging the battery pack ..... Battery pack _ .. f,k °" CHG (charge) lamp ,_/CHG(flash/charge) lamp Align the • mark on the DC plug with that on the DC IN jack. You can charge the "InfoLITHIUM" battery pack (V series) after attaching it to your camcorder.
- Page 15 Built in USB Cable to a wall outlet (wall socket) using an AC US01AD/A@USOAG USB charger/AC Adaptor (sold separately). _!\m cannot use a Sony CP-AH2R or CP-AL portable power supply device (sold separately) to charge the camcorder. • The USB charger/AC Adaptor may not be available in some countries/regions.
- Page 16 • The charging times shown in the table above are measured when charging the camcorder at a temperature of 25 °C (77 °F). It is recommended that you charge the battery in a temperature range of 10 °C to 30 °C (50 °F to 86 °F). ×...
- Page 17 Notes on the AC Adaptor • Usethe nearby wall outlet (wallsocket) when using tbe A(" Adaptor. Disconnect tbe A(" Adaptor fl'om the wall outlet (wallsocket) immediately if any malfunction occurs while using your camcorder. • Do not use the AC Adaptor placed in a narrow space, such as between a wall and fl.mliture. •...
- Page 18 Step 2:Turning the power on, and setting date and time Open LCD screen of your camcorder. Your camcorder is turned Oll and the lens cover is opened. • To turn on your camcorder when the LCD screen is open, press POWER. MODE l_unp POWER button...
- Page 19 Set [Daylight Savings] or [SummerTime], then touch [Next]. • If you set [Dayligbt Savings] or [Summer Time] to IOn], tbe clock advances l bour. °f' 5 ¸ Select date format, then touch [Next]. D_t_ _ Tim_ Foment V] _Set date t_m_- d_splay mod_...
- Page 20 To turn offthe power Close the LCD screen. The 11211 (Movie) lamp flashes for a fbw seconds and the camcorder is turned off_ _Tips • 5_u can turn of}'the camcorder also by pressingPOWER. • When [Power On By LCD]is set to [Off'],turn off'your camcorder by pressing POWER. You can change the 0n-screen displays to show messages in a specified language, Touch _ (MENU) -+ [Setup] -+ [% (general Settings)] _...
- Page 21 Step 3: Preparing the recording media The recording media that can be used are displayed on the screen of your camcorder as following icons. Internal hard disk Memory card In the defhult setting, both movies and photos are recorded on this recording media. _\m can periorm recording, playback and editing operations on the selected medium.
- Page 22 Types of memory card you can use with your camcorder SD Speed (;lass Described in this manual "Memory Stick PRO Duo" media (Mark2) sony "Memory Stick PRO Duo" media "Memory Stick PRO- HG Duo" media SD memory card SDHC memory card (;lass 4 or faster...
- Page 23 Open cover, and insert memory card with notched edge in the direction as illustrated until it clicks. • Close the cover after inserting the memory card. Access lamp 5 ¸ Note the direction of notched corner. The [Preparing image database file. Please wait.] screen appears if you insert a new memory card.
- Page 24 Recording In the default setting, movies and photos are recorded on the internal recording media. Movies are recorded with high definition image quality (HD). _Tips • To change the recording media, see page 21, Fasten the grip belt. Open the LCD screen of your camcorder. Your camcorder is turned on and the lens cover is opened.
- Page 25 Press MODE to turn on the _11(Movie) lamp. Press START/STOP to start recording. To stop recording, press START/STOP again. To display items on the LCD screen again Touch an}_vhere oll the screen except the buttons oll the LCD screen so that you can use items.
- Page 26 OTips * See page 63 on the recordable time of movies. * You can record photos during movie recording by pressing PHOTO fully (Dual Rec). * [ _ SteadyShot] is set to [Active] in the default setting. * You can specify the priority face by touching it. * You can capture photos from recorded movies.
- Page 27 Press MODE to turn on the O (Photo) lamp. The LCD screen display switches for photo recording mode, and the screen aspect ratio becomes 4:3. Press PHOTO lightly to adjust the focus, then press it fully. _Tips • See page 65 on the recordable number of photos. •...
- Page 28 Acquiring location information using the GPS (HDR-PJSOV) When you set the [GPS Setting] (p. 58) to [On], _._. appears on the LCD screeu, aud your camcorder starts searching for the GPS satellites and acquires the location information. Acquiring the location information enables you to use functions...
- Page 29 Playback on !:hecamcorder You can enjoy the playback of images with powerful sound through the stereo speakers built into the camcorder. In the default setting, movies and photos that are recorded on the internal recording media are played, _Tips • To change the recording media, see page 21. •...
- Page 30 Change to the movie/photo recording mode [] Timeqine bar Highlight Playback button _ Change Event Scale button _ Appears only when the image quality is set to [ _ HD Quality]. The Event Index screen appears when you touch the event that is displayed on the center.
- Page 31 You can use the functions shown in the figure below while the camcorder is playing a movie. The figure below will be displayed when you select [_g:_ MOVIE/PHOTO] (the default setting) or [ _ MOVIE] by touching the Switch hnage Type button on the Event Index screen.
- Page 32 You can use the functions shown in the figure below while you are viewing photos. The figure below will be displayed when you select [_ PHOTO] by touching the Switch hnage Type button on the Event Index screen. Delete- -._% Context- 101-0014 Previous...
- Page 33 Playing images on a TV Connection methods and the image quality (high definition (HD) or standard definition (STD)) viewed on the TV screen Connecting to a high definition differ depending on what type of TV is When the recording quality is high connected, and the connectors...
- Page 34 Connecting to a non-high-definition When you connect with component A/V cable 16:9 (wide) or 4:3 TV When movies are recorded with high • If you connect only component video plugs, audio signals are not output. Connect the white definition image quality (HD), they are and red plugs to output audio signals.
- Page 35 On "Photo TV HD" When your TV is monaural (When your TV has only one audio input jack) This camcorder is compatible with the • Connect the yellow plug of the A/V connecting "Photo TV HD" standard. "Photo TV cable to the video input jack and connect the HD"...
- Page 36 Deleting movies and photos You can free media space by deleting - ggGT_Tia,TH&TO movies and photos from recording media. _MOVIE NPHOTO } Q Notes * You cannot restore images once they are deleted. Save important movies and photos in Touch and display the 4 mark advance.
- Page 37 Useful functions available if you connect the camcorder to a computer (Windows) The software PMB stored in the CD-ROM (supplied) includes functions that enable you to do more with the images recorded with the camcorder. Easy uploading when away from home XAqth PMB Portable, which is pre-installed on tile camcorder, you can play back or upload your images to the Web by connecting your camcorder to a computer away from home.
- Page 38 Preparing a computer (Windows) Minimum 1,024 × 768 dots USB port (this must be provided as standard, Microsoft Windows XP SP3_×2/Windows Vista Hi-Speed USB (USB 2.0 compatible)), Blu- ray disc/DVD burner (CD-ROM drive is SP2_3/Windows necessary _br installation) Either NTFS or exFAT file system is recommended as the Intel Core Duo 1.66 GHz or faster, or Intel...
- Page 39 icon on the c omputer screen tostart "PMB Launcher;' Follow the instructions that appear on the computer screen Confirm that your camcorder is to continue the installation. not connected to the computer. • 5_u may be required to install some other applications included on the disc at the same time.
- Page 40 Q Notes • Do not insert AVCHD recording discs that have • To create discs or use other functions on been created using the "PMB" software to DVD Windows XR Image Mastering API v2.0 lbr players or recorders, as these devices do not Windows XP should be installed.
- Page 41 Starting Uploading images to a (Picture network service Motion Browser) The application software "PMB Portable" Double-click the"PMB"short-cut is pre-installed in the camcorder. You can enjw the following functions using the icon on the computer screen. "PMB Portable." • Uploading images to network services such as blogs with ease •...
- Page 42 Notes • When using "PMB Portable;' make sure to Touch [USB Connect] on the connect the camcorder to the network. camcorder screen. • Set [USB LUN Setting] to [Multi] (p. 58). When using Windows 7: The Device • If the "PMB Portable" does not start up, set [USB Connect Setting] to [Mass Storage] (p.
- Page 43 SoW serw, r. Howew, r, you may not be able to access the websites tbr some reason such as serw, r maintenance. • If Sony decides to terminate server operation, it will be announced advance on Sow's website, etc.
- Page 44 Selecting a method for saving images with an external device You can save high definition image quality (HD) movies using an external device. Select the method to be used according to the device. External media device USB Adapter cable Saving images on an external VMC-UAM1 (sold media device with high separately)
- Page 45 The types of media on which images are saved Refbr to "Selecting the recording mode" on page 28. DVD disc with high definition image quality (HD) AVCHD format playback devices, such as a Sony Blu-ray disc player or a PlayStation®3. DVD disc with standard definition image quality (STD) Ordinary DVD playback devices, such as a DVD player.
- Page 46 *br operating. camcorder or another playback device. • For details on available external media devices, go to the Sony support website in your (_ Notes country/region. • For this operation, you need the USB Adaptor Cable VMC-UAM1 (sold separately). • The USB Adaptor Cable VMC UAM1 may not...
- Page 47 When connecting an external media device The images saved in the external media device are displayed on the LCD screen. hnages saw,d on the connected external media device appear on the LCD screen. When an external media device is connected, the USB icon will appear on the Ew,nt View screen, etc.
- Page 48 Touch II_l --_ II'_/_i --_ II'_i You can save desired images in the on the camcorder screen. camcorder to the external media device. Connect the camcorder to the external media device and touch [Play without copying.]. Event View of the external mediun] is displayed.
- Page 49 Creating a disc with the DVD writer, DVDirect Express {_ Notes • If your camcorder does not recognize the You can create a disc or play back the external media device, try the fbllowing images on a created disc by using the DVD operations.
- Page 50 Insert an unused disc into the Perform this operation in the following DVD writer, and close the disc cases: tray. - When copying a desired image - When creating multiple copies of the same disc Press (DISC BURN) on the writer.
- Page 51 Touch El --_ _ on the camcorder screen. To create another disc of the salne Connect the AC Adaptor and the contents, insert a new disc and touch power cord (mains lead) to the [CREATE SAME DISC]. DC IN jack of your camcorder and the wall outlet (wall socket) After the operation...
- Page 52 AC Adaptor lbr this operation (p. 16). • SoW DVD writer may not be available in some countries/regions. • Alwaysmaintain the firmware of the Sony DVDirect (DVD writer) to its latest version. For details, see the lbllowing website. http://son>storagesupport.com/...
- Page 53 AC Adaptor fbr this operation (p. 16). The [USB Select] screen appears on the • Sony DVD writer may not be available in some camcorder screen. countries/regions. • If the [USB Select] screen does not appear, • High definition image quality (HD) movies...
- Page 54 A/V Remote Connector Connectyour camcorder to the AN R recording device (a disc recorder, etc.) with the A/V connecting cable (supplied) or an A/V connecting cable with SVlDEO (sold separately). • Connect your camcorder to the input jacks Input of the recording device. s VIDEO Start playback on your VIDEO...
- Page 55 Using menus You can enjoy using your camcorder more by making good use of menu operations. The camcorder has various menu items under each of 6 menu categories. !:[ Shooting Mode (Items for selecting a shooting mode) --*p. Camera/Mic (Items for customized shooting) --*p.
- Page 56 __Shooting Mode Movie .......... Records movies. Photo ........... Shoots photos. Smth SIw REC......Records fast moving subjects in slow motion. Golf Shot ........D ivides two seconds of fast movement into frames which are then recorded as a movie and photos. _Camera/Mic (Manual Settings) White Balance ....
- Page 57 Audio Mode ....Sets the r ecording sound format (5.1ch surround/2ch stereo). Micref Level ..... Sets the m icrophone level. q'_ (Shooting Assist) Guide Frame ....Displays the frame to make sure the subject is horizontal or vertical. Display Setting ....Sets the duration that icons or indicators are displayed on the LCD screen.
- Page 58 (Connection) TV Type ......C onverts the signal depending on the TV connected (p. 33). Component .....Select this option when you connect },our camcorder to a TV with the component input jack (p. 34). HDMI Resolution ...Selects the output image resolution when connecting your camcorder to a TV with an HDMI cable (sold separately).
- Page 59 Getting detailed information from the "Handycam" Handbook To view the "Handycam" Handbook, double-click the short-cut icon Oll the The "Han&/cam" Handbook is a user guide COlnputer screen. designed to be read on a computer screen. The "Hand},cam" Handbook is intended be read when you want to know more about operating...
- Page 60 • Turn on the power again. amount of data stored on the internal recording • Charge the battery pack (p. 14). media in order to investigate the problem. However, your Sony dealer will neither copy Pressing START/STOP or PHOTO does not nor retain your data.
- Page 61 •Total number ofmovie scenes or photos exceeded the r ecordable capacity of y our c:04:rTr7 calncorder (p. 63). Delete unnecessary images • The batter}, pack is not an "InfoLITHIUM" (p. 36). battery pack V series. Use an "InfoLITHIUM" battery pack (V series) (p. 14). The r ecording stops.
- Page 62 * The recording media is full. Delete unnecessary • The temperature of your carncorder is low: Make the camcorder warm. images (p. 36). * Photos cannot be recorded during processing. Wait for a while, then record. * When [ _ REC Mode] is set to [Highest •...
- Page 63 Recording time of movies/number recordable photos * The recording and playback time will be shorter when you use your camcorder in low "HD" stands for high definition image temperatures. quality, and "STD" stands for standard * The recording and playback time will be shorter depending on the conditions under which you...
- Page 64 3;i;0m [Standard (2ch)_- (36 h 30 m) [Standard 51h20m 51h10m You can change the recording sound format with ................(39 h 0 m) [Audio Mode[ (p. 57). [Long Time 88h40m 88h20m (5.1ch)_ (72 h 50 m) (72 h 30 m) O Notes * The number in ( ) is the minimum recordable...
- Page 65 Notes Standard definition imagequality (STD) * The unique pixel array of Sow's ClearVid and (unit: minute) the image processing system (BIONZ) allow still image resolution equivalent to the sizes described. 5.1ch_- (20) (50) (100) (205) (410) OTips * You can also use memory card with a capacity 2dl* (25) (50)
- Page 66 • If fingerprints or dust make the L('D screen casing, unplug your camcorder and have it dirty, it is recommended that you use a soft checked by a Sony dealer be*bre operating cloth to clean it. any further. • Avoid rough handling, disassembling, To clean...
- Page 67 Procedures On handling the casing Connect your camcorder to a wall outlet (wall • If the casing is soiled, clean the camcorder body socket) using the supplied AC Adaptor, and leave with a soft cloth lightly moistened with water, it with the LCD screen closed for more than 24 and then wipe the casing with a dry soft cloth.
- Page 68 Dolby Digital 2ch/5. lch properl?_ In this case, replace the battery with Dolby Digital 5.1 Creator a Sony CR2025 lithium batter?_ Use of another Photo file fbrmat battery may present a risk of fire or explosion. DCF Ver.2.0 Compatible Exif Ver.2.3 Compatible...
- Page 69 Effective (photo, 4:3): LCD screen Approx. 3540 000 pixels Picture: 7.5 cm (3.0 type, aspect ratio 16:9) Lens: Glens Total number of pixels: 230 400 (960 x 240) HDR X R160: 30 x(Optical) 22, 42 x(Extended) 23, 350 x Projector (HDR-PJ50/PJSOV) (Digital) Projection...
- Page 70 HDR-XR160: Design and specifications of your camcorder and 59.5 nun x 66 mm x 117.5 nun (2 3/8 in. x accessories are subject to change without notice. • Manufhctured under license from Dolby 2 5/8 in. x 4 5/8 in.) (w/h/d) including Laboratories.
- Page 71 United States and other countries. • "_P_" and "PlayStatioff' are registered trademarks of Sony Computer Entertainment Inc.. • Adobe, the Adobe logo, and Adobe Acrobat are either registered trademarks or trademarks of Adobe Systems Incorporated...
- Page 72 Screen indicators Center Center [STBY]/[REC] Recording status Slide show set I(@_ _ _,L_ Warning Playback mode Right Bottom Left Recording image quality (HD/STD), frame rate 60i _ (60p/60i/24p) MENU button recording mode (PS/FX/ xtY0 Self-timer recording FH/HQ/LP) GPS triangulating status 60rain _ Reraaining battery...
- Page 73 Bottom View Images button |'/" Micref Level low 1432J Wind Noise Reduct. Bit-in Zoom Mic _5.1ch a52ch Audio Mode :iiiIII1£I "_ Audio Level Display Low Lux Spot Meter/Fcs / Spot Meter/Exposure _1_1 Intelligent Auto Slide show button 101-0005 Data file name Protected image (i_ ,_+ ,_-...
- Page 74 Parts and controls Figures in ( ) are refk,rence pages. lamp (58) [] Camera recording The camera recording lamp lights up in red during recording. The lamp flashes when the remaining recording media capacity or battery HDR-PJ50/PJ50V power is low. HDR-XR160 [] LCD screen/Touch panel...
- Page 75 [_r_ (View Images) button (29) POWER button (18) PROJECTOR button (HDR-PJ50/PJ5OV) (32) MODE button (24) Power zoom lever [] I1_ (Movie)/O (Photo) lamps (24) PHOTO button (27) RESET button []CHG (charge) lamp (HDR-XR160), Press RESET using a pointed object. {/CHG (flash/charge) lamp (HDR-PJ50/ Press RESET to initialize all the settings PJ5OV) (14)
- Page 76 Index Macintosh ........38 Thumbnail ........36 A/V connecting cable...34, 54 Maintenance ........ 66 Tripod ........... 75 Media Select ........ 21 Troubleshooting ......60 Battery pack ......... 14 Media Settings ......21 Turning the power on ....18 Built in USB Cable ....8, 15 TV ..........
Need help?
Do you have a question about the Handycam HDR-XR160 and is the answer not in the manual?
Questions and answers