Table of Contents
Advertisement
Quick Links
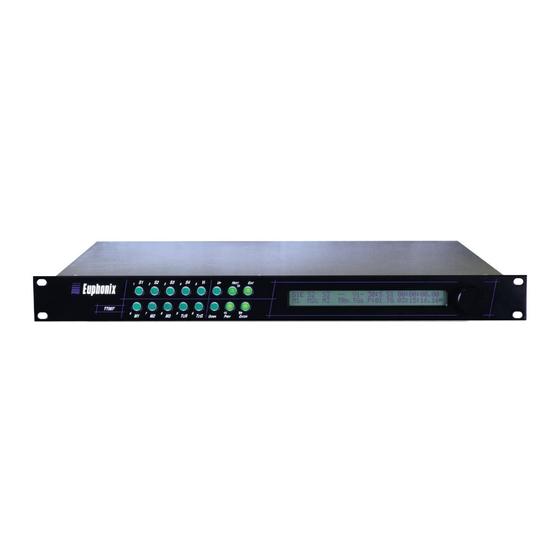
Euphonix TT007
Machine Control Hub for System 5
Euphonix Inc.
220 Portage Ave.
Palo Alto, California 94306
Phone:
650-855-0400
Fax:
650-855-0410
Web:
http://www.euphonix.com
e-mail:
info@euphonix.com
and CS Series Consoles
Operation Manual
Document Revision: 2.0
Release Date: February, 2002
TT007 Version: 4
Part Number: 840-05044-03
Advertisement
Table of Contents

Related Manuals for Euphonix TT007


Summary of Contents for Euphonix TT007
- Page 1 Euphonix TT007 Machine Control Hub for System 5 and CS Series Consoles Operation Manual Document Revision: 2.0 Release Date: February, 2002 TT007 Version: 4 Part Number: 840-05044-03 Euphonix Inc. 220 Portage Ave. Palo Alto, California 94306 Phone: 650-855-0400 Fax: 650-855-0410 Web: http://www.euphonix.com...
- Page 2 System 5, S-5, PatchNet, eMix, EuCon, R-1, Audio Deck, Studio Hub are trademarks of Euphonix Inc. ©2001 Euphonix Inc. All rights reserved worldwide. No part of this publication may be reproduced, transmitted, transcribed, stored in a retrieval system, or translated into any...
-
Page 3: Table Of Contents
2.3 Utility Mode Menu ..................17 2.4 Presets Mode Menu ...................19 2.5 Transport Mode Menu ................21 Chapter 3: Configurations ...................23 3.1 Euphonix as Master Machine ..............23 3.1.1 LTC ....................23 3.1.2 Serial ....................24 3.1.3 MIDI....................24 3.1.4 LTC/Serial/MIDI ................25 3.2 Euphonix As Slave Machine..............25 3.2.1 Serial ....................25... - Page 4 Euphonix TT007 Operation Manual Appendix A.1 Frequently Asked Questions ..............29 A.2 Explanation of Controllers.................30 A.2.1 Examples of Devices, Controllers, and Emulators ......31 A.3 MIDI Operation with Pro Tools..............34 A.3.1 OMS MIDI Setup................34 A.3.2 Pro Tools as Master................35 A.3.3 Pro Tools as Controller ..............36 A.4 9-Pin Operation with ProTools ..............37...
-
Page 5: List Of Figures
Video machine slaved to Euphonix console ..............24 Audio Workstation slaved to Euphonix console..............24 Audio Workstation, video deck, and hard-disk recorder slaved to Euphonix console ..25 Euphonix console slaved to video machine ...............25 Euphonix console slaved in a large network ..............26 TcR as Master ........................27... - Page 6 Euphonix TT007 Operation Manual List of Tables Port Modes........................12 Sync Modes........................16 Function and LCD symbols for front panel keys ............21 A-1 Devices and Controllers....................31...
-
Page 7: Chapter 1: Overview
Euphonix TT007 Operation Manual Chapter 1: Overview Introduction The TT007 is an optional rack-mount device that provides machine control for all Eu- phonix consoles. The TT007 allows the console to become the single, centralized ma- chine control hub within any studio. Virtually every machine, in or out of the control room, can be remotely controlled from the console at the press of a button. -
Page 8: Navigating The Front Panel
Euphonix TT007 Operation Manual Overview The transport controls of the master machine can drive the network but the TT007 is unique in its ability to accept transport commands from additional control surfaces and relay those commands to the master machine. Any controller device in the studio (Sys- tem 5, CS3000/CS2000, DAW, Sequencer, etc.) defined as a controller (and on-line) -
Page 9: Tt007 Menu Modes
Euphonix TT007 Operation Manual Overview When the TT007 boots up, the first screen visible is the Port Assignments Display, which is the default screen. Press the EXIT key from this screen to display the TT007’s ROM version number. Press the EXIT key one or more times from any other display (depend- ing on the depth within the menu system) to restore the Port Assignments Display. -
Page 11: Chapter 2: Tt007 Menu Modes
Euphonix TT007 Operation Manual TT007 Menu Modes Chapter 2: TT007 Menu Modes Port Mode Menu To access Port Mode from the Port Assignments Display: 1. Press any Menu key. 2. Scroll through the list with the PREV and NEXT keys until PORT MODE is displayed. -
Page 12: Machine Menu
Euphonix TT007 Operation Manual TT007 Menu Modes Table 2-1 Port Modes Symbol in Port Port Available assignments Assignments Display M1-M3 OFF / Controller / Slave / Master c / s / M S1-S3 OFF / Controller / Slave / Master... - Page 13 Euphonix TT007 Operation Manual TT007 Menu Modes Stop Still Translates Stop commands to device as Still Stop Translates Stop commands to device as Stop Standby Translates Stop commands to device as Standby Stop vs. Still or Standby commands are used by some hard disk machines, (such as Radar and Fairlight), to determine whether the device should return to input when parked.
-
Page 14: Timeline Lynx Network Support
Selects the number of frames to output during serial Rew/FF and lo- cate commands Delay For Euphonix diagnostics use only: should be set to OFF 2.1.2 TimeLine Lynx Network Support In addition to its own network of devices, the TT007 may also be integrated with a TimeLine Lynx machine control network. -
Page 15: Connecting Controllers To The Tt007
Euphonix TT007 Operation Manual TT007 Menu Modes 2.1.3 Connecting Controllers to the TT007 The TT007 serial ports (S1, S2, S3) are wired so they can be cabled directly to devices. When connecting an additional controller to the network, the transmit (Tx) and receive (Rx) pins of the RS-422 interconnect cable must be reversed to enable the TT007 to em- ulate a device and translate controller commands to the network. -
Page 16: Sync Mode Menu
Euphonix TT007 Operation Manual TT007 Menu Modes Sync Mode Menu Sync Mode is used to set basic synchronization parameters, such as frame rate and clock reference. To access the Sync Mode from the Port Assignments Display: 1. Press any Menu key. -
Page 17: Utility Mode Menu
Euphonix TT007 Operation Manual TT007 Menu Modes Utility Mode Menu Utility Mode is used to configure the TT007’s user interface options. All timecode display windows and Data Wheel functions are configured from this menu. To access the Utility Mode from the Port Assignments Display: 1. - Page 18 Euphonix TT007 Operation Manual TT007 Menu Modes NudgeMode Select In Transport Mode, the Data Wheel functions as: Jog Wheel (movement in single-frame steps) SHUTTLE Shuttle Wheel (scan speed control) CS3000/2000 owners: From the DSC, enter Jog by toggling the [<>] key until it flashes.
-
Page 19: Presets Mode Menu
Euphonix TT007 Operation Manual TT007 Menu Modes Presets Mode Menu Presets Mode is very powerful for users who require flexibility in machine control set- ups. Up to 50 presets can store different port assignment configurations. Each preset can be named for easy identification. -
Page 20: Tt007 Preset Examples
Euphonix TT007 Operation Manual TT007 Menu Modes Individual machines may be controlled independently simply by creating presets that identify only a single port. Groups of machines may be configured in the same manner. Those presets may then be instantly recalled from the console to control the entire net- work, a group, or individual machines. -
Page 21: Transport Mode Menu
Euphonix TT007 Operation Manual TT007 Menu Modes Parameters Stored in Presets • Port Assignments (Master, Controller, Slave, LynxNET, EsBUS) • LynxNET Master and On-line selections • Video Reference (Resolve/Free run) • Timecode Frame rate • Video Standard • Port selections for LCD Window timecode displays •... -
Page 23: Chapter 3: Configurations
3.1.1 A simple application for this additional functionality uses the Euphonix system to generate LTC. To use the Euphonix system as the LTC master, consult Figure 3-1 for parameter settings and configuration. ViR 30:S (factory default Preset #1) -
Page 24: Serial
SMPTE/EBU to MTC, which allows MTC machines to follow SMPTE/EBU synchronization networks. Figure 3-3 shows how to slave an Audio Workstation on the M1 port to the Euphonix System. ViR 30:S S1 00:18:01:06... -
Page 25: Ltc/Serial/Midi
Euphonix TT007 Operation Manual Configurations 3.1.4 LTC/Serial/MIDI The Euphonix system can control a group of slave machines as easily as a single slave. Figure 3-4 shows three machines slaved to the Euphonix system simultaneously. S1s S2 ViR 30:S S1 00:18:01:06... -
Page 26: Large Network (Serial/Midi/Ltc)
Euphonix TT007 Operation Manual Configurations In addition to simply slaving to timecode, however, the Euphonix system can also act as the machine transport controller for the Master video deck. Even though the Euphonix console is a slave to incoming timecode, it can still use its transport controls to drive the master machine. -
Page 27: Tcr As Master With Serial Control
Many older video decks do not provide timecode on their serial control cable, which is used only for machine control. The Euphonix system allows these machines to act as the Master by reading its audio LTC timecode track at the TcR Input Port. -
Page 28: Lynxnet As Master
Configurations LynxNET as Master The Euphonix system can address eight machines using the TimeLine Lynx protocol. S1 can be configured as the interface Port to the LynxNET. Any machine on the Lynx- NET may be assigned as Master for the entire TT007. We recommend that the master Lynx module feed timecode to the TcR Port using the From Master option to ensure accurate synchronization if video is not present. -
Page 29: Appendix
Euphonix TT007 Operation Manual Appendix Frequently Asked Questions Why does my TC generator not run when I hit play? • It is not configured as a Master or Slave. • It is set to video resolve but no video sync is being received... -
Page 30: Explanation Of Controllers
Be sure LTC from the Master is being sent to the TcR port and that the port is selected as From Master if no video sync is present. • Be sure that the Lynx modules are running current software versions. Euphonix has tested the TT007 using the following software versions: Lynx I: v500_26L... -
Page 31: Examples Of Devices, Controllers, And Emulators
Euphonix TT007 Operation Manual Appendix A.2.1 Examples of Devices, Controllers, and Emulators Table A-1 shows examples of devices and controllers. A machine that can act as both a device and controller is defined as an emulation device. They are particularly well suited to work with the TT007 because they can be an on-line audio member of a group while acting as an additional controller in the network. -
Page 32: Tt007 As Device
Euphonix TT007 Operation Manual Appendix TT007 as Device Figure A-2 shows a typical virtual machine configuration with the TT007 serving as random access TC Generator to drive sequencers and/or DAWs; uses reverse Tx/Rx cable pinout wiring. Remote Controller only Remote Controller only... -
Page 33: Tt007 As Multiple Controller Hub
Euphonix TT007 Operation Manual Appendix TT007 as Multiple Controller Hub Figure A-4 shows a configuration that takes advantage of the TT007’s unique ability to accept and translate commands from multiple controllers to a single master device. Any one of the four controllers in the network can operate the transport on the tape machine. -
Page 34: Midi Operation With Pro Tools
Euphonix TT007 Operation Manual Appendix MIDI Operation with Pro Tools A.3.1 OMS MIDI Setup Configure settings according to those set in the following dialogs. Figure A-5 OMS MIDI Setup Figure A-6 OMS Studio Setup and MIDI Device Info dialogs... -
Page 35: Pro Tools As Master
Euphonix TT007 Operation Manual Appendix A.3.2 Pro Tools as Master In the Synchronization tab of the Pro Tools Peripherals dialog (Figure A-7), select the Enable Control of Pro Tools via MMC checkbox. Configure other settings according to Figure A-7. Figure A-7 Synchronization tab in the Pro Tools Peripherals dialog On the TT007, set the MIDI port to: MTC only and Master. -
Page 36: Pro Tools As Controller
Euphonix TT007 Operation Manual Appendix A.3.3 Pro Tools as Controller In the Synchronization tab of the Pro Tools Peripherals dialog (Figure A-7), deselect the Enable Control of Pro Tools via MMC checkbox. In the MIDI Controllers tab, configure the settings as shown in Figure A-8. -
Page 37: 9-Pin Operation With Protools
Euphonix TT007 Operation Manual Appendix 9-Pin Operation with ProTools A.4.1 OMS Setup Deselect the Modem port in the OMS MIDI Setup dialog (Figure A-5). A.4.2 ProTools (9-pin Remote) as a Serial Master or Slave To control Pro Tools from the TT007, configure Pro Tools as follows: 1. -
Page 38: A-11 Pro Tools Remote Mode 9-Pin Cable
Euphonix TT007 Operation Manual Appendix On the TT007, set: • Stop = Stop • Arming = On or 48 no tallies Use the Pro Tools remote mode 9-pin cable shown below. A serial control 9-pin cable or v-LAN configuration will not work... -
Page 39: Operation With A 3324, 3348, Or 3348Hr
Euphonix TT007 Operation Manual Appendix Operation with a 3324, 3348, or 3348HR Master (Word Clock) 1. For System 5, connect the word clock from the SH612 to the 3348. 2. Connect the 3348 to the TT007’s serial port. 3. Set the port to Master. - Page 40 Euphonix TT007 Operation Manual Appendix Slave (Video Sync) 1. Connect video sync to the 3348 and TT007. 2. Connect the 3348 to the TT007’s serial port. 3. Set the port Slave. 4. Set the machine type to 33xx. 5. For System 5, connect the word clock from the 3348 to the SH612.
-
Page 41: Cable Pinouts
Euphonix TT007 Operation Manual Appendix Cable Pinouts Controller TT007 Figure A-12 Cable pinout diagrams...
Need help?
Do you have a question about the TT007 and is the answer not in the manual?
Questions and answers