Singer 7258 Instruction Manual
Hide thumbs
Also See for 7258:
- Instruction manual (84 pages) ,
- Features and benefits (3 pages) ,
- Quick start manual (3 pages)
Table of Contents
Advertisement
Advertisement
Table of Contents

Related Manuals for Singer 7258


Summary of Contents for Singer 7258
- Page 1 SINGE ® 7258 INSTRUCTION MANUAL MANUEL D'INSTRUCTION MANUAL DE INSTRUCCIONES...
- Page 2 National legislation relating to electrical/electronic products. If in doubt please contact your retailer for guidance. SINGER is a registered trademark of The Singer Company Limited or its affiliates. @2008 The Singer Company Limited or its affiliates. All rights reserved.
- Page 3 En cas de doute, veuillez contacter votre distributeur agree. SINGER est une marque enregistree de The Singer Company Limited ou de ses societes affiliees. ©2008 The Singer Company Limited ou ses societes affiliees. Tous droits reserves.
- Page 4 Si tiene alguna duda al respecto, por favor contacte con el distribuidor. SINGER es una marca registrada de The Singer Company Limited o sus filiales. @2008 The Singer Company Limited o sus filiales. Reservados todos los derechos.
-
Page 5: Table Of Contents
TABLE OF CONTENTS 1. KNOWING YOUR SEWING MACHINE Multi-stitch zigzag, Shell stitch Machine identification Sewing on a button Accessories Decorative and stretch stitches 10 - 11 Setting up your machine Straight stretch stitch, Honeycomb stitch, Overedge stitch, Spool pins, Presser foot lifter Feather stitch, Ric-rac stitch, Double overlock stitch, Darning plate Criss-cross... - Page 6 TABLE DES MATII RES 1. VOTRE MACHINE A COUDRE Zigzag multi-point, Point de lingerie Pose de boutons Description de la machine Accessoires Point decoratifs et points extensibles 10 - 11 Point droit extensible, Point nid d'abeille, Preparation de ta machine Porte-bobine, Levier du pied presseur Point surjet extensible,...
- Page 7 INDICE DE CONTENIDOS 1. PRINCIPALES PARTES DE LA MAQUINA Zig-zag de tres puntadas, Puntada de lenceria Cosido de botones Identificaco6n de la maquina Accesorios Puntadas decorativas y elasticas 10 - 11 Preparaci6n de la maquina Puntada recta triple, Puntada panal, Puntada sobre-orillado, Porta carretes, Palanca pie prensatelas Puntada pluma, Puntada ric rac, Puntada obrlock doble, Placa transparente...
-
Page 8: Knowing Your Sewing Machine
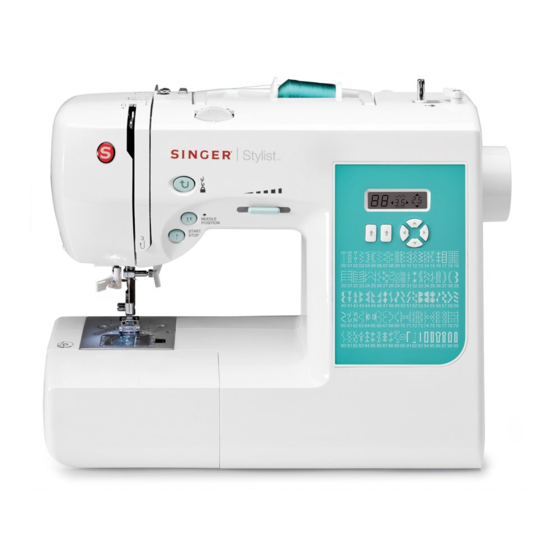
1. KNOWING YOUR SEWING MACHINE MACHINE IDENTIFICATION 1. Bobbin winding tension disk 2. Thread take-up 3. Thread tension control 4. Face cover 5. Thread cutter 6. Removable extension table/ Accessory box 7. Bobbin winder shaft 8. Bobbin winder stop 9. Sewing speed control 10. - Page 9 1. VOTRE MACHINE .A.COUDRE 1. PRINCIPALES PARTES DE LA MAQUINA DESCRIPTION DE LA MACHINE IDENTIFICACOON DE LA MAQUlNA 1. Disco de tensi6n de bobina 1. Disque de tension du bobineur 2. Releveur de fil 2. Tira hilos 3. Control tensi6n hilo 3.
-
Page 10: Accessories
ACCESSORIES 1. Needles 2. Bobbins (4 total - 1 in machine) 3. Auxiliary spool pin 4. Spool pin felt discs (2) 5. Spool pin cap (mini) 6. Spool pin cap (small) 7. Spool pin cap (large) 8. Buttonhole opener/Seam Ripper and Brush 9. - Page 11 ACCESSOIRES ACCESORIOS 1. Aiguittes 1. Agujas 2. Canettes (total 4 - 1 dans la machine) 2. Bobinas (4 total- 1 en maquina) 3. Porte-bobine auxiliaire 3. Porta carrete adicional 4. Rondetle feutre 4. Fiettros 5. Chapeau pour mini bobine 5. Sujetador de hito (mini) 6.
-
Page 12: Setting Up Your Machine
SETTING UP YOUR MACHINE Be sure to wipe off any excess oil from needle plate area before using your machine the first time. I NOTE: This machine can be used either with or without foot control. WHEN USING POWER LINE CORD ONLY WHEN USING POWER LINE CORD AND FOOT CONTROL Connect the plug of the power line cord into the cord socket (1) - Page 13 PRI_PARATION DE LA MACHINE PRI_PARACION DE LA MAQUINA Assurez-vous d'essuyer tout surplus d'huite autour de la AsegQrese de timpiar cualquier sobrante de aceite del area de plaque a aiguille, avant d'utiliser votre machine pour la la placa aguja antes de usar su maquina por primera vez. premiere lois.
-
Page 14: Spool Pins, Presser Foot Lifter
SPOOL PINS HORIZONTAL SPOOL PIN Bobine Place thread spool on the pin and secure with a spool cap to Carrete ensure smooth flow of thread. If the thread spool has a thread retaining slit, it should be placed to the right. Select the correct spool pin cap according to the type and... - Page 15 PORTE-BOBINE PORTA CARRETES PORTE-BOBINE HORIZONTAL PORTA CARRETE HORIZONTAL Placez ta bobine sur ta tige et fixez-y un couvre-fit pour Coloque el carrete de hito en el porta carrete y asegt_relo con assurer un debit de fil bien regulier. Si ta bobine est dotee d'une et sujetador de hito para asegurarse que el hito se mueve...
-
Page 16: Converting To Free-Arm Sewing
CONVERTING TO FREE-ARM SEWING Your machine can be used either as a flat- bed or as a free- arm model. With the extension table in position, it provides a large working surface. To remove the extension table, hold it firmly with both hands and pull it off to the left as shown, To replace, slide... - Page 17 UTILIZACION DEL BRAZO LIBRE UTILISATION DU BRAS LIBRE Cette machine peut s'utitiser aussi bien sous la forme d'une La maquina tanto se puede utilizar como base plana o una base plane que celte d'un bras libre. maquina de brazo libre. En conservant ta table de raltonge en place, vous obtiendrai Con ta base de extensi6n...
-
Page 18: Winding The Bobbin
WINDING THE BOBBIN I Be sure to use Class 15 J bobbins, 1. Place a spool of thread on the spool pin, and secure it with the spool pin cap. Pull the thread out from the spool and place it through thread guides as shown in illustration. Be sure to pull thread securely into the bobbin winding... - Page 19 PRI PARATION DE LA CANETTE DEVANADO DE LA BOBINA Este seguro de usar clase 15 J bobinas. Utilisez que la canette 15 J. 1. Placez une bobine de fil sur un porte-bobine et fixez-la bien 1. Cotoque el carrete de hito en el porta carrete y asegQrelo l'aide du couvre-fil.
-
Page 20: Threading The Bobbin Thread
THREADING THE BOBBIN THREAD 1. Raise the needle to its highest position by rotating the hand wheel toward you (counter-clockwise). 2. Remove the bobbin cover plate by pushing the release button to the right. Bobbin cover will pop up sufficiently allow you to remove the cover. - Page 21 ENFILAGE DU FIL DE CANETTE ENHEBRADO DEL HILO DE LA BOBINA 1. Tourner te volant vers vous jusqu'a ce que l'aiguille soit 1. Levante ta aguja a su posici6n mas alta girando el volante dans la position la plus haute. hacia usted (en sentido contrario a las manecillas del reloj).
-
Page 22: Threading The Top Thread
THREADING THE TOP THREAD A. Raise the presser foot lifter. Always be sure to raise the presser foot lifter before threading the top thread. (If the presser foot lifter is not raised, correct thread tension cannot be obtained.) B. Turn the hand wheel toward you until the needle is in its highest position. - Page 23 ENFILAGE DU FIL SUPI RIEUR ENHEBRADO DEL HILO SUPERIOR A. Elevez te pied presseur. Veittez a toujours etever A. Levante el prensatelas. Siempre asegQrese de tevantar releveur de pied presseur avant d'enfiler le fil superieur. el prensatelas antes de enhebrar et hito superior.
-
Page 24: Using Automatic Needle Threader
USING AUTOMATIC NEEDLE THREADER Raise the needle to its highest position by rotating the hand wheel towards you (counter-clockwise). 1. Hook thread into thread guide as illustrated. 2. Pull down lever while holding the end of thread. 3. Rotate the lever to the rear of the machine. 4. - Page 25 UTILISATION DE L'ENFILEUR DE CHAS EMPLEO DEL ENSARTADOR AUTOMATICO DE AGUJA D'AIGUILLE Amener l'aiguille en position haute en toumant le volant vers Levantar ta aguja a ta posici6n mas elevada girando vous (sens contraire). volante de ta maquina hacia usted (en sentido contrario a las manecillas del reloj).
-
Page 26: Picking Up Bobbin Thread
PICKING UP BOBBIN THREAD 1. Raise the presser foot lifter. ® 2. Holding needle thread loosely with your left hand, turn hand wheel toward you (counter-clockwise) with your right hand, first lowering the needle and continuing until the needle comes to its highest position. NOTE: A quick way to pick up the bobbin thread is, with straight stitch selected,... - Page 27 RAPPEL DU FIL INFI RIEUR EXTRACCION DEL HILO DE LA BOBINA 1. Relever le pied presseur. 1. Alzar la palanca det pie prensatetas. 2. Tenir le fit de t'aiguitte et tourner te volant vers vous en 2. Manteniendo flojo el hilo de ta aguja con la mano izquierda, faisant remonter l'aiguille a sa position la plus haute.
-
Page 28: Needle, Thread And Fabric Chart
16/100 purple band Do not use on stretch fabrics. * For best sewing results, always use a SINGER branded needle. Always disc0nnect the roach ne from power suPPlY by removing the p!ug fr0m the Wal!-0utleL Changing the needle 1. - Page 29 * Non recommandes pour tes tissus extensibles. * Pour obtenir tes meitteurs resultats de couture, utitisez No usar sobre el material estirado. toujours une aiguille de marque SINGER. Para los mejores resultados de costura, use siempre agujas marca SINGER. Debranchez...
-
Page 30: Adjusting Top Thread Tension
ADJUSTING TOP THREAD TENSION Under side C6t6 de dessous 90% of your sewing will be done with the tension control dial (on Reverso top of the machine) set at "AUTO". Well balanced Correct IHelpfulHint: A slight adjustment to a higher number or a l lower number may improve sewing appearance. - Page 31 AJUSTE DE LA TENSION DEL HILO RI_G.LAGE DE LA TENSION DU FIL SUPERIEUR SUPERIOR El 90% de tu costura se hara con el control de tensi6n 90% de votre couture sera accomptie avec te cadran reglage de tension (en haut de la machine) regl6 a "Auto" establecido en "AUTO"...
-
Page 32: Functions Of Control Panel
Stitch width/needle position of straight stitch Stitch length Largeur du point/position de t'aiguitte sur te point droit Longueur du point Ancho de puntada/posici6n de aguja en costura recta Largo de puntada LCD display Stitch pattern number Ecrans ECL Numero du point motif Pantalla LCD NQmero de patr6n de puntada Manual adjustment buttons for stitch... - Page 33 FONCTIONS DU PANNEAU FUNCIONES DE PANEL DE CONTROL COMMANDE BOTONES PAPA ELEGIR NUMERO DE PUNTADA BOUTON DE SF:LECTION DES NUMF:ROS DES Cuando ta maquina esta encendida, se setecciona costura MOTIFS recta y aparecen en ta pantalta de LCD los ajustes para personalizar las opciones.
- Page 34 HELPFUL MESSAGES If an incorrect operation is made, a helpful message wilt be displayed. When a helpful message is displayed, fix the problem following the instructions below. Bobbin winder is moved to right (operating position) during sewing. -_ Check bobbin winder and move it to left. Buttonhole lever is not lowered or raised.
- Page 35 MESSAGES D'AIDES MENSAJES DE AYUDA Si une operation ne sait pas faite correctement, un message Si se hace alguna operaci6n incorrecta, aparecera d'aide apparaitra. Lorsque le message d'aide apparait, mensaje de ayuda en pantalta. Cuando aparezca un mensaje resoudre le probleme en suivant les instructions ci-dessous. de ayuda, Arregle et problema siguiendo las instrucciones abajo.
-
Page 36: Operation Buttons
OPERATION BUTTONS Reverse stitch button Bouton du point de marche arriere _(._o Bot6n de puntada hacia atras i\_cJ-__ _ Programmable needle up/down button Touche de position d'arr@t d'aiguitte Nterruptor de posicion de aguja parada Start/stop button Bouton de marche/arr6t Bot6n inicio/parada START/STOP BUTTON When sewing without having the foot controller connected, the machine starts slowly when the start/stop button is pushed. - Page 37 BOUTONS DE FONCTIONNEMENT INTERRUPTORES DE FUNCIONAMIENTO BOT(_N INICIOIPARADA BOUTON DE MARCHE/ARRI_T La machine demarre lentement torsque vous ne vous servez AI coser sin estar conectado el pedal, la maquina empieza pas du rheostat mais que vous activez te bouton marche/arr_t. a moverse lentamente al oprimir el bot6n iniciolparada.
- Page 38 _..-- ==II II Sewing speed control Regulateur de vitesse Control de vetocidad de costura SEWING SPEED CONTROL Sewing speed is set by using the sewing speed control. The sewing speed control is moved horizontally to determine amount of speed required. Regardless of the setting, maximum...
- Page 39 RI_GULATEUR DE VITESSE CONTROL DE VELOCIDAD DE COSTURA La vitesse de couture est contr61ee en utitisant le regulateur de La vetocidad de ta costura se aplica al usar el control velocidad. El control de velocidad se mueve horizontalmente vitesse. Le regulateur de vitesse se deplace horizontalement pour obtenir la vitesse d6siree.
-
Page 40: Starting To Sew
2. STARTING TO SEW 2. COMMENCEZ A COUDRE 2. EMPEZER A COSER TABLEAU DE RI_FI_RENCE QUICK REFERENCE CUADRO DE REFERENCIA RAPIDEDES LONGUEURS ET TABLE OF STITCH RAPIDA DE LARGO Y LARGEURS DE POINTS LENGTHAND WIDTH ANCHO DE PUNTADA NEEDLE POSITION LENGTH TWIN POSITION D'AIGUILLE... - Page 41 LENGTH WIDTH WIDTH LENGTH TWIN TWIN LARGEUR(ram) LONGUEUR LARGEUR (ram) NEEDLE* STITCH No. (ram) LONGUEUR (ram) NEEDLE* ANCHO LARGO ANCHO LARGO AIGUILLE AIGUILLE POINT DOUBLE* DOUBLE* AUTOI MANUAL AUTO AUTO I MANUAL AUTO MANUAL MANUAL PUNTADA AGUJA AUTO AUTO MANUEL AUTOI MANUEL MANUEL AUTO I MANUEL...
- Page 42 WIDTH LENGTH TWIN WIDTH LENGTH TWIN STITCH LARGEUR(mm) LONGUEUR(mm) NEEDLE* STITCH LARGEUR(mm) LONGUEUR(mm) NEEDLE* ANCHO LARGO ANCHO LARGO POINT AIGUILLE POINT AIGUILLE DOUBLE* DOUBLE* AUTO MANUAL AUTO MANUAL AUTO MANUAL AUTO MANUAL PUNTADA AUTO MANUEL AUTO MANUEL PUNTADA No. AUTO MANUEL AUTO MANUEL...
- Page 43 WIDTH LENGTH TWIN WIDTH LENGTH TWIN STITCH No. LARGEUR(mm) LONGUEUR(mm) NEEDLE* STITCH LARGEUR(mm) LONGUEUR (ram) NEEDLE* ANCHO LARGO ANCHO LARGO AIGUILLE AIGUILLE POINT POINT DOUBLE* DOUBLE* AUTO MANUAL AUTO MANUAL AUTO MANUAL AUTO MANUAL PUNTADA No. AUTO MANUEL AUTO MANUEL PUNTADA No.
-
Page 44: Straight Stitching
STRAIGHT STITCHING Straight stitch is most frequently used for all types of sewing. Let's begin by following the steps below. 1. SETTINGS Presser foot- General Purpose Foot Thread tension control- AUTO NOTE: Based upon the weight of the fabric, slight "fine tuning"... - Page 45 POINT DROIT PUNTADA RECTA Ceci est le point le plus utitise pour toute genre de couture. La puntada recta se usa mas frecuentemente para coser todo Apprenez a vous servir correctement de votre machine, tipos de costura. Comencemos siguiendo los pasos abajo. suivant tes etapes ci-dessous.
-
Page 46: Straight Stitch With Auto Tie-Off Function
STRAIGHT STITCH WITH AUTO ,,_': ¢-, TIE-OFF FUNCTION 1. Press the foot control and the machine will sew 4 stitches in forward and then 4 stitches in reverse and continue sew in forward until the foot control is released. 2. Push the reverse switch and the machine will sew 4... - Page 47 POINT DROITAVEC FONCTION PUNTADA RECTA CON FUNCION ,:::': DE REMATE AUTOMATICO NOUAGE AUTOMATIQU 1. Appuyer sur te rheostat ; ta machine coudra alors 4 points 1. Pise el pedal y ta maquina cosera 4 puntadas hacia en marche avant puis 4 points en marche arriere, et vous delante y tuego 4 puntadas...
-
Page 48: Zigzag Stitching
ZIGZAG STITCHING Underside CSte de dessous SETTINGS :Presser foot- General Purpose Foot Reverso :Thread tension control- AUTO The top thread may appear on the bottom depending on the thread, fabric, type of stitch and sewing speed, but the bobbin thread must never appear on the top of the fabric. If bobbin thread is pulling to the top or you are experiencing Top side puckering, slightly reduce the tension with the Thread Tension... - Page 49 POINT ZIGZAG PUNTADA ZIG-ZAG Rg:GLAGES :Pied presseur- Pied universel AJUSTES :Pie prensatelas - Pie universal :Control tensi6n hilo -AUTO :Reglage tension du fil superieur- AUTO Le fil superieur peut parattre sur l'envers, en fonction du ill, du El hito superior puede aparecer en la parte inferior, segQn el tissu et de la vitesse de couture, mais le fil de la canette ne hilo, tejido, tipo de puntada y velocidad de costura, pero el hilo...
-
Page 50: Blindhem Stitch
BLINDHEM STITCH 04 o7 The btindhem stitch is primarily used for creating nearly invisible hems on curtains, trousers, skirts, etc. Medium to heavyweight fabric Settings • Presser foot- Blind stitch foot Material de peso medio a pesado • Thread Tension Control: AUTO Tissus moyens et tourds... - Page 51 POINT INVISIBLE 04 07 PUNTADA INVISIBLE 04 07 R¢:GLAGES :Pied presseur- Pied point invisible AJ USTES :Pie prensatelas- Prensatelas de puntada invisible :Reglage tension du fil superieur- AUTO :Control tensi6n hilo - AUTO - Puntada Invisible Regular para tela de lana normal - Point ourlet invisible regulier pour tissu tisse _ Puntada invisible super elastico para las telas - Point invisible pour les tissus extensibles...
-
Page 52: Multi-Stitch Zigzag, Shell Stitch
MULTI-STITCH ZIGZAG SETTINGS :Presser foot- General Purpose Foot :Thread tension control- AUTO This is a strong stitch because as its name implies, it makes three short stitches where the normal zig-zag makes only one. For this reason it is recommended for overcasting all types of fabrics. - Page 53 ZIGZAG MULTI-POINT ZIG-ZAG DE TRES PUNTADAS R¢:GLAGES :Pied presseur- Pied universel AJUSTES :Pie prensatelas - Pie universal :Control tensi6n hito -AUTO :Regtage tension du fil superieur- AUTO Pour reparer des dechirures droites ou en angle placez le Esta es una puntada fuerte, ya que como su nombre implica, tissu avec te debut de l'accroc sous ta partie centrale du pied.
-
Page 54: Decorative And Stretch Stitches
DECORATIVE AND STRETCH STITCHES SETTINGS :Presser foot - General Purpose Foot or Satin Stitch Foot :Thread tension control- AUTO Stretch stitches are mainly for use on knit, or stretchable fabrics, but can also be used on woven materials. STRAIGHT STRETCH STITCH Straight stretch stitch is far stronger than an ordinary straight stitch because it locks three times - forwards, backwards... - Page 55 POINT DI_CORATIFS ET POINTS PU NTADAS DECORATIVAS Y ELASTICAS EXTENSIBLES R¢:GLAGES :Pied presseur - Pied universel ou pour point AJUSTES :Pie prensatelas - Pie universal o para coser bourdon en saten :Control tensi6n hito -AUTO :Reglage tension du fil superieur- AUTO Les points extensible sont utilises surtout sur les tricots et tes...
- Page 56 The Entredeux stitch is most often sewn with a Wing Needle (SINGER Style 2040) to create holes in the stitch pattern. increase the size of the hole when using a Wing Needle,...
- Page 57 La puntada "Entre dos" es mas souvent cousu & t'aide d'une aiguitte aite (Style SINGER 2040) comQnmente usada con una aguja "de ala" (SINGER estilo pour creer des trous dans le motif du point. 2040) para crear agujeros en et patr6n de costura.
- Page 58 LADDER STITCH The Ladder stitch is primarily used for drawn thread hemstitching. It can also be used for sewing over thin tape in an opposite or same color. Place the stitch in the center and a special effect will be obtained for decoration. Another use for the ladder stitch is couching...
- Page 59 POINT D'#CHELLE PUNTADA EN ESCALERA Le point d'echelte est principalement utilise pour ta couture La puntada en escalera se usa principalmente para hacer d'ourlets a fil tir& I1 peut egalement _tre utitise pour effectuer dobladillos. Tambien se puede usar para coser sobre cinta fina la couture par dessus une mince...
- Page 60 k' :1 SLANT OVEREDGE STITCH 24 25 Seams and overcasts in one operation to produce a narrow, supple seam, particularly suited to swimwear, sportswear, T-shirts, babywear in stretch nylon, jersey and cotton jersey. CROSSED STITCH Use to sew and finish elastic fabrics or for decorative work. CHEVRON STITCH Use to create decorative borders.
- Page 61 t; "1 t; "1 SURJET OBLIQUE 24 25 PUNTADA OVERLOCK INCLINADO 24 25 Le surjet sert a la realisation de couture et surjet en une seule La puntada overlock inclinado produce una costura estrecha operation. Avec ce point, vous pouvez faire des coutures y elastica particularmente adecuada para prendas...
-
Page 62: Decorative Machine Stitching
FISHBONE STITCH Used mainly for decorative machine stitching. THORN STITCH It is a versatile stitch used for joining fabric pieces as well as for decorative machine stitching. REINFORCED OVEREDGE STITCH 76 77 Both of these stitches are perfect for attaching flat elastic. - Page 63 POINT D'ARR#TE PUNTADA RASPA Utitiser principalement pour coudre des points decoratifs a la Usadas principalmente como puntada decorativa. machine. POINT D'#PINE PUNTADA "HERRINGBONE" C'est un point potyvalent utilise pour joindre des pieces de Es una puntada versatit, usada para unir piezas de tela asi tissu aussi bien que pour la couture decorative a la machine.
-
Page 64: More Decorative Stitches & Ideas For Decorative Machine Stitching
MORE DECORATIVE STITCHES & IDEAS FOR DECORATIVE MACHINE STITCHING SETTINGS :Presser foot- Satin stitch foot :Thread tension control -AUTO or -1 You should carry out a test sewing on an extra piece of the fabric being sewn to check the decorative pattern to be used. Before starting to sew, check that there is enough... - Page 65 PLUS DE POINT DI_CORATIFS & IDI_ES MAS PUNTADAS DECORATIVAS POUR LA COUTURE DI_CORATIVE A LA E IDEAS PARA DECORAR MACHINE MANUALIDADES R¢:GLAGES :Pied presseur - Pied pour point bourdon AJUSTES :Pie prensatelas - Pie para coser en saten :Control tensi6n hilo -AUTO o -1 :Reglage tension du fil superieur- AUTO ou -1 Vous devriez...
-
Page 66: Buttonhole Making
BUTTONHOLE MAKING AUTOMATIC BUTTON HOLE Tab A Languette A Leng USING BUTTONHOLE FOOT Your machine offers you two different widths of bartack, keyhole and round end buttonholes sewn by a system that measures the size of the button and calculates the size of buttonhole required. - Page 67 CONFECTION DES BOUTONNII_RES CONFECCION DE OJALES OJALES AUTOMATICOS BOUTON NII_RE AUTOMATIQU UTILISATION DU PIED BOUTONNIERE USO DEL PRENSATELAS PARA OJALES Votre machine vous offre deux differentes largeurs Su maquina de coser te ofrece dos anchos de ojales boutonnieres & brides ; & ceillet et boutonnieres arrondies presilla, tipo sastre...
- Page 68 5. Carefully mark the position of buttonhole on your garment. 6. Place the fabric under the foot. Pull out the bobbin thread underneath the fabric to a length of about 4 inches to the rear. 7. Align the buttonhole mark on the fabric with the mark on the buttonhole foot, and then lower the buttonhole foot.
- Page 69 5. Marquezsoigneusementla position dela boutonnieresur 5. Marque cuidadosamente la posici6n del ojal en la le vetement, vestimenta. 6. Placez te tissu sous te pied. Tirez le fil de la bobine sous 6. Coloque el material debajo del pie. Tire del hito de la le tissu sur une longueur d'environ 10 centimetres...
-
Page 70: Automatic Buttonhole
CORDED BUTTONHOLES Spur aliente Hook filler cord (such as crochet thread or buttonhole twist) over the spur and pull both ends of the cord forward under the foot and tie off the Tige cord as shown in the illustration. Sew buttonhole so that zigzag stitches cover the cord. - Page 71 BOUTONNIERES GANS#ES OJALES CON CORDON (RENFORC#ES) Cord6n de relleno al saliente de ta guia y estirar ambos Passer le cordonnet (ill de passe ou fil de soie) par-dessus extremos del cord6n hacia adelante, por debajo de la guia. tige du pied boutonniere et tirez les deux extremites sous le Coser el ojal de forma que las puntadas de zig-zag cubran el...
-
Page 72: Caring For Your Machine
4. Clean the feed dogs and hook area with the lint brush. Put one drop of sewing machine oil on the hook race as indicated by the arrows. (A, B) NOTE: SINGER Brand Sewing Machine Oil is suggested. DO NOT use "all purpose" oil as it is not suited for sewing machine lubrication. - Page 73 REMARQUE: I'utilisation de I'huile de machine & NOTA: Se sugiere usar aceite de m&quina coudre de la marque SINGER est recommand_e. N'UTILISEZ PAS d'huile "universelle", elle ne convient coser marca SINGER. NO use aceite "para todo uso" debido a que no es el m&s adecuado para la pas &...
-
Page 74: Other Information
A twin-needle produces two rows of parallel stitches for pin tucks, double top stitching and decorative sewing. Use of a SINGER Brand 3mm (Style 2025) Twin Needle strongly recommended. THREADING THE TWIN NEEDLE 1. - Page 75 3 mm de la marque debera nunca ajustarse por encima de ta separaci6n de la SINGER (style 2025) est fortement recommandee. "aguja doble", sin importar la puntada seteccionada. De no hacerlo asi se romperan las agujas y podria resultar dafiada la maquina.
-
Page 76: Straight Stitch Needle Position
STRAIGHT STITCH NEEDLE POSITION The position of the needle when sewing straight stitch may be adjusted to anyone of 13 different positions with the Stitch Width Control as illustrated: Toward left Toward right Vers ta droite Vers ta gauche Hacia derecha Hacia izquierda Multi-function button... - Page 77 RI_GLAGE DE LA POSITION D'AIGUILLE AJUSTE DE POSICION DE AGUJA PARA POUR LE POINT DROIT PU NTADA RECTA 13 positions d'aiguille sont utitisables pour la couture droite en 13 posiciones de aguja disponibtes para acolchados, utilisant le contrSle de largeur de point. puntadas de revestimiento, etc.
-
Page 78: Special Accessories
5. SPECIAL ACCESSORIES STRAIGHT STITCH FOOT Use this foot when close control is needed according to the type of fabric or stitching procedure. OVERCASTING FOOT This foot is used to guide fabric when overcasting. Place your fabric under the foot with its edge against the edge guide and start to sew. - Page 79 SP¢CIALES 5. ACCESSOIRES 5. ACCESORIOS ESPECIALES PIED .A,POINT DROIT PIE COSTURA RECTA Utilisez ce pied pour obtenir un meilteur contr61e, Use este pie cuando requiera un control estricto de acuerdo dependamment du type de tissus ou de la procedure con el tipo de tela o procedimiento de costura.
- Page 80 GATHERING FOOT The gathering foot can form single rows of shirring quickly and easily. You can also use this foot to gather one fabric while simultaneously attaching it to another fabric which remains flat. To do shirring of a single layer of fabric: 1.
- Page 81 PIED .A,FRONCER PRENSATELAS PARA PLISAR Le pied & froncer peut former des rangees simples de fronce Et pie para plisados puede formar filas de ptisar rapida rapidement et facilement. Vous pouvez aussi utiliser ce pied y facitmente. Puede usarse tambien para ptisar una teta pour froncer un tissu en l'attachant simultanement...
-
Page 82: Performance Checklist
6. PERFORMANCE CHECKLIST GENERAL PROBLEMS Machine does not sew. * Power switch is turned off.- Turn on the switch. * Buttonhole lever is not raised when sewing stitch patterns. - Raise buttonhole lever. * Buttonhole lever is not lowered when sewing buttonhole. - Lower buttonhole lever. - Page 83 6. VI RIFIC.ATION DES PETITS 6. CUADRO DE VERIFICACION PROBLEMES DE COUTURE RENDIMIENTO PROBLEMESGENERAUX PROBLEMAS GENERALES Maquina no cose. La machine ne coud pas: * El interruptor de energia no esta conectado. - en la posici6n * L'interrupteur est hors fonction. L'active LOW o HIGH.
- Page 84 ENGLISH / FRAN(_AIS / ESPANOL C) Part No. 82242 1/09...
Need help?
Do you have a question about the 7258 and is the answer not in the manual?
Questions and answers
top stitch is good bottom stitch is bunchedup
The bottom stitch is bunching up on the Singer 7258 while the top stitch looks good because the upper thread tension is likely too loose. When the upper thread tension is not strong enough, it cannot properly pull the bobbin thread up into the fabric, causing loops or tangles underneath. This problem is more noticeable when sewing thick materials like folded web belting. To fix this, increase the upper thread tension and make sure the presser foot is down when adjusting.
This answer is automatically generated
There are things like bake to back Cs on the function window and the moter races but the machine doesn’t sew
Possible causes for the Singer 7258 sewing machine not sewing, despite the function window displaying settings and the motor running, include:
- Power switch is turned off – Turn on the switch.
- Buttonhole lever is not raised when sewing stitch patterns – Raise buttonhole lever.
- Buttonhole lever is not lowered when sewing buttonhole – Lower buttonhole lever.
- Bobbin winder is engaged – Disengage bobbin winder.
This answer is automatically generated
Hand wheel is hard to turn
The hand wheel on the Singer 7258 sewing machine may be hard to turn if thread is caught in the hook. In this case, clean the hook to fix the issue.
This answer is automatically generated
Which pages are English instructions
What are the correct settings for a draft stitch on this sewing machine