Table of Contents
Advertisement
Quick Links
Advertisement
Table of Contents

Related Manuals for Samsung SIR-T165


Summary of Contents for Samsung SIR-T165
- Page 1 " _Owner's instruction...
-
Page 2: Chapter 3:Operation
!Warning!Important Safety Instructions CAUTION CAUTION: TO REDUCE THE RiSKOF ELECTRIC SHOCK, DO NOT REMOVECOVER (OR BACK). NO USER SERVICEABLE P ARTS iNSiDE. REFER SERViCiNGTO OUALIFIED SERVICE PERSONNEL. This symbol indicates high voltage is present inside, it is dangerous to make any kind of contact with any inside part of this product, This symbol alerts you that important literature concerning operation and maintenance has been included with this product. - Page 3 Thank Y ou for Choosing Samsung Thank you for choosing Samsung! Your new Samsung Digital TV receiver represents the latest in DTV IRD technology. We designed it with easy4o-use on-screen menus and closed captioning capabilities, making it one of the best products in its class. We are proud to offer you a product that will provide convenient, dependable service and enjoyment for years to come.
- Page 4 Protect the power cord. Power supply cords should be routed so that they won't be walked on or pinched by objects placed on or against them, Pay particular attention to cords at plugs, conve- nience receptacles, and the point where they exit from the unit. Unplug the product from the wall outlet and disconnect the antenna or cable system during a lightning storm or when left unattended and unused for long periods of time.
- Page 5 AGuide t oDigital TV What isDigitalTelevision? Digital television (DTV) is a new way of transmitting high quality video and audio to your TV set. Using DTV, broadcasters can transmit high definition TV (HDTV) images, Dolby digi- tal surround audio, and new services such as multicasting (transmitting more than one pro- gram on the same TV channel)
- Page 6 How toView Digital Television There are three ways to watch DTV. The first is to use an integrated digital TV; one with a built-in digital television tuner. The second is to connect an external DTV set-top receiver a DTV-ready television or monitor.
- Page 7 Q&A 1. Is theantennaI usefor existingTV reception goodenough for DTV? Over-the-air (OTA) digital TV broadcasting uses the same channels as analog TV and works well with many existing TV antennas. However, DTV broadcast channel assignments are different than analog channels. You should find out whether your local DTV broadcasts are on VHF (channels...
- Page 8 Q&A 4. CanI connectmy DTVset-top receiver to mycableTV service? Cable TV systems use a different method for transmitting digital TV programs that is current- ly incompatible with broadcast DTV set-top receivers. So you will still need to use an out- door or indoor antenna to receive OTA broadcast...
-
Page 9: Table Of Contents
CONTENTS Chapter 1:Connecting theSet T op Box.......... Front Panel Controls and LEDs ......Rear Panel Jacks ........Connecting Antennas ........Connecting the Set-Top Box to a TV set ..... Connecting the Set-Top Box to a Computer Monitor .... Connecting Video Component ...... - Page 10 CONTENTS Setting the Time and Date ....... Chapter 4:Spedal Features ..........Changing the Screen Format ......Choosing a Sound "Multitrack" (When a Digital Signal is received) ....... Choosing a Sound "Multitrack" (When an Analog Signal is received) ...... Choosing a Digital Sound Format (Dolby or PCM) .....
-
Page 11: Front Panel Controls And Leds
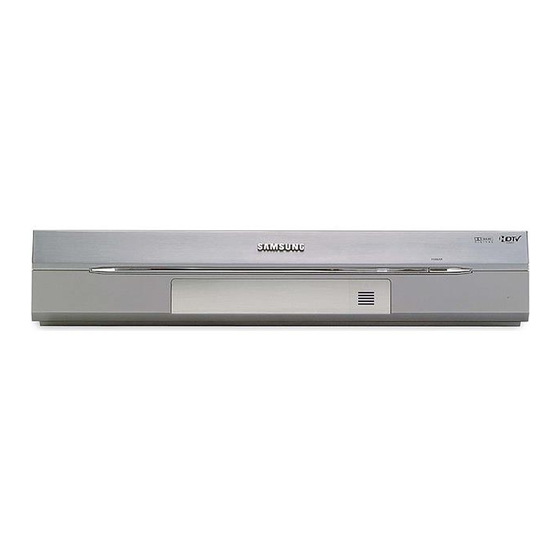
Front Panel Controls and LEDs Pull and open the cover to use front panel controls, MENU POWER Press todisplay the on-screen menus. Press toturn thepower onoroff, ENTER DTV (LED) When adigital s ignal isreceived, theLED indicator Press toactivatea selection whenusing the on-screen menus. -
Page 12: Rear Panel Jacks
Rear P anel J acks O DOLBYDIGITALOUT (OPTICAL) O RF (CABLE)INPUT Use toconnect theDigital Audio I nput ofyour " iV oraudio Connect theCAIV cable here. component. S-VIDEO INPUT/OUTPUT DOLBYDIGITALOUT (COAXIAL) Provides goad picture quality. I fyour I Vor monitor has S- Use t oconnect theDigital Audio i nput ofyour"iV. -
Page 13: Connecting Antennas
DTVOUT(NGB format) DVIOUT You c an comet R GB toa'iV, computer nomitor, another Use toconn_ a device equipped with O Vt int_aca. video component in_. 1080i, 720p, and 480p a reavailable by set- OVl OUT _ NOCP fu_n.(See Notes on page 1.9.) ling the RESOLUTION SELECT switch. -
Page 14: Connecting Theset-Top Box Toatv Set
Connecting theSet-Top Box toaTV Set Plasma DisplayPanel(PDP) Connect an antenna cable to the I;_l-input jacks on the Set-lop Box Connect theVideo Cables • YIP_P.format: Connect a video cable between the DIV OUI COMPONENI jacks on the Set-lop Box and the DIV INPUIjacks on the PDE •... - Page 15 Digital Ready IV or Normal IV Connect an antenna cable to the I_Finput jacks on the Setlop Box. Connect the Video Cables. • Digital Ready TV: Connect a video cable between the DIV OUI COMPO- NENI (YP_P_)jacks o n the Set-lop Box and the DIV INPUIjacks on the IV •...
-
Page 16: Connecting Theset-Top Box Toa Computer Monitor
Connecting theSet-Top Box toa Computer Monitor Sd-Top Bo_ r,e_rP,:_ Connect an antenna cable to the RF input jacks on the Set-10p Box. Connect a computer video monitor cable belween the DIV OUI (RGB format)jack on the SetII0p Box and the VIDEO INjack the computer monitor Connect an audio... - Page 17 VCR with a Cable Box Connem a VCR wilha cablebox tothe Set-lop Box, as shown intheilluslralion righ_ VCR Re_ V_ _ith_niter Outjad_ If you connect a VCR with the MONI- IOR OUI jacks to _heSin-lop Box, the VCR will record exactly whm you are viewing on the Sin-lop Box.
- Page 18 _rr_rdsr Connect a camcorder to the Set-10p Box, as shown in the illustration to the right. Connect Audio/Video cables or S-Video cable between the Set-10p Box and camcorder NOTE If both S-Video end Video cables ere connected, S-Video will override Video.
-
Page 19: Connecting The Set-Top Box To A Device With Dvljack
Connecting theSet-Top Box toa Device with a DVI jack Connect a DVI cable belween the Be-Top B inder Portal DVI OUIjack on the Set-10p and the DVl INjack on the DVI device (IV, monitor) Connect audio cables between the Ltil_t AUDIO OUIjacks on the Set-10pBox and the Lil_!AUDIO INjacks on the DVI device. - Page 20 Connecting a D-VHS d evice Digital Signal IN Digital recording: Connect a FireWire cable (not supplied) between the IEEE1394 INiOUI connector on the D-VHS device and the I-IREWII;_EINiOUI connector on the Set- lop BOX k F,mr_4 Analog recording: Connect a I-ireWire cable between an D-VHS device and the Set-10p Box and also an analog cable between the AV input on the D-VHS device and the AV out-...
-
Page 21: Important Notes About Copy Protection
Important Notes A bout Copy P rotection * If an external device signal (DVD, AV1, AV2) is input, you will not be able to record contents using an analog VCI;L However, you can record IV programs. * 10 play the D-VHS contents protected by a copy protection system, connect to the YI_P_ OUlPUIjack... - Page 22 Reviewing theRemote Control The Set-Top Box remole conlrol and on-screen menu system work logelher to operate the Sel-Top Box as simply as possible. Understanding the remote control butions and 1he menus allows you 1o operate 1he Sel-Top Box wilh ease. If you need some assistance while using the female control and 1he menus, use the provid- edon-screen help feature.
- Page 23 Remote Control COMPONENTSELECTION BUROI_ Press toselect apartkular cornbenent ($1B, IV,_R, C_PL D VD) tobecontrdled b ythe mrmete control, see°Progremming theRem_e Central for O ther Cernpaner_" anpage (419). (_ PRE_CH (PreviousChaa_,l) #1 Press toalternate be_tt_en thecurrent Cbennels and the last channel that w asdisplayed. _1_ M'I_ (Multitrack Sound)#1 Press toselect availahle °rnuititrucl_"...
-
Page 24: Installing Thebatteries
Social Notes: #1 ]he _1V _ buttons (VOL+/-, MUIE,W/VIDEO, +100): TOUSe"_hese buffons, you mustfirs_ Switchthe remote control to" TV" mode, (Pressthe TV buffon on'_he remo'_econtrol _ select" _.r ) #2 ]he _VCI_ buttons (FF,PEW, P LAY, SLOP, PAUSE, RECORD): TOuse "_hese blJffons, you must first Switchthe remote control to" VCI_ mode, (Pressthe TV b_Jffonon'_he renlo'_econtrol _ select"... -
Page 25: The On-Screen Menu System
The On-Screen Menu System First, press MENU button, then use the Menu UP/DOWN/LEF I/I,_IGH [ buttons in the center of the remote control to move between the menus, Io enter a particular menu, press ENIEI,L Ihe menu system has three different levels, Ihe five icons on the left side of the screen are the "first level"... -
Page 26: Using Theon-Screen Help
Using theOn-screen Help To bJrnthe on-screen help on: Press the MENU button on the remote control. Use the Menu Up/Down buttons to highlight the Preference icon and press EN IER. Use the Menu Up/Down buttons to highlight Help and press ENIEI*! "Help: Off"... -
Page 27: Viewing Theinformation
Viewing theInformation You can quickly check the status of many of the Set:lop Box features and options by using the Info but[on. TheInfe shews: " Ihe major channel number and the minor channel number (if you are viewing a digital channel). -
Page 28: Memorizing Channels
Memorizing Channels Before you can use any of the special channel butions ICH AY, PAV_CH),the available channels must first be scanned and memorized. This is an easy, automatic process that _ypically takes _o minutes. To memorize channels: Pressthe MENU button on the remotecontrol. Usethe Menu Up/Down buttonsto highlight the Channel icon and press ENTER. -
Page 29: Adding And Deleting Channels
Adding a ndDeleting C hannels I0 add channels that were not memorized (or to delete unwanted channels from the memory): Enter the digits of the channel to be added or deleted. Press the MENU button on the remote control. Use the Menu Up/Down bultons to highlight the Channel icon and press EN IEl! Use the Menu Up/Down... -
Page 30: Changing Channels
Changing Channels Numberbuttons Press the number buttons (O - 9) to enter channel numbers PRE-CH buttons Press to return to the previous channel you viewed For exam- ple, if the box is tuned to channel 55 and then you change to channel 56, pressing PI;_E-CH will return to channel... -
Page 31: Setting Your Favorite Channels
Setting Your F avorite Channels Pressthe MENU button on the remote control Use the Menu Up/Down buttonsto highlight the Preferenceicon and press ENIEF_ Usethe Menu Up/Down buttonsto highlight the Set FavoriteChannels icon and press ENIEIL 10 designate a particular channel as a "Favorite Channel,"... -
Page 32: Fine Tuning Analog Channels
Fine Tuning A nalog Channels Ihe Fine luning function lets you manually adjust the IV's tuner if you have difficulty tuning analog channels, Press the MENU button on the remote control. Use the Menu Up/Down buttons ..... to highlight the Channel icon and press EN IEI._ Use the Menu Up/Down buttons... -
Page 33: Checking Thedigital-Signal Strength
Checking theDigital-Signal Strength Unlike analog channels, which can vary in reception quality from "snowy" to clear, digital (HDIV) channels have either perfect reception quality or you will not receive them at all. So, unlike analog channels, you cannot fine tune a digital channel. -
Page 34: Setting The Time And Date
Setting theTime a nd Date First, select the channel that has a Digital Signal. Pressthe MENU button on the remote control Usethe Menu Up/Down buttons to highlight the Setup icon and press EN IEI;L Use the Menu Up/Down buttons to highlight the Auto lime Setup icon and press EN IEI;L You will be asked if your local area observesDaylight Saving... -
Page 35: Changing The Screen Format
Changing theScreen Format Your options in the Screen Format menu depends on the type of IV or monitor you are using with your Set-lop Box, Pressthe MENU button on the remote control Use the Menu Up/Down buttonsto highlight theSetup icon and press ENI EI;L Use the Menu Up/Down buttons to... - Page 36 MONITOR FORMAT Source S ignal LETTER FULL ZOOM *© With a 4:3 RatioTVor Moriter If you are using a 4:3 aspect ratio IV or monitor and receiving an image with a 16:g aspect ratio, you need to specify how the image is displayed. Letterbox Choose this when receiving a 16:g _mage and you want to see the original wide format.
- Page 37 16:9MONITOR FORMAT Source S ignal PILLARBOX FULL ZOOM With a IG:S R_ T¥ u' haitw If you are using a 16:9 aspect ratio IV or monitor and receiving an image with a 4:3 aspect ratio, the image will be displayed at the 4:3 aspect ratio on your monitor unlessyou specify otherwise. Ihe Screen Formatmenu allows you to adjust the image through the following options: Whu a 4:3 _ _sl_l is _iv_i...
-
Page 38: Choosing Asound" Multitrack' (When A Digital Signal Isreceived)
Choosing aSound" Multitrack' (When a Digital Signal isreceived) [he digital-iV transmission system is capable of simultaneous transmission of many audio tracks (for example, simultaneous translations of the program into foreign languages). availability of these additional "multitracks" depends upon the program. SelectirKj a multitr_k language Pressthe MENU button on the remote control Usethe Menu Up/Down buttonsto... -
Page 39: Choosing A Sound "Multitrack" (When A Nanalog Signal Isreceived)
Choosing a Sound "Multitrack" (When a nAnalog Signal isreceived) SelectirKja rmalftrack sound Press the MENU button on the remote control Use the Menu Up/Down buttonsto highlight the Preferenceicon and press EN IEI;L Usethe Menu Up/Down buttonsto highlight the Multi4rack Options icon and press EN IEI,! Use the Menu Up/Down buttons to... -
Page 40: Choosing A Digital Sound Format (Dolby Or Pcm)
Choosing aDigital Sound Format (Dolby orPCM) Both analog and digital sounds can bo output from tho roar-panol connoctors on your Sot- lop Box, Iho digital sound outputs are optical and coaxial connectors labolod "Dolby Digital Output," After connocLing an optical or a coaxial digital-audio component,... -
Page 41: Using Dynamic Range Compression (Drc)
Using D ynamic Range C ompression (DRC) When you switch channels, the volume may vary depending on the channel. Ihe Dynamic flange Compression function can adjust the volume difference automatically. Pressthe MENU button on the remote control. Use the Menu Up/Down buttons to highlight the Setup icon and press EN IEI;L... -
Page 42: Setting Up Digital Captions (On-Screen Text Messages)
Setting U pDigital Captions (On-Screen Text M essages) [he Digital Captions function operates on digital channels, How to Activate or Deactivate the On-screenCaptions Pressthe MENU button on the remotecontrol. Use the Menu Up/Down buttons to highlight the Preference icon and press EN IEI;L Use the Menu Up/Down buttons to highlight... - Page 43 Selectthe option IService, Size, Slyle, Foregroundor Background}you want using the Menu Up/Down bultons Use the Menu Up/Down bultons to selectthe menuyou want and press ENTER Service: This option consistsof Service 1 ~ Service6. The default is Service 1. Either the reading level or the language may change depending on the service option Size:This option consistsof Default, Small, Standard, Large The default is Standard.
-
Page 44: Setting Up Analog Captions (On-Screen Text Messages)
Setting UpAnalog Captions (On-Screen Text M essages) [he Analog Captions function operates in either analog I,_1- c hannel mode or external signal(DVD, AVI, AV2) mode, (Depending on the broadcasting signal, the Analog Captions function may operate on digital channels,) How to Activate or Deactivate the On-screenCaptions Pressthe MENU button on the remotecontrol. -
Page 45: Rating Control Menu
Rating C ontrol Menu Access to channels and programs is controlled by a password (i,e,, a 4-digit secret code that is defined by the user),lhe on-screen menu will instruct you to assign a password (and you can change it later, if necessary), Howto Charige YourPassword Pressthe MENU button on the remote control. -
Page 46: Ratings Or Mpaa Ratings
How toLock P rograms Using t heW (FCC) Ratings orMPAA Ratings Press the MENU button on the remote control. Use the Menu Up/Down buttonsto highlight the Preferenceicon and pressENIER Use the Menu Up/Down buttonsto highlight the Rating Control icon and pressENIER Enter your password correctly After the password is entered, the... - Page 47 Important N otesAbout Parental L ocks (" P.Locks") Explanation of the MPAA and IV (FCC) I;_ating Systems: TV (FCC) Age-Based Ratings TV-G General audience. It contains little TV-MA Mature audiences only. Ihis pro- gram may contain mature themes, profane or no violence, no strong language, and lit- language,...
-
Page 48: Electronic Program Guide
Electronic Program G uide Your Set-lop Box has an Electronic Program Guide (EPG) to help navigate through all the possible viewing options. EPG supplies information, such as program lisLs, start and end times of all available channels. In addition, the detailed information about the program is often available... -
Page 49: Using The Epg (Electronic Program Guide)
Using t heEPG (Electronic Program G uide) Howto Set EPG Pressthe MENU button on the remote control. Use the Menu Up/Down buttons to highlight the Guide icon and press EN IEI;L Use the Menu Up/Down buttons to highlight the Set Default Guide icon and press EN IEI;L Use the Menu Up/Down buttonsto alternate between "Mini"... - Page 50 Viewing Information about aSingle C hannel Pressthe MENU button on the remote control Usethe Menu Up/Down buttonsto highlight the Guide icon and press ENIEI! Use the Menu Up/Down buttonsto highlight the Mini Guide icon and press ENIEI;L Use the Menu Up/Down buttons to view information about one channel by time.
-
Page 51: Viewing Information About Channels
Viewing Information about Channels Press the MENU button on the remote control Use the Menu Up/Down buttons to highlight the Guide icon and press ENIER. Usethe Menu Up/Down buttonsto highlight the FFull Guide icon and press ENIEI._ Use the Green button (SLOP) to activate "-2 Hours" and the Yellow button (PLAY)to activate "+2 Hours"... -
Page 52: Timer Recording
Timer R ecording You can program your Set-lop Box to automatically record a particular channel at a certain time. l,irst, connect a D-VHS device to your Set-lop Box with a I-irewire cable, Press the MENU bulton on the remote control Use the Menu Up/Down bultonsto highlight the Guide icon and press EN IEI;L... -
Page 53: Controlling Firewire Devices
Controlling FireWire Devices HreWireisa digital serial interface t hat allo_.,_ devices_quipp_ witha FireWireconn_torto exchangedigital video signals, d igital audiosignals, a nddevicecontrol s ignals bi-dire_ionailyovera singlecable. 5aforecontrolli% RreWiredevices,conne_ a RreWire devicetothe Set-rap]_oxwith a FireWirecable Pressthe MENU button on the remote control. Use the Menu Up/Down buttons to highlight the FiroWire icon and press... -
Page 54: Programming The Remote Control For Other Components
Programming theRemote Control forOther C omponents Ihe remote control has been pre-programmed to operate your Set-top Box However, you can program the remote control to operate other components, such as a cable IV, a VCI_, a DVD player, etc (even though they are made by different manufacturers) Press the appropriate button among the Component Selection buttons to activate another component (SIB, IV, VCI._,CAP,], DVD) - Page 55 53,54,61 Craig 16,21 _roscan Curtis-Mathes 9,18,17,23,24,55,62,73,76 Quartz L)aew_ 3,4,5,6,7,&22,54,85 Quasar 17,53 23,25 I_adio S_ackiRealis_ic 11,15,17,18,21,24,28,36,52,62 Dimensia I_CA 9,14,18,17,37,44,46,63,78 L)ynatec_ Electro_ome Samsung 0,16,22,31,41,51 Sansui Emerson 17,18,19,22,24,29,32,36,43 50,51,58,58,66,71,74,76,77,79 Sanyo 11,21 Sco_ 22,50,58,77 Fisher 1121,27,2&52,57,67 Fur_ai Sears 11,14,18,21,27,28,44,52,57 General Electric 8,16,17,41,62 S_arp 15,36,48,54...
- Page 56 '19,67 Macom 45,5.1 10tom 25,29,57,58,63 Ma£navox 15,16,27,29,34,36,37,40,4.1,48,49 Nawoo Unite 39,40,49 Universal 59,60 24,46 Viewstar 15,16,27,29,34,36,37,40,4'1,48,49 Warner A mex OskSigma Zenith 22,50,65,69 Panasonic '1 '1,35,47,69 Philips 15,18,27,29,34,36,37,40,4'1,48,49 DVD Remote Control Codes Philips FroScan Sony Samsung r0s_iba Panasonic Sharp CurtisMethes 4.22...
- Page 57 "IV RemoteCo.trol Codes A-Mark 88, 37, 90 rvllC 2,3,15,,3,49,93, 20, 8, 75 Admiral 25,75,20,8,6,5,1,1 Ake] 20, 6 Nikei Anam 37, 47,64, 41, 50 Onk]ng 6, 37, 20, 5,3 On,:,,'e Bell & 14owell Optonica Brok_nic Panasonic 64, 72, 58, 82 ,3,3 Candle ,3,12,20, 46, ,30 Pennei:/...
-
Page 58: Troubleshooting
Troubleshooting If you have difficulty with your digital IV set-top receiver, there are several possibilities should investigate before calling a service technician. (continued) -
Page 60: Care And Maintenance
Care and Maintenance With proper care, your Set-lop Box will give you many years of service. Please follow these guidelines to get the maximum performance. Pla(:emeet • Do not put the Set-lop Box near extremely hot, cold, humid or dusty places. •... -
Page 61: Specifications
Specifications GeneralSpecifications Broadcasting standard DIV (AISC), Analog IV (NISC) Power requirement AC 120 V, 50/60Hz Power consumption 40 watts / In standby: 2 watts Dimensions (W x D x H) 16,93 X 12,6 X 3.35 (inches) Weight 78 Ibs RFSpecification I-/S luning system type VHF 2 - 13... - Page 62 ELECTRONICS Samsung Electronics America inc. SERVICE DIVISION 400 Valley Read, Suite 201 Mount Arlington, NJ 07856 TEL" 1-800-SAMSUNG (1-800-726-7864) MD68-00278A(E...
Need help?
Do you have a question about the SIR-T165 and is the answer not in the manual?
Questions and answers