Table of Contents
Advertisement
Available languages
Available languages
Operator's
Manual
CRRFr ;MRN°
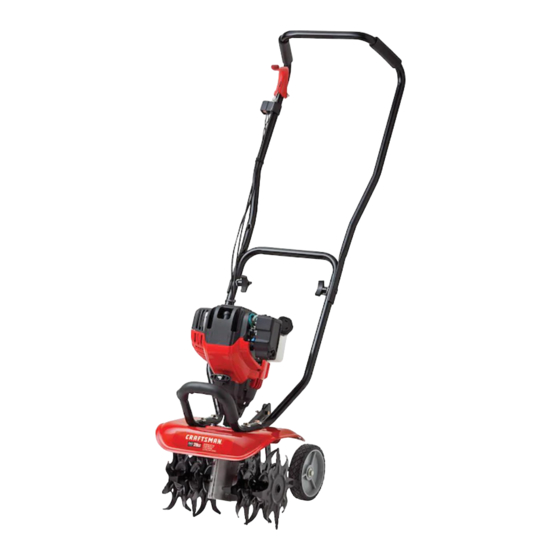
4-Cycle
CULTIVATOR
/ EDGER
Model No. 316.292710
CAUTION:
Before
using
this product,
read this
manual
and follow
all
safety
rules and operating
instructions.
• SAFETY
• ASSEMBLY
• OPERATION
• MAINTENANCE
• PARTS LIST
• ESPANOL, p. 23
Sears, Roebuck
and Co., Hoffman Estates, IL 60179, U.S.A.
Visit our website" www.sears.com/craftsman
P/N 769-02196
(1/06)
Advertisement
Table of Contents

Related Manuals for Craftsman Incredi-Pull 316.292710


Summary of Contents for Craftsman Incredi-Pull 316.292710
- Page 1 • ASSEMBLY this product, read this • OPERATION manual and follow • MAINTENANCE safety rules and operating • PARTS LIST instructions. • ESPANOL, p. 23 Sears, Roebuck and Co., Hoffman Estates, IL 60179, U.S.A. Visit our website" www.sears.com/craftsman P/N 769-02196 (1/06)
-
Page 2: California Proposition
Cultivator / Edger For two (2) years from the date of purchase, if this Craftsman Equipment is maintained, lubricated, and tuned up according to the instructions in the operator's manual, Sears will repair or replace free of charge any parts found to be defective in material or workmanship. -
Page 3: Before Operating
The purpose of safety symbols is to attract your I SYMBOL MEANING attention to possible dangers. The safety symbols, and their explanations, deserve your careful attention and understanding. The safety warnings do not by DANGER: Failure to obey a themselves eliminate any danger. The instructions or safety warning will warnings they give are not substitutes for proper result in serious injury to yourself or to... -
Page 4: While Operating
• Always s toptheengine andallowittocoolbefore filling Do not touch the engine or muffler. These parts get thefueltank.Never r emove t hecapofthefueltank,or extremely hot from operation. They remain hot for a addfuel,when theengine ishot.Never o perate theunit short time after you turn off the unit. without t hefuelcapsecurely i nplace. - Page 5 SAFETY AND INTERNATIONAL SYMBOLS This operator's manual describes safety and international symbols and pictographs that may appear on this product. Read the operator's manual for complete safety, assembly, operating and maintenance and repair information. MEANING SYMBOL MEANING SYMBOL • THROWN OBJECTS AND ROTATING CUTTER CAN CAUSE Indicates danger, warning, or "_._-Ib"...
- Page 6 Applications • Cultivating sod and light to medium soil • Cultivating in garden areas, around trees, etc. • Edging STOP/OFF Throttle Control Primer Bulb START/ON Handlebar Knob Handlebar Muffler Starter Rope Grip_j_ Front Handle Tine Guard Choke Control WheelSuppo_ Bracket Cultivator Tines Wheel...
-
Page 7: Adjusting Tine Depth
ADJUSTING TINE DEPTH NOTE: Before setting up your cultivator / edger, disconnect the spark plug wire from the spark To adjust the wheel support bracket proceed as follows: plug. 1. Stop engine and disconnect spark plug to avoid POSITIONING THE HANDLEBARS accidental starting. -
Page 8: Oil Type
CAUTION: OVERFILLING CRANKCASE CAUSE PRODUCT DAMAGE. Check and maintain the proper oil level in the crank case; it is important and cannot be overemphasized. Check the oil before each Funnel Spout_ use and change it as needed. See Changing the Oil. 4-Cycle Motor RECOMMENDED OIL TYPE... -
Page 9: Fuel Type
• Drain tank and run the engine dry before storing unit Using Fuel Additives The use of fuel additives, such as Craftsman Fuel Stabilizer or an equivalent, will inhibit corrosion and minimize the formation of gum deposits. Using a fuel additive can keep fuel from forming harmful deposits in Fig. -
Page 10: Starting Instructions
ON (I) WARNING: Operate th s unit only in a well- ventilated outdoor area. Carbon monoxide exhaust fumes can be lethal in a confined area. OFF (O) WARNING: Avoid accidental starting. Make sure you are in the starting position when pulling the starter rope (Fig. -
Page 11: Operating Tips
OPERATING TIPS WARNING: Dress properly to reduce the risk of injury when operating this unit. Do not wear loose clothing or jewelry. Wear eye and ear/hearing protection. Wear heavy long pants, boots and gloves. Do not wear short pants, sandals or operate barefoot. Move the cultivator to the work area prior to starting the engine. -
Page 12: Maintenance Required
MAINTENANCE SCHEDULE NOTE: Maintenance, replacement, or repair of the emission control devices and system may be Perform these required maintenance procedures at the performed by a Sears or other qualified service frequency stated in the table. These procedures should dealer. Call 1-800-4-MY-HOME® for more also be a part of any seasonal tune-up. -
Page 13: Checking The Oil Level
CHECKING THE OIL LEVEL CHANGING THE OIL For a new engine, change the oil after the first 10 hours of CAUTION: To prevent extensive operation. Change the oil while the engine is still warm. The engine wear and oil will flow freely and carry away more impurities. damage to the unit, a lways maintainthe properoil level inthe crankcase.Never CAUTION:... -
Page 14: Air Filter Maintenance
AIR FILTER MAINTENANCE Apply enough clean SAE 30 motor oil to lightly coat the filter (Fig. 21). Cleaning the Air Filter Clean and re-oil the air filter every 10 hours of operation. It is an important item to maintain. Failure to maintain your air filter properly can result in poor performance can cause permanent damage to your engine. -
Page 15: Spark Arrestor
NOTE: Ensure the tines are not in contact with the ground when adjusting the idle. Release the throttle trigger and let the engine idle. If the engine stops, insert a small phillips or flat blade 0.025 in. screwdriver into the hole in the air filter/muffler cover (0.655 mm.) (Fig. - Page 16 Start the engine and allow it to run until it stalls. This Cleaning the Unit ensures that all gasoline has been drained from the WARNING: To avoid serious carburetor. personal injury, Allow the engine to cool. Remove the spark plug and always turn the unit off and allow it to cool put 1 oz.
- Page 17 CAUSE ACTION Fill fuel tank with new fuel Empty fuel tank Primer bulb wasn't pressed enough Press primer bulb fully and slowly 10 times Engine is flooded Pull starter rope repeatedly with throttle control fully engaged and with the choke lever in Position 3 Old fuel Drain gas tank and add fresh fuel Fouled spark plug...
-
Page 18: Rocker Arm Clearance
ROCKER ARM CLEARANCE The rocker arm clearance may need adjustment if your unit suffers a loss of performance power or has trouble starting. Adjusting the rocker arm clearance requires Screw disassembly of the engine. If you feel unsure or unqualified to perform this, take the unit to a Sears or other qualified service dealer. - Page 19 Pull the starter rope slowly to bring the piston to the top Adjusting of its travel, (known as top dead center). Check that: • The piston is at the top of its travel while looking in Rocker Arm the spark plug hole (Fig. 27) •...
- Page 20 Engine Type ..............Air-Cooled, 4-Cycle Displacement ..............1.6 cu. in. (26.2 cc) Idle Speed RPM ..............3,000-3,600 Operating ..............7,200-8,800 Clutch Type ................. Centrifugal Ignition Type ................. Electronic On/Off Stop Control ..............Rocker Switch Valve clearance (intake and exhaust) ......... 0.003-0.006 in.
- Page 22 California / EPA Emission Control Warranty Statement Your Warranty Rights and Obligations The California Air Resources Board, The Environmental Protection Agency and Sears, Roebuck and Co. are pleased to explain the emission control system warranty on your 2005 and later small off-road engine. New small off-road engines must be designed, built and equipped to meet stringent anti-smog standards.
- Page 23 CRRFr ;MRN° 4-Ciclos CULTIVADORA / BORDEADORA Modelo No. 316.292710 with FIRE.IGNITION' PRECAUCION: Lea el manual del operador y siga todas las advertencias instrucciones de seguridad. Sears, Roebuck and Co., Hoffman Estates, IL 60179, U.S.A. Vaya a: www.sears.com/craftsman P/N 769-02196 (1/06)
- Page 24 Craftsman Por un periodo de dos (2) afios a partir de la fecha de compra, con la condici6n de que a este equipo Craftsman se le realiza el mantenimiento, la lubricaci6n y ajustes de acuerdo con las instrucciones...
-
Page 25: Informacion De Seguridad
Los simbolos de seguridad se utilizan para Ilamar su I SIMBOLO SIGNIFICADO atenci6n sobre posibles peligros. Los simbolos de seguridad y sus explicaciones merecen toda su atenci6n PELIGRO: El n o obedecer y comprensi6n. Los simbolos de seguridad no eliminan advertencia ningQn peligro por si mismos. - Page 26 Mantenga las manos, la cara y los pies lejos de todas • Mezcle y cargue el combustible en un _.rea exterior las partes m6viles. No toque ni intente detener las bien ventilada donde no haya chispas ni llamas. Quite pOas mientras est_.n girando. No opere la unidad sin lentamente la tapa del combustible s61o despu6s de las protecciones...
- Page 27 SIMBOLOS DE SEGURIDAD DE INTERCACIONALES Este manual del operador describe los simbolos y flguras de seguridad e internacionalesque pueden aparecer en este producto. Lea el manual del operador para obtener informaci6n completa acerca de la seguridad, ensamble, operaci6n y mantenimiento y reparaci6n. SIMBOLO SIGNIFICADO SIMBOLO...
- Page 28 APLICACION Use esta unidad para cultivar tierra herbosa y tierra negra ligera a mediana. Tambi6n se utiliza para cultivar _.reas de jardines, alrededor de Arboles, etc. OFF/ APAGADO (O) Control del regulador Bombilla del cebador ENCENDIDO Perillas del manubrio Manubrio Silenciac Mango de la cuerda de arranque...
-
Page 29: Ajuste De La Profundidad
AJUSTE DE LA PROFUNDIDAD NOTE: Desde la posici6n de funcionamiento, se observa la referencia a la derecha o a la izquierda de la Para ajustar la m6nsula de soporte de la rueda proceda cultivadora / bordeadora. de la siguiente manera: Detenga el motor y desconecte la bujia para evitar un COLOCACION DEL MANUBRIO... -
Page 30: Tipo De Aceite Recomendado
Tap6n de relleno ADVERTENClA: E,,,ENAR DEMA- de medici6n SIADO EL CARTER PUEDE CAUSAR LESIONES PERSONALES GRAVES No podemos exagerar la importancia del control y mantenimiento del nivel correcto de aceite en el cigQeSal. Verifique el aceite antes de cada uso y cambielo cuando sea necesario segQn se indica en la secci6n de Cambio de/aceite. - Page 31 El uso de aditivos en el combustible, como el ADVERTENCIA: La estabilizador de gasolina Craftsman o similar, inhibir6, la gasolina es corrosi6n y reducir_, la formaci6n de dep6sitos de goma. muy inflamable. Los gases pueden explotar El uso de aditivos puede evitar que se formen dep6sitos si se encienden.
- Page 32 ENCENDIDO / ON ADVERTENCIA: Use e sta unidad s61o en un &tea exterior b ien ventilada. L os gases de escape de mon6xido de carbono pueden ser letales e n un &rea cerrada. • Evite los ADVERTENCIA. arranques accidentales. Coloquese en posici6n de inicio cuando tire de la cuerda de arranque (Fig.
- Page 33 CONSEJOS PARA LA OPERACION ADVERTENCIA: Vista en forma adecuada para reducir el riesgo de lesiones cuando opere esta unidad. No use ropa holgada ni alhajas. Use protecci6n ocular y auditiva. Use pantalones largos y gruesos, betas y guantes. No use pantalones cortes, sandalias ni trabaje descalzo.
-
Page 34: Mantenimiento
NOTA: El mantenimiento, la sustituci6n o arreglo de NOTA: Algunos procedimientos de mantenimiento dispositivos para el control de emisiones y pueden requerir el uso de herramientas o sistemas pueden ser hechos por cualquier habilidades especiales. Si no estA seguro acerca establecimiento de reparaci6n, persona o de estos procedimientos,... -
Page 35: Cambio Del Aceite
INSPECCION DEL NIVEL DE ACEITE CAMBIO DEL ACEITE En un motor nuevo, cambie el aceite despu6s de las 10 PRECAUCION: Para evit r primeras horas de operaci6n. Cambie el aceite mientras un desgaste el motor aOn estA caliente. El aceite fluirA con libertad y excesivodel motor y elda_o de launidad, IlevarA mAs impurezas. -
Page 36: Ajuste Del Carburador
MANTENIMIENTO DEL FILTRO DE AIRE Aplique suficiente aceite limpio de motor SAE 30 para recubrir ligeramente el filtro (Fig. 21). Limpieza del filtro de aire Limpie y vuelva a aceitar el filtro de aire cada 10 horas de operaciSn. Es un elemento cuyo mantenimiento importante. - Page 37 ADVERTENCIA: La unidad • No limpie IPREOAUOION. con chorro funcionar_. durante los ajustes del carburador. Use ropa de arena, ni raspe ni limpie los electrodos. El que Io proteja y cumpla con todas las motor podria daSarse si penetran pequeSas instrucciones de seguridad para prevenir particu as en e c ndro.
- Page 38 Arranque el motor y d6jelo funcionar hasta que se Limpieza de la Unidad ahogue. Esto asegura que toda la gasolina se haya drenado del carburador. ADVERTENCIA: Para evitar graves Deje enfriar el motor. Saque la bujia de encendido y lesiones personales, apague siempre su coloque 1 onza (30 ml) de aceite de motor de buena unidad y espere que se enfrie antes de...
- Page 39 CAUSA ACClON El interruptor de encendido est.. APAGADO Mueva el interruptor a Encendido El tanque de combustible est.. vacio Llene el tanque de combustible La bombilla del cebador no fue oprimida Io suficiente Oprima la bombilla del cebador completa y lentamente 10 veces El motor se ha inundado Hale el cord6n de arranque repetidas veces con el control...
-
Page 40: Huelgo Del Brazo Oscilante
HUELGO DEL BRAZO OSCILANTE Saque el tornillo que estA detrAs de la cubierta del motor (Fig. 26). El espacio libre del brazo oscilador pudiera necesitar ajuste si su unidad experimenta una p6rdida de potencia de rendimiento o tiene problemas al arrancar. Para ajustar el espacio libre del brazo oscilador se requiere desarmar el motor. - Page 41 Tire lentamente de la cuerda de arranque para traer el Tuerca de ajuste pist6n hacia la parte superior de su recorrido (conocido como punto muerto superior). Verifique que: Balancin • El pist6n se encuentre en la parte superior de su recorrido mientras mira dentro del orificio de la bujia de encendido (Fig.
- Page 42 Tipo de motor ..............Enfriado por aire, 4 ciclos Desplazamiento ............26,2 cc (1.6 pulgadas cQbicas) Tipo de embrague ................. Centrifugo R.P.M. de velocidad minima ............3.000-3.600 r.p.m. R.P.M. de operaci6n ..............7.200-8.800 r.p.m. Tipo de embrague ................. Centrifuge Tipo de encendido ................
- Page 43 ENGINE PARTS - MODEL SEARS CULTIVATOR 4-CYCLE GAS CULTIVATOR Part Numbers On Following Page...
- Page 44 ENGINE PARTS - MODEL SEARS CULTIVATOR 4-CYCLE GAS CULTIVATOR Description Item Part No. Description Item 753-04288 Palnut 753-04028 Engine Cover Assembly (includes 3 & 4) 753-1202 Plate Screw 791-181930 Engine Cover Screw 753-05074 Pressure Plate Assembly (includes 50) 791-182651 Starter Rope Eyelet 753-05072 Recoil Pulley Assembly (includes 49 &...
- Page 45 LOWER CULTIVATOR PARTS - MODEL SEARS CULTIVATOR 4-CYCLE GAS CULTIVATOR Item Part No. Description Item Description 753-04042 Trottle Control 753-04060 Cap Screw 753-04043 Torsion Spring 753-04061 Lock Nut 791-182673 On/Off Switch 753-04062 Cap Push 753-04044 753-04063 Foam Grip Wheel Suppor_ Bracket Assembly 753-04147 Throttle Cable 753-04064...
- Page 46 DECLARACION DE LA GARANTJA DE CONTROL DE EMISIONES DE CALIFORNIA / EPA SUS DERECHOS DE GARANTJA Y OBLIGACIONES La Junta de Recursos del Aire de California, EPA (Agencia de Protecci6n del Medio Ambiente), y Sears tienen el gusto de explicar la garantia del sistema de control de emisions de su pequefio motor todo-terreno del afio 2005 y afios ppsteriores.
- Page 47 Agreements Congratulations on making a smart purchase. Felicidades por haber hecho una compra inteligente. Su Your new Craftsman ®product is designed and nuevo producto Craftsman est,. diseSado y fabricado manufactured for years of dependable opera- para que opere de manera confiable durante aSos. Pero tion.
- Page 48 Your Home For repair-in your home-of all major brand appliances, lawn and garden equipment, or heating and cooling systems, no matter who made it, no matter who sold it! For the replacement parts, accessories owner's manuals that you need to do-it-yourself. For Sears professional installation of home appliances and items like garage door openers and water heaters.
Need help?
Do you have a question about the Incredi-Pull 316.292710 and is the answer not in the manual?
Questions and answers