Table of Contents
Advertisement
Quick Links
Advertisement
Table of Contents

Related Manuals for Panasonic CT20620T


Summary of Contents for Panasonic CT20620T
- Page 1 IIIIII!1 IIIIII [111 'nlF+ Color Television Operating Instructions ® _0oooo C_Z3 mmnmnmnmnpmm_. - C_ead these instructions completely before operating this set. ..;cntents subject to change without notice or obligation. Printed in U.S.A. TQB2AO919...
-
Page 2: Safety Instructions
Safety Instructions WARNING WARNING: To reduce the risk of electric shock do not remove cover or back. No user-serviceable parts inside. Refer servicing to qualified service personnel. The lightning flash with ar- The exclamation point within a triangle is intended to tell is intended to tell the user the user that important oper- ating and servicing... -
Page 3: Specifications
14. If an outside antenna is connected to the television equipment, be sure the antenna system is grounded so as to provide some protection against voltage surges and built up static charges. In the U.S. Section 810 of the National Electrical Code and in Canada Part I of the Canadian Electrical Code provides information with respect to proper grounding of the mast and supporting structure, grounding of the lead-in wire to an antenna discharge unit, size of grounding conductors, location of antenna-discharge... -
Page 4: Table Of Contents
Introduction Congratulations on Your New Purchase Your new video component features an all solid state chassis which is designed to give you many years of enjoyment. It was thoroughly tested and adjusted at the factory for best performance. In order for you to take full advantage of your new video component, please read and follow the installation and operating instructions supplied with this product. -
Page 5: Installation
Installation Receiver Location Locate for comfortable viewing. Avoid placing where sunlight or other bright light (including reflections) will fall on the screen. Use of some types of fluorescent lighting can reduce remote control transmitter range. Adequate ventilation is essential to prevent internal component failure. Keep away from areas of excessive heat or moisture. -
Page 6: Antenna/Cable Connections
Antenna/Cable Connections Antenna Connection - For proper reception of VHF/UHF channels an external antenna is required. For best reception an outdoor antenna is recommended. Antenna Mode must be set to TV. (Refer to Antenna Mode section.) Indoor Outdoor Incoming Cable From Home Antenna (75 Ohm) Typical VHF/UHF Antenna VHF/UHF... -
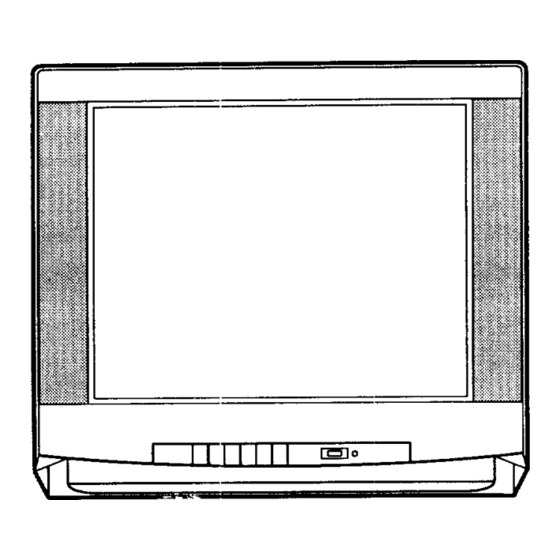
Page 7: Location Of Controls
• oca,,on o, Contro,s Front Control Panel for Some Models Ligiht r Remote Control Sensor Front Control Panel for Some Models ACTION POWER • VOLUME I_ • c..EL. .cT,o. _N,0EO (_)iC) ® "W/VIDEO Remote Control @@@1 Sensor ® ® ® L®... -
Page 8: Control Operation
Control Operation Power Button Channel Change- options) - Pressthe POWER button to turn (Two ON. Press again to turn OFF. Option Press the CHANNEL (CH) UP or DOWN button to POWER sequentially scan through programmed channels (while On Screen Menus are not displayed). NOTE: The TV/CABLE switch (located on Remote) must be set in the TV position. -
Page 9: Tv/Video Button
Multi Button TV/Video Button - Press the TV/VIDEO button The MULTI button can be programmed to operate up to select desired input. to 6 Remote function buttons at the same time. For Example: TV Power/On, VCR Power/On (selected TV/VIDEO brands) can be operated at the same time with one press of the MULTI button. -
Page 10: Main Menu (Icons)
Main Menu (Icons) I-_l EXITI I 'NPuT I F'_'- r_.--j IP'OTUREI I AUD'O I[-'_ I GAME I IO"ANNELI GUARD I I CAPTIONI _ ]'_1 T_MER I I SET-UP Located On Remote Control ACTION Selects Desired JWhen Menu is Displayed Displays and Exits Menus Selects or Adjusts Features When Menu is Displayed... -
Page 11: Picture Adjustments
Picture Adjustments Color, Tint, Brightness, Picture & Sharpness Adjustments • Picture Norm • Color Press the ACTION button to display the Main Menu. • Tint Press the CH DOWN button to select the Picture • Brightness Icon. • Picture Press the ACTION button to display the Picture •... -
Page 12: Game Guard
Game Guard ACTION GAME GUARD LOCKED Displays and Exits Menus Located On Remote Control Game Guard Activated Game Guard (Unlock) _Selects Desired To unlock the Game Guard feature, repeat steps 1 through 3. Enter the same 3 digit code previously used in step 5 with Remote Control Keyboard. -
Page 13: Timer Features
Timer Features Sleep Ti met- This feature is used for automatic turn off in 30, 60 or 90 minutes. • Sleep Timer NOTE: Display will flash 3, 2 and 1 to indicate the last • Program Timer three remaining minutes prior to turn off. The Recall display will also appear. -
Page 14: Program Timer
Program Timer Program Timer This feature is capable of turning the TV on, tuned to a desired channel and off at a predetermined time (one day or everyday). NOTE: The clock must be set for this feature to operate. (Refer to the Set-Up Menu to set time.) ACTION Press the ACTION button to display the Main Menu. -
Page 15: Set-Up Features
Set-Up Features Menu The Main Menu can be displayed in two formats. Icon with Text or Icon without Text for those • Menu familiar with the Icon system. • CC (Closed Caption) on Mute Press the ACTION button to display the Main Menu. •... -
Page 16: Cc (Closed Caption) On Mute
[C' O n Mute Closed Caption with Mute Button Activates the On Screen Closed Captioning when the MUTE button on the Remote Control is pressed. To deactivate press the MUTE button again. ACTION NOTE: This feature only functions when the Close Caption Mode is in the "OFF"... -
Page 17: Set Time (Clock)
Set Time (Clock) Set Time - Clock (when set) will display on screen at initial 'q'urn On", after a channel change and when pressing the RECALL button. The time must be set first in order to operate the Program ON/OFF Timer. ACTION Press the ACTION button to display the Main Menu. -
Page 18: Antenna Tuning Mode
Antenna Mode TV or Cable Tuning Mode -The proper Input mode must be selected for the type of signal at the antenna input. • TV mode is used when the Receiver is not connected ACTION to a cable TV system, for example when using a VHF/UHF antenna (channels 02 - 69). -
Page 19: Auto Programming
Auto Program Auto Programming - This feature allows you to place all channels with a video signal into Channel Scan Memory. Press the CHANNEL (CH) UP or DOWN button and only those channels with a signal will be accessed. ACTION Press the ACTION button to display the Main Menu. -
Page 20: Manual Programming
Manual Program Manual Programming - This feature allows you to select which channels are placed into Channel Scan Memory. Press the CHANNEL (CH) UP or DOWN button and only those channels will be accessed. ACTION Press the ACTION button to display the Main Menu. Press the CH DOWN and VOL RIGHT buttons to select the Set-Up Icon. -
Page 21: Closed Caption Mode
Mode Closed Caption Mode This Receiver has a built in decoder that provides a visual depiction of the audio portion of a television program in the form of written words across the screen ACTION (White or Colored letters on a black background). allows the viewer to read the dialogue of a television program or other information. -
Page 22: Language Menu System
2 Language Menu System Icon Language Selection English or Spanish The Language Menu is factory set to ENGLISH. Follow these instructions to change the Language Menu to Spanish and back to English. ACTION Press the ACTION button to display the Main Menu. Press the CH DOWN and VOL RIGHT buttons to select the SET-UP Icon. -
Page 23: Channel Caption (Station Identifier)
Channel Caption Channel Caption (Station Identifier) This feature allows you to enter the call names of up to 30 stations into memory (using up to 4 characters for each station). The call name will then display along with the channel number when changing channels or press- ACTION ing RECALL. -
Page 24: Audio Adjustments
Audio Adjustment Audio Mode Selection • (Audio) Mode Stereo/Sap/Mono • AI Sound When Audio is broadcast in Stereo or SAP an ON Screen display will appear on initial 'q-urn On" and "Channel Change". available choices will be ACTION indicated in red. Press the ACTION button to display the Main Menu. -
Page 25: Ai Sound
AI Sound AI Sound - This feature regulates the volume between programs and commercial audio to maintain a constant sound output level. Press the ACTION button to display the Main Menu. ACTION Press the CH DOWN and VOL RIGHT buttons to select the Audio Icon. -
Page 26: Video Input
Video Input Video Input - This feature is used to select TV or Video Input. Press the ACTION button to display the Main Menu. ACTION Press the VOL RIGHT button to select the Input Icon. Press the ACTION button to display the Input Select Menu. -
Page 27: Programming The Universal Remote Control
Programming The Universal Remote Control Cable Converter Preferred Procedure - Code Known Preferred Procedure - Code Known Programming Universal Remote Using Infra- Programming Universal Remote Using In- Access Codes Cable Television fra-Red Access Codes for VCRs Converter Boxes • Determine brand of VCR. •... -
Page 28: Vcr Programming Codes
The Universal Remote Control is not designed to control all features that are available in all models. Infra-Red Code Index For VCRs VCR Brand Code(s) VCR Brand Code(s) POWER 02, 14, 16, 30 Audio Dynamics 14, 16 Broksonic Panasonic 00, 01 MULTI Pentax Canon 00, 01 Capehart Philco 00, 29 Citizen Philips 00, 29 Pioneer... -
Page 29: Optional Equipment Connection & Operation
Optional Equipment Connection and Operation To Audio AMP Connection (Stereo) "1 To Auxiliary Input TO AUDIO ® ® ®,..°. © TV SPEAKERS R AUDIO VIDEO TERMINALS ON BACK OF RECEIVER • To Audio AMP Connect to an external audio amp auxiliary input for monitoring sound through a stereo system. NOTE: 'q-O AUDIO AMP"... -
Page 30: Care & Cleaning
Care and Cleaning Picture Tube (Turn set off) Use a mild soap solution or window cleaner and a clean cloth. DO NOT USE ABRASIVE CLEANERS. Avoid excessive moisture and wipe dry. Plastic Cabinets Wipe the cabinet with a soft cloth dampened with water or a mild detergent solution and wipe dry with a soft clean cloth. Avoid excessive moisture. -
Page 31: Troubleshooting Chart
Troubleshooting Chart Before you call for service, determine the symptoms and make a few simple checks shown below. Symptoms Check Picture Sound ANTENNA LOCATION AND/OR CONNECTION NOISY SOUND SNOWY PICTURE <, ANTENNA DIRECTION AND/OR LOCATION ANTENNA LEAD-IN WIRE NORMAL SOUND MULTIPLE IMAGE ELECTRICAL APPLIANCES,... - Page 32 Matsushita Electric of Canada Limited Panasonic Sales Company, Matsushita Consumer Electronics Division of Matsushita Electric 5770 Ambler Drive Company, Division of Matsushita of Puerto Rico Inc. ("PSC") Mississauga, Ontario L4W 2T3 E'lectric Corporation of America Ave. 65 de Infanteria. Km 9.5...
Need help?
Do you have a question about the CT20620T and is the answer not in the manual?
Questions and answers