Table of Contents
Advertisement
Advertisement
Table of Contents

Summary of Contents for Omega CO-E130
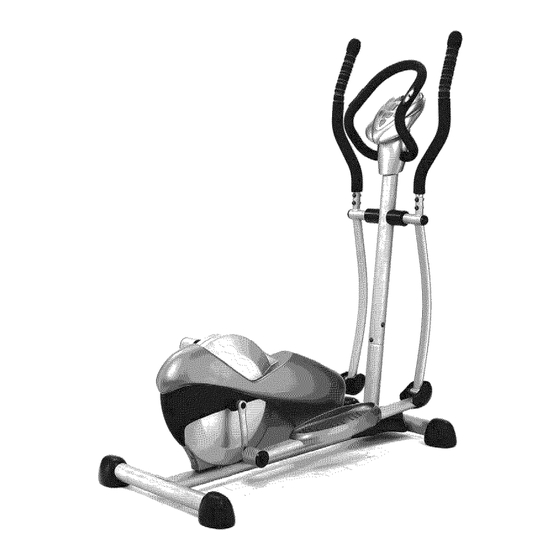
- Page 1 Elliptical Trainer iNSTRUCTiON...
-
Page 2: Introduction
iNTRODUCTiON Thank you for purchasing the CO- E 130 elliptical trainer. Please take time to read these instructions which have been written to ensure that you get the very best from your purchase. SAFETY ARNING: To reduce the risk of serious inju_, read the following important... -
Page 3: Table Of Contents
iNTRODUCTiON ................SAFETY PRECAUTIONS ..............PARTS LiST ..................TOOLS LiST ..................ASSEMBLING .................. Front and rear supports ................Handlebar post and foot bar assembly ............. Foot plates ....................Foot bars ....................Hand grips ....................Handlebar ....................Console ....................PREPARING THE CONSOLE FOR USE ........ -
Page 4: Parts List
LiST OMEGA Fitness... -
Page 5: Tools List
Mainframe Plastic sleeve Frontsupport t ube Retaining bolt Plastic cover Rearsupport t ube Hand grips Handlebar p ostandfootbarassembly Handlebar ConsoleUpcable Front console mount ConsoleDowncable Rear console mount Footplate Console TOOLS LiST ® ® Multi tool Multi Spanner Multi tool Hexagonal key 6 mm OMEGA Fitness... -
Page 6: Assembling
STEP 1 OF 7 FRONT AND REAR SUPPORTS FiG 1 Tilt the main frame (1) backwards and fit the front support tube (2) onto the main frame (fig 1). Ensure that the rubber feet face downwards. Secure with the nuts and washers provided. Tighten the nuts using the tool (17) provided. -
Page 7: Handlebar Post And Foot Bar Assembly
STEP 2 OF 7 HANDLEBAR POST AND FOOT BAR ASSEMBLY Connect the console 'Up' cable (6) to the console 'Down' cable (7) (fig 2). Note: To make assembly easier, do not remove the packing securing foot bars. insert the handlebar post and foot bar assembly (5) into the main frame (1), and secure in place with the four set screws and washers. -
Page 8: Foot Plates
STEP 3 OF 7 FOOT PLATES FiG 3 Remove the packing from the first foot bar (A). Attach the foot plate (8) to the foot bar (A) with the two screws supplied using the 6 mm hexagonal key (18). The foot plates are handed and should be fitted with the fiat edge on the inside and the chevrons sloping backwards. -
Page 9: Foot Bars
STEP 4 OF FOOT BAR S FIG4 Remove the protective rubber cap from the spindle (A) and slide the protective plastic sleeve (9) onto the spindle. Fit the connecting rod (B) over the spindle (A) and rotate the connecting rod until it locates on the square end of the spindle. -
Page 10: Hand Grips
STEP 5 OF 7 HAND GRIPS FiG 5 install the hand grips (12) into the hand bars (5). The hand grips are handed so make sure the top of the handle faces forward when installed. Secure with the three screws supplied and tighten with the 6mm hexagonal key (18). -
Page 11: Handlebar
STEP 6 OF 7 HANDLEBAR FiG 6 Attach the handlebar (13) to the handlebar post and foot bar assembly (5) with the two bolts and washers. Tighten the bolts with the 6mm hexagonal key (18) provided. Note: Be careful not to trap the two sensor cables when fitting the handlebar. OMEGA Fitness... -
Page 12: Console
STEP 7 OF 7 CONSOLE Attach the front console mount (14) to the handlebar post and foot bar assembly (5), using the two screws provided and partially tighten with the tool (17). Do not fully tighten. Attach the rear console mount (15)to the base of the console (16) using the fourscrews supplied and tighten with the tool (17). -
Page 13: Preparing The Console For Use
STEP 7 OF 7 (CONT'D) (CONT'D) CONSOLE FiG 7 (CONT'O) Note: Take care to ensure that neither the sensor cables or console Up/Down cables are trapped between two halves of the console mount. _ghtenthefivescrewsandthetwoleftlooseinsteplwiththetool(17). OMEGA Fitness... -
Page 14: Using The Elliptical Trainer
ELLiPTiCAL PREPARATION FOR USE Place the Elliptical Trainer on a firm flat floor. Position the Elliptical Trainer such that the trailing power cable does not present a trip hazard. Make sure the Elliptical Trainer is stable by adjusting the four levelling feet under the front and rear support tubes (2) and (4). -
Page 15: Using The Console
USING THE CONSOLE The elliptical trainer is equipped with a programmable console to heJp you reach your fitness goals. The console provides different programs designed to meet your exercise requirements. In addition, the console has a wide variety of modes that enable you to monitor your performance as you exercise. - Page 16 ELLiPTiCAL When you start training, the main screen will be setto SCAN mode. To select a particular func_on use the MODE button. You can stop training at any time by pressing the START/STOP button. When you stop training, all the functions (except PULSE) will show the accumulated data ®...
- Page 17 ELLiPTiCAL TRAINING WiTH MANUAL PRESET FUNCTION - with Watt target preset If you have preset Watt datas, the training resistance level will be adjusted automaticaUy according to the training speed and RPM. if you see the symbol _[' on the monitor, it means your training speed is slow that the resistance level will be increased automatically to maintain the preset watt.
- Page 18 TRAiNiNG WiTH PROGRAM FUNCTION • Press the RESET button for more than 2 seconds to dear the previous program. • MANUAL and PROGRAM will be flashing on the top screen. Press the UP/DOWN button to select PROGRAM and press the MODE button to enter. •...
- Page 19 ELLiPTiCAL TRAINING iN USER PROFILE MODE • Press UP/DOWN to increase or decrease training level when select User Training mode. Press UP/DOWN/MODE to preset your own profile for training. You can stop profile setting mode by pressing the MODE button for more than 2 seconds. Press UP/DOWN/MODE to set target function datas of Time, Distance, Calories, and Pulse.
-
Page 20: Conditioning Guidelines
PTICAL FUNCTION PRESET Each function target preset range is as below • TIME: Preset area is from 00:00 to 99:00, each increment is 1:00 (minute). DISTANCE: Preset area is from 0.00 to 99.90, each increment is 0.10 km or mile. CALORIE: Preset area is from 0 to 990, each increment is 10 cal. - Page 21 ELLiPTiCAL SELECTING MODES The console's mode function enabJes you to monitor your performance as you exercise and inputvalues for specific exercise parameters. • Press the MODE button to display the following modes. The mode name will flash on the display to indicate that it is the selected mode. •...
- Page 22 PULSE Pulse mode displays your pulse rate in beats per minute during your workout. When you grip the handlebar, cover the pulse sensors (see 'Pulse monitor position' in the 'Using the elliptical trainer' section). The pulse rate will be displayed after four stable pulse signals have been detected.
- Page 23 The following guidelines will help you to plan your exercise program. Remember that proper nutrition and adequate rest are essential for successful results. WARNING: Before beginning this or any exercise program, consult your doctor. This is particularly important for people over the age of 35 or those with health problems.
-
Page 24: Beginner'sguide
HOW TO BEGIN Jfyou're beginning an exercise program, you should check with your Start with two or three 15 minute doctor if: sessions per week with a rest day between work-outs. You have been diagnosed with heart problems, high blood pressure or Warm-up for 5 to 10 minutes with other medical conditions. -
Page 25: Stretching Guide
TiPS FOR STRETCHING • Begin with gradual mobility exercises of all the joints, i.e. simply rotate the wrists, bend the arm and roll your shoulders. This will allow the body's natural lubrication (synovial fluid) to protect the surface of your bones at these joints. - Page 26 CALF STRETCH Stand with one leg in front of the other, both feet facing forwards and the front leg bent (the knee should be above the ankle). Press the heel of the back leg into the floor until you begin to feel the calf muscle in the back of the rear leg starting to stretch.
- Page 27 QUADRICEPS STRETCH With one hand against a wail for balance, reach back and grasp one foot with your other hand. Bring your heel as close to your buttocks possible. Hold for the required count and then relax. iNNER THIGH STRETCH Sit with the soles of your feet together and your knees outward.
- Page 28 TOE TOUCH STRETCH • Stand with your knees bent slightly and slowly bend forward from your hips. Allow your back and shoulders relax as you reach down toward your toes, stretch as far as possible. Hold for the required count, then slowly return to the upright position and relax.
- Page 29 LOWER BACK • Lie on your back with your knees bent. Keeping your upper back firmly on the floor, allow your knees to fall to one side, your lower back will rotate naturally. Hold for the required count and then relax. Repeat on the other side.
- Page 30 UPPER BACK • Start off on all fours looking down towards the floor. Push your shoulders as high as possible, imagine a wire placed between your shoulder blades lifting you. Hold for the required count, then relax. Note: This stretch is sometimes called the cat stretch.
- Page 31 DELTOIDS SHOULDER STRETCH Stand up and place one arm across the front of the body. Use the other arm to push the outstretched arm into your chest. Note: Push at the point just above the elbow. Try to keep the arm straight and breathe normally.
-
Page 32: Specifications
SPECIFICATIONS 1370 mmx 710 mm x 1530 mm Dimensions (L x W x H) 52 inx28inx61 Net Weight 38.2kg / 841b Maximum User Weight 150kg / 3001b Please note that the specifications are subject to change without notice. o m eg afits OMEGA Fitness...
Need help?
Do you have a question about the CO-E130 and is the answer not in the manual?
Questions and answers
How to get the display to work can’t find battery apartment or where to charge it
To make the Omega CO-E130 display work, you need to:
1. Properly connect the console down cable into the rear of the console.
2. Ensure no cables are trapped when assembling the console mount.
3. Press the MODE button to navigate functions and the START/STOP button to begin training.
The context does not provide information on the battery compartment or charging method.
This answer is automatically generated