Table of Contents
Advertisement
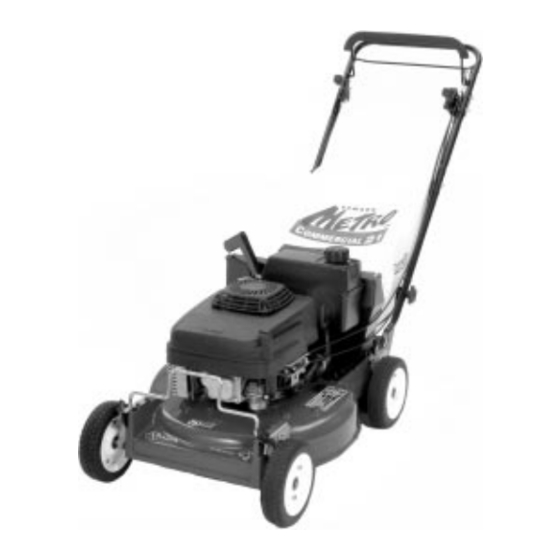
on the purchase of your new Exmark mower. This product has been carefully designed and manufactured to give
you a maximum amount of dependability and years of trouble–free operation. If additional information is needed, or should you require trained
mechanic service, contact your authorized Exmark equipment dealer or distributor. If you need to order replacement parts from your dealer,
always give the model number and serial number of your mower as well as the part number, description and quantity of the part needed.
The Serial No. plate is located on the top of the mower deck on the right hand corner of the machine. For ease of ordering and reference,
we suggest that you record the information requested in the following identification table.
Place Model No. and Serial No. Label Here
(Included in Literature Pack)
or Fill in Below
Model No.
Serial No.
Engine Model No. and Spec. No. (Code)
Engine Serial No (E/No)
Date Purchased
For Serial Nos.
440,000 & Higher
Part No. 3350-478
Advertisement
Table of Contents

Related Manuals for Exmark M216KASPC


Summary of Contents for Exmark M216KASPC
- Page 1 If additional information is needed, or should you require trained mechanic service, contact your authorized Exmark equipment dealer or distributor. If you need to order replacement parts from your dealer, always give the model number and serial number of your mower as well as the part number, description and quantity of the part needed.
- Page 2 Keep gasoline away from eyes and skin. Never siphon gasoline by mouth. Exmark reserves the right to make changes to add improvements to its products at any time without incurring any obligation to make such changes to products manufactured previously. Exmark, or its distributors and dealers, accept no responsibility for variations which may be evident in the actual specifications of its products and the statements and descriptions contained in this publication.
- Page 3 UPS has initiated a Saturday delivery program to many areas of the continental United States and can be requested for an overnight shipment on Friday to be delivered Saturday. The next day air charge, plus the Saturday delivery fee will be the responsibility of the purchaser. Exmark Mfg. will assume no responsibility for Saturday delivery shipments.
- Page 4 If additional information is needed, or should you require trained mechanic service, contact your authorized Exmark equipment dealer or distributor. All Exmark equipment dealers and distributors are kept informed of the latest methods of servicing and are equipped to provide prompt and efficient service in the field or at their service stations. They carry ample stock of service parts or can secure them for you from the factory.
-
Page 5: Table Of Contents
General Lawn Mower Safety ....Exmark Lawn Mower Safety .... -
Page 6: Introduction
B71.4 specifications of the American National Standards Institute in effect at the time of production. Exmark designed and tested this lawn mower to offer reasonably safe service; however, failure to comply with the following instructions may result in personal injury. - Page 7 Before and while moving backward, look behind and down for small children. Stop the blade(s) if you must tilt the lawn mower for transportation when crossing surfaces other than grass and when transporting the lawn mower to and from the area to be mowed.
-
Page 8: Maintenance And Storage
Exmark Lawn Mower Safety The following list contains safety information specific to Exmark products or other safety information that you must know that is not included in the ANSI/OPEI standard. This product is capable of amputating hands and feet, and of throwing objects. - Page 9 43-8480 52-2620 68-7410 100-3282 104-1329 74-1970 1. Transmission speeds 2. Neutral 76-2110 93-7398...
-
Page 10: Assembly
Note: Determine the left and right sides of the machine from the normal operating position. Installing the Handle 1. Mount the handle to the outside of the lawn mower housing (using the bottom hole) with 2 cap screws (5/16–18 x 1–1/4 in.), washers, and thin nylon insert locknuts. -
Page 11: Installing The Discharge Tunnel Plug
To add oil: 1. Move the lawn mower to a level surface. 2. Clean around the dipstick (Fig. 6). 3. Remove the dipstick by rotating the cap counterclockwise and pulling it out. -
Page 12: Filling The Fuel Tank With Gasoline
Important Do not overfill the crankcase with oil and run the engine; engine damage will result. Drain the excess oil until the oil level on the dipstick reads Full. 8. Insert the dipstick into the filler neck and rotate the cap clockwise until it is tight. -
Page 13: Operation
1. Release the blade control bail and move the throttle control to the (Off) position. 2. Disconnect the wire from the spark plug if you do not use the lawn mower or if you leave it unattended. m-7280 (Choke) position (Neutral) -
Page 14: Operating The Blade And The Self-Propel Drive
C position without sliding the blade control bail to the right. The lawn mower has 3 ground speeds. 1 is slow, 2 is medium, and 3 is fast. The ground speed control is located at the rear of the belt cover (Fig. -
Page 15: Adjusting The Cutting Height
If the ball did not go under the deck, repeat steps 6 through 11. 13. Pull the lawn mower away from the newspaper. If the newspaper ball unravels or is shredded, the blade has not properly stopped, resulting in an unsafe operating condition. -
Page 16: Using The Grass Bag
Check the grass bag frequently. If it is damaged, install a new Exmark replacement bag. Cut the grass until the bag is full. Important Do not overfill the bag. -
Page 17: Operating Tips
Avoid striking trees, walls, curbs, or other solid objects. Never deliberately mow over any object. If the lawn mower strikes an object or starts to vibrate, immediately stop the engine, disconnect the wire from the spark plug, and examine the lawn mower for damage. -
Page 18: Maintenance
Maintenance Note: Determine the left and right sides of the machine from the normal operating position. Recommended Maintenance Schedule Maintenance Service Maintenance Procedure Interval Check the engine oil level. Check the stopping time of the blade brake. The blade must stop within 3 seconds of releasing the bail;... -
Page 19: Checking The Engine Oil Level
Checking the Engine Oil Level Before you use the lawn mower, make sure that the oil level is between the Add and the Full marks as shown on the dipstick (Fig. 6). If the oil level is below the Add mark, and oil. -
Page 20: Cleaning The Discharge Tunnel And Plug
Grass clippings and other objects can be thrown from an open discharge tunnel and cause serious injury or kill the operator or bystanders. Never start or operate the lawn mower unless one of the following is true: The discharge tunnel plug is locked securely in the discharge tunnel. -
Page 21: Maintaining The Blade
6. Raise the left side of the lawn mower to drain the oil into the drain pan. Note: You can also remove the oil from the crankcase using an oil extractor. 7. Lower the left side of the lawn mower. -
Page 22: Cleaning The Blade Brake Clutch Shield
The blade is properly balanced when neither end drops. Installing the Blade 1. Install a sharp, balanced Exmark blade, the blade accelerator, the anti-scalp cup, and the blade nuts (Fig. 23). 2. Torque the blade nuts to 15 to 27 ft-lb (20 to 37 N m). -
Page 23: Emptying The Fuel Tank And Cleaning The Fuel Filter
BBC shield to the deck. 9. Install the blade, the accelerator, the anti-scalp cup, and the two blade nuts. 10. Turn the lawn mower upright. 11. Connect the wire to the spark plug. Emptying the Fuel Tank and Cleaning the Fuel Filter The fuel filter (screen) element is located inside the fuel tank. -
Page 24: Adjusting The Self-Propel Drive
Adjusting the Self-propel Drive If the lawn mower does not self-propel or has a tendency to creep forward when the control bar is more than 1-1/2 inches (3.8 cm) from the handle, adjust the wheel drive control knob on the rear of the gear box. -
Page 25: Lubricating The Gear Case
If the blade does not stop rotating in three seconds or less, bring the lawn mower to an Authorized Service Dealer for repair. 1. Stop the engine and wait for all moving parts to stop. -
Page 26: Servicing The Wheels
Storage To prepare the lawn mower for off-season storage, perform the recommended maintenance procedures. Refer to Maintenance on page 14. Store the lawn mower in a cool, clean, dry place. Cover the lawn mower to keep it clean and protected. -
Page 27: Preparing The Fuel System
Empty the fuel tank when mowing the last time before storing the lawn mower. 1. Run the lawn mower until the engine stops from running out of fuel. 2. Prime the engine and start it again. 3. Allow the engine to run until it stops. When you can no longer start the engine, it is sufficiently dry. -
Page 28: Troubleshooting
Troubleshooting Exmark designed and built your lawn mower for trouble-free operation. Check the following components and items carefully, and refer to Maintenance on page 14 for more information. If a problem continues, contact an Authorized Service Dealer. Problem Engine does not start... - Page 29 Problem Lawn mower or engine vibrates excessively Uneven cutting pattern Discharge chute plugs Lawn mower does not self-propel Possible Causes 1. The blade is bent or is out of balance. 2. The blade mounting bolt is loose. 3. The underside of the lawn mower deck contains clippings and debris.
-
Page 30: Limited Warranty Exmark Turf Equipment
Exmark and found by us (in the exercise of our reasonable discretion) to be defective in factory materials or workmanship. -
Page 31: Service Record
SERVICE RECORD Date Description Work Done Service Done By... -
Page 32: Grass Catcher Capacity
The engine exhaust from this product contains chemicals known to the State of California to cause cancer, birth defects, or other reproductive harm. 2004 EXMARK MFG. CO. INC. INDUSTRIAL PARK BOX 808 BEATRICE, NE 68310 ALL RIGHTS RESERVED LAZER Z...
Need help?
Do you have a question about the M216KASPC and is the answer not in the manual?
Questions and answers