Table of Contents
Advertisement
Available languages
Available languages
Owner's
Manual
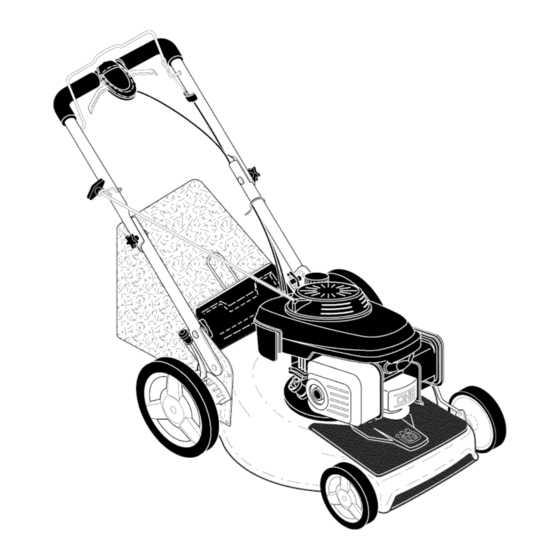
ROTA
sqva
Y LAWN
160cc Honda Engine
22" Rear Discharge
Self-Propelled
Model No.
917.379151
Product No.
HU800HW
®
MOWER
• EspaSol, p. 22
CAUTION:
Read and follow all
Safety Rules and Instructions
before operating
this equipment
Husqvarna,
Charlotte,
NC 28269
Visit our website: www.husqvarna.com
U.S.A.
Advertisement
Table of Contents

Related Manuals for Husqvarna HU800HW


Summary of Contents for Husqvarna HU800HW
- Page 1 ROTA 160cc Honda Engine 22" Rear Discharge Self-Propelled Model No. 917.379151 Product No. HU800HW • EspaSol, p. 22 CAUTION: Read and follow all Safety Rules and Instructions before operating this equipment U.S.A. Husqvarna, Charlotte, NC 28269 Visit our website: www.husqvarna.com...
- Page 2 Maintenance ........14-16 Warranty ..........Safety Rules .......... Service and Adjustments ....18-19 Product Specifications ......Storage ..........19-20 Assembly / Pre-Operation ......Troubleshooting ......... 20-21 Operation ..........9-13 Repair Parts ........42-51 Maintenance Schedule ......IMPORTANT: This cutting machine is capable of amputating hands and feet and throwing ob- jects.
- Page 3 In the state of California the above is required by law (Section 4442 of the California Public Resources Code). Other states may have similar laws. Federal laws apply on federal lands. A spark arrester for the muffler is available through your nearest Husqvarna other authorized service center (See the REPAIR PARTS section of this manual).
- Page 4 Husqvarna will repair or replace at its discretion, any defective product or part covered by the Limited Warranty, free of charge at any authorized Husqvarna Servicing Dealer/Center...
- Page 5 Servicing Dealer/Center and arrange for pick-up or return of your unit after the repairs have been made. If you do not know the location of your nearest authorized Husqvarna Servicing Dealer, call Husqvarna, at 1-800-487-5951 during the hours of 8:00 AM to 8:00 PM Eastern Standard Time, or visit www.husavarna.com.
- Page 6 Consumer Commercial Manufacturer's warranty LCT Engines on specific Snow Throwers & Tillers, warranty through Husqvarna. ** See reference 1 (b) of the warranty statement. RZ - Two (2) Year Consumer warranty, parts & labor, with Hydro-Gear Distributor network. EZ - One (t) Year...
- Page 7 Record both serial number and date of purchase in space provided above. These accessories were available when this lawn mower was produced. They are not shipped with your mower. They are also available at most Husqvarna retailers and service centers. Some of these accessories may not apply to your lawn mower.
- Page 8 Read these instructions and this manual in its entirety before you attempt to assemble or operate your new lawn mower. IMPORTANT: This lawn mower is shipped WITHOUT OIL OR GASOLINE in the engine. Your new lawn mower has been assembled at the factory with the exception of those parts left unassembled for shipping purposes.
- Page 9 The use of any gasoline exceeding 10% ethanol (El0) will void the product warranty. MEETS CPSC SAFETY REQUIREMENTS Husqvarna rotary walk-behind power lawn mowers conform to the safety standards the American National Standards Institute and the U.S. Consumer Product Safety Com- mission.
- Page 10 DRIVE CONTROL ADJUSTMENT The operation of any lawn SAFETVG'ASSES mower can result in foreign Over time, the drive control system may objectsthrowninto the eyes, become "loose", resulting in decreased which can result in severe speed. There is a turnbuckle on the drive eye damage.
- Page 11 TO CONVERT MOWER TO EMPTY GRASS CATCHER Your lawn mower was shipped ready to 1. Lift up on grass catcher using the be used as a mulcher. To convert to rear frame handle. bagging or discharging: 2. Remove grass catcher with clippings from under lawn mower handle.
- Page 12 ADD GASOLINE TO STOP ENGINE , Fill fuel tank to bottom of tank filler neck. , To stop engine, release operator pres- Do not overfill. Use fresh, clean, regular ence control bar. Wait until blade and unleaded gasoline with a minimum of all moving parts have stopped and turn 87 octane.
- Page 13 MULCHING MOWING TiPS MOWING TiPS A CAUTION: Do not use de-thatcher IMPORTANT: For best performance, blade attachments on your mower. Such keep mower housing free of built-up attachments are hazardous, will damage grass and trash. See "CLEANING" in the Maintenance section of this manual.
- Page 14 MAINTENANCE BEFORE AFTER EVERY EVERY EVERY BEFORE EACH EACH 25HOURS STORAGE SCHEDULE USE USE HOURS OR SEASON HOURS Check for Loose Fasteners 1_ # lean /Inspect Grass Catcher * Check Tires Check Drive Wheels v" Clean Lawn Mower ..M Clean under Drive Cover *** O Check Drive Belt / Pulleys *** W Check / Sharpen / Replace Blade Lubrication...
- Page 15 5. Install the blade bolt with the lock LAWN MOWER washer and hardened washer into Always observe safety rules when per- blade adapter and crankshaft. forming any maintenance. 6. Use block of wood between blade and TIRES lawn mower housing and tighten the o Keep tires free of gasoline, oil, or insect blade bolt, turning clockwise.
- Page 16 GRASS CATCHER 1. Disconnect spark plug wire from spark o The grass catcher may be hosed with plug and place wire where it cannot water, but must be dry when used. come in contact with plug. o Check your grass catcher often for dam- 2.
- Page 17 TO CLEAN AIR FILTER ened engine life. 1. Remove cover. WATER WASHOUT FEATURE 2. Carefully remove cartridge. Your lawn mower is equipped with a fitting 3. Clean by gently tapping on a flat sur- that allows quick and easy cleaning of face.
- Page 18 ,_, WARNING: To avoid serious injury,before performing any service and adjustments: 1. Releasecontrol bar and stop engine. 2. Make sure the blade and all moving parts have completely stopped. 3. Disconnectspark plug wire from spark plug and place wire where it cannot come in contact with plug.
- Page 19 Overspeeding too slow, take your mower to a Husqvarna the engine above the factory high speed or other qualified service center for repair setting can be dangerous.
- Page 20 Allow the engine to cool before storing in any enclosure. TROUBLESHOOTING - See appropriate section in manual unless directed _air Center. to a Husqvarna or other qualified Parts & Re CORRECTION PROBLEM CAUSE Does not start 1. Dirty air filter.
- Page 21 Excessive Worn, bent or loose blade. 1. Replace blade. Tighten vibration blade bolt. Bent engine crankshaft. 2. Contact a Husqvarna other qualified service center Engine flywheel brake is on 1. Depress control bar to Starter rope when control bar is released.
- Page 22 Garanfia ............ 24-26 Mantenimiento .......... 34-37 Reglas de Seguridad ........ 22-23 Servicio y Adjustes ........38-39 AImacenamiento ........39-40 Especificaciones del Producto ....... Identificaci6n de problemas ...... 40-41 Montaje / Pre-Operaci6n ....... Operaci6n ..........29-33 Partes de repuesto ........42-51 Programa de Mantenimiento ......
- Page 23 HACER: • Nunca Ilenar contenedores en un vehfculo, en • Puede recortar a traves de la superficie de un cami6n o caravana con un forro de pl_.stico. Colocar siempre los contenedores en el suelo la cuesta, nunca hacia arriba y hacia abajo. lejos de su vehiculo antes de Ilenar.
- Page 24 Dana, Hydro-Gear, Tuff-Torq proporcionan garanfia para la transmisi6n/transeje al comprador final o a Husqvarna. Husqvarna asignarb, la garanfia del fabricante de la transmisi6n/transeje o cualquier derecho sobre dicho elemento al comprador original de la unidad. Para obtener servicios para transmisiones/transejes...
- Page 25 COMO OBTENER SERVlClO 5. Centro/concesionario de servicio Husqvarna autorizado. Para obtener cobertura de garanfia, es su responsabilidad (a su costo y cargo) entregar o enviar su unidad Husqvarna a un centro/ concesionario de servicio Husqvarna autorizado y organizar la recogida...
- Page 26 Hydro-Gear. EZ - Un (1) ado de garantia comercial, partes y mano de obra, con Husqvarna. Dos (2) ados de garantia al consumidor, partes y mano de obra, con red de distribuidores Hydro-Gear. MZ - Dos (2) ados de garantia comercial, partes y mano de obra, con red de distribuidores Hydro-Gear.
- Page 27 Estos accesorios estaban disponibles cuando se produjo la segadora. No son facilitados junto al cortacesped. Tambien estb.n disponibles en la mayor[a de las tiendas de Husqvarna yen los centros de servicio. AIgunos de estos accesorios tal vez no se apliquen a su segadora. RENDIMIENTO...
- Page 28 Lea estas instrucciones y este manual completamente antes de tratar de montar u operar su sega- dora nueva. IMPORTANTE: Este cortacesped viene SIN ACEITE O GASOLINA en el motor. Su segadora nueva ha sido montada en la f_.brica con la excepci6n de aquellas partes que se de- jaron sin montar por razones de env[o.
- Page 29 CUMPLE CON LOS REQUiSlTOS DE SEGURIDAD DE LA CPSC Las segadoras a motor, que se conducen desde la parte de atrb.s, rotatorias, Husqvarna, cumplen con los estb.ndares de seguridaAd del American National Standards Institute y de la U.S. Consumer Product Safety Commission.
- Page 30 AJUSTE DEL MANDO Laoperaci6n decualquier Ocasionalmente, el sistema de mando puede segadora puedehacerque SEGURIDAD "aflojarse', provocando una disminuci6n de la saltenobjetosextraflos dentrode susojos,Ioquepuedeproducir velocidad. Hay un torniquete en la sede del mando para apretar la tensi6n del cable. Pro- daflosgravesenestos.Siempre ceder de la siguiente manera: useanteojos deseguridad o protecci6n para 1.
- Page 31 PARA CONVERTIR LA SEGADORA PARA VAClAR EL RECOGEDOR Su segadora fue enviada Nsta para usarse como CESPED acolchadora de capa vegetal. Para convertirla a Levante el recogedor de cesped usando el una operaci6n de ensacado o de descarga: mango del bastidor. DESCARGA TRASERA: Remueva el recogedor de cesped, con los re- cortes, de debajo del mango de la segadora.
- Page 32 AGREGUE GASOLINA PARA PARAR EL MOTOR • Lleneel estanque de combustible h astala ,----Para parar el motor y si no intenta ponerlo en parteinferior delcuellode relleno deles- marcha de nuevo, alivie la barra de control tanque de gasolina. N oIoIlenedemasiado. que exige la presencia del operador.
- Page 33 CONSEJOS PARA SEGAR CONSEJOS PARA SEGAR Y ACOL= _PRECAUClON: No utilizar dispositivos anti- CHAR paja de la hoja en la segadora ya que estos IMPORTANTE: Para obtener el mejor accesorios son peligrosos, pueden daSar su rendimiento mantenga la caja de la segadora segadora y anular su garanfia.
- Page 34 PROGRAMA ANTES DESPUES CADA CADA CADA ANTES DEL DE CADA DE CADA 25 HORAS O ALMACE= MANTEN|M|ENTO HORAS TEMPORADA HORAS NAMIENTO v" Revisar si hay Sujetadores Sueltos Limpiar/Inspeccionar el Recogedor de Cesped * Controlar los Neumaticos Controlar las Ruedas Motrices _1_ Limpiar la Segadora ..
- Page 35 SEGADORA 5. Instale el perno de la cuchilla con la arandela de seguridad y la arandela endurecida en el Siempre observe las reglas de seguridad cu- adaptador de la cuchilla y el cigueSal. ando haga el mantenimiento. 6. Use un bloque de madera entre la cuchilla LLANTAS y la caja de la segadora y apriete el perno •...
- Page 36 RECOGEDOR DE ClaSPED Remueva la tapa del dep6sito del aceite; • El recogedor de cesped puede ser rociado dejela a un lado en una superficie limpia. con el agua de la manguera pero tiene que Incline la cortadora de cesped pot este estar seco cuando se vaya a usar.
- Page 37 DERRUBIO DEL AGUA Cuidadosamente, remueva el cartucho. Limpielo golpeAndolo suavemente en una Su cortacespedes de cesped se equipa de una superficie plana. Si esta muy sucio cambie guarnici6n que permita la limpieza rApida y el cartucho. fAcil del superficie inferior de la cubierta. Para ,_IPREOAUOION: Los solventes de petr61eo, utilizar esta caracteristica,...
- Page 38 _bADVERTENClA: Para evitar lesi6nes serias, antes de dar calquier servico o de hacer ajustes: Suelte la barra de control y pare el motor. AsegOrese que la cuchilla y que todas las partes movibles se hayan detenido completamente. Desconecte el alambre de la buj[a y p6ngalo en donde no pueda entrar en contacto con esta. PARA CAMBIAR CORREA DE IMPULSION...
- Page 39 Ileve su segadora a contacto con VELOCIDAD DEL MOTOR su centro de servicio Husqvarna o con un otro La velocidad del motor ha sido ajustada en centro de servicio cualificado para repararla y/o la fAbrica. No trate de aumentar la velocidad ajustarla.
- Page 40 DE PROBLEMAS - Yea ia secci6n apropiada en el manual amenos este dirigido a un centro de servico Husqvarna. CORRECClON PROBLEMA CAUSA No arranca Filtro de aire sucio. Limpie/cambie el filtro de aire. Sin combustible. Llene el estanque de combustible.
- Page 41 Cigue_al del motor doblado. P6ngase en contacto con su centro de servicio Husqvarna o con un otto centro de servicio cualificado. Cordon El freno del volante del motor Presione la barra de control arrancador estb.
- Page 42 HUSQVARNA ROTARY LAWN MOWER - MODEL NUMBER 917,379151 (PRODUCT NUMBER HUSOOHW) 70 ... /'/58 ...._ .... 57 .... 51...
- Page 43 HUSQVARNA ROTARY LAWN MOWER - MODEL NUMBER 917.379151 (PRODUCT NUMBER HUSOOHW) PART PART PART DESCRiPTiON DESCRiPTiON DESCRiPTiON 186296 Upper Handle Assembly 72250505 Bolt, Carriage 5/16-18 x 5/8 155377 Nut, Hex (Includes Foam Grip) 438584 Grassbag 437517X498 Bar, Lower Handle 440386...
-
Page 44: Parts Diagram
HUSQVARNA ROTARY LAWN MOWER - MODEL NUMBER 917,379151 (PRODUCT NUMBER HUSOOHW) ( (, "_ 41 31 3415 " ..... 32... - Page 45 HUSQVARNA ROTARY LAWN MOWER - MODEL NUMBER 917,379151 (PRODUCT NUMBER HUSOOHW) PART PART DESCRiPTiON DESCRiPTiON 430995 Drive Control Assembly 437336X460 Wheel & Tire Assembly, Rear, 11" (Includes Cable) 409148 Nut, Flangelock 3/8-16 431650 Cable, Drive 197480 Q-Ring 429544X479 Mounting Bracket, Drive Control...
- Page 46 HONDA 4-CYCLE ENGINE MODEL NUMBER GCV160-LAS3A CRANKSHAFT CYLINDER BARREL ® 3/8-24UNF 2B TAP _86,7 1357_ O525 CARBURETOR "-.. "_ .-1_,-12 "'"--.--- RECOIL STARTER_ _ll'__ -2o<z_.. _ 26 _ _-_2 ..(0"" J_"-- - -""'_-- .._t.b..-" 21 ,,,r. " " 17--f L_ _/"...
- Page 47 HONDA 4=CYCLE ENGINE MODEL NUMBER GCV160=LAS3A CYLINDER BARREL CONTROL PART PART DESCRIPTION DESCRIPTION 1 12000-ZOL-406 1 16551-ZM0-010 Arm, Governor Cylinder Assembly 12000-ZOL-840 2 16555-ZOL-801 Rod, Governor Cylinder Assembly 3 12310-ZOJ-000 Cover, Cylinder Head 3 16561-ZOL-000 Spring, Governor 12311 -ZL8- D00 Cover, Head 4 16562-ZM0-000 Spring, Throttle Return...
- Page 48 HONDA 4=CYCLE ENGINE MODEL NUMBER GCV160=LAS3A 1 _15 - 27...
- Page 49 (CT200) 13 90201-ZOT-800 "T89" ("NH1 ") (Black) Nut, Special (14 mm) 19610-ZOL-861 14 51125-ZOL-003 Cover Assembly, Holder, Wire (Fastex) 90681-959-003 "T93" (Husqvarna Grey) Clip A, Cable (3.8mm) 19610-ZOL-861 Cover Assembly, (Black) (NIFCO) 15 93892-04012-00 "T98" (M.T.D. Red) Screw, Washer Head...
- Page 50 HONDA 4=CYCLE ENGINE MODEL NUMBER GCV160-LAS3A <;> CAMSHAFT PULLEY...
- Page 51 HONDA 4=CYCLE ENGINE MODEL NUMBER GCV160=LAS3A CAMSHAFT PULLEY PISTON / CONNECTING PART PART DESCRIPTION DESCRIPTION 1 14320-ZL8-010 1 13101-Z2A-010 Piston Pulley, Camshaft 2 14324-ZL8-000 2 13111-ZE0-000 Pin, Piston Shaft, Cam Pulley 3 14400-Z0J-014 3 13200-ZOJ-000 Belt, Timing Connecting Rod Assembly 4 90001-ZE1-000 (84HU7 G-200) Bolt, Connecting...
- Page 52 Your Home For repair - in your home - of all major brand appliances, lawn and garden equipment, or heating and cooling systems, no matter who made it, no matter who sold it! For the replacement parts, accessories owner's manuals that you need to do-it-yourself. For Sears professional installation of home appliances...
Need help?
Do you have a question about the HU800HW and is the answer not in the manual?
Questions and answers