Table of Contents
Advertisement
Quick Links
®
MODEL NUMBER 917.256591
OWNER'S MANUAL
o Assembly
o Operation
o Customer Responsibilities
o Service and Adjustments
o Repair Parts
CAUTION:
Read and follow
all safety
rules and instructions
before
operating
this equipment.
FOR CONSUMER
ASSISTANCE
HOT LINE, CALL THIS TOLL FREE NUMBER:
1-800-659-5917
IIIIIII
III I I
Advertisement
Table of Contents

Subscribe to Our Youtube Channel
Related Manuals for Craftsman 917.256591


Summary of Contents for Craftsman 917.256591
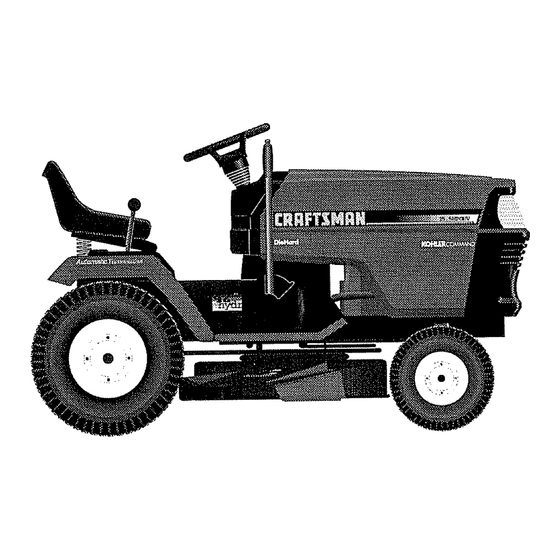
- Page 1 ® MODEL NUMBER 917.256591 OWNER'S MANUAL o Assembly o Operation o Customer Responsibilities o Service and Adjustments o Repair Parts CAUTION: Read and follow all safety rules and instructions before operating this equipment. FOR CONSUMER ASSISTANCE HOT LINE, CALL THIS TOLL FREE NUMBER: 1-800-659-5917 IIIIIII III I I...
- Page 2 SAFETY RULES Safe Operation Practices for Ride-On Mowers IMPORTANT: THIS CUTTING MACHINE IS CAPABLE OF AMPUTATING HANDS AND FEET AND THROWtNG OBJECTS.. FAILURE TO OBSERVE THE FOLLOWING SAFETY INSTRUCTIONS COULD RESULT IN SERIOUS INJURY OR DEATH GENERAL OPERATION !11, CHILDREN •...
- Page 3 RIDING EQUBPMENT For two (2) years from the date of purchase, if this Craftsman Riding Equipment is maintained, lubricated and tuned up according to the instructions in the owner's manual, Sears will repair or replace, free of charge, any parts found to be defective in material or...
- Page 4 TABLE OF CONTENTS SAFETY RULES ............OPERATION ............10-15 PRODUCT SPECIFICATIONS ........MAINTENANCE SCHEDULE ........CUSTOMER RESPONSIBILITIES ..... 3, 16-19 SERVICE AND ADJUSTMENTS ......20-25 WARRANTY ..............STORAGE ..............TABLE OF CONTENTS ..........TROUBLESHOOTING ........... 27-28 INDEX ................REPAIR PARTS =TRACTOR ........
-
Page 5: Accessories
ACCESSORUE$ ATTACHMENTS ,i i,i1,1, H, i i,,,111 ..,......, ,i,ii,, i ,, ii U,ill These accessories and attachments were avaifab{e through most Sears retail outlets and service centers when the tractor was purchased. Most Sears stores can order these items for you when you provide the model number of your tractor ENGINE MAINTENANCE ENGINE OIL... - Page 6 CONTENTS OF HARDWARE PACK ..i......... ,u,,, in ......uu lU , u ..Parts B g contents shown full size Parts packed separately in carton lu ..ii ,, Seat (1) Knob Video (1) Shoulder Bolt Steering Cassette 5/16-18 Wheel...
- Page 7 ASSEMBLY ........I,II n,,lll, II I lu,I Your new tractor has been assembled at the factory with exception of those parts left unassembled for shipping purposes. To ensure safe and proper operation of your tractor ai] parts and hardware you assemble must be tightened securely_ Use the correct tools as necessary to insure proper tightness.
- Page 8 mll_ll,!,l,, 1,1,11¸11111111 Use terminal access doors for: CHECK TIRE PRESSURE Inspection for secure connections (to tighten hard- The tires on your tractor were overinflated at the factory for ware). shipping purposes Correct tire pressure is important for Inspection for corrosion best cutting performance.
- Page 9 mN,,l=, ,,-r, ASSEMBLY INSTALL MULCHER PLATE CAUTION: Do not remove discharge (See Figs. 5 & 6) guard from mower. Raise and hold guard when attaching mulcher plate Install two latch hooks to mulcher plate using screw, and allow it to rest on plate while in washer, lock washer, and weld nut as shown operation.
- Page 10 .i......... OPERATION mu,Hn These symbols may appear on your tractor or in literature supplied with the product. Learn and understand their meaning. ÷ BATTERY CAUTION OR REVERSE FORWARD FAST SLOW WARNING ENGINE ON ENGINE OFF OIL PRESSURE CLUTCH LtGHTS ON LIGHTS OFF FUEL CHOKE...
- Page 11 OPERATION , ,i, , ii ......KNOW YOUR TRACTOR READ THIS OWNER'S MANUAL AND SAFETY RULES BEFORE OPERATING YOUR TRACTOR Compare the illustrations with your tractor to familiarize yourself with the locations of various controls and adiustments Save this manual for future reference° AMMETER IGNITION SWITCH...
- Page 12 ,HHmp,,= H,,, =,,,,==, ==, === , ,, OPERATgON u:J_,J= =,m, , = 11 = 1, 11,111, The operation of any tractor can result in foreign objects thrown into the eyes, which can s_ _ result in severe eye damage. Always wear safety glasses or eye shields while operating your over the spectacles or Standard safety glasses=...
- Page 13 OPERATION (See Figs. TO TRANSPORT 8 and TO OPERATE MOWER (See Fig. 9) Your tractor is equipped with an operator presence sensing When pushing or towing your tractor, be sure to disengage switch, Any attempt by the operator to leave the seat with transmission by placing freewheel control in freewheeling position,, Free wheef control is located at the rear drawbar the engine running and the attachment clutch engaged will...
-
Page 14: Carburetor
OPERATION ....l!,ll ADD GASOLINE Be sure the tractor' is on level ground. Fill fuel tank.. Use fresh, clean, regular unleaded Place the motion control lever in neutral gasoline with a minimum of 87 octane. (Use of leaded Release the parking brake and let the clutch/brake gasoline will increase carbon and lead oxide deposits slowly return to operating position.. - Page 15 OPERATION ....... MULCHING MOWING TIPS MOWING TIPS IMPORTANT: FOR BEST PERFORMANCE, KEEP Tire chains cannot be used when the mower housing is MOWER HOUSING FREE OF BUILT-UP GRASS AND attached to tractor° TRASH, CLEAN AFTER EACH USE Mower should be properly leveled for best mowing The special mulching btade will recut the grass clip- performance.
- Page 16 CUSTOMER ESPONSHBILBTJlES FILL iN DATES ' ._._,-O_'_., AS YOU COMPLETE ____ REGOLAR SERV,CE .I '%RVlOE DATES ..Check Brake 0potation '" I"_ ...._'" Check Tire Pressure Check for Loose Fasteners Sharpen/Replace Mower Blades Lubdcalion Chart Check Battery Level!Recharge Clean Battery and Terminals Check Transaxle Cooling...
- Page 17 ..... CUSTO RESPONSmB LUTUES i ......To check blade balance, you will need a 5/8" diameter TRACTOR steel bolt, pin, or a cone balancer_ (When using a cone Always observe safety rules when performing any mainte- balancer, follow the instructions supplied with bal- nance.
- Page 18 il,,, ,,, _,, i,,,,,t, IH"nMU CUSTOMER RESPONSMBILSTIES 11 inn u n u TRANSAXLE PUMP FLUID KNOB The transaxle was sealed at the factory and fluid mainte- WING NUT AIR CLEANER nance is not required for the life of the transaxle. Shouldthe COVER transaxle ever leak or require servicing, contact your near- RUBBER...
- Page 19 , i ii,lllll ¸ CUSTOMER RESPONSUlBIL , ,i i,im ,llll MUFFLER CLEAN AIR INTAKE/COOLING AREAS Inspect and replace corroded muffler and spark arrester (if To insure proper cooling, make sure the grass screen, equipped) as it could create a fire hazard and/or damage., cooling fins, and other external surfaces of the engine are kept clean at all times, SPARK...
- Page 20 SEIRVmCEAND ADJUSTMENTS ,,r,, ......CAUTION: BEFORE PERFORMING ANY SERVICE OR ADJUSTMENTS: Depress clutchtbrake pedal fully and set parking brake. Place motion control lever in neutral (N) position. Place attachment clutch in "DISENGAGED" position. ° Turn ignition key "OFF" and remove key. Make sure the blades and all moving parts have completely stopped.
-
Page 21: Side-To-Side
ii,u,, iir-i SERVNCE ....... ,r,lllJ,J TO LEVEL MOWER HOUSING FRONT-TO-BACK ADJUSTMENT (See Figs. 21 and 22) IMPORTANT: DECK MUST BE LEVEL SIDE-TO-SiDE. Adjust themower while tractor is parkedon level g round or THE FOLLOWING FRONT-TO-BACK ADJUSTMENT driveway Make sure tires are properly inflated (See NECESSARY, BE SURE TO ADJUST BOTH FRONT LINKS "PRODUCT SPECIFICATIONS"... - Page 22 SERVICE AND ADJUSTMENTS WITH PARKING BRAKE "ENGAGED" TO REPLACE MOWER BLADE DRIVE BELT NUT "A" (See Fig. 23) ,JAM NUT The mower blade drive belt may be replaced without tools. Park the tractor on level surface_ Engage parking brake. BELT REMOVAL- Remove mower from tractor (See "TO REMOVE...
- Page 23 , i lUl!,!,lll,i , i,,,11 ,,i, SERVICE AND ADJUSTMENTS i Ul..., ....TO ADJUST NOTION CONTROL LEVER (See TO REMOVE WHEEL FOR REPAIRS Fig. 26) (See Fig, 27) Block up axle securely The motion control lever has been preset at the factory and adjustment should not be necessary.
- Page 24 SERVmCE AND ADJUSTMENTS ,,,,H,=, =iN l= =Hill lllili= ......... TO REPLACE FUSE Replace with 30 amp automotive-type plug-in fuse. fuse holder' is located behind the dash. TO REMOVE HOOD AND GRILL ASSEMBLY (See Fig. 29) Raise hood., ° Unsnap headlight wire connector. •...
-
Page 25: Throttl E Control Cable
..u ..IIM, SERWCE AND ADJUSTMENTS ACCELERATION TEST ENGINE • Move throttle control lever from slow (.=_) to fast (._) TO ADJUST THROTTLE CONTROL CABLE position, if engine hesitates or dies, turn idle fuel adjusting needle out (counterclockwise) 1/8 turn° Re- (See Fig, 30) peat test and... -
Page 26: Cleaning
STORAGE Hi,m, n= ,mural 1' ='n ,jj_ ENGINE Immediately prepare your tractor for storage at the end of the season or if the tractor will not be used for 30 days or more FUEL SYSTEM IMPORTANT: 1T IS IMPORTANT TO PREVENT CAUTION: Never store the tractor with DEPOSITS FROM... -
Page 27: Air Filter
TROUBLESHOOTING POnNTS PROBLEM CAUSE CORRECTION Fill fuel tank Out of fuel Will not start See "TO START ENGINE" in Operation section, Engine not "CHOKED" properly Wait several minutes before attempting to start Engine flooded Replace spark plug Bad spark plug Clean/replace air filter Dirty air filter... -
Page 28: Seat
TROUBLESHOOTNNG PONNTS PROBLEM CAUSE CORRECTION i ,i ii ,IH,I Engine continues to run Faulty operator-safety presence control system Check wiring, switches and connections If not corrected, contact an authorized service center/ when operator leaves seat with attachment clutch department engaged Poor cut - uneven Worn, bent or loose blade Replace blade...
Need help?
Do you have a question about the 917.256591 and is the answer not in the manual?
Questions and answers