Table of Contents
Advertisement
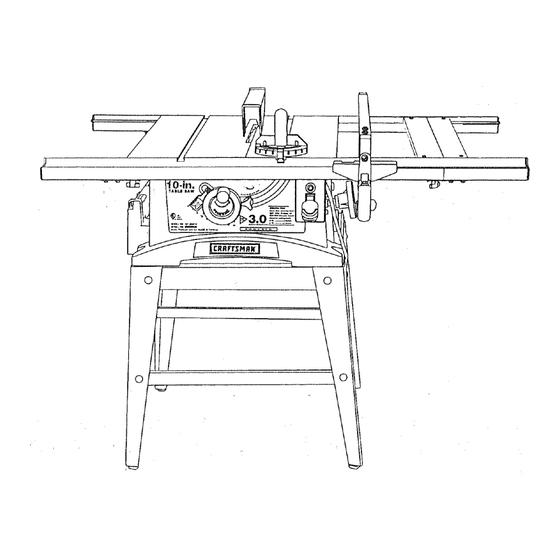
Owner's
anual
3 HP (Maximum
Developed)
10" inch
B_ade
4000
R.P.M.
"TABLE SAW
Model No.
137.228010
C
US
CAUTION:
Before using this Table Saw,
read this manual and follow
all its Safety Rules and
Operating
Instructions.
• Safety Instructions
• Installation
,, Operation
o Maintenance
o Parts List
Customer
Help
Line
1-800=843=t682
Sears,
Roebuck
and Co., Hoffman
Estates,
IL 60179
USA
Part No. 137228010001
Advertisement
Table of Contents

Related Manuals for Craftsman 137.228010


Summary of Contents for Craftsman 137.228010
- Page 1 Owner's anual 3 HP (Maximum Developed) 10" inch B_ade 4000 R.P.M. "TABLE SAW Model No. 137.228010 CAUTION: • Safety Instructions • Installation Before using this Table Saw, read this manual and follow ,, Operation all its Safety Rules and o Maintenance Operating Instructions.
- Page 2 GENERAL SAFETY INSTRUCTIONS SECTION WEARYOUR ALWAYS WEAR EYE PAGE PROTECTION. Any table BEFORE USING THE TABLE SAW Warranty ..............saw can throw foreign Product Specifications ............. objects into the eyes which Safety is a combination of common sense, staying alert could cause permanent eye Safety Instructions...
- Page 3 24. WARNING: Dust generated from certain materials can 14. AVOID AWKWARD OPERATIONS and hand GROUNDING INSTRUCTIONS Fig. A be injurious to your health. Always operate saw in well positions where a sudden slip could cause your hand IN THE EVENT OF A MALFUNCTION OR BREAKDOWN, 3-Prong Plug ventilated areas and provide for proper dust removal, to move into the cutting tool.
- Page 4 Visit your Sears Hardware Department or see the with the illustration and the list of loose parts to make Craftsman Power and Hand Tools Catalog to purchase certain all items are accounted for, before discarding any recommended accessories for this power tool.
- Page 5 Milergauge Blade guard ASSEMBLY JNSTRUCTUONS Extension r ail Extension w ing SAW TO LEG SET (FIG. C) Before mounting the blade guard, the rip fence and miter gauge to the saw top, invert the saw table so that it is facing the floor. For your own safety, never connect plug to power source Position the leg set upside down on the saw base.
- Page 6 Fig. G BLADE GUARD ASSEMBLY (FIG. F, G, H) Place a combination square ruler across a table rail and MOUNTED TO OTHER WORK SURFACES (FIG. C) one extension support rail. If lhe rail is not level with the table rail, adjust the bolts (4) and rails.
- Page 7 Install the new blade (FIG. I) CHANGINGTHE BLADE(FIG.I) If adjustment is needed to make it parallel: Fig. Place the new blade onto the arbor with the blade Loosen the two screws (4) on the top of the rip fence, teeth pointing forward to the front of the saw. and lift up on the handle (3).
- Page 8 BLADE TILT POINTER (FIG. Q) BLADE ALIGNMENT (FIG. P ) Wrenches (FIG. R) STORAGE (FIG. R, S) The proper blade alignment is set at the factory, but should The blade tilt pointer (1) should indicate 0° on the Below the blade storage are slots (2) for convenient be rechecked and adjusled if necessary.
- Page 9 USING THE TABLE EXTENSIONS (FIG. W) RIPPING (FIG. X,Y) The table extension length allows a maximum 24-1/2" rip capacity to the right of the blade, with the rip fence (1) placed at the end of the extension. To prevent serious injury: After placing the rip fence at the distance desired, °...
- Page 10 Never pull the workpiece back when the blade is Hold the workpiece firmly against the miter gauge Fig. DD Fig. BB turning. Turn the switch OFF. When the blade completely with the blade path in line with the desired cut stops raise the kickback pawls on each side of the location.
- Page 11 MAiNTAiNiNG YOUR TABLE TROUBLESHOOTmNG GUIDE Fig. FF GENERAL MAINTENANCE To avoid injury from an accidental start, turn the switch OFF and always remove the plug from the power source before making any adjustments. For your own safety, turn the switch OFF and remove the o Consult your local Sears Service Center if for any reason the rnotor will not run.
- Page 12 MODEL NO. 137.228010 When servicing use only CRAFTSMAN replacement parts. Use of any other parts may create a HAZARD or cause product damage. Any attempt to repair or replace electrical parts on this Table Saw may create a HAZARD unless repair is done by a qualified service technician.
- Page 13 CRAFTSMAN 10" TABLE SAW MODEL NO. 137.228010 SCHEMATIC CRAFTSMAN 10" TABLE SAW MODEL NO. 137.228010 PARTS LIST FOR SCHEMATIC L.nLq <O • N ° . ,.b"_ '-xm' ,.b'_ 117 _--_ "0 ¢-'-_u ..C-- tat" ¢0 llg_ 118 ..!1.5 ..
- Page 14 CRAFTSMAN 10" TABLE MODEL NO. 137.228010 SCHEMATIC CRAFTSMAN 10" TABLE MODEL NO. 137.228010 PARTS LIST FOR SCHEMATIC 12gA 1" ¢'4 ¢N >4 .135 _136 >. ¢5 o_ Q _ j3. C- o O.-C _; u_r'{_ O_o'_ x_-- _+_ _ x _-=-o_z_-_ •...
- Page 15 MOTOR MODEL NO. 137.228010 SCHEMATIC D MOTOR MODEL NO. 137.228010 PARTS LIST FOR SCHEMATIC ¢Y1 ¢0 .£ • o_--_ .__._ _o >'_- r- d ._._ _222o_ ,..,.. _ <_iz ° 130(30 CO000 ¢N 130000 O0 I_ CO 60 I"-- ,CO 0 <<...
- Page 16 LEG STAND MODEL NO. 137.228010 SCHEMATIC CRAFTSMAN 10" TABLE SAW LEG STAND MODEL NO. 137.228010 PARTS LIST FOR SCHEMATIC E Part Number Description Size Quantity 17050106 Bracket (leg) 2672BBDA54 Cap head square neck bolt M8x1.25-16 17050408 Bottom support bracket (long)
- Page 17 © "_ ooo__ _._,_ b_,. _ O_o___ o> "_ (D O ii_!!J O _" !_iii!
Need help?
Do you have a question about the 137.228010 and is the answer not in the manual?
Questions and answers