Advertisement
Table of Contents
TABLE
OF CONTE
Welcome&Congratulations
.......
Sel_l_
Important Safety Instructions ..... ii:!ili
_t_
_
Features at a Glance .............................
5 _
::B_
Before Setting Oven Controls .................................
8
Majo_
Setting Oven Controls ..........................................
11
ts
ing... ...................................................24
www,fdgidaire.com
USA 1-800-944-9044
www.frigidaire.ca
Canada 1-800-265-8352
......... _ iiiiiiiiiiiiiiiiiiiiiiiiiiiiiiiii
i
Advertisement
Table of Contents

Subscribe to Our Youtube Channel
Related Manuals for Frigidaire FFEW2725LBA


Summary of Contents for Frigidaire FFEW2725LBA
- Page 1 TABLE OF CONTE Welcome&Congratulations ..Sel_l_ ing............24 Important Safety Instructions ..ii:!ili Features at a Glance ......::B_ Before Setting Oven Controls ......... Majo_ Setting Oven Controls .......... www,fdgidaire.com USA 1-800-944-9044 www.frigidaire.ca Canada 1-800-265-8352 .._ iiiiiiiiiiiiiiiiiiiiiiiiiiiiiiiii...
-
Page 2: Product Registration
Congratulations on your purchase of a new appliance! Product Registration At Electrolux Major Appliances, we are very proud of Register Your Product our product and are completely committed to providing you with the best service possible. Your satisfaction is our The PRODUCT number one priority. - Page 3 Read all instructions before using this appliance. Save these instructions for future reference. DEFINITIONS • Injury to persons could result. Thisis the safety alert symbol.Itisused to alert • Install anti=tip bracket packed with you to potential personal injury hazards. Obey all safely •...
-
Page 4: Oven Elements
IMPORTANT SAFETY INSTRUCTIONS USING YOUR OVEN • Use Care When Opening an Oven Door--Stand Do not store items of interest to children in the to the sideof theappliance when openingthe door of cabinets above the appliance. Children climbing on a hotoven. Lethotair or steam escape beforeyou the cooktop to reach items could be seriously injured. -
Page 5: Safety Instructions
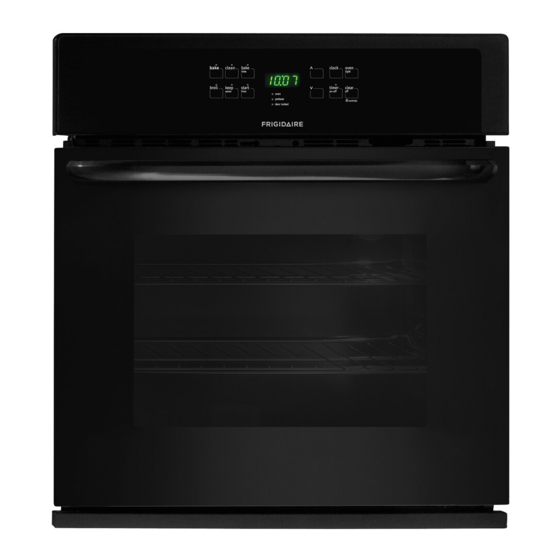
IMPORTANT SAFETY INSTRUCTIONS CLEANING YOUR OVEN • Do not use oven cleaners, No oven cleaner or oven • Clean the appliance regularly to keep all parts liner protective coating of any kind should be used in or free of grease that could catch fire. Exhaustfan around any part of the appliance. - Page 6 Your Electric Wall-Oven Features: Electronic oven control with kitchen timer. Oven vent. Self-clean door latch. Broil element. Oven interior light with removable cover. Self-clean oven interior. Adjustable interior oven rack(s). Large 1-piece oven door handle. Full width oven door with window.
-
Page 7: Arranging Oven Racks
Oven Vent Location Arranging Oven Racks The oven is vented at the center trim. When the oven is ALWAYSARRANGEOVEN RACKSWHEN THE OVEN IS COOL on, warm air is released through the vent. This venting is (PRIOR TO OPERATING THE OVEN). Always use oven mitts necessary for proper air circulation in the oven and good when using the oven. -
Page 8: Control Pad Features
Control Pad Features READ THE INSTRUCTIONS CAREFULLY BEFORE USING THE OVEN. For satisfactory use of your oven, become familiar with the various features and functions of the oven as described below. Detailed instructions for each feature and function follow later in this Use & Care Guide. The graphics on your timer may not look exactly like the one shown. -
Page 9: To Set The Minute Timer
To set the Clock For a silent control panel When choosing a function, a beep will be heard each time a pad is pushed. If desired, the controls can be programmed for silent operation. To tell if your oven is set for normal or silent operation The time of day must first be set in order to push and hold Start time pad for 7 seconds. - Page 10 To Set Control Continuous Bake or 12 8 seconds after the Up or Down arrow pad is Hour Energy Saving released, the oven wilt begin heating to the selected The oven control has a built-in 12 Hour Energy Saving feature that will shut off the oven if the control is left on temperature.
- Page 11 To Set the Timed Bake and Delay Start Accessories available via the enclosed brochure: Features The BAKE TIlE and START TIlE pads operate the Broiler features that will turn the oven ON and OFF at the times Inse_ you select in advance. The oven can be programmed to start immediately and shut off automatically (Timed Bake) or to begin baking at a later time with a delayed...
- Page 12 7. Press the Up or Down arrow pad until the desired Setting Keep Warm Feature baking time appears. The Keep warm pad turns ON the Keep Warm feature Wait 5 seconds for the control to accept the time. and will maintain an oven temperature of 170 °...
- Page 13 To Set Sabbath Feature (for use on the Jewish Sabbath & Holidays) Press and hold both the Bake time and Start time The Bake time and Start time pads are used to set the Sabbath feature. The Sabbath feature may only be pads for at least 3 seconds.
- Page 14 Self=Cleaning A self-cleaning oven deans itself with high temperatures (well above normal cooking temperatures) which eliminate soils completely or reduces them to a fine powdered ash To avoid possible burns use care when opening the oven you can wipe away with a damp cloth. door after the SeIFCleaning cycle.
- Page 15 Self-Clean Cycle "CLn" will appear in the display during the Self-Clean cycle and the "Door Locked" light will glow until the Self-Cleaning cycle is complete or cancelled and the The kitchen area should be well ventilated using an oven temperature has cooled.
- Page 16 Cleaning Various Parts of Your Range Before cleaning any part of the range, be sure all controls are turned OFF and the range is COOL. REMOVESPILLOVERS AND HEAVY SOILING AS SOON AS POSSIBLE. REGULARCLEANING WILL REDUCE THE NUMBER OF MAJOR CLEANING LATER. •...
-
Page 17: Removing And Replacing The Lift=Off Oven Door
Care cleaning of stainless steel Some models are equipped with stainless steel exterior parts. Specia! care and cleaning are required maintaining the appearance of stainless parts. Refer to _round_ the General Care & Cleaning table for detailed cleaning lOT oven instructions. - Page 18 Oven Baking For best cooking results, heat the oven before baking cookies, breads, cakes, pies or pastries, etc. There is no need to preheat the oven for roasting meat or baking casseroles. The cooking times and temperatures needed to bake a product may vary slightly from your previously owned appliance.
- Page 19 IMPORTANT Before you callfor service,reviewthislist. Itmay saveyou time and expense.The list includes common occurrences thatare notthe result o f defective workmanship or materials i nthis appliance. OCCURRENCE POSSIBLE CAUSE/SOLUTION Oven Control Beeps Electronic control has detected a fault condition. Push CLEAR pad to clear the display and stop and Displays an "F"...
- Page 20 Yourappliance i s covered b ya oneyearlimited warranty. Foroneyearfromyouroriginal d ateofpurchase, Electrolux will payall costsfor repairing or replacing anypartsof this appliance that proveto be defective in materials or workmanship whensuchappliance i s installed, u sed andmaintained i n accordance withthe provided instructions. Exclusions This warranty does not cover the following:...
Need help?
Do you have a question about the FFEW2725LBA and is the answer not in the manual?
Questions and answers