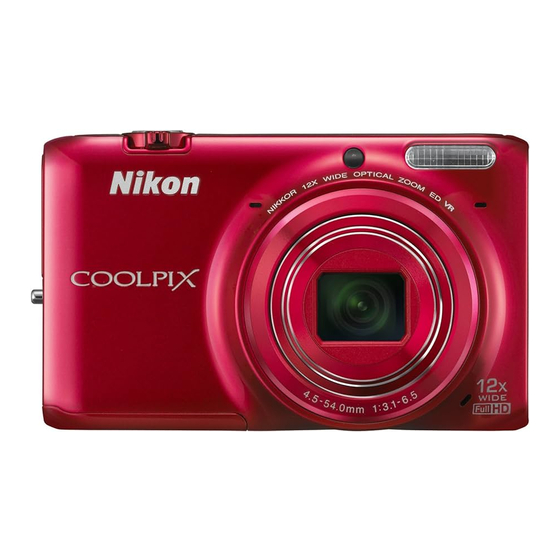
Nikon COOLPIX S6500 Reference Manual
Hide thumbs
Also See for COOLPIX S6500:
- Reference manual (284 pages) ,
- Reference manual (153 pages) ,
- Quick start manual (333 pages)
Table of Contents
Advertisement
Quick Links
Advertisement
Table of Contents

Related Manuals for Nikon COOLPIX S6500


Summary of Contents for Nikon COOLPIX S6500
- Page 1 Nikon DIGITAL CAMERA COOLPI.X $6500 Reference Manual...
- Page 2 Image editing effects that are fun and easy to apply while shooting Quick effects ............. [_]30, Create images with effects it] three easy steps, simply by shooting, selecting, and saving. Thirty effects are available. Just as with a smartphone application, you can preview the results of each effect on the image and choose your favorite one to suit the scene or your mood.
- Page 3 Introduction The Basics of Shooting and Playback...
- Page 4 Thank you for purchasing the Nikon COOLPIX $6500 digital camera. Before using the camera, please read the information in "For Your Safety" ([]_]]viii x) and familiarize yourself with the information provided in this manual. After reading, please keep this manual handy and refer to it to enhance your enjoyment of your new camera.
- Page 5 About This Manual If you want to start using the camera right away, see "The Basics of Shooting and Playback" (1_13). To learn about the parts of the camera and information that is displayed in the monitor, see "Parts of the Camera" ([_ 1).
- Page 6 Other Information • Symbols and Conventions To make it easier to find the information you need, the following symbols and conventions are used in this manual: Symbol ?"T .._ '_ Description This icon indicates cautions and information that should be read before using the camera.
- Page 7 Only Nikon brand electronic accessories (including battery chargers, batteries, Charging adapters, and AC adapters) certified by Nikon specifically for use with this Nikon digital camera engineered and proven to operate within the operational and safety requirements of this electronic circuitry,...
- Page 8 • Nikon will not be held liable for any damages resulting from the use of this product, • While every effort was made to ensure that the information...
- Page 9 Disposing of Data Storage Devices Please note that deleting images or _rmatting data storage devices such as memory cards or built in camera memory does not completely erase the original image data. Deleted files can sometimes be recovered from discarded storage devices using commercially available...
- Page 10 To prevent damage to your Nikon product or injury to yourself or to others, read the following safety precautions in their entirety before using this equipment. Keep these safety instructions where all those who use the product will read them.
- Page 11 • Do not short or disassemble the battery or Should the insulation be damaged and the attempt to remove or break the battery wires become exposed, take it to a Nikon insulation or casing. authorized service representative for • Do not expose the battery to flame or to inspection.
- Page 12 Turn the power off while inside the airplane or sold by Nikon for the purpose, to during take off or landing. Follow the maintain compliance with product...
- Page 13 Nikon Corporation may void the user's and used in accordance with the authority to operate the equipment.
- Page 14 Interface Cables Notices for customers in Europe Use the interface cables sold or provided by CAUTIONS Nikon for your equipment Using other RISK OF EXPLOSION IF BATTERY IS inte_ace cables may exceed the limits of REPLACED BY AN INCORRECT TYPE.
- Page 15 (products purchased in the EU or EFTAcan be used anywhere within the EU and EFTA). Nikon does not accept liability for use in other countries. Users who are unsure as to the originaJ country of sale should consult with their local Nikon service center or Nikon-authorized service representative.
- Page 16 102 of the IC radio frequency (RF) Exposure rules. Please refer to the SARtest report that was uploaded to FCC website. Declaration of Conformity Hereby, Nikon Corporation, declares that COOLPIX $6500 is in compliance with tile essential requirements and other relevant provisions of Directive 1999/5/EC. The declaration conformity may be consulted at http://im_ging.nikon.com/support/pdf/Dod_SdSOO.pd_...
- Page 17 3. ffyou have further questions, contact a Nikon service center or Nikon authorized service representative. Personal Information...
- Page 18 Step 3 Frame a Picture ........28 Introduction ........... Using the Zoom ............Read This First ............ii Step 4 Focus and Shoot ........30 About This Manual ..........The Shutter release Button ......31 information and Precautions ......v Step 5 Play Back Images .........
- Page 19 Features That Can Be Set with the MENU Playing Back Movies ........100 Button (Shooting Menu) ........ 67 Options Available in the Shooting Menu General Camera Setup ........................Features That Can Be Set with the MENU Features That Cannot Be Used Simultaneously ..........
- Page 20 Smile Timer ............Editing Features .........._'B16 Blink Proof ............Quick Effects ............. _'B18 Quick Retouch: Enhancing Contrast The Playback Menu ........_60 Saturation ............_'_20 Print Order (Creating a DPOF Print Order) .................. D Lighting: Enhancing Brightness Contrast .............. _'_20 Slide Show ............
- Page 21 Charge by Computer ........ _100 Blink Warning .........._102 Wi Fi Options .........._'_104 Eye Fi Upload .........._106 Reset All ............. Firmware Version ........_110 File and Folder Names ......_111 Optional Accessories ......_113 Error Messages ......... _114 Technical Notes Index...
- Page 23 Parts of the Camera This chapter describes the parts of the camera and explains information that is displayed in the monitor. The Camera Body ..............Attaching the Camera Strap ................... Using Menus (the MENU Button) ........... The Monitor ................Shooting Mode ........................
- Page 24 Lens cover closed...
- Page 25 release button Shutter ........30 Flash ................Zoom control ............Microphone (stereo) ......... 84, 96 W: wide angle ..........Lens T: telephoto ............_;;_: thumbnail playback ......81 Lens cover 0_: playback zoom .......... Speaker ............84, 100 help ..............Eyelet for camera strap ........
- Page 27 Charge lamp ........17, _101 Flash lamp ............... memory ca rd slot cover ......14, 15 (,1_ movie record) button ..... 96 Power connector cover (for connection with optional AC adapter) ...._ (shooting mode) button ....... 26 Battery latch ............I-_] (playback) button .......
- Page 28 Use the multi selector and _) button to navigate the menus. Press the MENUbutton. Press the multi selector • The menu is displayed. • The current menu icon is displayed in yellow, Menu icons Press • or • to select the 4"...
- Page 29 Press • or • to select a menu Press the _) button. option. • The settings for the option selected are displayed. Press • or • to select a Press the _) button. setting. • The setting you selected is applied. •...
- Page 30 The information that is displayed in the monitor during shooting and playback changes depending on the camera's settings and state of use. By default, information is displayed when the camera is first turned on and when you operate the camera, and turns off after a few seconds (when Photo info is set to Auto info in Monitor settings ([_ 104)),...
- Page 31 Shoodng mode ..........26, 27 Aperture value ............Macro mode ............Shutter speed ............Zoom indicator ..........29, 62 Print date ............... Focus indicator ............. Focus area (target finding AF) ..... 30, 68 AE/AF L indicator ..........Focus area (for manual or center) ....
- Page 32 Playback Mode -_,@_o]_ _ ---J _.-r- 26 %m 25 _ !0 11 22 ZZ1 I"TT13 L.._15 b I= 2f,_:; ®_I 2g,[.@51...
- Page 33 Date of recording ..........(a) Current image number/ total number of images ......32 Time of recording ..........(b) Movie length ..........Voice memo indicator ..... 84, _69 Internal memory indicator ......32 Album icon in favorite pictures mode Easy panorama playback guide ................
- Page 35 The Basics of Shooting Playback Preparation PreParation 1 !ns_rtthe Battery i_i_i:,iiiii:i.. _ ii_ii..iii_iiii.._i:ii_il i ii- .._i_iii-.-...i.._,_ii114 Prepa ration 2 Cha rg e the Battery _L:;iii_..ii.iii:_i._,_..iiiiiiiii,_iii_i:_i,.._ii!...i_i.iiiiiiiiii_ii.:i 16 Preparation 31nsert a Memory Card ::ii_ii_ii:_;::;,il;;_i._:_ii;::::::;_.-iii:-iiii-ii-ii-i.._iiii_iii 18 Preparation 4 Setting the Display Language, Date, and Time ::::::::::::::::::::::::::::::::: Shooting Step1 Turn the Camera On_..:::ii:iiii ii ii_ii-iii..i._iil.i:.i:iLi_ii_i,iii_i:_ i iiiiiii:-_--!iiiii.._il-24 Step2 Select a Sho0ting Mode:,iLii:_iiii_iiiiiii: i:iii!i.:iiii_ii:.iii..;;iZi.:ii:ii:ii:iil, i.:i::ii..::ii:ii:26...
- Page 36 Open the battery-chamber/memory card slot cover. Insert the included EN-EL19 battery Batterylatch (rechargeable Li-ion battery). • Use the battery to push the orange battery latch in the direction indicated by the arrow ((1)), and fully insert the battery ((_). • When the battery is inserted correctly, battery...
- Page 37 Removing Battery Turn the camera off and be sure that the power on ]amp and the ..monitor have turned off before opening the battery chamber/ memory card slot cover. To eject the battery, open the battery<hambe_/memory card sWot cover and slide the orange battery latch up in the direction indicated by the arrow (_1-).
- Page 38 Prepare the included Charging AC Adapter EH-70P, Ifa plug adapter _ is included with your camera, attach the plug adapter to the plug on the Charging AC Adapter. Push the plug adapter firmly until it is securely held in place. Once the two are connected, attempting to forcibly remove...
- Page 39 Disconnect the Charging AC Adapter from the electrical outlet then disconnect the USB cable. The Charge Lamp Status Description Flashes slowly (green) The battery is charging. The battery is not charging. When charging is complete, the charge lamp stops flashing green and turns off.
- Page 40 Be sure that the power-on lamp and the monitor are off and open the battery- :::_::::::::::::: I _D_I cham ber/me mo ry card slot cover. ::::::::::: ..• Be sure to turn off the camera before opening the cover. ___f_ ..
- Page 41 Formatting MemoryCards • The first time you insert a memory card that []as been user] in another device into this camera, sure to format it with this camera. • All data stored on a memory card is permanently deleted when the card is formatted. If there is data saved on the memory ca rd that you wish to keep, copy...
- Page 42 When the camera is turned on for the first time, the language selection screen and the date and time setting screen for the camera clock are displayed. Press the power switch to turn on the camera. • When the camera is turned on, the power on lamp (green)
- Page 43 Press_ori_toselectyourhome time zone and press the I_) • To enable daylight saving time, press •. • • button. When the daylight saving time function enabled, % is displayed above the map, To turn off the daylight saving time function, press V, sPress.
- Page 44 Changing Language Setting and the Date and Time Setting • You can change these settings using the Language and Time zone and date settings in the setup menu (_104). • You can enable or disable daylight saving time in the _ setup menu by selecting Time zone...
- Page 46 Press the power switch to turn on the camera. • The lens extends and the monitor turns on. I _. ,'),¢o_)!'_] Check the battery level indicator and the number of exposures remaining. Battery level indicator Battery level indicator ......Description The battery level is high, The battery...
- Page 47 Turning the Camera On and Off • When the camera is turned on, the power on lamp (green) will light and then file monitor will turn on (the power on lamp turns off when the monitor turns on). • To turn offthe camera, press the power...
- Page 48 1 Press the I_! button. • The shooting mode selection menu, which allows you to select the desired shooting mode, displayed, Press the multi selector • or • to select a shooting mode and press the @ button. • II_ (auto) mode is used in this example.
- Page 49 Available Shooting Modes Auto mode Used for general shooting. Settings can be adjusted in the shooting menu (_68) to suit the shooting conditions and the type of shot you want to capture. Scene mode _]_40 Camera settings are optimized according to the scene that you select.
- Page 50 Hold the camera steady. • Keep fingers, hair, the camera strap, and other objects away from the lens, flash, AF assist illuminator, microphone, speaker, • When taking images in portrait ("tall") orientation, turn camera so that the flash is above the lens.
- Page 51 When Using a Tripod • We recommend using a tripod to stabilize the camera in the following situations. When shooting in dim lighting or when the flash mode (_58) is set to (_1 (off) When using the telephoto setting • Set Vibration reduction to Off in the setup menu...
- Page 52 • When the can'_era detects the n'_a_n subject, itfocuses ([_31Press the).shutter-release button halfway ..on that subiect. When the subject is in focus, the focus area that is in focus lights in green (up to three areas). See "Using Target Finding AF"...
- Page 53 The Shutter-release Button To set focus and exposure (shutter speed and aperture value), )ress the shutter release button lightly until you feel a slight resistance. Focus and exposure remain locked while the shutter Press halfway release button is pressed halfway. While pressing the shutter...
- Page 54 Use the multi selector to select an image to Displaythe previousimage display. • Display the previous image: • or • _--_ • Display the subsequent image: • or • • Display the next image • Remove the memory card from the camera to play back images saved in the camera's internal...
- Page 55 Viewing Images • Images may be displayed briefly at low resolution immediately after switching to the next or previous image. • When images in which the face of a person (_73) or a pet (_48) was detected at the time of shooting are displayed in full frame playback...
- Page 56 Press the'_ button to delete the image _ ............... currently displayed in the monitor. Press the multi selector • or • to select the desired deletion method and press the I_) button. • Current image: Only the current image is deleted, •...
- Page 57 Operating the Erase Selected Images Screen Press the multi selector _ or _ to select an image to be deleted, and then press • to display 1_, • To undo the selection, press • to remove "_, • Rotate the zoom control (_3) to T (c{) to switch back to...
- Page 59 Shooting Features This chapter describes the camera's shooting modes and the features that are available when using each shooting mode. You can select shooting modes and adjust settings according to the shooting conditions and the kind of images you want to capture. (Auto) Mode ..............
- Page 60 Used for general shooting. Settings can be adjusted in the shooting menu ([]_68) to suit the shooting conditions and the type of shot you want to capture. Enter shooting mode -'_ I_1 (shooting mode) button -_ I_1 (auto) mode -'_ _) button •...
- Page 61 Using Quick Effects When in _ (auto) mode, you car] apply effects to images immediately after releasing tile shutter. • The edited image is saved as a separate file with a different name (_111). Press the _) button when the image is displayed after it is taken in _ (auto) mode.
- Page 62 When one of the following scenes is selected, camera settings are automatically optimized the selected scene. Enter shooting mode -'_ _ (shooting mode) button -_ _ (second icon from the top _) -_ • •, • --_ select a scene -_ _) button The icon of the last scene selected...
- Page 63 To View a Description (Help Display) of Each Scene Select the desired scene from the scene selection screen rotate the zoom control (a_]3) to i (_) to view a description of that scene. To return to the original screen, rotate the zoom control to T ((i_) again.
- Page 64 I_ Landscape • The focus area or focus indicator (_9) always glows green when the shutter release button pressed halfway. _: Sports • The camera focuses on the area in the center of the frame. • The camera focuses even when the shutter release button is not pressed halfway.
- Page 65 _ Party/indoor • The camera focuses on the a rea i nthe c enter of t he f rame. • To a void the e ffects of c a m era shake, hold the c amera steady. Vibration reduction to Off in the setup menu (_104) when...
- Page 66 []Night landscape • The focus area or focus indicator (_9) always glows green when the shutter release button pressed halfway, • From the screen displayed after [] Night landscape is selected, select Hand-held or Tripod, • Hand-held (default setting): Select this option to produce shots with reduced blurring...
- Page 67 _l!Food • Macro mode (_62) is enabled and the camera automatically zooms to the closest position which it can focus, • You can move the focus area. To move the focus area, press the _) button, and then press the multi selector •,...
- Page 68 [] Black and white copy • The camera focuses on the area in the center of the frame. • Use together with macro mode (_62) when shooting subjects that are close to the camera. 1_ Backlighting • The camera focuses on the area in the center of the frame.
- Page 69 l:::l _jgasv panorama • Allows you to take a panorama image simply by moving the camera in the desired direction. • The camera focuses on the area in the center of the frame when shooting starts. • From the screen displayed after I;;::3Easy panorama is selected, select the shooting...
- Page 70 Pet portrait • When you point the camera at a dog or cat, the camera detects the pet's face and focuses on it. By default, the shutter is automatically released when focus is acquired (pet portrait auto release). • From the screen displayed after _ Pet portrait is selected,...
- Page 71 3D photography • The camera captures one image for each eye to simulate a three dimensional image on a 3D compatible IV or monitor. • The focus area can be moved from the center of the frame to a different position.
- Page 72 Playing Back 3D Images • 3D images cannot be played back in 3D on the camera monitor, Only the left eye image of a 3D image is displayed during playback, • To view 3D images in 3D, a 3D compatible TV or monitor is required, Use a 3D compatible...
- Page 73 Effects can be applied to images during shooting. i_ -_ • "_ select an effect -_ _) button Enter shooting mode -'_ I_l (shooting mode) button -_ S0 (third icon from the top*) * The icon of the last effect selected is displayed.
- Page 74 • The camera focuses on the area in the center of the frame. • When Selective color or Cross process is selected, press tile multi selector • or • to select the desired color from i!f I_ :i_i_i_i_i: _{{i:ii _il II tile slider.
- Page 75 When the camera detects a smiling face, you can take an image automatically without pressing the shutter release button (smile timer). You can use the skin softening option to smooth the skin tones of human faces. Enter shooting mode -) I_I (shooting mode) button -) [] Smart portrait mode --) _) button Frame the image.
- Page 76 Auto Power Off in Smile Timer Mode When Smile timer is set to On (single), On (continuous), or On (BSS), the auto power function 104) is activated and the camera turns offwhen either of the situations indicated below persists and no other operations are performed.
- Page 77 Using Skin Softening When the shutter is released while using one of the shooting modes listed below, the camera detects up to three human faces and processes the image to soften facial skin tones. • Scene auto selector (_41), Portrait (_41), or Night portrait...
- Page 78 When shooting, the multi selector A, V, ,, and i_ can be used to set the following features. (flash mode) _.) (self-tim er), ,_f_ (exposure compensation) pet portrait auto release --_,0'_ O_K'_)_-- _ (macro mode) Available Features The features that are available vary with the shooting mode, as shown below.
- Page 79 Using the Flash (Flash Modes) You carl set the flash mode to match the shooting conditions. Press the multi selector • (_ flash mode). Press • or • to select the desired mode and press the I_) button. • See "Available Flash Modes"...
- Page 80 Available Flash Modes _ABT8Auto The flash fires automatically when lighting is dim, _l_l_ Auto with red-eye reduction Reduce red eye in portraits caused by the flash (_59). The flash will not fire, We recommend using a tripod to stabilize the camera when shooting in dark surroundings,...
- Page 81 Red-eye Reduction This camera uses Advanced Red-Eye Reduction (In Camera Red Eye Fix). If the camera detects red eye while saving an image, the affected area will be processed to reduce red eye before the image is saved. Note the following when shooting;...
- Page 82 Using the Self-timer Tile camera is equipped with a sel_timer that releases the shutter ten seconds or two seconds after you press the shutter release button. The self-timer is useful when you want be in the image you are taking, and when you want to avoid...
- Page 83 Press the shutter-release button rest of the way down. • The self timer starts, and the number of seconds remaining before the shutter is released is displayed in the monitor, The selfitimer lamp flashes while the timer is counting down. About one second before the shutter is released, the lamp stops flashing and glows steadily.
- Page 84 Using Macro Mode When using macro mode, tile camera carl focus on objects as close as approximately 8 cm (3.2 in.) from tile front of tile lens. This feature is useful when taking close up images of flowers and other small subjects.
- Page 85 Notes About Using Flash The flash may be unable to light the entire subject at distances of less than I m (3 ft 4 in,). Autofocus When using macro mode in the Iffl (auto) mode, you can _cus without pressing the shutter release button halfway...
- Page 86 Adjusting Brightness (Exposure Compensation) You carl adjust overall image brightness. Press the multi selector i_ (t_-M exposure compensation). Press • or • to select a compensation value. • To make the image brighter, apply positive (+) exposure compensation, • To make the image darker, apply negative (-) exposure compensation,...
- Page 87 Default Settings are described below. Default settings for each shooting mode ..... _o--_c,_,,:_,_ _7'_C_'t_'o Exposure Self-timer Macro Flash compensation (_s7) ! i ([_60) ([_62) I_1 (auto) SO (special effects) _NOI Off 3 (smart portrait) Scene (_41) Off s _AIJIO4 of P 1_ (_41) of P (_42)
- Page 88 3D(_4% 1 Cannot be used when Blink proof is set to On or when Smile timer is set to On (continuous) or On (BSS). 2 Can be set when Smile timer is set to Off. 3 The setting cannot be changed. 4 The camera automatically selects the flash mode...
- Page 89 The s ettings listed below can b e changed by pressing the MENU button during shooting (12_6). The settings that can be changed var, depending on the shootinq mode, as shown below. Auto mode Scene2 Special Smart effects portrait Image mode 1 White balance...
-
Page 90: Continuous Shooting
Options Available in the Shooting Menu Option Description Allows you to select the combination of image size and image _'_40 Image mode quality used when saving images The default setting is i_ 4608x3456 Allows you to adjust white balance to suit the light source in order to make the colors in images match... -
Page 91: Skin Softening
..,,_ _ ,_,,u_,,u_,,u_,,u_,,u_,,u_,,u_,,u_,,u_,,u_,,u_,,u_,_ ..Option Description Allows you to select how the camera focuses, When Single AF (default setting) is selected, focus is locked when the shutter button is pressed halfway, Autofocus mode When Full-time AF is selected, the camera focuses even when the shutter... - Page 92 Some functions cannot be used with other menu options..,u_,,u_,o_,,_ ......Restricted function Option Description When a setting other than Single is selected, Continuous (_68) the flash cannot be used. When Blink proof is set to On, the flash Flash mode cannot be used.
- Page 93 Restricted function Option Description When Pre-shooting cache, Continuous 120 fps, Continuous H: 60 fps, or Multi- ISO sensitivity Continuous (_68) shot 16 is selected, the ISO sensitivity setting is automaticaly specified according the brightness, When a setting other than Auto is selected AF area mode White...
- Page 94 Restricted function Option Description When a setting other than Single is selected, Continuous (_68) Motion detection is disabled When the ISO sensitivity is set to any setting ISO sensitivity (_68) other than Auto, Motion detection disabled. Motion detection When Subject tracking is selected, Motion AF area mode...
- Page 95 This camera uses autofocus to focus automatically when shooting. The focus area varies depending on the shooting mode. Here, we will explain how to use focus areas and focus lock. Using Face Detection In tile following shooting modes, the camera uses face detection to automatically...
- Page 96 • If the shutter button is pressed halfway when no faces are detected: In I_1 (auto) mode, the camera selects one or more of the nine focus areas containing the subject closest to the camera. When Scene auto selector is selected, the focus area changes depending on which scene the camera selects.
- Page 97 Using Target Finding When AF area mode (_68) in I_ (auto) mode is set to Target finding AF, tile camera focuses in the manner described below when you press the shutteerelease button halfway. • If the camera detects the main subject, it focuses on that subject.
- Page 98 Subjects Not Suitable for Autofocus Tile camera may not focus as expected in the following situations. In some rare cases, tile subject may not be in focus despite the fact that the focus area or the focus indicator glows green: •...
- Page 99 Focus Lock Youcarl use focus lockto focus on off center subjectswhen center is selected for AFarea mode. Thefollowing proceduredescribes how to use focus lock when using I_ (auto) mode with AFarea mode (_68) setto Center. Position the subject in the center of the frame. Press the shutter-release button •...
- Page 101 Playback Features This chapter describes how to select certain types of images for playback as well as some of the features available when playing back images. Playback Zoom ..............Thumbnail Display, Calendar Display ......Selecting Certain Types of Images for Playback .... 82 MENU Features That Can Be Set with the B utton (Playback...
- Page 102 Rotating the zoom control to 1" (% in full frame playback mode (_32) zooms in on the center of the image displayed in the monitor. Displayed area guide Image is displayed full-frame. Image is zoomed • You can change the zoom ratio by rotating the zoom control to W ([]) or 1"...
- Page 103 Rotating the zoom control to W (_;;_) in full-frame playback mode (_32) displays images as thumbnails. Full-frame Display Image Thumbnail Display Calendar Display (4, 9, and 16 images per screen) • You can view several images on one screen, making it easy to find the image you want. •...
- Page 104 You can change the pWayback mode according to the type of images you want to view. Available Playback Modes Play _[_J32 All images are played back. When you switch from shooting mode to playback mode, this mode is selected. Favorite pictures Play back images added to an album.
- Page 105 Switching Between Playback Modes When viewing images in full-frame playback mode or thumbnail playback mode, press the button. I_._ [L___.J .The p,ayback modese,ect,on menu,sd,sp,ayed from H wh_chyoucanselectoneoftheava,ableplaybackmodes. Pressthe multi selector • or • to select the desired mode and press the I_) button. •...
- Page 106 When viewing images in full frame playback mode or thumbnail playback mode, configure the menu operations listed below by pressing the MENUbutton (_1]]6). When using favorite pictures (El), auto sort (_), or list by date (_1) mode, the menu for the current playback mode...
-
Page 107: Choose Key Picture
Option Description Sequence display Allows you to select whether to display only the key pictu re for a sequence of images captured continuously or to display options sequence as individual images. Allows you to change the key picture for images captured Choose key picture... - Page 108 You can enhance your enjoyment of images and movies by connecting the camera to a TV, computer, or printer. • Before connecting the camera to an externaWdevice, make sure the remaining battery level is sufficient and turn the camera off. For information about the connection methods and subsequent operations, refer to the documentation...
- Page 109 Viewing images On a TV _'_26 Images and movies captured with the camera can be viewed on a TV. audio video cable to the TV's input]acks. Alternatively, connect a corn mercially Connection method: Connect the video and audio plugs of the included available HDMI cable (Type D) to the TV's HDMI input jack, Viewing...
- Page 110 An Internet connection is required. Compatible Operating Systems Windows Windows 8, Windows 7, Windows Vista, Windows XP Macintosh MacOS X10.6, 10.7, 10.8 Refer to the Nikon website for details on system requirements, including the latest information on operating system compatibility.
- Page 111 Start the computer and insert the ViewNX 2 CD-ROM into the CD-ROM drive. • Windows: if instructions for operating the CD ROM are displayed in the window, follow instructions to proceed to the installation window, • Mac OS: When the ViewNX 2 window is displayed, double...
- Page 112 The following software is installed: • ViewNX 2 (consisting of the three modules below) Nikon Transfer 2: For transferring images to the computer ViewNX 2: For viewing, editing, and printing transferred images Nikon Movie Editor: For basic editing of transferred movies •...
- Page 113 Transferring Images to the Computer Choose how images will be copied to the computer. Choose one of the following methods: • Direct USB connection: Turn the camera off and ensure that the memory card is inserted in the camera, Connect the camera to the computer using the included...
- Page 114 • Confirm that the name of the connected camera or removable disk is displayed as the "Source" on the "Options" title bar of Nikon Transfer 2 ((1)). • Click Start Transfer (_), • At default settings,...
- Page 115 Terminate the connection. • If the camera is connected to the computer, turn the camera offand disconnect the USB cable. If you are using a card reader or card slot, choose the appropriate option in the computer operating system to eject the removable disk corresponding to the memory card...
- Page 117 Recording and Playing Back Movies You can record movies by simply pressing the • (_1_1 movie record button. Recording Movies ............. MENU Features That Can Be Set with B utton (Movie Menu) ....... 99 Playing Back Movies ............
- Page 118 You can record movies by simply pressing the • movie record) button. Display the shooting screen. Movieoption • The icon for the selected movie option is displayed. default setting is _ 1080_ir/30p (_99). Movie recording time remaining _<. moviePress therecording. •...
- Page 119 Notes About Recording Images Saving Movies The indicator showing the number of exposures remaining or the indicator showing the maximum movie length flashes wMe images are being recorded orwMe a movie is being saved, Donotopen the battery-chamber/memory card slot cover or remove the battery or memory card while...
-
Page 120: The Movie Menu
_1_ Camera Temperature • The ca mera may become warm when shooting movies for an extended period of time or when the camera is used in a hot area. • If the inside of the camera becomes extremely hot when recording movies, the camera will automatically stop recording after ten seconds, The amount of time remaining until the camera stops recording... -
Page 121: Movie Options Open With Hs Footage
Features That Can Be Set with the MENU Button (Movie Menu) shooting menu MENU Enter mode b utton -_ _1_ icon -_ _) button The settings of the menu options listed below can be configured. Option Description Select the movie type. - Page 122 Press the [] button to enter playback mode. Movie options Movies are indicated by the movie options icon ([_._99). Press the _) button to play back movies. Deleting movies ,< To delete a movie, select the desired movie in full-frame phyback mode (_32) or thumbnail playback mode ([_1_81) and press the _ button (_34).
- Page 123 Functions Available During Playback Paused Playback controls are displayed at the top oflthe monitor. Press the multi selector • or • to select a control. The operations described below are available. Function Icon Description Rewind HoM down the _) button to rewind the movie.
-
Page 125: The Setup Menu
General Camera Setup This chapter describes the various settings that can be adjusted in the _ setup menu. • Forfurther details about each setting,referto "TheSetup Menu" in the ReferenceSection (_82). -
Page 126: Welcome Screen
(setup) menu Press the MENU button --_ _ icon --_ _]_ button The settings of the menu options listed below can be configured. ,u,_,uE Option Description Allows you to select whether or not the welcome screen is Welcome screen displayed when the camera is turned Time zone and date... -
Page 127: Charge By Computer
Option Description Format memory/ Allows you t o format the internal memory or the m emory Format card ca r d, Language Allows you to change the camera's display language, TV settings Allows you t o adjust TV connection settings. When set to Auto (default setting),... -
Page 129: Memory Cards
Using the Wi-Fi (Wireless LAN) Feature Functions that Can Be Performed Using Wi-Fi You carl perform the following functions if you install the dedicated software "Wireless Mobile Utility" on your smart device that runs on Android OS or iOS,and connect it to the camera. Take Photos You can display the shooting screen of the camera on your smart device and operate the camera by remote controk _... - Page 130 Use your smart device to connect to Google Play Store, App Store or other online apps marketplace and search for"Wireless Mobile Utility." • Check the user's manual provided with your smart device for further details. Check the description and other information and install the software.
- Page 131 menu options Press the MENUbutton -_ _ icon -_ Wi-Fi -_ _]_ button Press the multi selector to select the Wi-Fi network and press the I_) button. Select On and press the I_) button. • SSID and the password are displayed, •...
- Page 132 Set the Wi-Fi setting on the smart device to On. • Check the user's manual provided with your smart device for further details, • After the network name (SSID) that can be used for the smart device is displayed, select the SSID displayed on the camera •...
- Page 133 No reproduction in any form of this manual, in whole or in part (except for brief quotation in critical articles or reviews), may be made without written authorization from NIKON CORPORATION. NIKON CORPORATION 6MN09511-03 YP2L03(11) © 2013 Nikon Corporation...
Need help?
Do you have a question about the COOLPIX S6500 and is the answer not in the manual?
Questions and answers