Table of Contents
Advertisement
Advertisement
Table of Contents

Related Manuals for Craftsman 917.25891


Summary of Contents for Craftsman 917.25891
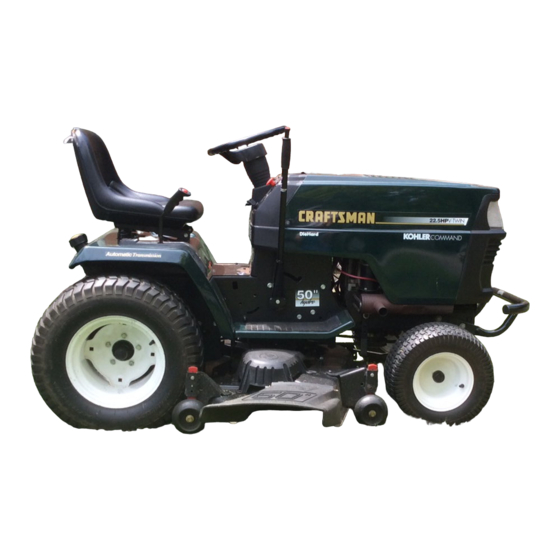
- Page 1 8E/AR8 ® MODEL NUMBER 917.25891 OWNER'S MANUAL o Assembly o Operation o Customer Responsibilities o Service and Adjustments Repair Parts CAUTION: Read and follow all safety rules and instructions before operating this equipment, FOR CONSUMER ASSISTANCE HOT LINE, CALL THIS TOLL FREE NUMBER: 1-800-659-5917...
- Page 2 SAFETY RULES Safe Operation Practices for Ride-On Mowers & IMPORTANT: THIS CUTTING MACHINE iS CAPABLE OF AMPUTATING HANDS AND FEET AND THROWING OBJECTS. FAILURE TO OBSERVE THE FOLLOWING SAFETY INSTRUCTIONS COULD RESULT IN SERIOUS lNJURY OR DEATH, GENERAL OPERATION III. CHILDREN •...
- Page 3 RUDING EQUIPMENT For two (2) years from the date of purchase, if this Craftsman Riding Equipment is maintained, lubricated and tuned up according to the instructions in the owner's manual, Sears will repair or replace, free of charge, any parts found to be defective in material or workmanship.
- Page 4 ,,,,ll,, u..i,,,, i i , TABLE OF CONTENTS SAFETY RULES ............MAINTENANCE SCHEDULE ........PRODUCT SPECIFICATIONS ........SERVICE AND ADJUSTMENTS ......21-27 CUSTOMER RESPONSIBILITIES ..... 3, 16-19 STORAGE ..............WARRANTY ..............TROUBLESHOOTING ..........29-30 TRACTOR ACCESSORIES ........5,15 REPAIR PARTS - TRACTOR .........
-
Page 5: Accessories
..i,, ...... AND ATTAOHMEHT$ AOOI$SOI!IS These accessories and attachments were available through most Sears retat outlets and service centers when the tractor was purchased. Most Sears stores can order these items for you when you provide the model number of your tractor. ENGINE MAINTENANCE GAS CAN... - Page 6 i, ,111 ... Parts Bag contents shown (4) Washers 3/8 x 3/4 x 14 Ga_ (4) Retainer Springs (4) Bracket_ (double toop_ IIIt I ('?1 _ [z . , Bolts . (4) Clevis Pins _ (4) Adjusting Bar (4) Shoulder Bolt (4) Wheels (12) CrownLock Nuts 3/16 x 8 (4) Loeknut...
- Page 7 ASSEMBLY Your new tractor has been assembled at the factory with the exception of those parts left unassembled for shipping purpose& To ensure safe and proper operation of your tractor all parts and hardware you assemble must be tightened securely° Use the correct tools as necessary to insure proper tightness,, TOOLS REQUIRED FOR ASSEMBLY...
- Page 8 ASSEMBLY n,,u i.,!_l ..Use terminal access door's for': CHECK TERE PRESSURE Inspection for secure connections (to tighten hard- The tires on your tractor' were overinflated at the factory for ware), shipping purposes. Correct tire pressure is important for Inspection for corrosion. best cutting performance.
- Page 9 , u,,,i.u .... i,,r ....i¸ ASSEMBLY ......i,,, ,..... INSTALL MOWER AND DRIVE BELT Place the suspension arms on inward pointing deck (See Figs. 5 and 7) pins, If necessary, rock and raise front of mower to atign deck pins with the holes in suspension arms, Be sure tractor is on level surface and mower suspension Retain with double loop retainer springs with loops...
- Page 10 i ¸ 1,1,,i iI,,i ..i,,,i,,,,,,,,,11,,,i,,,11,,,,11.,11 ..i ..L,_I_I ASSEMBLY , ,,, I ..,, i,, ,,,111,1,,,,i , , ,i,i]111 ...... ,/CHECKLIST BEFORE YOU OPERATE AND ENJOY YOUR NEW TRACTOR, WE WISH TO ASSURE THAT YOU RECEIVE THE BEST PERFORMANCE AND SA TISFA CTION FROM THIS QUALITY PRODUCT_ PLEASE REVIEW THE FOLLOWING CHECKLIST:...
- Page 11 OPERATmON These symbols may appear on your tractor or in literature supplied with the product. Learn and understand their meaning. ÷ BATTERY CAUTION OR REVERSE FORWARD FAST SLOW WARNING ENGINE ON ENGINE OFF OIL PRESSURE CLUTCH LIGHTS ON LIGHTS OFF MOWER HEIGHT DIFFERENTIAL PARKING BRAKE...
- Page 12 OPERATION KNOW YOUR TRACTOR READ THiS OWNER'S MANUAL SAFETY RULES BEFORE OPERATING YOUR TRACTOR. Compare the iitustrations with your tractor to familiarize yourself with the location of various controls and adjustments° Save this manual for future reference° AMMETER ATTACHM ENT LIGHT SWITCH CLUTCH SWITCH LIFT LEVER...
- Page 13 OPERATION T"e operation of any tractor can result in foreign objects throt_n into the eyes, which canresult in severe eye damage. Always wear safety glasses or eye shields while operating your tractor or performing any adjustments or repairs. We recommend a wide vision safety mask over the spectacles or standard safety glasses.
- Page 14 TO ADJUST GAUGE WHEELS (See Fig. 8A) TO OPERATE ON HILLS Gauge wheels are properly adjusted when they are slightly "_C-AuTIO---'N:Do not drive up or down'_ offthe ground when mower is at the desired cutting height in operating position. Gauge wheels then keep the deck in hills with slopes greater than 15 °...
-
Page 15: Carburetor
OPERATRON BEFORE STARTWNG THE ENGBNE TO START ENGINE (See Fig, 6) When starting the engine for the first time or if the engine CHECK ENGINE OIL LEVEL (See Fig. 10) has run out of fuel, it will take extra cranking time to move fuel from the tank to the engine, •... - Page 16 OPERATION MOWBNG TgPS PURGE TRANSMgSSION Tire chains cannot be used when the mower housing is attached to tractor. freewheel lever while the engine is run, 1-'_' _ CAUTi'ON: Never engage or disengage rang Mower' should be properly leveled for best rnow!ng performance.
- Page 17 CUSTOMER RESPONS!!BQL TIES F, LL ,N OATES ASYOU COMPLETE ..Check Brake Operation Check Tire Pressure e" Check for Loose Fasteners Sharpe'rdRePia'ce Mowe; Bi'ades ..... 6/'4 Lubrication Chart Check Battery LeveVRecharge _ ..Clean Battery and Termlnais Cheek Transax'le Cooling ..
- Page 18 CUSTOM ESPONS B!L TRACTOR TO SHARPEN BLADE (See Fig. 13) Care should be taken to keep the blade balanced. Always observe safety rules when performing any mainte- unbalanced blade will cause excessive vibration and even- nanceo tual damage to mower and engine. BRAKE OPERATION The blade can be sharpened with a file or on a grinding...
- Page 19 , ,i,,i,, ..CUSTOMER RESPONSIBILITIES TO CHANGE ENGINE OIL (See Figs, 14 and t5) TRANSAXLE COOUNG Determine temperature range expected before oil change, The fan and cooling fins of transmission should be kept NI oil must meet API service classification SF, SG or SH clean to assure proper cooling_ Be sure tractor is on level surface..
- Page 20 CUSTOMER RSSPONSnBJLJTUES CLEAN AIR INTAKE/COOLING AREAS ENGINE OBL FILTER To insure proper cooling, make sure the grass screen, Replace the engine oil filter every season or every other oil change if the tractor is used more than 100 hours in one cooling fins, and other external surfaces of the engine are kept clean at all times.
-
Page 21: Clutch Pulley
SERVICE A ADJUSTMENTS ,= ..CAUTION: BEFORE PERFORNING ANY SERVICE OR ADJUSTIVlENTS: Depress clutch/brake pedal fully and set parking brake. Place attachment clutch in "DISENGAGED" position. Place motion control lever in neutral (N) position. Turn ignition key "OFF" end remove key. Make sure the blades and all moving parts have completely stopped. - Page 22 ADJUSTMENTS $ERVUOB AND ..,i........i, i,,,i,,,,i,, i,,i,,, iii TO REPLACE iVIOWER DRIVE BELT FRONT-TO-BACK ADJUSTMENT (See Figs. 20 and 21) - IMPORTANT: DECK MUST BE LEVEL S1DE-TO-S{DEo IF MOWER DRIVE BELT REMOVAL (See Fig. 22) - THE FOLLOWING FRONT-TO-BACK ADJUSTMENT...
- Page 23 i ,,,,i,,,, iii..;;;,_ ,,,,,, ,,,. ,.., ..,,i ..ADJUSTMENTS SERVmCE AND i1,,,,,11 ......i ,i,,,,,i,, NOTE: After installing a new electric clutch, run tractor at TO REPLACE MOWER BLADE DRIVE BELT full throttle and engage and disengage electric clutch 10 (See Fig.
- Page 24 TO ADJUST MOTION CONTROL LEVER TO REPLACE MOTION DRIVE BELT (See Fig. 26) (See Fig. 27) Park the tractor on level surface° Engage parking brake° The motion control lever has been preset at the factory and For ease of service there isa belt installation guide decal on adjustment should not be necessary.
- Page 25 SERVICE AN ADJUSTMENTS FRONT WHEEL TOE-IN ADJUSTMENT Front wheel toe-in is required for proper steering operation, RETAINING Toe-in was set at the factory and adjustment should not be RING necessary. If parts in the front axle or steering mechanism have been replaced or damaged, check toe-in and adjust AXLE if necessary.
- Page 26 TO REMOVE HOOD AND GRILL ASSEMBLY TO REPLACE HEADLIGHT BULB (See Fig. 33) ° Raise hood° Raise hood. Pull bulb holder out of the hole in the backside of the grill° Unsnap headlight wire connector. Replace bulb in holder and push bulb holder securely Standinfrontoftractor.
-
Page 27: Throttle Control Cable
SERV!CE AND ADJUSTMENTS ,, ,, ,,,,,, ,,, .." i ......=,, ..TO ADJUST CARBURETOR (See Fig. 34) iDLE FUEL ADJUSTING IDLE SPEED The carburetor has been present at the factory and adjust- NEEDLE merit should not be necessary. However, minor adjustment SCREW may be required to compensate for differences... -
Page 28: Cleaning
STORAGE ENGINE Immediately prepare your tractor for storage at the end of the season or if the tractor will not be used for 30 days or nore_ FUEL SYSTEM IMPORTANT: IT IS IMPORTANT TO PREVENT GUM & CAUTION: Never store the tractor with DEPOSITS FROM FORMING IN ESSENTIAL... -
Page 29: Air Screen 1
,,,, ,i,,,i ,,u==, ..,, ...... TIROUBLESHOOT NG POUNTS i ,,_11 CORRECTION PROBLEM CAUSE Fill fuet tank Out of fuet, Will not start See "TO START ENGINE" in Operation section Engine not "CHOKED" properly Engine flooded Waft several minutes before attempting to start Bad spark plug Replace spark plug, Clean!replace... -
Page 30: Headlights
TROUBLESHOOTING POINTS ............u.u. =.,u ..PROBLEM CAUSE CORRECTION ,.,,,,., .,..._ Engine continues to run Faulty operator-safety presence control system. Check wiring, switches and connections tf not when operator leaves seat corrected, contact an authorized service center:/ with a_achment clutch department engaged...
Need help?
Do you have a question about the 917.25891 and is the answer not in the manual?
Questions and answers