Table of Contents
Advertisement
Available languages
Available languages
Owner's Manual
CRAFTSMAN °
ROTARY
160cc Honda Engine
Power-Propelled
21" Multi-Cut
Model No.
917.371813
• Espa_ol, p. 21
CAUTION'.
Read and follow all
Safety Rules and Instructions
before operating this equipment
Sears, Roebuck and Co., Hoffman Estates, IL 60179
Visit our Craftsman website: www.sears.com/craftsman
U.S.A.
Advertisement
Table of Contents

Related Manuals for Craftsman 917.371813


Summary of Contents for Craftsman 917.371813
- Page 1 160cc Honda Engine Power-Propelled 21" Multi-Cut Model No. 917.371813 • Espa_ol, p. 21 CAUTION'. Read and follow all Safety Rules and Instructions before operating this equipment U.S.A. Sears, Roebuck and Co., Hoffman Estates, IL 60179 Visit our Craftsman website: www.sears.com/craftsman...
- Page 2 Lawn Mower fails due to manufacturer defects in material or workmanship within two years from the date of purchase, return it to any Sears store, Parts & Repair Center or other Craftsman outlet for free repair (or replacement if repair proves impossible),...
-
Page 3: Operation
IoGENERAL OPERATION Ii. SLOPE OPERATION • Read, understand,and follow all Slopes are a major factor related to slip & instructions on the machine and in the fall accidents which can result in severe manual(s) before starting. Be thoroughly injury. All slopes require extra caution. -
Page 4: General Service
• Remove gas-powered equipmentfrom • Never tamperwith safetydevices. Check the truck or trailer and refuel it on the their proper operation regularly. ground. If this is not possible, then • Keep machine free of grass, leaves, or refuel such equipmentwith a portable otherdebrisbuild-up.Cleanoil orfuel spill- container, rather than from a gasoline age.Allow machineto coolbeforestoring. -
Page 5: Maintenance
Repair Protection Agreements Congratulations on making a smart pur- • Fast help by phone- phone sup- chase. Your new Craftsman@ product port from a Sears representative designed and manufactured for years products requiring in-home repair, plus dependable operation. But like all prod-... -
Page 6: How To Set Up Your Lawn Mower
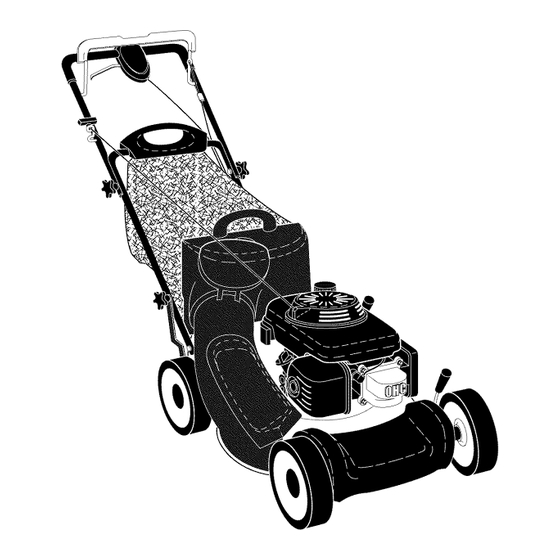
Read these instructions and this manual Operator MOWING its entirety before you attempt to assemble presence POSITION control bar or operate your new lawn mower. IMPORTANT: This lawn mower is shipped WITHOUT OIL OR GASOLINE in the engine. Your new lawn mower has been assem- LIFT Upper... - Page 7 KNOW YOUR LAWN MOWER READ THIS OWNER'S MANUAL AND ALL SAFETY RULES BEFORE OPERATING YOUR LAWN MOWER. Compare the illustrations with your lawn mower to familiarize yourself with the location of various controls and adjustments. Save this manual future reference. These symbols may appear...
- Page 8 DRIVE CONTROL ADJUSTMENT The operation of any lawn mower can result in foreign Over time, the drive control system may be- objectsthrowninto the eyes, come "loose", resulting in decreased speed, which can result in severe There is a turnbuckle on the underside of the eye damage, Always wear drive control...
- Page 9 SIDE DISCHARGING • Grass catcher and discharge chute must be removed. • Open mulcher door and install front of side discharge deflector beneath door and position rear over threaded stud. • Secure rear of side discharge deflector to lawn mower housing with knob.
-
Page 10: To Empty Grass Catcher
TO EMPTY GRASS CATCHER You recieve a container of oil with the unit. Slowly pour the entire container Open round door of discharge chute down the oil fill spout into the engine. move starter rope out and away from Insert and tighten oil fill cap/dipstick. -
Page 11: To Start Engine
TO START ENGINE Keep top of engine around starter clear and clean of grass clippings and chaff, NOTE: Due to protectivecoatings on the This will help engine air flow and extend engine, a small amount of smoke may be engine life, presentduring the initial use of the product and should be considered normal,... -
Page 12: Maintenance Schedule
MAINTENANCE BEFORE AFTER EVERY EVERY EVERY EACH EACH 25 HOURS BEFORE SCHEDULE HOURS OR SEASON HOURS STORAGE Check for Loose Fasteners Clean / Inspect Grass Catcher Check Tires Check Drive Wheels Clean Lawn Mower ..Clean under Drive Cover *** Check Drive Belt / Pulleys Check / Sharpen... - Page 13 LAWN MOWER Trailing Always observe safety rules when per- Blade ada forming any maintenance. TIRES • Keep tires free of gasoline, oil, or insect control chemicals which can harm rubber. • Avoid stumps, stones, deep ruts, sharp objects and other hazards that may cause...
- Page 14 ENGINE Wipe off any spilled oil from lawn mower or side of engine. Maintenance,repair,or replacementof Fill engine with oil. Slowly pour oil the emission control devices and systems, down the oil fill spout into the engine. which are being done at the customersex- Wait one minute to allow oil to settle.
- Page 15 CLEANING iMPORTANT: For best performance, keep mower housing free of built-grass and trash. Clean the underside of your mower after each use. _kCAUTION: Disconnect spark plug wire from spark plug and place wire where cannot come in contact with plug. •...
- Page 16 _I:_WARNING: To avoid serious injury, before Return spring Drive cable anchor performing any service and adjustments: Drive belt Release control bar and stop engine. Make sure the blade and all moving parts have completely stopped. Disconnect spark plug wire from spark plug and place wire where it cannot come...
- Page 17 TO REPLACE DRIVE BELT TO ADJUST HANDLE Place new drive belt in the belt retainer The handle on your lawn mower of the debris shield. Be sure to route multiple height positions - adjust to height belt between belt keepers and through that suits you.
- Page 18 IMPORTANT: Never tamper with the the engine-governed high speed needs engine governor, which is factory adjusting, contact a Sears or other for proper engine speed. Overspeeding qualified service center, which has proper the engine above the factory high speed equipment and experience to make setting...
-
Page 19: Engine Oil
3. Pull starter handle slowly a few times • Never use engine or carburetor cleaner to distribute oil. products in the fuel tank or permanent Replace with new spark plug, damage may occur. • Use fresh fuel next season. NOTE: Fuel stabilizer is an acceptable OTHER... - Page 20 TROUBLESHOOTING - See appropriate section in manual unless directed to a Sears Parts & Repair Center. CAUSE CORRECTION PROBLEM 1. Raise cutting height. Loss of power Rear of mower housing blade dragging in grass. Cutting too much grass. Raise cutting height.
- Page 21 Sears, al Centro de Repuestos y Reparaci6n, o a otro comercio donde se vendan los equipos Craftsman, a efectos de que se la reparen sin costo (o bien se la reemplacen, en caso que no sea posible repararla).
- Page 22 I. OPERACION II. OPERAClON SOBRE LAS CUESTAS Los accidentes ocurren con mas frecuencia , Antes de empezar, debe familiarizarse las cuestas. Estos accidentes ocurren debido a completamente con los controles y el uso correcto de la maquina. Para esto, debe leer resbaladas o caidas, las cuales pueden resultar y comprender...
- Page 23 , Nunca Ilenar contenedores en un vehiculo, en Nunca manipule de forma indebida los un cami6n o caravana con un forro de plastico. dispositivos de seguridad. Controle regular- mente su funcionamiento correcto. Colocar siempre los contenedores en el suelo lejos de su vehiculo antes de Ilenar. Mantenga la maquina libre de hierba, hojas , Quitar equipos que funcionan con gasolina u otras acumulaciones...
-
Page 24: Mantenimiento
Reparaci6n Congratulaciones por su buena compra. Ayuda rapida por telefono - soporte tele- nuevo producto Craftsman® esta diseSado f6nico por parte de un representento Sears y fabricado para funcionar de modo fiable pot sobre productos que requieren un arreglo en muchos aSos. - Page 25 Lea estas instrucciones y este manual comple- Barra POSICION tamente antes de tratar de montar u operar su que sxige la PARA segadora nueva. presencia del , SEGAR IMPORTANTE: Este cortacesped viene SIN operador ACEITE O GASOLINA en el motor. //// Su segadora nueva ha sido montada en la fabrica con la excepci6n de aquellas partes que...
- Page 26 FAMILIARICESE CON SU SEGADORA LEA ESTE MANUAL DEL DUENO Y LAS REGLAS DE SEGURIDAD ANTES DE OPARAR SU SEGADORA. Compare las ilustraciones con su segadora para familiarizarse con la ubicaci6n de los diversos controles y ajustes. Guarde este manual para referencia en el futuro. Estos s[mbolos pueden apareser sobre su segadora...
- Page 27 AJUSTE DEL MANDO La operaci6n de cualquier Ocasionalmente, el sistema de mando puede segadora puede hacer que "aflojarse", provocando una disminuci6n de la salten objetos extra_os dentro de velocidad. Hay un torniquete en la parte trasera sus ojos, Io que puede producir de la sede del mando para apretar la tensi6n da_os graves en estos.
- Page 28 SEGADORAS CON DESCARGA LATERAL LengL_etas del tubo de descarga Hay que quitar el dep6sito de hierba y el /" canal de eyecci6n. Abrir la puerta de la puerta del acabador e instalar la parte delantera del deflector de descarga lateral debajo la puerta y colocar el parte trasero en la esparrago fileteado.
- Page 29 PARA VACIAREL RECOGEDOR D EC_:SPED Usted recibe un envase de aceite con la 1. Abiertola puertaredonda delcanal i ncli- unidad. Vierta lentamente el envase entero nadode la descarga paramoverla cuerda de aceite en el tubo de relleno del motor. delarrancador h acia fueray lejosdesdeel lnserte y apriete la varilla medidora de aceite.
- Page 30 PARA PARAR EL MOTOR Los poros en los recogedores de cesped de tela pueden Ilenarse con mugre y polvo con ._ Para parar el motor y si no intenta ponerlo en marcha de nuevo, alivie la barra de control el uso y los recogedores recaudaran menos que exige la presencia del operador.
-
Page 31: Programa De Mantenimiento
PROGRAMA ANTES DESPUES CADA CADA CADA ANTESDEL MANTENIMIENTO DECAOAOECAOAI0 2 .ORASO 100 ALMACE- HORAS TEMPORADA HORAS NAMIENTO Revisar si hay Sujetadores Suettos Limpiar/lnspeccionar el Recogedor de Cesped * Controlar los Neumaticos Controtar las Ruedas Motrices *** Limpiar la Segadora ..Limpiar debajo la CubieFta de la Transmisi6n Revisar las Correas y las Poleas Impulsadas... - Page 32 Borde de SEGADORA Adaptador salida Siempre observe las reglas de seguridad cu- de la cuchilla ando haga el mantenimiento. LLANTAS , Mantenga las Ilantas sin gasolina, aceite o substancias quimicas para control de insec- tos que pueden dafiar la goma. , Evite los tocones, las piedras, las grietas pro- fundas, los objetos afilados y otros peligros Arandela...
- Page 33 MOTOR Limpie todo el aceite derramado en la sega- dora yen el lado del motor. El mantenimiento, la reparaci6n, o el reemplazo Rellene el motor con aceite. Vierta lenta- de cualquier dispositivos o sistemas del control mente el aceite en el tubo de relleno del de la emisi6n, los cuales sean hechos al costo motor.
- Page 34 LIMPIEZA IMPORTANTE: Para obtener el mejor rendimineto, mantenga la caja de la segadora sin acumulacion de cesped y basura. Limpie la parte de abajo de su segadora despues de cada uso. Oreja _PRECAUClON: Desconecte el alambre de la bujia y p6ngalo en donde no pueda entrar en contacto con esta.
- Page 35 _ADVERTENCIA: Para evitar lesi6nes serias, Cable de mando ancla El resorte antes de dar calquier servico o de hacer Correa de mando de vuelta / Orificio en el ajustes: bastidor Suelte la barra de control y pare el motor. AsegOrese que la cuchilla y que todas las partes movibles se hayan detenido comple- tamente.
- Page 36 PARA CAMBIAR LA CORREA DEIMPULSION 10. Volver a colocar el cable del mando y el re- 1. Colocar l a nuevacorreade mando enel sorte de vuelta en el conjunto de la palanca estribodela pantalla delosescombros. de transmisi6n, luego fijar el cable de mando Asegurarse d e colocar la correaentrelos al ancla.
- Page 37 CARBUP, ADOR para la velocidad del motor adecuada. Puede Su carburadorno es ajustable. Si su motor no ser peligroso hacer funcionar el motor a una esta funcionando en forma adecuada debido velocidad por sobre el ajuste de alta velocidad a problemas que se sospecha vienen del carbu- de la fabrica.
- Page 38 AVlSO: El estabilizador de combustible es una Tire la manilla de arranque lentamente unas alternativa aceptable para reducir a un minimo cuantas veces para distribuir el aceite. la formaci6n de dep6sitos de goma en el com- Vuelva a montar la nueva bujia. bustible durante el periodo de almacenamiento.
- Page 39 SOLUCION DE PROBLEMAS - Yea la secci6n apropiada en el manual amenos est_ dirigido a un centro de servico Sears. PROBLEMA CAUSA CORRECCION Falta de Eleve la altura de corte. Cuchilla desgastada, doblada fuerza o suelta. Eleve la altura de corte. AItura de las ruedas dispareja.
- Page 40 CRAFTSMAN ROTARY LAWN MOWER - - MODEL NUMBER 917.371813...
- Page 41 CRAFTSMAN ROTARY LAWN MOWER - - MODEL NUMBER 917.371813 PART PART PART DESCRIPTION DESCRIPTION DESCRIPTION 188505X4!8 Handle, Grassbag, Rear 191730 Nut, Hex, Flangelock 1/4-20 86899X004 Bracket, Upstop Nut, Hex 1/4-20 65322 Hairpin Cotter 183445 Rod, Hinge 132004 Rope Guide 183483...
- Page 43 CRAFTSMAN ROTARY LAWN MOWER - - MODEL NUMBER 917.371813 PART PART DESCRiPTiON DESCRiPTiON Idler Arm !96785 Drive Control Assembly (Includes Cable) 408004X004 406260X428 Cover, Drive Control, Top 166043 Pulley, Idler Bolt, Hex Head, Shoulder 5/16-18 x 1/2 187353 Pulley, Drive Control...
- Page 44 CRAFTSMAN ROTARY LAWN MOWER - - MODEL NUMBER 917.371812 GEAR CASE ASSEMBLY - - PART NUMBER 408029 PART PART DESCRiPTiON DESCRiPTiON 412736 Case, Upper 412746 Pin, Output Shaft 413269 Shaft, Output, Long 412739 Fixed Dog Clutch, LH 183508 Seal, Output Shaft...
- Page 45 SERVICE NOTES...
- Page 46 HONDA 4-CYCLE ENGINE MODEL NUMBER GCV=160=LAS3A LABEL CAMSHAFT PULLEY FAN COVER CARBURETOR RECOIL STARTER CLEANER...
- Page 47 HONDA 4=CYCLE ENGINE MODEL NUMBER GCV=160=LAS3A LABELS CAMSHAFT PULLEY PART PART DESCRIPTION DESCRIPTION 7049679 8311029 Label, Warning Pulley, Camshaft 7400187 Mark, Choke Indication 5580063 Shaft, Cam Pulley 7058985 Belt, Timing (84HU7 G200) 7526122 Rocker Arm, Intake Valve CHOKE 7526130 Rocker Arm, Exhaust Valve 5580105...
- Page 48 HONDA 4-CYCLE ENGINE MODEL NUMBER GCV-160-LAS3A CYLINDER BARREL PISTON CONNECTING ROD l CRANKSHAFT OIL PAN i ! ,, =_! _.z_ l_m__!.] tilk\ .--._ I MUFFLER...
- Page 49 HONDA 4=CYCLE ENGINE MODEL NUMBER GCV=160=LAS3A FLYWHEEL CRANKSHAFT PART PART DESCRIPTION DESCRiPTiON 1240845 Grommet A, Rear Cover 5664495 Crankshaft Comp. 0348433 5581012 Washer, Thrust Key, Special, Woodruff #25 x 18 5580659 Coil Assembly, Ignition 5580667 Flywheel Assembly 6869630 OIL PAN Arm, Governor 7229859 Rod, Governor...
- Page 50 SERVICE NOTES...
- Page 51 SERVICE NOTES...
-
Page 52: Need More Help
NEED MORE HELP? You'[[ find the a_.swer a_d :more on ma_agemyhom_,oCOm - for free! o Find this and a[[ your other product manuals online. o Get answers from our team of home experts. o Get a personalized maintenance plan for your home. o Find information and too[s to help with home projects.
Need help?
Do you have a question about the 917.371813 and is the answer not in the manual?
Questions and answers