Advertisement
Quick Links
Owner's Manual
iP
R
0
F E S
S
I
0
N A
L I
7-1/4 in. PROFESSIONAL
CIRCULAR SAW
Double Insulated
Model No.
315.271 O80
Save this manual
for
future
reference.
CAUTION:
Read and follow
all Safety
Rules and Operating
Instructions
before
first use of
this product.
Customer
Help Line: 1-800-932-3188
• Safety
• Features
• Assembly
• Operation
• Maintenance
• Parts List
Sears,
Roebuck
and Co., Hoffman
Estates,
IL 60179
USA
Visit the Craftsman
web page: www.sears.com/craftsman
972000-825
7-01
Advertisement

Subscribe to Our Youtube Channel
Related Manuals for Craftsman 315.271080


Summary of Contents for Craftsman 315.271080
- Page 1 Read and follow • Operation all Safety Rules and Operating Instructions before first use of • Maintenance this product. • Parts List Customer Help Line: 1-800-932-3188 Sears, Roebuck and Co., Hoffman Estates, IL 60179 Visit the Craftsman web page: www.sears.com/craftsman 972000-825 7-01...
- Page 2 TABLE OF CONTENTS • Table of Contents ............................... • General Safety Rules ............................. • Specific Safety Rules and/or Symbols ......................• Features ................................. • Assembly ................................ • Operation ..............................10-17 • Maintenance ............................... 17-18 • Accessories ..............................• Exploded View and Repair Parts List ......................20-21 •...
- Page 3 • Check for misalignment or binding of moving Tool Use and Care parts, breakage of parts, and any other condi- • Use clamps or another practical way to secure tion that may affect the tool's operation. If and support the workpiece to a stable plat- damaged, have the tool serviced before using.
- Page 4 Specific Safety Rules for Circular Saws causing the blade to climb out of the kerr and jump back toward the operator. (continued) • Kickback is the result of tool misuse and/or • Always observe that the lower guard is incorrect operating procedures or conditions...
- Page 5 Hold tool by insulated gripping surfaces when performing an operation where the cutting tool may con- tact hidden wiring or its cord. Contact with a "live" wire will make exposed metal parts of the tool "live" and shock the operator. Make sure your extension cord is in good Additional Rules For Safe Operation...
- Page 6 SYMBOLS SYMBOL NAME DESIGNATION/EXPLANATION Volts Voltage Amperes Current Hertz Frequency (cycles per second) Minutes Time ALternating Current Type or a characteristic of current Direct Current Type or a characteristic of current No Load Speed Rotational speed, at no load Class II Construction Designates Double Insulated Construction Tools .../rain...
- Page 7 Your circular saw has been shipped completely WARNING: If any parts are missing, do not assembled except for the blade. Inspect it carefully to operate this tool until the missing parts are make sure no breakage or damage has occurred replaced.
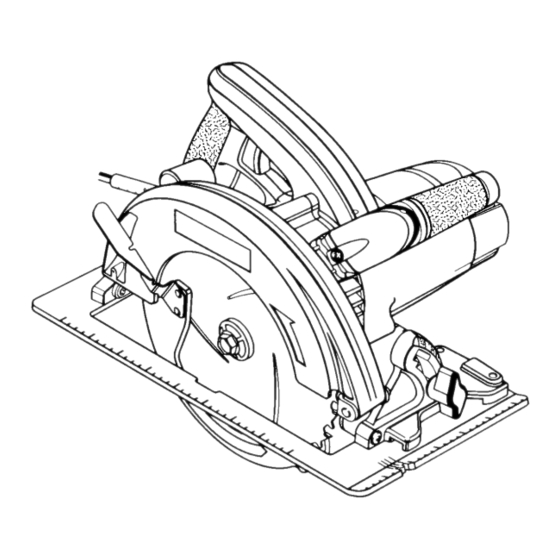
- Page 8 SWITCH TRIGGER UPPER LOWERBLADE BLADEGUARD GUARDHANDLE DUSTCHUTE BEVELCUT ADJUSTMENT (BEVELADJUSTMENTKNOB) SPINDLE LOCKBU'I'FON BASE ASSEMBLY LOWER BLADEGUARD BLADE DEPTHOF CUTSCALE BLADEWRENCH DEPTHOF CUTADJUSTMENT Fig. 1 (DEPTHADJUSTMENTKNOB) ,_k WARNING: A 7-1/4 in. blade is the maximum WARNING: Your saw should never be blade capacity of your saw.
- Page 9 • Replace "D" washer and spring washer. TO ASSEMBLE OR REMOVE BLADE Note: "Cupped" side of spring washer goes See Figures 2, 3, and 4. against "D" washer. See Figure 3. • Unplug your saw. OUTERBLADEWASHER("D"WASHER) ,_k WARNING: Failure to unplug your saw could result in accidental starting causing possible serious personal injury.
- Page 10 KICKBACK SAW BLADES See Figure 6. The best of saw blades will not cut efficiently if they are not kept clean, sharp, and properly set. Using a dull blade will place a heavy load on your saw and increase the danger of kickback. Keep extra blades on hand, so that sharp blades are always available.
- Page 11 TO LESSEN THE CHANCE OF KICKBACK: • When making a cut use steady, even pressure. Never force cuts. • Always keep the correct blade depth setting - the • Do not cut warped or wet lumber. correct blade depth setting for all cuts should not exceed 1/4 inch below the material to be cut.
- Page 12 TO HELP MAINTAIN CONTROL: STARTING A CUT • Always support your workpiece near the cut. Know the right way to use your saw. See Figure 1 1. • Support your workpiece so the cut will be on your right. • Clamp your workpiece so it will not move during the cut.
- Page 13 Hold your saw firmly with both hands. CAUTION: When lifting your saw from the See Figure 14. workpiece, the blade is exposed on the underside of your saw until the lower blade guard closes. Make sure lower guard is closed before setting your saw down on work surface.
- Page 14 TO BEVEL CUT When making a bevel cut hold your saw firmly with both hands as shown in Figure 17. The angle of cut of your saw may be adjusted to any Rest the front edge of the base on the workpiece. desired setting between zero and 51.5 °...
- Page 15 POSITIVE O° BEVEL STOP TO ADJUST See Figure 18. • Unplugyoursaw. BEVEL WARNING: Failure to unplug your saw could ADJUSTMENT result in accidental starting causing possible KNOB serious personal injury. • Loosen bevel adjustment knob. • Using hex key, turn setscrew and adjust base until square with saw blade.
- Page 16 TO POCKET C-clamps, firmly clamp a straight edge to the workpiece and guide the saw along the straight edge See Figure 20. to achieve a straight rip cut. Do not bind the blade in the cut. If using the rip guide provided, see the LOWER following instructions and Figure 22.
- Page 17 UPPER DUST NOZZLE BLADEGUARD See Figure 23. Dust nozzle kit, part no. 982829-001, is packed with your saw. The dust nozzle directs the flow of dust and chips away from the operator. As shown in Figure 23, the dust nozzle fits over the dust chute which is located on the upper blade guard.
- Page 18 WARNING: The use of attachments or accessories not listed might be hazardous. WARRANTY FULL ONE YEAR WARRANTY ON CRAFTSMAN PROFESSIONAL CIRCULAR SAW If this I'I_I_FI'$MFIlt Circular Saw fails due to a defect in material or workmanship within one year from the date pf purchase, Sears will repair it, free of charge.
- Page 20 CRAFTSMAN CIRCULAR SAW - MODEL NUMBER 315.271080 SEE NOTE "A" PAGE 21 < 9 10...
- Page 21 CRAFTSMAN CIRCULAR - MODEL NUMBER 315.271080 The model number will be found on a plate attached to the motor housing. Always mention the model number in all correspondence regarding your CIRCULAR SAW or when ordering repair parts. BACK PAGE PARTS...
- Page 22 G ffi f @ . i:your home or ours! For repair of major brand appliances in your own home... no matter who made it, no matter who sold it! 1-800-4-MY-HOM EsM Anyt,me, day or night (1-800-469-4663) www.sears.com To bring in products such as vacuums, lawn equipment and electronics for repair, call for the location of your nearest Sears Parts &...
Need help?
Do you have a question about the 315.271080 and is the answer not in the manual?
Questions and answers