HP NetStorage 6000 Desktop Conversion
Hp netstorage 6000 desktop conversion
Hide thumbs
Also See for NetStorage 6000:
- User manual (192 pages) ,
- Management manual (52 pages) ,
- Manual (28 pages)
Advertisement
H
P
N
E
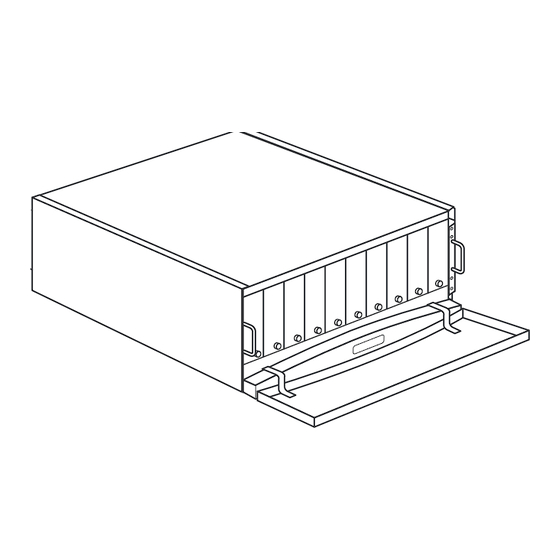
Desktop Conversion
2.
Attach the Feet
Insert Bracket Screws
Attach the Bracket
T
S
T
O
R
1.
4.
3.
A.
Use the screwdriver to attach two feet to each bracket assembly.
A.
Insert three bracket assembly screws in the holes allotted on the
side of the HP Net Storage 6000, only inserting them halfway.
TIP:
For this step, it may be easiest to hang the edge of the unit off the
table.
A.Place the bracket over the set of screws and push it up, so the slots
engage the screws.
A
G
E
6
Kit Contents:
1.
Bracket assembly (2)
2.
Side panels (2)
3.
Panel screws (4)
4.
Feet and feet screws (4)
5.
Bracket screws (8)
5.
Tools Required:
Phillips screwdriver
0
0
0
Advertisement
Table of Contents

Related Manuals for HP NetStorage 6000


Summary of Contents for HP NetStorage 6000
- Page 1 Desktop Conversion Kit Contents: Bracket assembly (2) Side panels (2) Panel screws (4) Feet and feet screws (4) Bracket screws (8) Tools Required: Phillips screwdriver Attach the Feet Use the screwdriver to attach two feet to each bracket assembly. Insert Bracket Screws Insert three bracket assembly screws in the holes allotted on the side of the HP Net Storage 6000, only inserting them halfway.
- Page 2 Tighten the Bracket Screws A.Completely tighten the 3 screws. Insert and tighten 1 additional bracket screw in the front of the unit. Attach the Side Panel A.Place the side panel over the bracket assembly and push the panel forward until the back lip is flush with the back of the unit. Using a Phillips screwdriver, use two screws to attach the side panel to the mounting bracket.
Need help?
Do you have a question about the NetStorage 6000 and is the answer not in the manual?
Questions and answers