Table of Contents
Advertisement
Quick Links
- 1 Casing's Internal Structure
- 2 Front, Rear, and Left Side Panel Structure
- 3 Specification Features
- 4 Installation of Power Supply
- 5 Installation of Front I/O Panel
- 6 Casing's Internal Structure
- 7 Installation of Built-In Hdd (Hard Disc Drive)
- 8 Diy Front Bracket of Projector Light
- Download this manual
Advertisement
Table of Contents

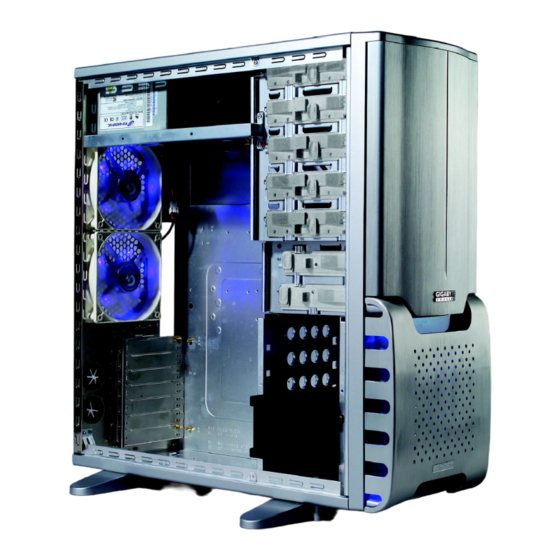
Summary of Contents for Gigabyte 3D AURORA GZ-FSCA1-AN
- Page 1 3D AURORA GZ-FSCA1-AN GZ-FSCA1-SN User's Manual 20050608-GZFSCA1AN rev.1003...
- Page 2 3D AURORA Introduction Gigabyte Technology has been dedicated to the integration of casing and water/air cooling technology to provide users with the most optimal solution for thermal dissipation. The five features of the 3D AURORA series casing include state-of-art design, cooling technology, liquid cooling support, system security, and easy installation etc.
-
Page 3: Table Of Contents
Content 1 Components Introduction ....................4 Casing’s Internal Structure............... 4 Front, Rear, and Left Side Panel Structure..........6 2 Features ........................7 3 Specification Features ....................8 4 Installation Instruction....................9 Installation of Power Supply..............9 Installation of Motherboard ..............9 Installation of Interface Card ..............10 Installation of Front I/O Panel ..............11 Casing’s Internal Structure.............. -
Page 4: Components Introduction
Components Introduction Casing’s Internal Structure Power supply PCI tool-free fastener Motherboard/panel card 5.25” Front device bay... - Page 5 3.5” Floppy Built-in hard disk Foot support Tool enclosure b. Power extension a. Standoff x 9 c. Securing runner x 10 cable x 2 d. Key x 2 e. Wire clamp x 2 f. Motherboard securing screw x 9 (Refer to the right figures for the h.
-
Page 6: Front, Rear, And Left Side Panel Structure
Front, Rear, and Left Side Panel Structure Left side panel (A-1) Latch (A-2) Side panel security lock (A-3) Left side panel (A) Front panel (B-1) Rear dual fan (C-1) Front panel security lock (B-2) Drainage outlet (C-2) Front fan (B-3) Front projector light (B-4) Rear Panel (C) -
Page 7: Features
Gigabyte top-class full tower cooling casing. Lightweight aluminum casing (GZ-FSCA1-AN only) Full-open aluminum panel design, top-class hairline finish Personalized ‘Gigabyte LOGO projector display (patent pending) Complete support - Complete front multimedia support, including 2 USB 2.0 ports / 1 IEEE 1394 /1 audio line-out and mic-in jacks. -
Page 8: Specification Features
: Two 12 cm silent fans equipped with blue LEDs (1000 rpm) I / O Ports (front) : 2 USB2.0 / One IEEE 1394 / 1 audio line-out and mic-in jacks Optional Thermal Solutions GIGABYTE Liquid Cooling - 3D Galaxy Series GIGABYTE Air Cooling - G-Power Series... -
Page 9: Installation Instruction
Installation Instruction Please follow the reference sections in order for installation. Installation of Power Supply To facilitate the installation, it is recommended to place the 3D AURORA casing upright on the table. Required tools: power supply securing screws x 4. 4-1-1 Remove the side panel. -
Page 10: Installation Of Interface Card
4-2-1 According to motherboard specifications, select proper screw holes, engage the standoffs into the corresponding holes of the casing. 4-2-2 Secure the motherboard with securing screws. Motherboard Code Securing screw Standoffs A1-A9 MINI ATX M1-M9 MICRO ATX U1-U9 FLEX ATX F1-F6 Select proper “rear I/O panel”... -
Page 11: Installation Of Front I/O Panel
Installation of Front I/O Panel Incorrect connector installation may possibly burn out the motherboard and other components. Be sure to observe the instructions on installation in the manual. Any loss arising from nonobservance of the proper operation provided is not covered by the warranty. -
Page 12: Casing's Internal Structure
4-4-3 Insert the Audio connector into the corresponding socket on the motherboard. Definition Definition Rear Audio (R) Reserved POWER Front Audio (L) Front Audio (R) Rear Audio (L) (2) Basic casing power switch control cable kit. Follow the connectors listed below for installation (see the figure below). Connector Color Speaker... -
Page 13: Installation Of 5.25" Front Device Bay
Installation of 5.25” Front Device Bay The installation of 5.25” CD-ROM is also intended for installation of general 5.25” front device bay. Required tool: None 4-6-1 Open the front panel, remove the 5.25” plastic drive rail and internal metal panel. 4-6-2 Slide the 5.25”... -
Page 14: Installation Of Built-In Hdd (Hard Disc Drive)
4-7-3 Refer to the installation order illustrated in the left figure and secure the 3.5” floppy disc drive by controlling the latch. (reverse steps for disassembly) 4-7-4 Installation completed. Installation of Built-in HDD (Hard Disc Drive) The 3D AURORA provides built-in bays to accommodate up to 5 hard disc drives (after removal of the tool enclosure). -
Page 15: Diy Front Bracket Of Projector Light
Required tool: transparent projector panel (slides and laser printer or copy machine should be provided by the user) 4-9-1 Visit Gigabyte’s website, (http://tw.giga-byte.com/Peripherals/Support/ Manual/Manual_List.htm) and search for the 3D AURORA series; the file name: DIYbracket.doc... -
Page 16: Application Of Security Lock
4-10 Application of Security Lock The 3D AURORA is supplied with two security locks, including a panel lock and a side panel lock. Required tool: key x 2 4-10-1 Insert and turn the key by 90° as shown in the figure, and lock it. -
Page 17: Liquid Cooling System Support
4-12 Liquid cooling System Support The 3D AURORA series casing can fully support the Gigabyte 3D Galaxy liquid cooling kit (also support most of the liquid cooling systems commercially available). While installing the liquid cooling system, please consult its manual first.

Need help?
Do you have a question about the 3D AURORA GZ-FSCA1-AN and is the answer not in the manual?
Questions and answers