Sony Cyber-shot U DSC-U30 Operating Instructions Manual
Hide thumbs
Also See for Cyber-shot U DSC-U30:
- Operating instructions manual (84 pages) ,
- Brochure (2 pages) ,
- Service manual (58 pages)

Related Manuals for Sony Cyber-shot U DSC-U30


Summary of Contents for Sony Cyber-shot U DSC-U30
- Page 1 3-083-967-11(1) Getting started Shooting still images Viewing still images Enjoying movies Deleting images Enjoying images on your computer _ Troubleshooting Additional information Index...
- Page 2 If you have any questions about this product, you may call: This eqtfipment has been tested and tbund to Sony Custome_ Information Smvices Center To prevent fire or shock hazard, do comply with the limits for a Class B digital...
- Page 3 Never use the nearest you. plug without tlle fitse cover If you should lose the f/tse cover, please contact your nearest Sony For more information regarding recycling sel_-ice station ofrechargeable...
- Page 4 Before using your camera Trial recording Note on "Memory Stick" LeD screen, LCD finder (only models This calnera turns off whenever you open tbe with an LCD finder) and lens Before yoll record one-tinle events, yo/i 1118}' want to make a trial Iecordmg to make sine that tile battery/"Memory Stick"...
- Page 5 Corporation the flash surface, resulting in insufficient light • "Memory Stick Duo" and MEM[IR¥ 5TIEK 0UI] enllssion, are trademarks of Sony (o13Joration • "Memory Stick PRO" and [ItEMllRY 51g:K PR[} Do not get the camera are trademarks of Sony CotlJorafion _\rhen taking pictures outdooIg ill tile lain oI •...
-
Page 6: Table Of Contents
Table of contents Before using your camera ......Shooting five images continuously How to hold the camera ......Burst .......... Identi_'ing the palts ........Adding special effects Copying images to yore- COlnputer Picture Effect ......For Windows users ....Installing the USB driver .... - Page 7 Menu items ..........Precautions ..........On "Memo_" Stick"........ On Nickel-Metal Hydride batteries ..75 On the batter?- charger ......Specifications .......... LCD screen displays ....... Index ............
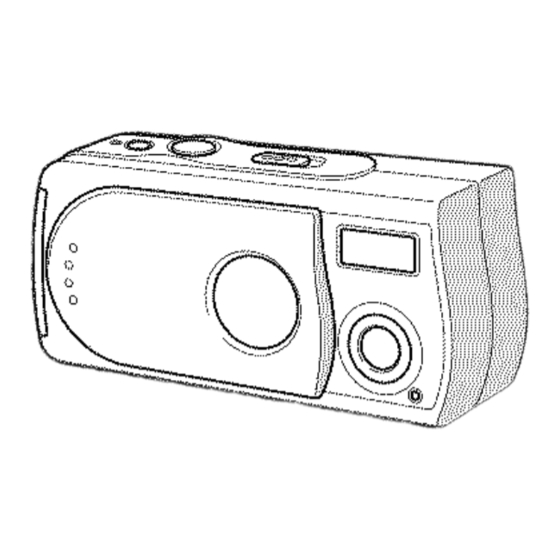
- Page 8 Identifying parts See the pages in parentheses for details of operation. ® Shutter button (20) POWER button (14) POWER lamp (14) Lens cover (14) Mode switch [J_: To view images (34) To shoot still images (20) To shoot five images ®...
- Page 9 LCD screen $ (Flash charge) lamp (orange) (24) MENU button (15) Control button Menu on: A/T (15) Menu off: S/SCENE (23 28) EXEC/Q (Enlarged playback) i!ii!ii!ii!ii!ii!iiiiiiiiiii,i_iii_i_il-_ button (15, 38) Hook for neck strap Battery/"Memory Stick" cover OPEN button (12) Access lamp (17) _ (USB) jack (51) USB jack cover RESET button (bottom surface)
-
Page 10: Preparing Batteries
(wall socket) If some trouble occurs Hydride battery f_om a lnanufacrurer other than while/_sing the bat_e_>' cha_ge_', immediately Sony shut offthe power by disconnecting the plug • Be sure to charge the Nickel-Metal Hydride fiom the wall outlet (wall socket) batteries supplied with your camera before •... - Page 11 Notes on the Nickel-Metal Charging time • Do :lot peel offthe externuI seals or damage the Hydride batteries batteries. Never use batteries from which the NickeI-Metal Hydride seals have been parhally or completely • If the poles of the Nickel-Mmal Hych-Ide :emoved.
-
Page 12: Inserting The Batteries
Inserting batteries =1_ Insert batteries. =1_ Open the battery/"Memory =1_ Close the battery/"Memory Stick" cover. Stick" cover. Match the ÷ poles of the batteries to the Slide the cover in the direction of the arrow marks inside the batte D' case. Close the battex_i"Memo]_ Stick"... - Page 13 Battery life and number of Viewing still images _' Battery remaining indicator (When using Nickel-Metal images that can be recorded/ NH-AAA-DA (2) (supplied) Image Hydride batteries) viewed size No. of Battery life images (min.) As the battery power decreases w-lth use. the The tables show the approxtmate...
-
Page 14: Using Yottr Camera Abroad
Using your camera Turning on/off your camera abroad Power sources Auto power-off function POWER POWER, mp If you do not operam the camera for about YOI.I l_lse your calnel-a COl.llltry three minutes, the camera turns off region with the supplied battery charger ,_o;_... -
Page 15: How To Use The Buttons
to use Setting date time buttons €_ --I_ Slide the lens cover in the To change the current settings of the _1_ Select the desired date display camera, bring up the menu, and use the format with A/Y on the control direction of the arrow or press... - Page 16 =1_ Select [OK] with • on the =1_ Set the numeric value with •IT control button, then press control button, then EXEC. press EXEC. The date and time are entered and the clock The item to be set is indicated x_ith _IY.
-
Page 17: Inserting And Removing A
Inserting removing a "Memory Stick" Terminal side % lamp insert the "Memory Stick." =1_ Open the battery/"Memory =1_ Close battery/"Memory Stick" cover Stick" cover. Holding the "Memo W Stick" as shown Slide the cover in the direction of the alxow the illustration, insert it all the way in until... -
Page 18: Image Size
Setting still image size _RETURN AUTO FOCUS AUTO _-_JSELFTINER OFF SELFTiNER OFF P.EFFECT OFF MENU --I_ Set the mode switch to a, and --I_ Select [101]with • on the --I_ Select the desired image size turn on the power, then press control button, then press with •IT on the control button, MENU. - Page 19 "Memory Stick." Choose an _mage s_ze appropriate for the • When tile nnages recorded using earher Sony kind of images you want to shoo_. • The actual mlmbe_ of images may diffe_ models are played back. the image size depending on the shooting conditions.
-
Page 20: Basic Still Image Shooting
Basic still image shooting Using auto adjustment mode AE/AF I indicator Flashes green Lights up --I_ Press and hold the shutter --I_ Set the mode switch to a, --I_ Hold the camera steadily with slide the lens cover to turn on both hands and position the button halfway... - Page 21 Auto Focus LCD light When you try- to shoot a subject that is can use [LCD LIGHT] under [r'_ ] difficult to focus on. the AE/AF lock with MENU and A/V on the control burton ln&cator changes to flashing slowly-. to turn the LCD hght on and of!2 This is...
- Page 22 Using the self.timer LCD screen display during shooting RETURH You can use [DISPLAY] under [r'l] with AUTO MENU and &/V on the control button SELFTINER OFF turn the display on and off. This is useful when recording under condittons where 1_is difficult to check the nnage...
- Page 23 Selecting a flash mode , Self-timer lamp =1_Set the mode switch to a, and --1_ Select [ON] with • on the --1_ Center the subject in the LCD press • ($) on the control control button, then press screen and press the shutter EXEC.
- Page 24 Creating selecting a folder • _u camlot use the flash in the Burst mode Red-eye reduction Your camera can create multiple _lders • If the menu is currently displayed, press MENU a "Memo W Stick." Also, you can select the The flash pre-strobes before shooting...
- Page 25 Creating a new folder ii , i¸ --I_ Set the mode switch to a, --I_ Select with • on the --I_ Select [OK] with • on the then press MENU. control button, then press control button, then press EXEC. EXEC. The menu appears on the LCD screen.
- Page 26 Selecting the recording folder SIZE.BURST r2..o M FENU --I_ Select the desired folder with --I_ Set the mode switch to a, --I_ Select [_!!] with • on the control button, then press then press MENU. ,&IT on the control button, then EXEC.
- Page 27 =1_ Select [OK] with • on the control button, then press EXEC. When you press MENU. the menu disappears and the selected folder is displayed. To cancel changing the recording folder Select [CANCEL] in step I_ll.
- Page 28 Shooting according to scene conditions Scene Selection • When the focus setting is set to [AUTO], file \\_en shooting portraits, landscapes, foctts is a(liusted to telephoto twilight scenes, twilight portraits, or moving subjects, use the modes below to Vivid nature mode improve the quality ofyonr images This mode enhances...
- Page 29 To cancel Scene Selection ._2 Active outdoor mode Press • (SCENE) repeatedly to set to No This mode lets you stop the movement indicator (Auto). your subject and get lix ely shots of those moving ol_iects in bright outdoor • If the menu is currently displayed, press MENU conditions.
- Page 30 Setting distance subject Focus preset €* (a R_UR. I_SIZE.BURST AUT_I "_ I_ F°cUS I _SELFTINER OFFH --!_ Set the mode switch to I_, and Select [1_1] with • on the When shooting an image using a previously control button, then press press MENU.
-
Page 31: Shooting Five Images Continuously
Shooting five images continuously m Burst AUTO MENU --I_ Select the desired focus --I_ Select [1_1]with • on the --I_ Set the mode switch to a, control button, then press setting with •IV on the control press MENU. EXEC. button, then press EXEC. -
Page 32: Adding Special Effects Picture Effect
Adding special effects -- Picture Effect You can digitally process images to obtain special effects. NEG. ART SEPIA :EXEC!_ The color and The picture is sepia- brightness of the toned like an oId picture are reversed photograph. --1_Select [BURST] with • on the =1_ Press the shutter button as in a negative. - Page 33 _RETURN 1 SIZE*RURST_M I@SIZE'BURST_M FOCUS AUTO SELFTINER OFF RETURN --I_ Select the desired mode with --I_ Select [1_1]with • on the --I_ Set the mode switch to a, &IV on the control button, then control button, then press press MENU. EXEC.
-
Page 34: Viewing Still Images On The Lcd
Viewing still images images Viewing single on the LCD screen Single (single- Index (four-image) image) screen screen --!_ Select the desired still image Set the mode switch to _), and You can view images shot with your camera with A/V on the control button. -
Page 35: Screen
Viewing an index screen (four.image) To return to the single-image screen Select [SINGLE] in step []. Or when ±\_ttr RETURN DELETE frames are displayed press EXEC to I(_ DELETE Eo E,NFDLOER DELETEIN FOLDER display the single image shown with the yellow border. -
Page 36: Selecting The Folder And Playing
Selecting folder playing back images Folder @/_RM AT ....1 iMAGE I cffEATED: I/ L2oo3 74 =1_ Select the desired folder with --I_ Select [_!] with • on the --I_ Set the mode switch to [_, A/V on the control button, then control button, then press... - Page 37 When multiple folders are created in the "Memory Stick" \Vhen the first or last image in the folder displayed, the following indicators appear on the LCD screen. Moves to the previous i\_lder. Moves to the next folder. : Moves to both the previous and next folders.
- Page 38 Enlarging image Enlarged playback can zoom in on an image shot _ith your camera to enlarge it to 25 or 5 times the original size lx (normal) 2.5x --I_ Set the mode switch to [_, and --I_ Press EXEC/Q (Enlarged playback) repeatedly to select select the image you want to the desired enlargement level.
-
Page 39: Print (Dpof)
Choosing images to print Print (DPOF) mark You can mark still images shot with your RETURN camera that you want to have printed. This DELETE fmlction is convenient when you have images printed at a shop or using a printer _DoEXDELETE IN FULDER that coni\)nns... - Page 40 --1_ Select [ON] with • on the =1_Select [DPOF] with • on the control button, then press control button, then press EXEC. EXEC. When you press MIENU. the menu disappears and the _ mark is marked the displayed image. To unmark the print (DPOF) mark Select [OFF] in step I_11.The _ mark disappears.
- Page 41 Shooting movies =1_ Set the mode switch to H, and =1_ Press the shutter button fully =1_ To stop recording, press down. open the lens cover to turn on shutter button fully again. the power, "REC" appears on the LCD screen and the Indicators during shooting camera...
- Page 42 Viewing movies on the LCD screen Shooting time The shooting time is different, depending on the capacity of the "Memory- Stick." Refer to the following chart when you choose a "Memory Suck." • The maximum shooung is 15 seconds recording •...
- Page 43 --I_ Press EXEC. The lno'_'ie is played back. To stop playback Press EXEC. Indicators while viewing movies Indicators on the LCD screen are not recorded. You can use [DISPLAY] m_der [r'=l ] with MENU and Air on the control button to turn the display on and off (page...
- Page 44 Deleting images RETURN RETURN DELETEIN FOLDER DELETE DPOF iNDEX =1_ Set the mode switch to [_, and =1_ Press MENU and select [[_]] =1_ Select [DELETE] with A/Y on with • on the control button, turn on the power. the control button, then press Press A/Y on the control...
- Page 45 a "Memory Stick" DELETE RETURN ..DELETE _@_DELETE I NFOLDER --I_ Select [OK] with • on the --I_ Insert the "Memory Stick" --I_ Turn on the power, and press want to format into the camera. MENU. control button, then press EXEC.
- Page 46 FORMATTING _1_ Select with • on the _1_ Select [OK] with • on the control button, then press control button, then press EXEC. EXEC. Select [FORMAT] with •/• When the message "FORMATTING" the control button, then press disappears, the folTnat is complete. EXEC.
-
Page 47: Copying Images
USB mode Recommended computer copy images using an additional device. environment the Son?" Website for details. There are two modes l\_r a USB connection_ http:i www.sony.net/ [NORMAL] and [PTP]* 1nodes. Microsoft Windows 98 Windows factory setting is the [NORMAL] mode. - Page 48 Click [USB Driver] on the Click [Yes, I want to restart Installing driver installing menu screen. computer now], then click _\_en using Windows XP, you need not [Finish]. install the LTSB driver. Once the USB driver is installed, you need not install the USB driver again.
-
Page 49: Transfer Settings
Click [Next]. When Select the folder to be Installing "Image Transfer" "Licence Agreement" screen installed, then click [Next]. You can use the "Image Transfer" soft_ are appears, click [Yes]. Select the program folder, then to copy images to your computer click [Next]. - Page 50 [Finish]. Installing "lmageMixer" Restart your computer according to the instructions You can use the "ImageMixer Ver. 1.5 for that appear on the screen. Sony" software to copy, view and edit images. For details, see the software's help Remove the CD-ROM.
-
Page 51: On Your Computer
Open the jack cover, • Note that the power cannot be turned on if a Connecting camera "Memory Stick" is not inserted in the camera connect the supplied your computer • When yoll/lse a desktop computer, we cable to the _ (USB) jack of recmnmend that you connect the USB cable to Insert the "Memory... - Page 52 Wizard activates. 1 Double-click _ on the tasktray. If you want to cancel the setting, ±\_llow the procedure below. 2 Click _* (Sony DSCk then chck [Stop]. Click [Start], then click [My 3 Confirm the de,ace on the confirmanon screen, then chck [OK Computer].
- Page 53 Sony DSC]. • When the "Removable Disk" icon is *lot shown below appears. • When using Windows 2000, right-click see tile following cohmm [_I Sony DSC]. • When using Windows XP. see page 54 @ ('lick [Remove] (Ol- [Uninstall] Double-click [DCIM], then Windows 2000).
- Page 54 • When using Windows XP, click [Start] _ again Documents] in that order Click [Next]. • "x%ucan use the ' ImageMixer Ver t 5 for Sony" The images stored on the "Memory software to view and edit images on your Stick" are displayed...
-
Page 55: Destinations And File Names
Image file storage destinations and file names Image files recorded x_ith your camera grouped as folders in the "Memo W Stick". Example: For Windows Me users Desktop My Documents My Compute_ r4:1_ Loca D sk '¥_' Compac D sc Folder containing image data recorded using a _-,r=_ Removable_ Disk... -
Page 56: To Your Colnputer
±;actox3". For the following models, update using the [NORMAL] mode. the Sony Website i\)r details. your OS to Mac OS 9.0.9.1 or 9.2. When the camera is connected to your http :' www.sony.net iMac with Mac OS 8.6 installed... - Page 57 3 Click [USB Driver]. computer off driver and application. The "USB Driver" screen appears. • You can use the "hnageMixer Ver 1.5 for Sony" 4 Double-click the icon of the hard disk Copying images software to copy images to your conlp/lter and containing the OS to open the screen.
- Page 58 Creating a Video CD using "lmageMixer" Click _. Insert a blank CD-R into the can create a Video CD using "hnageMixer Ver 15 for Son?'" You can CD-R drive and click [OK]. play back created Video on a Video The disc creation starts CD-compatible DVD player, or on a...
- Page 59 RESET button on the properly', consult yotu: Sony dealer bottom of the camera using a fine-tipped local authorized Sony se:a-ice ±;acility. 1 First check the items on the tables below. olziect, then turn on the power again.
- Page 60 Shooting still images/movies The subject does not appear • Tile mode switch is set to [_. ÷ Set the mode switch to I_1 o! H (pages 20 and 41) on the LCD screen. The image is out of focus. • Tile subject is too close. ÷...
- Page 61 Your camera cannot record • No "Memo D" Stick" is instated. * Insm_ a "Memo D" Stick" (page 17) images. • The capacity of the ';Niemo D, Stick" is * Delete the images saved in the "Memm T Stick" (page 44), or insufficient.
- Page 62 Your • Enlaiged camera cannot playback is not available for files perform enlarged playback, created or processed using other devices. You cannot display a print ° You cannot display piint (DPOF) marks on (DPOF) mark. movies Deleting images N tc, Your camera cannot delete...
- Page 63 + Use the supplied U SB cable (page 51). Your computer does not • You are not using the supplied USB cable. + Disconnect the USB cable, and connect it again firmly. Make recognize your camera. • The USB cable is not connected firmly sure that "USB MODE"...
-
Page 64: Imagemixer
(pages 52, 53 and 57) movie on a computer. You cannot print an image. ÷ Check the printer settings. ÷ Click on HELP for the "ImageMixer Ver 1.5 for Sony" application software An error message appears ° The compute1 display is not set correctly. -
Page 65: Appears
Others Your camera does not work. ÷ Chage the batteries (page 10) • The barrel W level is low (Tile ¢_\_indicator appears.) • The USB cable is connected ÷ Disconnect the USB cable (pages 52 and 57). The power is on, but the •... - Page 66 Warnings messages The %llowing messages appear on the LCD screen. NO MEMORY STICK • Inse_t a "Memory Stick" (page 17) SYSTEM ERROR • Turn the power offand on again (page 14). MEMORY STICK ERROR • The inserted "Memo_), Stick" catmot be used in yore camera (page 74).
- Page 67 €)
- Page 68 T. Contact Self-diagnosis display your Sony dealer or local authorized Sony sela;ice facility and in±brm them of the 5- digit code. Example: E:61:10...
-
Page 69: Menu Items
items Menu items that can be modified differ depending on the position of the mode switch. The LCD screen shows only the items you can operate at the moment. Facto1?7 settings are indicated with When the mode switch is set to I_1 (when [a] is selected in the menu settings) SIZE.BURST Selects the image... - Page 70 When mode switch is set or H (when is selected in the menu settings) FORMAT OK / CANCEL Fomlats tile "Memo!) _Stick." When you format a "Memory _ Stick," note thai all data in the "Memory Stick," including images that were write-protected by another device, will be permanently erased (page 45).
- Page 71 The following menus are available no matter what position the mode switch is in. When [123] is selected in the menu settings ire, _'":": ': ': ': ': ': ': ': ':':' ,c!pu,_:::::::::::::::::::::::::::::::::::::::::::: ..LCD LIGHT ==ON / OFF Selects the b]ightness of the LCD sc]een.
-
Page 72: Precautions
Precautions Do not leave the camera in the On cleaning Note on operating temperature following places Your camera is designed for use between Cleaning the LCD screen the telnperatures of 0'>C and 40°C (32_'F and • In extremely hot place, such as in a car Wipe the screen... - Page 73 On internal rechargeable How to prevent moisture condensation When bringing the camera from a cold button battery place to a warln place seal the camera in a This camera has an internal rechargeable plastic bag and allow it to adapt to button battely for maintaining...
- Page 74 On "Memory Stick" "Memory Stick" is a new compact, portable • Do not remove the "Melnoly, Stick" while Recording/ "Memory Stick" type reading or writing data and versatile I( recording medium with Playback • Data may be eorntpted in the following eases data capacity that exceeds the capacity...
- Page 75 Nickel.Metal Hydride batteries Notes on using "Memory Stick Effective use of the battery Battery life Duo" (not supplied) • Batter3" performance decreases in low- • The batte W life is limited. The batte W • _\qlen using a "Memory Stick Duo" with yore temperature surrotmdings, and the batte W...
- Page 76 battery charger • Do not charge any other batteries except • When the CHARGE lamp flashes, this Son?" Nickel-Metal Hydr-ide batteries may indicate a batte W elTor or that the battel_- charger supplied with yotu- batteries other than the specified 13-pe have been inserted.
-
Page 77: On "Memo_" Stick
,BC-CS2A/CS2B Ni-MH IlCamera [LCD screen] battery charger [System] panel used 2.5 cm (1.0 type) TFT drive Input rating Image device Total number of dots 240 V AC, 50/60 Hz. 3 W 6.72 111111 (i/2.7 type) color 64 460 (293x220) dots Primary color filter... - Page 78 screen displays When shooting still images When shooting movies Image size indicator (18, 31) Recording mode indicator (41) Battery remaining indicator (13) Battery remaining indicator (13) Flash mode indicator (23)/ Focus preset indicator (30) Red-eye reduction indicator (23) Picture effect indicator (32) Focus preset indicator (30)
- Page 79 When playing back still images When playing back moving images I_ l_rO_ _-, lzl ........= 0:121 ....../_o,.2. 5 _ /121 []......I......_ 1 I <c_::m_' _ , 8......[]....11oi-oo, ....... I......[] ........_Ioi oo_ I:_o_ 4 3o:3o_: I............
-
Page 80: Index
Index (rearing a new folder ........hnage T_ansfer ..........hnageMixer ............Index screen ............. Installation Deleting xmages ..........hnage Transfer ..........Access lamp ............. DPOF ............... AE_AF lock indicator ........hnageMixer ..........Auto Focus ............driver ..........48. 57 Auto power-off fimction ........Enlarged playback ........... - Page 81 1111age size ........... number of images that can be saved ... 19 Nickel-Metal Hydride bakeries ....10, 75 Picture Effect ..........Scene Selection ........... using auto adjusnnent mode ....... Picture Effect ............ using tbe flash ..........POWER ............using tbe self-flirter ........Power Still image viewing batteries...
- Page 82 Printed on I00% recycled paper using VOC (Volatile Organic Compound)-free vegetable "-4_ based ink. http://www.sony.net/ asked questions can be found at our Customer Support Website. I AddRional information on this product and answers to frequently Sony Corporation Printed in Japan...
Need help?
Do you have a question about the Cyber-shot U DSC-U30 and is the answer not in the manual?
Questions and answers