Table of Contents
Advertisement
RETAIN THESE INSTRUCTIONS
FOR FUTURE REFERENCE
This appliance may be installed in an aftermar-
ket permanently located, manufactured home
(USA only) or mobile home, where not prohib-
ited by local codes. This appliance is only for
use with the type of gas indicated on the rating
plate. This appliance is not convertible for use
with other gases, unless a certified kit is used.
WARNING: IF THE INFORMATION IN THIS MANUAL
IS NOT FOLLOWED EXACTLY, A FIRE OR EXPLO-
SION MAY RESULT CAUSING PROPERTY DAM-
AGE, PERSONAL INJURY OR LOSS OF LIFE.
FOR YOUR SAFETY: Do not store or use gasoline
or other flammable vapors or liquids in the vicin-
ity of this or any other appliance.
FOR YOUR SAFETY: What to do if you smell gas:
• DO NOT light any appliance.
• DO NOT touch any electrical switches.
• DO NOT use any phone in your building.
• Immediately call your gas supplier from a
neighbor's phone. Follow your gas suppliers
instructions.
• If your gas supplier cannot be reached, call the
fire department.
Installation and service must be performed by a
qualified installer, service agency or the gas
supplier.
OTL Report No. 116-F-17-4
NOTE: DIAGRAMS & ILLUSTRATIONS NOT TO SCALE.
INSTALLATION
INSTRUCTIONS
DIRECT VENT
DT-400 & DR-400
VENTED GAS FIREPLACE HEATERS - DIRECT VENT MODELS
P/N 700,020M REV. M 11/2004
MODELS
M
l i
v i l
t l o
M
o
e d
D
T
4 -
0 0
C
D
T
4 -
0 0
C
D
R
4 -
0 0
C
D
R
4 -
0 0
C
AVERTISSEMENT: ASSUREZ-VOUS DE BIEN SUIVRE
LES INSTRUCTIONS DONNÉ DANS CETTE NOTICE POUR
RÉDUIRE AU MINIMUM LE RISQUE D'INCENDIE OU
POUR ÉVITER TOUT DOMMAGE MATÉRIEL, TOUTE
BLESSURE OU LA MORT.
POUR VOTRE SÉCURITÉ: Ne pas entreposer ni utiliser
d'essence ni d'autre vapeurs ou liquides inflammables
dans le voisinage de cet appareil ou de tout autre
appareil.
POUR VOTRE SÉCURITÉ: Que faire si vous sentez une
odeur de gaz:
• Ne pas tenter d'allumer d'appareil.
• Ne touchez à aucun interrupteur. Ne pas vous servir
des téléphones se trouvant dans le batiment où
vous vous trouvez.
• Evacuez la piéce, le bâtiment ou la zone.
• Appelez immédiatement votre fournisseur de gaz
depuis un voisin. Suivez les instructions du
fournisseur.
• Si vous ne pouvez rejoindre le fournisseur de gaz,
appelez le service dos incendies.
L'installation et service doit être exécuté par un qualifié
installeur, agence de service ou le fournisseur de gaz.
E
e l
r t c
n o
c i
s l
M
o
e d
s l
M
N
D
T
4 -
0 0
C
E
N
M
P
D
T
4 -
0 0
C
E
P
M
N
D
R
4 -
0 0
C
E
N
M
P
D
R
4 -
0 0
C
E
P
1
Advertisement
Table of Contents

Related Manuals for Superior DR-400


Summary of Contents for Superior DR-400
-
Page 1: Installation Instructions
INSTALLATION INSTRUCTIONS DIRECT VENT DT-400 & DR-400 RETAIN THESE INSTRUCTIONS VENTED GAS FIREPLACE HEATERS - DIRECT VENT MODELS P/N 700,020M REV. M 11/2004 FOR FUTURE REFERENCE MODELS This appliance may be installed in an aftermar- v i l t l o r t c ket permanently located, manufactured home (USA only) or mobile home, where not prohib-... -
Page 2: Table Of Contents
PACKAGING DO NOT ATTEMPT TO ALTER OR MODIFY TABLE OF CONTENTS THE CONSTRUCTION OF THE APPLIANCE OR ITS COMPONENTS. ANY MODIFICATION OR Packaging ........page 2 The assembled vented gas fireplace heater is ALTERATION MAY VOID THE WARRANTY, packaged with: Introduction ........ - Page 3 Millivolt Models - The millivolt appliances are manually controlled These appliances must be isolated from the gas Millivolt models come standard with the and feature a spark ignitor (piezo) that allows the supply piping system (by closing their individual manually-modulated gas valve; flame ap- appliance's pilot gas to be lit without the use of manual shut-off valve) during any pressure test- pearance and heat output can be con-...
-
Page 4: Location
APPLICATION HORIZONTAL VENT HORIZONTAL VENT VERTICAL VENT HORIZONTAL VENT VERTICAL VENT TOP VENT (Rear Vent Application (Rear Vent Application (Top Vent (Top Vent (Rear Vent without a chase) With a chase) Application) Application) Application) RECESSED INSTALLATION TOP VENT APPLICATION Figure 2 Typical Locations LOCATION In selecting the location, the aesthetic and... -
Page 5: Vent Termination Clearances
Step 1. FRAMING VENT TERMINATION CLEARANCES Horizontal Vent Termination Clearances Frame these appliances as illustrated in Fig- Combustible Projection These instructions should be used as a guide- ures 8 on page 7, unless the appliance is to be inches or less in length line and do not supersede local codes in any installed in a corner . - Page 6 EXTERIOR HORIZONTAL VENT TERMINATION CLEARANCE REQUIREMENTS See Item D in the Text Below. Center Line Exterior Wall Inside of Termination Corner Detail *18” Horizontal Termination 18” Ventilated Soffit Inside Corner = 9” in U.S. = 12” in Canada Detail D 3 ft.
- Page 7 FIREPLACE FRAMING SPECIFICATIONS **FRAMING WITH SQUARE HORIZONTAL TERMINATIONS (SV4.5HTSSL, SV4.5HTSS or SV4.5HTS) AND ROUND HORIZONTAL TERMINATION (SV4.5HTR) VENT FRAMING - TOP VENT WITH ONE 90 ELBOW VENT FRAMING - REAR VENT WITH NO ELBOWS (178) (130) (308) Framing should be constructed of 2x4 or larger lumber.
-
Page 8: Fireplace Specifications
FIREPLACE SPECIFICATIONS FRAMING (Louvered Front Model Shown) (546) SPACERS (Top and Sides *CONCENTRIC FLUE (273) FLUE - 4 (114) and Rear) COMBUSTION AIR - 7 (190) Inches (millimeters) *DR models have only a rear vent *DT models have only a top vent (173) Top View (330) -
Page 9: Vertical Termination Systems
Select Venting System - Horizontal or Vertical i t c With the appliance secured in framing, deter- i t c mine vent routing and identify the exterior i t c i t c termination location. The following sections describe vertical (roof) and horizontal (exterior wall) vent applications. - Page 10 Vertical (Offset) Installation All of the appliances covered in this document To add another vent component to a length of are fitted with collars having locking inclined vent run, align the dimpled end over the inclined Analyze the vent routing and determine the channels.
- Page 11 Loop the tape around the vent, securing the ends of the tape to the framing. If desired, Storm sheet metal screws #6 x " length may be Collar used to secure the support straps to the vent pipe. Refer to Figure 17. F.
-
Page 12: Vertical Vent Tables And Figures
VERTICAL VENT FIGURES/TABLES Note: Secure Vent (rigid vent pipe) is shown in the figures; Secure Flex (flexible vent pipe) may also be used. *Ceiling Firestop/Spacer (SV4.5BF) WARNING: UNDER NO CIRCUMSTANCES **Wall MAY SEPARATE SECTIONS OF CONCEN- Firestop/Spacer (SV4.5HF) TRIC FLEXIBLE VENT PIPE BE JOINED TOGETHER. - Page 13 VERTICAL VENT FIGURES/TABLES (continued) *Ceiling Firestop/Spacer (SV4.5BF) A Vent Restrictor, as shown in Figure 18, page 10, must be used in this application **Wall Firestop/Spacer (SV4.5HF) *Ceiling Firestop/Spacer (SV4.5BF) Figure 26 - Rear Vent - THREE ELBOWS *Ceiling Firestop/Spacer **Wall (SV4.5BF) Firestop/Spacer (SV4.5HF)
-
Page 14: Horizontal Termination System
HORIZONTAL (OUTSIDE WALL) TYPICAL HORIZONTAL VENT INSTALLATION TERMINATION SYSTEM Support Building Horizontal / Inclined Run SV4.5HTSSL Brackets Support Figures 28, and Figures 34 to 41 on pages 16 to Termination Framing Shown 18 and their associated Horizontal Vent Table SV4.5E90 illustrate the various horizontal venting configura- Elbow tions that are possible for use with these appli-... - Page 15 If the terminus of the last section is not within *Firestop/Spacer (SV4.5HF) shown this distance, use the telescopic vent section on the exterior side of the wall. It SV4.5 HTSS may also be installed on the SV4.5LA, as the last vent section. For wall Termination interior side.
-
Page 16: Horizontal Vent Tables And Figures
M. Install the desired termination - See the Orient the housing of the termination with the The SV4.5HTR Round Termination may not horizontal venting figures for application re- arrow pointed upwards. Secure the termina- be used when the appliance is vented di- strictions on the round termination (SV4.5HTR). - Page 17 HORIZONTAL VENT FIGURES/TABLES (CONTINUED) Refer to Table 3 on page 16 for an aid in venting component selection for a particular range of exterior wall thicknesses when using the square (SV4.5HTS), small square (SV4.5HTSS) or the round (SV4.5HTR) termination . Short Square Termination (SV4.5HTSS) shown;...
- Page 18 HORIZONTAL VENT FIGURES/TABLE (CONTINUED) Refer to Table 3 on page 16 for an aid in venting component selection for a particular range of exterior wall thicknesses when using the square (SV4.5HTS), small square (SV4.5HTSS) or the round (SV4.5HTR) H + H termination .
-
Page 19: Venting Using Flexible Vent Pipe
VERTICAL OR HORIZONTAL VENTING USING SECURE FLEX KITS AND COMPONENTS FLEX VENT NOTE: OUTER PIPE IS PULLED AWAY TO SHOW THE DETAIL OF THE INNER PIPE Secure Flex venting kits and components may SECURING SCREW (3 PLACES EQUIDISTANT be used in any venting application where rigid JUST BELOW GEAR CLAMP) Secure Vent (SV4.5) direct vent components Apply ONLY MIL-PAC BLACK HIGH... -
Page 20: Step 4. Field Wiring
Step 4. FIELD WIRING Note: The supplied 15 feet of 2 conductor wire 4. Connect the ground supply wire to the has one end of each conductor connected to outlet's green ground screw. The gas valve is set in place and pre-wired at the gas valve circuit and the other end of each the factory on both models. -
Page 21: Step 6. Connecting Gas Line
FBK-250 Blower Kit (See Figure 46 ) Step 6. CONNECTING GAS LINE Turn on gas supply and test for gas leaks using a soapy water solution. Never use an open An electrical outlet box is provided for the instal- flame to check for leaks. Make gas line connections. -
Page 22: Step 7. Installing Logs
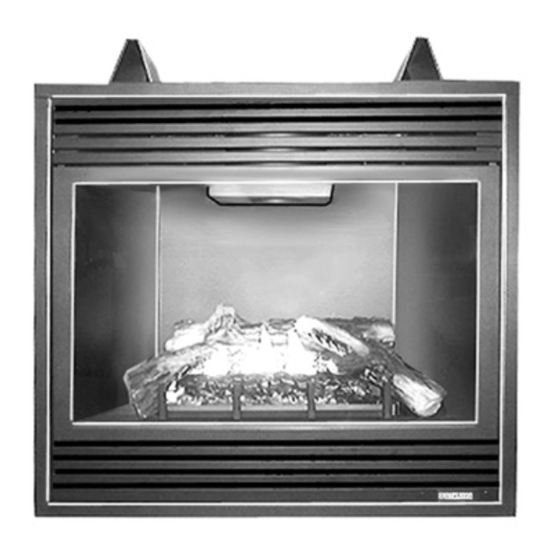
Step 7. INSTALLING LOGS AND GLOWING Replace logs if removed for pilot inspection. Step 9. INSTALLING THE GLASS DOOR EMBERS To light the burner; turn “ON” the remote wall Retrieve the glass door. Visually inspect the switch and rotate the gas valve control knob The logs are packaged in a carton which is gasket on the backside of the frame. -
Page 23: Step 10. Burner Adjustments
Step 10. BURNER ADJUSTMENTS Allow the burner to operate for at least 15 min- Step 11. HOOD INSTALLATION utes. Observe the flame continuously. If it ap- All of these appliances must have hoods Flame Appearance and Sooting pears weak or sooty as previously described, installed prior to operating. -
Page 24: Cold Climate Insulation
A hearth extension is not required with this appliance. If a hearth extension is used, do not block the lower control compartment door. Any hearth extension used is for appearance only and does not have to conform to standard hearth extension installation requirements. Note: Combustible wall finish materials and/or surround materials must not be allowed to encroach the area defined by the appliance front face (black sheet metal). - Page 25 INSTALLATION ACCESSORIES (Continued) t s i ™ t s i ™ i t a t i k r i f , r e . r e i t c z i r l a t l l a i t c i t a l l a i t c...
-
Page 26: Gas Conversion Kits
GAS CONVERSION KITS WARNING: THIS CONVERSION KIT SHALL BE AVERTISSEMENT: CET ÉQUIPEMENT DE CONVERSION INSTALLED BY A QUALIFIED SERVICE AGENCY IN SERA INSTALLÉ PAR UNE AGENCE QUALIFIÉE DE SERVICE ACCORDANCE WITH THE MANUFACTURER'S IN- CONFORMÉMENT AUX INSTRUCTIONS DU FABRICANT ET STRUCTIONS AND ALL APPLICABLE CODES AND TOUTES EXIGENCES ET CODES APPLICABLES DE REQUIREMENTS OF THE AUTHORIZED AGENCY... - Page 27 Pilot for Honeywell Millivolt Gas Valve Pilot for SIT Millivolt Gas Valve (Loosening of Hex Fitting For Orifice Strip Tab Positioning) Hood Alignment Hood 7/16 in. Open End Wrench Pilot Orifice Figure 60 Orifice Strip Tab b. Attach manometer to the manifold side pressure test fitting and verify manifold pres- Take Care Not to Contact the Orifice Strip Tab sure reads 3.5 inches water column (0.87 kPa)
- Page 28 b. Attach manometer to the manifold side All Models Inlet Pressure Test Port pressure test fitting and verify manifold pres- Step 7. Remove the orifice from the mani- sure reads 3.5 inches water column (0.87 kPa) fold and replace it with the one provided with for natural gas, and 10.0 inches water column the kit.
Need help?
Do you have a question about the DR-400 and is the answer not in the manual?
Questions and answers