Table of Contents
Advertisement
Owner's Manual
®
19,5 HP
ELECTRAC START
42" MOWER
AUTOMATRC
LAWN TRACTOR
Model No
917.27082
#
o Safety
o Assembly
o Operation
o Maintenance
o Repair
Parts
L
¸
! ;
_
bF
?
_
_
-
)
_.,
,
:
•
_This
product
has a low emisSiOn
engine which operates
diffei;_tly
I11 ILL_JIlt from
previously
built
engines_
Before
yOU start:the
engine_ read
and understand
this Owner's
Manual
,
:
==
CAUTION:
Read and followall
Safety Rules and Instructions
before operatingthisequip-
menL
For answers
to your questions
about
this product,
Call:
1-800-659-591
7
Sears
Craftsman
Help
Line
5am-5pm,
Mon-Sat
Sears, Roebuck
and Co,, Hoffman
Estates,
IL 60179
Visit our Craftsman
website:www
sears
corn/craftsman
Advertisement
Table of Contents

Related Manuals for Craftsman 917.270824


Summary of Contents for Craftsman 917.270824
- Page 1 For answers to your questions CAUTION: about this product, Call: Read and followall 1-800-659-591 Safety Rules and Instructions Sears Craftsman Help Line before operatingthisequip- 5am-5pm, Mon-Sat menL Sears, Roebuck and Co,, Hoffman Estates, IL 60179 Visit our Craftsman website:www sears corn/craftsman...
- Page 2 Operation..........RepairParts..........Maintenance Schedule......PartsOrdering ..... B ack Cover LIMITEDTWOYEARWARRANTY ON CRAFTSMAN RIDINGEQUIPMENT For two (2) yearsfromthe date of purchase,if this CraftsmanRidingEquipmentis maintained,lubricatedandtuned up accordingto the instructionsin the owner's manual,Searswill repairor replace,free of charge,any partsfound to be defectivein materialor workmanship_ This Warrantydoes not cover: •...
-
Page 3: Slope Operation
parkingbrake, stop engine,and re- ly downhill, if possible. movekeys beforedismounting, ° Do not mow near drop-offs, ditches, • Turn off bladeswhen not mowing. embankments. The mower could sud- • Stop engine beforeremovinggrass denly turn over if a wheel is over the catcheror uncloggingchute edge of a cliff or ditch, or if an edge •... - Page 4 Keepmachinefree-of grass, leave_ er . Grass catcher components are subject otherdebds build-up Clean oil or fuel to wear, damage, and deterioration, spillage Allow machineto cool before which could expose moving parts or storing. allow objects to be thrown Frequently o Stop and inspectthe equipmentif you check components and replace...
-
Page 5: Maintenance
TORQUE: Sears Authorized Service Center (See REPAIR PARTS section of this manual) CONGRATULATIONS on your purchase of a Craftsman Tractor It has been de- signed, engineered and manufactured give you the best possible dependability and performance Should you experience any problem... - Page 6 PartsBag contentsshownfull size (1) Hex Bolt 5/16-18 x !-1/4 © © (1) Hex Bolt 3/8-16 x 1 (!) Lockwasher (1) Large Flat Washer (1) Locknut 5/16q8 (1) Knob (1) Shoulder Bolt 5/16-18 (1) Washer 17/32 x 1-3/16 x 12 Gauge 3/16 x 3/4 x 16Gauge (2) Lock Washers...
- Page 7 Parts 3acked separately in carton g& Seat Video Steering Cassette Mulcher Boot Plate Steering Manual Parts Bag Wheel Parts Bag contents not shown full size Steering Wheel Adapter Steering Wheellnsert _--. Steering Extension (2) Keys Shaft _((2 ) Latch Hook Assemblies Slope Sheet...
-
Page 8: Tools Required
Your new tractor has been assembled at the factory with exception of those parts left unassembled for shipping purposes To ensure safe and proper operation of your trac- tor all parts and hardware you assemble must be tightened securely Use the correct tools as necessary to insure proper tightness Review... -
Page 9: Install Seat
INSTALL SEAT .... ".... _ 'Check engine oil level and fill fuel tank Adjust seat before tightening adjustment with gasoline, knob, o Place freewheel control in "transmis- o Remove cardboard packing on seat sion engaged" position o Sit on seat in operating position, o Place seat on seat pan and assemble press clutch/brake... - Page 10 _CHECKLiST Hook Points Weld Nut From Down The Top Before you operate and enjoy your new tractor, we wish to assure that you l eceive Lock the best performance and satisfaction Weld Washer from this quality producL Screw Please review the following checklist: Latch All assembly...
- Page 11 Thesesymbolsmay appearon your tractoror in literaturesuppliedwith the product, Learnand understandtheir meaning. E:3& ÷ REVERSE FORWARD FAST SLOW BATrERY CAUTION OR WARNING OVER TEMP OIL PRESSURE LIGHTS ON ENGINE ON ENGINE OFF LIGHT UNLOCKED MOWER LIFT FUEL CHOKE MOWER HEIGHT PARKING BRAKE LOCKED ATTACHMENT REVERSE...
-
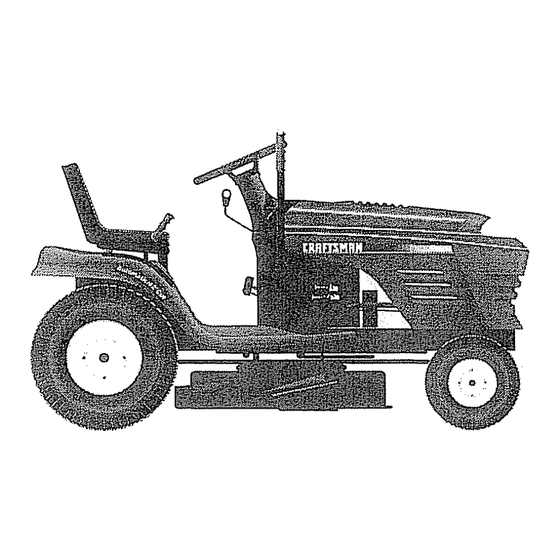
Page 12: Know Your Tractor
KNOW YOUR TRACTOR READ "fillS OWNER'S IVIANUALAND SAFETY RULES BEFORE OPERATING YOUR TRACTOR ....Compare the illustrations with your tractor to familiarize yourself with the locations of various controls and adjustment& Save this manual for future reference Light Switch Position Attachment Ignition Clutch Lever... - Page 13 _The operation Of-_ny tr%c-tor ca--n"re-_sult in foreign objects thrown ini0 the ..eyes, which can result in severe eye damage. Always wear safety glasses or eye shields while operating your tractor or performing any adjustments or repairs We recommend a wide vision safety mask over spectacles, ....
- Page 14 o For best cuttingperformance, g rass = Avoid stopping or changing speed over 6 inches in height should be hills mowedtwice. Makethe first cut rela- ° If slowing is necessary, move throttle tively high;the secondto desired control lever to slower position.
-
Page 15: Before Starting The Engine
TO START ENGINE When starting the engine for the first time or if the engine has run out of fuel, it will take extra cranking time to move fuel from the tank to the engine. o Be sure freewheel control is in the transmission engaged... - Page 16 AUTOMATIC TRANSMISSION WARM-UP o Sitting in the tractor seat, start engine. o Beforedrivingthe unit in cold weather, After the engine is running, move the transmissionshouldbe warmed up throttle control to slow position. With . as follows: ..motion control lever in neutral (N) posi_ •...
-
Page 17: Mowing Tips
MOWING 'TIPS MULCHING MOWING TiPS o Mowershouldbe properly leveled for IMPORTANT: For best performance, keep best mowing performance, See "TO mower housing free of built-up grass and LEVEL MOWER HOUSING" in the Ser- trash. Clean after each use, vice and Adjustments section of this °... -
Page 18: Lubrication Chart
• r As Y OU COMPLETE "BGU R SE"V'OE / ERVlCE DATES Check Blake Operation Check Tire Pressure Check Operator Presence and Interlock Systems Check tot Loose Fasteners Sharpen/Replace Mower Blades Lubrication Chart Check Battery Level Clean Battery and Terminals Check Transax,e Cooling Adjust Blade Belt(s) Tension... - Page 19 TRACTOR IMPORTANT: Blade bolt is grade 8 heat Alwaysobservesafety ruleswhen per- treated formingany maintenance Trailing Mandrel Assembly BRAKE OPERATION Edge Blade Center If tractor requires more than six (6) feet Hole stopping distance at high speed in high- est gear, then brake must be adjusted. Flat Washer (See "TO ADJUST BRAKE"...
- Page 20 - DisconnectBLACKbatterycablefirst eration or at least once a year if the tractor then RED batterycable and remove is not used for 50 hours in one year, batteryfrom tractor Check the crankcase oil level before start- o Rinsethe battery'withplainwater and ing the engine and after each eight (8) hours of operation.
-
Page 21: Air Filter
AIR FILTER ENGINE FILTER Yourenginewill not run properly using a Replace the engine oil filter every sea- dirtyair filter. Cleanthe foam pre-cleaner son or every other oil change if the trac- afterevery25 hoursof operationor ev- tor is used more than 100 hours in one ery season, Servicepaper cartridgeev- year. - Page 22 &CAUTION: Beforeperformingany serviCe or adjustments: Depressclutch/brakepedalfully and set parking brake. Place motion control lever in neutral (N) position. Place attachment clutch in "DISENGAGED" position. Turn ignition key "OFF" and remove key. Make sure the blades and all moving parts have completely steppe&...
- Page 23 ° Beforemaking any necessaryadjust- Idler Pulleys ments,checkthat bothfrontlinksare Mandrel equal in length. Both linksshouldbe Pulley ----__ approximately10-3/8" o If links are not equalin length,adjust one link to same lengthas other link. o To lowerfront of mowerloosennut "E" Mandrel on bothfront links an equal numberof turns.
- Page 24 Engine Pulley- steering wheel and reassemble Clutching Idler _ instructions in the Assembly sect'lon of this manual. Stationa_.ldler_ FRONT WHEEL TOE-IN/CAMBER The front wheel toe-in and camber are not Transmission adjustable on your tractor If damage Input Pulley-..._. occurred to affect the front wheel toe-in camber, contact your nearest...
- Page 25 o Connectthe other endof:the.BLACK . TO REPLACEHEADLIGHT BULB o Raise hood. cableto good CHASSISGROUND, awayfrom fuel tank andbattery. o Pull bulb holder out of the hole in the TO REMOVECABLES,REVERSE backside of the grill. ORDER- o Replace bulb in holder and push bulb o BLACKcablefirst from chassisand then holder securely back into the hole in the...
- Page 26 AI_iUST CHO'K5 CONTROL o While still holding thrott!e lever against The choke control has been preset at the idle Speed screw, turn idle mixture factory and adjustment should not be screw i n (clockwise) until engine begins necessary. Check adjustment as de- to die and then tutti out (countercloCk- scribed...
- Page 27 Immediately prepareyourtractorfor storT Also, experience indicates that alcohol ageat the end of the seasonor if the trac- blended fuels (called gasohel or using tor will not be usedfor 30 days or more, ethanol or methanol) can attract moisture CAUTION:Neverstore the tractorwith which leads to separation and formation gasolinein the tank inside a building...
-
Page 28: Troubleshooting
TROUBLESHOOTING CHART PROBLEM CAUSE CORRECTION Will not sta_ ..;: o Out of fuel,: Fill fuel tank. Engine not "CHOKED" prop- See "TO START ENGINE" in erly, Operation section. Engine flooded Wait several minutes before at- tempting to start Bad spark plug Replace spark plug Dirty air filter Clean/replace air filter... - Page 29 TROU BLESHO'O1"IN:( ::0H'ART PROBLEM CAUSE CORRECTION Loss of power Dirty/clogged muffler. • Clean/replace muffler. (oont'd) Loose or damaged wiring . Check all wiring. Carburetor out of adjustment. . See To Adjust Carburetor" in Ser- vice and Adjustments section, Engine valves out of adjust- •...
- Page 30 TROUBLESHOO NG CHART CORRECTION PROBLEM C,g.USE • Place freewheel control in "en- Loss of drive = Freewheel control in 'disen gaged position gaged' position - Motion drive belt worn, dam- - Replace motion drive belt aged or broken • Air trapped in transmission - Purge transmission during shipment or servicing...
Need help?
Do you have a question about the 917.270824 and is the answer not in the manual?
Questions and answers