
Related Manuals for Nexgrill 720-0033


Summary of Contents for Nexgrill 720-0033
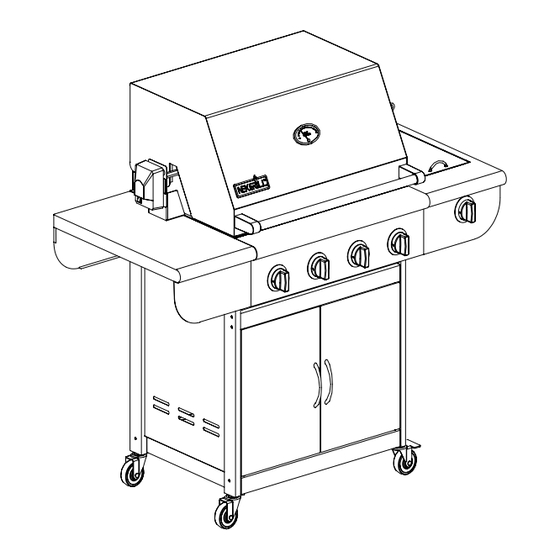
- Page 1 Stainless Steel GAS GRILL With Side Burner USE AND CARE GUIDE MODEL NO.: 720-0033 FOR OUTDOOR USE ONLY PLEASE CONTACT 1-800-913-8999 FOR ASSISTANCE DO NOT RETURN TO PLACE OF PURCHASE...
-
Page 2: Table Of Contents
MESSAGE TO OUR MEMBERS Thank you for selecting Pro-series stainless steel gas grill. Because this appliance contains features not found on any other grill, we recommend that you read this entire booklet before your first use. Keep it in a handy place as it has answers to questions that may occur during future use. -
Page 3: Precaution
PRECAUTIONS produces intense heat and can increase accident FOR YOUR SAFETY potential. When using this appliance basic safety If you smell gas: practices must be followed, including the following: 1. Shut off gas to the appliance. 2. Extinguish any open flames. Read this Care and Use Manual carefully and 3. -
Page 4: Placement Of The Grill
PRECAUTIONS When using the grill, do not touch the grill rack, burner around the grill. The chemical that produces the spraying grate or immediate surrounding area as these areas action could, in the presence of heat, ignite or cause become extremely hot and could cause burns. Use only metal parts to corrode. -
Page 5: Assembly Instructions
Assembly Instructions PLEASE READ THE INSTRUCTIONS CAREFULLY AND FOLLOW STEP BY STEP. TOOLS REQUIRED: Philips head screwdriver (not provided), wrench (provided). The following hardware is provided. Item Description Specification Quantity Truss head screw 1/4-20*1-1/2 8pcs inch Truss head screw 1/4-20*1/2inch 22pcs Step 1: Remove side panel (marked “L”) and two 4”... - Page 6 Step 3: Align the 2 doors bottom panel hole fir st & align with cross bar & with top of the 2 sides . Use the four pieces 1/4”-20X1 1/2” screws for the s ide panel. Step 4: Remove the upper portion of grill from carton. Slide-in the upper portion of the grill onto the cart from the front.
- Page 7 Step 5: Screw the upper portion of the grill to the cart with Truss head ¼-20 x 1/2”. Screw in four corners of the grill housing. Make sure the four screws are tight. Step 6: ssemble side burner with 8pcs truss head ¼-20 x ½” screws. Align the holes on the right side of grill ousing and screw through the holes in the right side shelf and tighten into the grill housing as per the iagram below.
- Page 8 Step 7: Place flame tamers, cooking grids, warming rack and grease tray as shown below. Step 7: Place three flame tamers, cooking grids, warming rack and grease tray as shown below. Step 8: Assemble the rotisserie kit as per the diagram below: First locate the motor bracket on left side of the b assembly with tw o “1/4-20 x ½”...
- Page 9 Your gas grill is ready to use.
-
Page 10: Gas Hook-Up & Leak Testing
GAS HOOK-UP NEVER CONNECT AN UNREGULATED GAS SUPPLY L.P. GAS HOOK-UP: INE TO THE APPLIANCE. USE THE REGULATOR Ensure that the black plastic grommets are in place and SSEMBLY SUPPLIED. that the hose does not come into contact with the heat shield or the grill head. -
Page 11: Installer Final Checklist
ALWAYS CHECK FOR LEAKS AFTER O TEST EVERY L.P. TANK CHANGE Make sure all control valves are in the “OFF” position. Turn the gas supply on. Check all connections from the Check all gas supply fittings for leaks before each use. It L.P. -
Page 12: Operating Instructions
OPERATIN G INS TRUCTION General use of the grill and rotisserie Each burner is rated at 12,000 Btu/hr. The grill bur ners Place the food on the grill and cook to the desired encompass the entire cooking area and are side por ted to doneness. -
Page 13: Grill Lighting Instructions
GRILL LIGHTING INSTRUCTIONS to light the burner. If the burner does not light, wait for 5 WARNING: IMPORTANT! minutes then retry. BEFORE LIGHTING… Inspect the gas supply piping or hose prior to turnin g the TO MATCH LIGHT THE GRILL: gas “ON”. -
Page 14: Care And Maintenance
GRILL RACK attempt is made to relight the grill. Frequency of he easiest way to clean the grill is immediately after cleaning will depend on how o ften you use the grill. ooking is completed and after turning off the flame. ear a barbeque mitt to protect your hand from the heat GRILL BURNER CLEANING and steam. - Page 15 CHECKLIST PROBLEMS WHAT TO DO Grill won’t light when the ignition Remove the g rill rack and the radiant tray. With a mirror, watch the igniter button is pushed. tip. You shoul d see a s park jump from the tip of the igniter when the button is pressed.
-
Page 16: Grill Parts List
Part List... - Page 17 MODEL 720-0033 PARTS LIST DESCRIPTION Q’TY REF# CRIPTION Q’TY Lid, Front Handle of Lid Logo Handle of Rotisserie Heat Indicator Key washer Heater Insulating spacer Counter-balance Handle Spit Fork Cooking grid w/hole Shaft Collar Warming rack Spit rod Cooking grid Front Baffle Flame tamer Valve...
-
Page 18: Grilling Hints
GRILLING HINTS The doneness of meat, wh ether rare, medium, or well done, is affected to a large deg ree by the thickness of the cut. Expert chefs say it is impossible to have a rare doneness with a thin cut of meat. The cooking time is affecte d by the kind of meat, the siz... -
Page 19: Grill Cooking Chart
GRILL COOKING CHART WEIGHT OR APPROXIMATE SPECIAL INSTRUCTIONS FOOD THICKNESS FLAME SIZE TIME AND TIPS VEGETABLES Slice. Dot with butter or margarine. Wrap in heavy-duty foil. Fresh Grill, turning occasionally. Beets Medium 12 to 20 minutes Carrots Grill, turning once. Brush occasionally Turnips with melted butter or margarine. - Page 20 WEIGHT OR APPROXIMATE SPECIAL INSTRUCTIONS FOOD THICKN FLAME SIZE TIME AND TIPS Tenderloin, Porterhouse, T-Bon e, Sirloi Remove excess fat from edge. Slash remaining fat at 2-inch intervals. Rare 1 inch High 8 to 14 minutes Grill, turning once. 1-1/2 inch High 11 to 18 minutes Medium...
- Page 21 Breasts well-done Medium 3 0 to 45 minutes WEIGHT OR APPR OXIM SPECIAL INSTRUCTIONS FOOD THICKNESS LAME SIZE TIME AND TIPS FISH AND SEAFOOD Grill, turning once. Brush withmelted butter, margarine or oil Steaks to keep moist. Halibut 3/4 to 1 i Mediu m to 8 to 15 minutes...
-
Page 22: Grill Recipe Suggestions
GRILL RECIPE SUGGEST SALMON ter and sprin ed with chopped rsley and a crisp lettuce salad. BARBECUED LONDON 2 large salmon steaks BROIL 2 tbs. Oil Note: Substitute catfish, halibut or Salt & pepper d for salmon 4 to 6 se rvings 2 oz. - Page 23 VEGETABLE KABOBS ½ lb. boneless loin of lamb cut into 1” cubes CKEN TANDOORI STYLE 2/3 c. water, divided medium-sized zucchini ¼ c. chopped onion 12 cherry tomatoe large chicken thighs or 2 tbs. soy sauce 2 fresh mushrooms drumsticks ¼...
- Page 24 high. Rotisserie for 50 minutes or ntil done. PORK ROAST Apple cider vinegar bastin g sauce: c. apple cider vinegar 6 oz. water ½ stick butter Salt, pepper, parsley and garlic seasoning 2 oz. lemon juice 10 lbs. pork roast Time: 1-1/2 hours to 2 hours Bring pork to room temperature before placing it on the spit rod.
-
Page 25: Warranty
MODEL 720-0033 STAINLESS STEEL OUTDOOR GAS GRILL Nexgrill Industries ,I nc. warrants to the original consumer purchaser of each Outdoor Gas Grill that when subject to normal r esidential use, it is free from defects in workmanship and materials for the periods specified below. This warranty excludes grills used in rental or commercial applications.
Need help?
Do you have a question about the 720-0033 and is the answer not in the manual?
Questions and answers