Table of Contents
Advertisement
Quick Links
Palm.Net Discontinued: The Palm.Net service is
discontinued as of August 31, 2004. Any information in
this manual pertaining to Palm.Net, PQAs (web
clipping applications), MyPalm and the WAP Browser
is not applicable after that date. For wireless email and
web browsing, we recommend you migrate to a
palmOne smartphone.
We can help you do this: Click here to learn how to
upgrade to a new solution.
Handbook for
Palm
i700 Series
™
Handhelds
Advertisement
Table of Contents

Subscribe to Our Youtube Channel
Related Manuals for Palm i700 Series


Summary of Contents for Palm i700 Series
- Page 1 Palm.Net Discontinued: The Palm.Net service is discontinued as of August 31, 2004. Any information in this manual pertaining to Palm.Net, PQAs (web clipping applications), MyPalm and the WAP Browser is not applicable after that date. For wireless email and web browsing, we recommend you migrate to a palmOne smartphone.
- Page 2 End User Software License Agreement. Software Download Available Palm™ Desktop software is supplied on a CD-ROM disc. If you do not have access to a CD-ROM drive for your computer, you can download the Palm Desktop software from www.palm.com. PN: 406-2771-01...
-
Page 3: Table Of Contents
Palm MultiMail Desktop Link ........ - Page 4 Contents The Graffiti alphabet ..........20 Writing capital letters .
- Page 5 Contents Protection of your wireless transactions ....... 46 ® Chapter 5: Using MultiMail Deluxe .
- Page 6 Removing applications ......... . . 97 Removing Palm Desktop software ....... . . 97 Chapter 7: Using Address Book .
- Page 7 Contents Working in Week View ......... . 123 Spotting event conflicts .
- Page 8 Contents Performing cradle HotSync operations ....... 158 Performing a cradle HotSync operation: Windows ....158 Performing a direct HotSync operation: Mac computers .
- Page 9 Contents Application problems ..........208 HotSync problems .
- Page 10 Contents viii...
-
Page 11: About This Book
About This Book Welcome to the Palm™ i700 Series handheld. This handbook is designed to help you get up and running quickly on your handheld. It describes all you need to know about how to use your handheld and the applications that come with it. It... - Page 12 About This Book...
-
Page 13: Chapter 1: Setting Up
CHAPTER 1 Setting Up Your new Palm™ i700 Series handheld is wirelessly enabled so that you can use it to transmit and receive information over the airwaves. Use your handheld to do the following: Receive secure business e-mail wherever you are, and rely on your handheld’s blinking indicator light, vibrator, or alarm to notify you of its arrival. -
Page 14: Minimum Requirements: Mac Computers
® If you already own a Palm OS handheld, you must install the version of Palm Desktop software that comes with your new Palm i700 Series handheld. Before you ® install new software, perform a HotSync operation using your old handheld and... -
Page 15: Step 1: Connect The Hotsync Cradle
Step 1: Connect the HotSync cradle Step 1: Connect the HotSync cradle Shut down and turn off your computer. Plug the USB connector into a USB port on your computer. Connect the power cord that attaches to the back of the cradle’s USB port connector to the AC adapter cord. -
Page 16: Step 4: Install Software
Log in using your existing Palm.Net ® username and password. Palm VII/VIIx users: You must also check the box beneath the password that identifies you as a Palm VII/VIIx user. Log in using your MyPalm portal username and MyPalm portal members: password. -
Page 17: Step 7: Activate Your Handheld
Enter the Activation Key you received when you activated your wireless account. Activation will also configure MultiMail Deluxe to work with your Palm wireless account and your business e-mail account. At the Activation Successful screen, write down your user name and login information. -
Page 18: Updating The Mobile Portal
Palm folder, and then open the Documentation folder. Double- click the file Palm Desktop.pdf. The online help for Palm Desktop software. To access the online help, go to the Help menu in Palm Desktop software. If you have upgraded, your new handheld and your old handheld have the NOTE same user name after completing the upgrade process. -
Page 19: Chapter 2: Exploring Your Handheld
CHAPTER 2 Exploring Your Handheld Your Palm™ i700 Series handheld is wirelessly enabled. It will help you stay in touch with important e-mail and information, and to stay organized, on time, and up to date with daily tasks while you are away from your desk. Use your new handheld to do the following: Compose and securely send and receive business or personal e-mail wirelessly. -
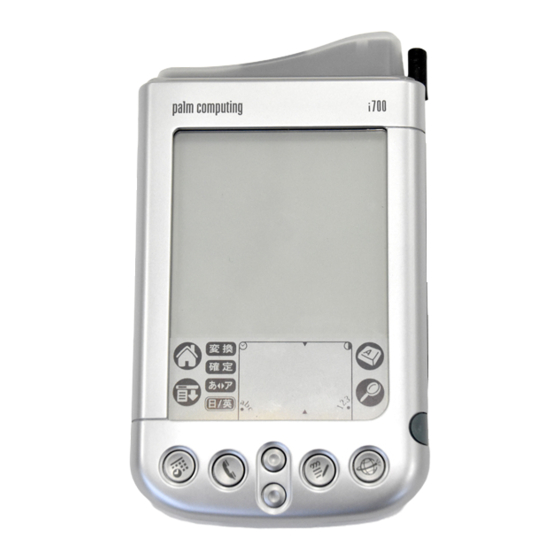
Page 20: Handheld Components
® Wireless Book Deluxe Application buttons Uses infrared technology to transmit data to and receive data IR port from other Palm OS handhelds, and to perform HotSync operations. See “Beaming data” Chapter 3 and see “IR HotSync operations” Chapter 16 or more information. -
Page 21: Using The Backlight
Handheld components The area where you write letters and numbers using the Graffiti writing area Graffiti alphabet. See “Using Graffiti writing to enter data” Chapter 3 to learn how to write Graffiti characters. Turns your handheld on or off and controls the backlight Power button/ Backlight control feature. -
Page 22: Locating Back Panel Components
Chapter 2 Exploring Your Handheld Locating back panel components Reset button Side channel for cover Expansion card slot Universal connector Under normal use, you should not have to use the reset Reset button button. See “Resetting your handheld” Appendix A information about when and how to use the reset button. -
Page 23: Tapping And Typing
Tapping and typing To insert a card: Insert the card in the direction shown by the icon. Push the card in with your thumb. You feel the card lock and hear the system sound. To remove a card: Push lightly against the card with your thumb. When the card is released, you hear the system sound. -
Page 24: Elements Of The Handheld Interface
Chapter 2 Exploring Your Handheld Open applications Choose menu commands Initiate a Find operation to search through applications installed on your handheld for specific text (Find operations do not search through applications on expansion cards) Select options in dialog boxes Open the onscreen keyboards Just as you can drag the mouse to select text or move objects on your computer, you can also drag the stylus to select text. - Page 25 Tapping and typing Previous/next arrows Check Pick list Command Scroll button When a check mark appears in a check box, the corresponding Check box option is active. If a check box is empty, tapping it inserts a check mark. If a check box is checked, tapping it removes the check mark.
- Page 26 Chapter 2 Exploring Your Handheld Displaying online tips Many of the dialog boxes that appear on your handheld contain an online Tips icon in the upper-right corner. Online tips anticipate questions you have in a dialog box, provide shortcuts for using the dialog box, or give you other useful information. To display an online tip: Tap the Tips icon After you review the tip, tap Done.
-
Page 27: Chapter 3: Entering Data In Your Handheld
Beaming data from another Palm OS handheld that is close by and has an infrared port. Entering or importing data in Palm™ Desktop software and then synchronizing with your handheld Using Note Pad Using a portable keyboard accessory, sold separately, and attached to the... -
Page 28: Using Graffiti Writing To Enter Data
Chapter 3 Entering Data in Your Handheld When a keyboard is open, you can tap to open any of the other keyboards, including the international keyboard. Alpha Backspace Caps lock Carriage return Caps shift Tap here to display alphabetic keyboard Numeric International Tap here to display... - Page 29 Using Graffiti writing to enter data Most characters require only a single stroke. When you lift the stylus from the Graffiti writing area, your handheld recognizes and displays the text character immediately. To accomplish single strokes, some Graffiti strokes are portions of the regular alphabet equivalents.
-
Page 30: Graffiti Tips
Chapter 3 Entering Data in Your Handheld You must begin the character strokes in the Graffiti writing area. If you do not NOTE make Graffiti strokes in the Graffiti writing area, your handheld does not recognize them as text characters. Graffiti tips When using Graffiti writing, keep these tips in mind: Accuracy improves when you write large characters. -
Page 31: Writing Capital Letters
Using Graffiti writing to enter data Space Back Space Carriage Period tap twice Return “Pen A fullscreen pen stroke brings up Graffiti help on your handheld. preferences” for details. Chapter 17 Writing capital letters You make capital letters with the same stroke shapes as the basic alphabet characters. -
Page 32: Writing Numbers
Chapter 3 Entering Data in Your Handheld To enter only capital letters (Caps Lock): Use the Caps Lock stroke: Caps Lock When Caps Lock is active, an underlined “up arrow” symbol appears in the lower-right corner of the handheld screen. To return to lowercase, make the Caps Shift stroke. -
Page 33: Additional Graffiti Punctuation
Using Graffiti writing to enter data appears to show it is active. The next stroke you make with the stylus creates a punctuation mark. Punctuation shift When Punctuation Shift is active, you can make a symbol stroke anywhere in the Graffiti writing area (the letters or numbers side). -
Page 34: Writing Accented Characters
Chapter 3 Entering Data in Your Handheld — Writing accented characters To create accented characters, draw the stroke normally used to create the letter, followed by an accent stroke. Graffiti writing then adds the accent to the letter. For example, the following diagram shows the strokes required to draw an accented “e.”... -
Page 35: Navigation Strokes
Using Graffiti writing to enter data Navigation strokes In addition to character symbols, Graffiti writing includes special strokes that you can use to navigate within text or fields in your applications. Stroke Command Move cursor right Move cursor left Previous field (Address Book only) Next Field (Address Book only) -
Page 36: Beaming Data
Your handheld is equipped with an IR (infrared) port that you can use to beam information to another Palm OS handheld that’s close by and also has an IR port. The IR port is located at the top of the handheld, behind the small dark shield. - Page 37 For best results, handhelds should be between 10 centimeters (approximately 4 inches) and 1 meter (approximately 39 inches) apart, and the path between the two handhelds must be clear of obstacles. Beaming distance to other Palm OS handhelds may be different.
-
Page 38: Using Your Computer Keyboard
Save the data in one of the file formats listed below, import it into Palm Desktop software, and then perform a HotSync operation to transfer the data to your handheld. - Page 39 Importing data Archive formats can only be used with Palm Desktop software. Use the archive file ® formats to share information with other people who use a Palm OS handheld or to create a copy of your important Palm Desktop information.
-
Page 40: Importing Data From A Mac Computer
Chapter 3 Entering Data in Your Handheld Text (*.txt) For information on how to set up a file link, see the Palm Desktop online Help. Importing data from a Mac computer Palm Desktop software can import data from any of the following applications... -
Page 41: Using Note Pad
Using Note Pad See Palm Desktop online Help for more information on importing and exporting data. Using Note Pad In addition to using Graffiti characters and the onscreen keyboard, you can enter data on your handheld using the Note Pad application. When you use Note Pad, you write quick notes directly on the handheld screen in your own handwriting. - Page 42 Chapter 3 Entering Data in Your Handheld...
-
Page 43: Chapter 4: Using Wireless Features
To use the wireless features, you must first establish a wireless account and activate your handheld. See “Setting Up” Chapter 1 or Getting Started with Palm™ i700 Series Handhelds for details. After activatation, you can use your wireless account to securely send and receive business and personal e-mail. See Chapter 5 for details. -
Page 44: Turning On The Radio
Chapter 4 Using Wireless Features Turning on the radio To send and receive wireless information and receive wireless notifications, the internal radio needs to be turned on. Use the Wireless Preferences screen to turn the radio on or off, or to schedule radio operation. You can open the Wireless Preferences screen in multiple ways: Press and hold down the Wireless button for one second. -
Page 45: Monitoring The Transmission Signal
Monitoring the transmission signal Turning off the handheld does not turn off the radio. When the IMPORTANT handheld is turned off, the radio can remain on to receive notification of e-mail. The indicator light shows radio and notification status. Monitoring the transmission signal When the radio is turned on, a signal strength bar graph and text message appear on the Wireless Preferences screen. -
Page 46: Using The Indicator Light
Chapter 4 Using Wireless Features Using the indicator light The indicator light at the top of the handheld blinks to indicate the following status levels: Radio is off. No light Radio is on and transmitter is within range. Green light flashes every 5 seconds Radio is on, but transmitter is out of range. -
Page 47: Web Clipping, Not Web Browsing
What is Web Clipping? automatic teller machines; driving directions; stock market data; movie listings; availability of tickets to local events; business and general news; definitions, spelling, and synonyms of words; and business and residential phone numbers, addresses, and e-mail addresses. Web Clipping, not web browsing It can be impractical to browse the Internet from a small handheld computer and look at elaborate, animated, graphics-laden web pages on a small screen. -
Page 48: Using The Mypalm Mobile Portal
This application is also dynamic. If you selected the option to receive updates to the MyPalm mobile portal when you installed Palm™ Desktop software, you automatically receive newer versions of the application when you perform a ®... -
Page 49: Browsing Or Searching The Internet
Using the MyPalm mobile portal To access Internet content by channel: Tap a content channel, such as Finance. Tap an icon to view the content. If you want to access more web clipping applications, tap More or More Content at the bottom of the screen. Browsing or searching the Internet Browsing or searching Internet sites directly using a URL is available from the MyPalm mobile portal. -
Page 50: Working With Web Clipping Applications
Chapter 4 Using Wireless Features To add web clipping applications using the MyPalm mobile portal: Tap the web clipping applications icon on the command bar. Tap Download. Do one of the following: – Enter search terms, and then tap Search. –... -
Page 51: Using Installed Web Clipping Applications
Using installed web clipping applications Web clipping applications installed on your handheld appear in a list accessible from the MyPalm mobile portal. They also appear by default in the Palm.Net category of the Applications Launcher. To open a web clipping application from the Applications Launcher: Tap the Applications icon Tap the pick list in the upper-right corner of the screen. -
Page 52: Example Of Web Clipping
Chapter 4 Using Wireless Features To stop a wireless transaction: Tap the Stop icon. Stop icon Any data that is downloaded to your handheld before you tap the Stop icon appears onscreen. Example of web clipping This example takes you through the process of finding driving directions using the MapQuest web clipping application. -
Page 53: Reviewing Current Queries And Clippings
Working with web clipping applications Within seconds, your clipping appears. In this example, the clipping needs more than one screen to display all the directions. Use the scroll bar to see the rest of the clipping. Reviewing current queries and clippings Your handheld stores the queries and clippings of your current session so that you can review them. -
Page 54: Saving Information From A Web Clipping Application
Chapter 4 Using Wireless Features History pick list Select the clipping you want to review. Saving information from a web clipping application You can copy the text of a clipping or a page of a web clipping application and paste it into another application. For example, you can copy driving directions and paste them into Memo Pad. -
Page 55: Sending E-Mail From A Page
Web Clipping Preferences The Copy Page command copies only the first 4,096 bytes (4KB) of data. If the clipping or page you copy contains more than 4KB of data, your handheld appends the word “truncated” to the end of the pasted text. Use the Info command in the Options menu to find out how large a clipping is. -
Page 56: Protection Of Your Wireless Transactions
Chapter 4 Using Wireless Features Access any of the following options: Displays the name of the current connection, either the Palm Connection Wireless Service or a network dialup connection. Changes you make in the Network preferences panel update this field. - Page 57 Protection of your wireless transactions Encryption makes your data unreadable by anyone but the intended recipient. Encryption is done using a technology used in a wide variety of consumer handheld devices and enterprise applications. It’s not unusual to experience a delay of several seconds when a wireless transaction is being encrypted.
- Page 58 Chapter 4 Using Wireless Features...
-
Page 59: Chapter 5: Using Multimail Deluxe
Support for SMTP, POP3, and IMAP4 protocols. Support for up to six e-mail accounts, in addition to your Palm wireless account and desktop account. When you registered for your wireless account and activated your handheld, a mailbox was configured to work with your Palm wireless account. -
Page 60: Receiving E-Mail
Chapter 5 Using MultiMail ® Deluxe Holding down the button for two seconds initiates wireless message retrieval. Receiving e-mail Tap Get Mail. If you have e-mail stored in your Outbox, you will see Get and Send. In the Get Mail dialog box, select choices for downloading subjects only or messages. -
Page 61: Reading E-Mail
Receiving e-mail A list of your e-mail appears in the Inbox. Shows unread/total messages Icons indicate whether a message or subject has been downloaded, or has attachments Reading e-mail To read e-mail, tap the item in the Inbox or another folder. The e-mail appears on the screen. -
Page 62: Moving E-Mail Between Folders
Chapter 5 Using MultiMail ® Deluxe Tap the folders pick list in the upper-right corner of the screen. Tap the folder you want to view. Moving e-mail between folders You can move one or multiple e-mail messages between folders. To move one e-mail: Tap the folder that contains the e-mail message you want to move. -
Page 63: Sending E-Mail
Receiving e-mail Sending e-mail To start a new e-mail: Tap New. Tap New Tap the Subject field and enter the subject of your e-mail. Address your e-mail by entering the address until recognized or looking it up in the Address Book. To enter the address: Tap the To field and enter the address. -
Page 64: Adding Attachments
Outbox. Sends the e-mail immediately. Send Adding attachments You can attach and send files from your Palm wireless e-mail account. Attached files can be no larger than 3KB. The following files are supported as attachments: v Card (.vcf) vCal (.vcs) text (.txt) -
Page 65: Completing Drafts
Receiving e-mail To attach a file to a message: Tap the Menu icon Tap Options, and then tap Add Attachments. Tap the attachments pick list, and select the file type. All files of the selected type appear in the Select box. Tap the file to attach, and then tap Add. -
Page 66: Deleting E-Mail
Chapter 5 Using MultiMail ® Deluxe Enter a reply. Tap Outbox or Send to send the message. Deleting e-mail You can delete one or more e-mail messages at a time. To delete one e-mail: Tap the folders pick list and select the folder that contains the e-mail. Tap the icon next to the message you want to delete. -
Page 67: Emptying Trash
Receiving e-mail Tap the Menu icon , and then tap Delete. (Optional) Select the check box to delete the message on the server. Tap OK. If you delete a message on the server, you cannot retrieve it and view IMPORTANT it again later. -
Page 68: Configuring Multimail Deluxe
Empty Trash Configuring MultiMail Deluxe If you have activated your handheld and established a Palm wireless account, a Palm wireless e-mail account is already configured in MultiMail Deluxe. If you installed Palm MultiMail Deluxe Desktop Link, a business e-mail account is configured to receive your forwarded business e-mail. - Page 69 Configuring MultiMail Deluxe To open account setup: Tap the Menu icon Tap Accounts. Tap Account Setup. Tap the Account pick list, and then tap New Account. To add a mailbox: Tap Next. Enter a name for the mailbox you are creating. Tap Next.
- Page 70 HotSync operation. E-mail is sent and received using a modem accessory. Modem/Dialup E-mail is sent and received using Palm wireless service. Palm Wireless The next screens in the setup process will differ based on the selected connection method.
- Page 71 Configuring MultiMail Deluxe To enter mail server settings: Tap Next. Enter the name of your outgoing mail server, and then enter your name and your full e-mail address. (Optional) Tap Next and enter a signature to attach to your outgoing mail. (Optional) Tap More to set options for receiving replies at a different e-mail address and sending blind (bcc:) copies to other recipients.
- Page 72 Chapter 5 Using MultiMail ® Deluxe To set mail retrieval server options for a POP account: Tap Next. If you want to view incoming mail later on your desktop, tap Leave mail on server. If you want only unread mail to be downloaded to your handheld, tap Get unread mail ONLY.
-
Page 73: Editing E-Mail Accounts
Tap the name of the account you want to change, and then tap OK. To change the connection type: Tap the Connection pick list and select Synchronize Only, Modem/Dialup, or Palm Wireless. To change your username or password: Tap the username field and enter a new username. - Page 74 Chapter 5 Using MultiMail ® Deluxe To change incoming mail server settings: Tap Server. Tap Incoming Mail. In the Server field, enter the name of your incoming mail (POP or IMAP) server. Tap the appropriate protocol for this server: POP or IMAP. Tap OK.
-
Page 75: Deleting An Account
Configuring MultiMail Deluxe To set additional outgoing mail options: Tap More and set additional options for outgoing mail. Set additional options for outgoing mail: If you want replies sent to a different e-mail address, tap the Reply To Address check box and enter an alternative address. Tap the check box and enter an e-mail address to which a blind carbon copy will be sent. -
Page 76: Setting Imap Options
Disconnects from the server. Disconnect Setting notification options Turn notification on or off, or set filters for your Palm wireless e-mail account so that you control the e-mail messages that are delivered to and trigger an alert from your handheld. -
Page 77: Using Notification Filters
Using notification filters For your Palm wireless e-mail account only, use notification filters to limit the e- mail messages that are delivered to and trigger an alert from your handheld. For example, when you travel, you may want to receive and be alerted only to e- mail regarding a particular project. -
Page 78: Creating Filters
When you initiate a Get Mail or a Get and Send Palm wireless e-mail account: transaction, filters can be used to define which e-mail is downloaded to your handheld. - Page 79 Creating filters The three pick lists and the edit line combine to create a statement that identifies the type of e-mail and what you want to do with the e-mail. For example, a filter might read, “If the [Subject] [Contains] sales meeting, Then retrieve and move to [Sales].”...
-
Page 80: Setting Multimail Deluxe Preferences
Chapter 5 Using MultiMail ® Deluxe Tap the filter check boxes to select those filters you want to work for a subsequent e-mail transaction. A check mark next to a filter means that it is selected. To remove a check mark, tap the check box. - Page 81 Setting MultiMail Deluxe Preferences Select if you want to choose subjects only or entire messages Ask Every Time each time you retrieve e-mail. Displays a confirmation dialog before executing e-mail Confirm Deletions deletions. Deletes messages on the server that you have deleted on your Delete Msgs on Server handheld.
- Page 82 Chapter 5 Using MultiMail ® Deluxe If you have a wireless modem and want to give the modem a Modem Wait few seconds to initialize itself, tap and enter a number of seconds for the wait. The typical setting for a wireless modem is 3, and the typical setting for most normal modems is 0.
-
Page 83: Chapter 6: Working With Applications
CHAPTER 6 Working with Applications This chapter explains how to open and switch between applications on your handheld, how to change application settings so they are personalized to your work methods, and how to categorize applications so you view them in related groups. -
Page 84: Opening Expansion Card Applications
Chapter 6 Working with Applications To find an application quickly, you can write the Graffiti ® character for the first letter of its name. The Applications Launcher scrolls to the first application with a name that begins with that letter. Opening expansion card applications When an expansion card is properly seated in the expansion card slot, the Applications Launcher switches to the card and displays its contents. -
Page 85: Categorizing Applications
Categorizing applications Categorizing applications The category feature enables you to manage the number of application icons that appear onscreen in the Applications Launcher. You can assign an application to a category and then display a single category or all your applications. To categorize an application: Tap the Applications icon Tap the Menu icon... -
Page 86: Changing The Applications Launcher Display
Chapter 6 Working with Applications Changing the Applications Launcher display By default, the Applications Launcher displays each application as an icon. As an alternative, you can choose to show a list of applications. You can also choose to view the same category of applications each time you open the Applications Launcher. -
Page 87: Using Menus
Using menus Tap Copy on the App menu. Select the card name from the Copy To pick list. Select Handheld from the From pick list. Tap an application to copy. Tap Copy. Tap Done. You can install applications to a card that is seated in the expansion card slot during a HotSync ®... - Page 88 Chapter 6 Working with Applications – Tap on the inverted title area at the top of the screen. Tap the title area Tap the Menu icon In this example, three menus are available: Record, Edit, and Options. The Record menu is selected and contains the commands New Memo, Delete Memo, and Beam Memo.
-
Page 89: Choosing Application Preferences
Choosing application preferences Undo Copy Paste Beam Delete The command toolbar displays context sensitive menu commands for the current screen. For example, if text is selected the menu icons displayed may be undo, cut, copy, and paste. Tap on an icon to select the command, or immediately write the corresponding command letter for an appropriate command in the Graffiti writing area. -
Page 90: Creating Records
Chapter 6 Working with Applications Creating records You can use the following procedure to create a new record in Date Book, Address Book, To Do List, Note Pad, and Memo Pad. To create a record: Select the application in which you want to create a record. Tap New. -
Page 91: Deleting Records
Common tasks To select text in an application: Tap the beginning of the text that you want to select. Drag the stylus over the text to highlight it (in black). You can also double tap to select a word, or triple tap to select a line of NOTE text. -
Page 92: Purging Records
A confirmation dialog box appears. If you want to save a copy of the deleted item to an archive file in Palm™ Desktop software, be sure that the check box is checked. If you don’t want to save a copy, tap the check box to remove the check. -
Page 93: Categorizing Records
Common tasks Tap the pick list and select how old a record must be to be purged. Date Book: Purge deletes repeating events if the last of the series ends before the date that you purge records. If you want to save a copy of the purged records to an Date Book, To Do List: archive file on your desktop, be sure that the check box is checked. - Page 94 Chapter 6 Working with Applications Select the category for the record. Tap OK. In Address Book, Note Pad, and Memo Pad you can tap the category NOTE name in the upper-right corner of the screen and select a new category for the item.
- Page 95 Common tasks To define a new category: Tap the category pick list in the upper-right corner of the screen or list. Tap here Tap Edit Categories. Tap New. Enter the name of the new category, and then tap OK. Tap OK. You can assign any of your records to the new category.
-
Page 96: Finding Information
Chapter 6 Working with Applications Enter the new name for the category, and then tap OK. Tap OK. You can group the records in two or more categories into one category by giving the categories the same name. For example, if you change the name of the Personal category to Business, all records formerly in the Personal category appear in the Business category. - Page 97 Common tasks To look up an Address Book record: Display the Address list screen. Enter the first letter of the name you want to find. Look Up line The list scrolls to the first entry that begins with that letter. If you write another letter, the list scrolls to the first entry that starts with those two letters.
- Page 98 Chapter 6 Working with Applications As your handheld searches for the text, you can tap Stop at any time. You may want to do this if the entry you want appears before your handheld finishes the search. To continue the search after you tap Stop, tap Find More. Tap the text that you want to review.
-
Page 99: Sorting Lists Of Records
Common tasks Phone Lookup tips Write the Graffiti Command stroke “/L” to activate the Phone Lookup feature. You can also activate it in the following circumstances: For example, to insert the full name and phone number for While entering text: someone with the last name “Williams,”... -
Page 100: Attaching Notes
To sort the Note Pad or Memo list manually, tap and drag a memo or note to a new location in the list. To make the list of your memos appear in Palm Desktop software as you manually sorted it on your handheld, open Memo Pad in Palm Desktop software and click List by. -
Page 101: Choosing Fonts
Common tasks To attach a note to a record: Display the entry to which you want to add a note. In Address Book only: Tap Edit. Tap Details. Tap Note. Enter your note. Tap Done. A small note icon appears at the right side of any item that has a note. Note icon To review or edit a note: Tap the Note icon... -
Page 102: Reviewing Alerts
When you use certain application settings, your handheld can alert you to any of the following: An appointment set in Date Book A note created in Note Pad An alarm set in Clock E-mail received by your Palm wireless or business e-mail accounts... -
Page 103: Hiding Or Masking Private Records
Installing and removing applications This section explains how to install and remove applications on your handheld or on an expansion card, and how to remove Palm Desktop software from your computer. Installing add-on applications Your handheld comes with applications installed and ready to use, but you can also install additional applications, such as games and other software, on your handheld or on a card that is seated in the expansion card slot. - Page 104 Click Install. You can also access the Install Tool dialog by selecting Install Tool from the Palm Desktop program group or by double-clicking any file with a PRC, PDB, PQA, PNC, or SCP file extension. In the User drop-down list, select the name that corresponds to your handheld.
- Page 105 This can happen if the file type was not recognized during the HotSync operation. Expansion cards may hold applications that use files other than the Palm™ application files. In order for your handheld to recognize such a file, you must launch the application that uses these files at least once.
- Page 106 Chapter 6 Working with Applications From the HotSync menu, choose Install Handheld Files. From the User pop-up menu, select the name that corresponds to your handheld. Click Add to List. Select the Add-on folder from the pop-up menu. Select the application(s) you want to install. Click Add File to add the selected application to the Install Handheld Files list.
-
Page 107: Removing Applications
Tap the application that you want to remove. Tap Delete. Tap Yes. Tap Done. Removing Palm Desktop software If you no longer want to use Palm Desktop software, you can remove it from your computer. - Page 108 PIM. To remove Palm Desktop software from a Mac computer: Locate the Palm Desktop Installer icon and double-click this icon. From the Easy Install screen, choose Uninstall from the pop-up menu. Select the software you want to remove.
-
Page 109: Chapter 7: Using Address Book
Assign Address Book entries to categories so that you can organize and view them in logical groups. ® Create your own digital business card that you can beam to other Palm OS handhelds. To open Address Book: Press the Address Book application button on the front panel of your handheld. -
Page 110: Creating An Address Book Entry
A record in Address Book is called an “entry.” You can create entries on your handheld, or you can use Palm™ Desktop software to create entries on your computer and then download the entries to your handheld with your next HotSync ®... -
Page 111: Selecting Types Of Phone Numbers
Creating an Address Book entry letters, a closer match appears. For example, you may already have Sacramento and San Francisco in your Address Book. As you enter “S” Sacramento appears, and as you continue entering “a” and “n” San Francisco replaces Sacramento. As soon as the word you want appears, tap in the next field to accept the word. -
Page 112: Changing Address Entry Details
Chapter 7 Using Address Book Changing Address Entry details The Address Entry Details dialog box provides a variety of options that you can associate with an entry. To open the Address Entry Details dialog box: Tap the entry whose details you want to change. Tap Edit. - Page 113 Creating an Address Book entry Makes a copy of the current record and displays the copy in Duplicate Address Address Edit so you can make changes to the copied record. The copy has the same category and attached notes as the original record.
- Page 114 Chapter 7 Using Address Book Shows version information for Address Book. About Address Book...
-
Page 115: Chapter 8: Using Calculator
CHAPTER 8 Using Calculator Calculator enables you to perform basic calculations. Use Calculator to do the following: Perform addition, subtraction, multiplication, division, and square root operations. Store and retrieve values. Display the last series of calculations, which is useful for confirming a series of “chain”... -
Page 116: Recent Calculations
Chapter 8 Using Calculator Places the current number in memory. Each new number you enter with the M+ button is added to the total already stored in memory. The number that you add can be either a calculated value or any number you enter by pressing the number buttons. Pressing this button has no effect on the current calculation (or series of calculations);... - Page 117 Calculator menus Options menus Shows version information for Calculator. About Calculator...
- Page 118 Chapter 8 Using Calculator...
-
Page 119: Chapter 9: Using Card Info
CHAPTER 9 Using Card Info Card Info lets you review general information about an expansion card. Use Card Info to do the following: Review card contents. Rename a card. Format a card. Reviewing Card Information Tap the Applications icon Tap the Card Info icon Review Card name, Type, and Size. -
Page 120: Formatting A Card
Chapter 9 Using Card Info Tap Rename. Formatting a card Formatting a card destroys all its data and prepares it to accept new applications and data. Tap the Applications icon Tap the Card Info icon Tap the Menu icon. Tap Card, and then tap Format Card. Tap OK. -
Page 121: Chapter 10: Using Clock
CHAPTER 10 Using Clock Clock enables you to view the current time and date and to set an alarm. Use Clock to do the following: View the current time and date. Open a preferences screen where you can set the time and date for all the applications on your handheld. -
Page 122: Setting An Alarm
Chapter 10 Using Clock Setting an alarm To set an alarm: Tap the Applications icon Tap the Clock icon Tap the Alarm box to open the Set Alarm dialog box. Tap the time columns to set the hour and minute. When the alarm reminder message appears, do one of the following: Tap OK to permanently dismiss the reminder and return to the current screen. - Page 123 Clock menus Options menu Allows you to choose which information appears on the Clock Display Options screen. Activates the day of the week display. When it is on, the day Day. appears above the time. Activates the date display. When it is on, the date appears Date.
- Page 124 Chapter 10 Using Clock...
-
Page 125: Chapter 11: Using Date Book
CHAPTER 11 Using Date Book Date Book lets you quickly and easily schedule appointments or any kind of activity associated with a time and date. Use Date Book to do the following: Enter a description of your appointment and assign it to a specific time and date. -
Page 126: Scheduling An Event
Chapter 11 Using Date Book When you open Date Book, the screen shows the current date and a list of times for a normal business day. Scheduling an event A record in Date Book is called an “event.” An event can be any kind of activity that you associate with a day. - Page 127 Scheduling an event If the event is one hour long, skip to step 5. If the event is longer or shorter than an hour, tap the time of the event to open the Set Time dialog box. Tap the time of an event You can also open the Set Time dialog (to select a start time) by making sure no event is selected, and then writing a number on the number side of the...
- Page 128 Chapter 11 Using Date Book Previous Next week week Tap to select a day of the current week You can also use the scroll button on the front panel of your handheld to move forward or backward one day at a time. –...
-
Page 129: Rescheduling An Event
Rescheduling an event Enter a description of the event. untimed event No time selected Tap a blank area on the screen to deselect the untimed event. If you create an event and decide later that there is no particular start or end time, you can easily change it to an untimed event. -
Page 130: Scheduling Repeating Or Continuous Events
Chapter 11 Using Date Book Tap the pick list to select Minutes, Hours, or Days. Select the 5 and enter any number from 0 to 99 (inclusive) as the number of time units. Enter number of time units here Tap here to select unit of time Tap OK. - Page 131 Scheduling repeating or continuous events A birthday is a good example of an event that repeats annually. Another example is a weekly guitar lesson that falls on the same day of the week and the same time of day. A business trip or a vacation is an example of a continuous event. To schedule a repeating or continuous event: Tap the event.
-
Page 132: Changing The Date Book View
Chapter 11 Using Date Book Do one of the following: Tap Current to delete only the current event item. Tap Future to delete the current and all future event items and reset the end date of the repeating event to the last shown date. Tap All to delete all occurrences of the repeating event. -
Page 133: Working In Week View
Changing the Date Book view Tap on the appropriate view icon in the lower-left corner of Date Book. To display the current time: Tap and hold the stylus on the date bar to display the current time. Current time displays Tap and hold the date Drag the stylus below the title area and then lift it to redisplay the date. -
Page 134: Spotting Event Conflicts
Chapter 11 Using Date Book Event details Tap to show event details Tips for using Week View Keep the following points in mind: To reschedule an event, tap and drag the event to a different time or day. Tap a blank time on any day to move to that day and have the time selected for a new event. -
Page 135: Working In Agenda View
Changing the Date Book view Previous/next month Dashed line indicates continuous event Dashes on right side indicate events Crosses below date indicate untimed Month View button You can control the dots and lines that appear in the Month View. See “” later in this chapter. -
Page 136: Date Book Menus, Preferences, And Display Options
Chapter 11 Using Date Book You can also change the category of To Do items shown. Click on the NOTE pick list to choose another category. See Chapter 15 for more information on working with To Do items. Date Book menus, preferences, and display options Date Book menus are shown here for your reference, and Date Book features that are not explained elsewhere in this book are described here. - Page 137 Date Book menus, preferences, and display options Display Options Allows you to change Date Book’s appearance and which events display. Activates the time bars that appear in the Day View. The time Show Time Bars bars show the duration of an event and illustrate event conflicts.
- Page 138 Chapter 11 Using Date Book Defines how many times the alarm will occur after the initial Remind Me occurrence. The choices are Once, Twice, 3 Times, 5 Times, and 10 Times. Defines how often the alarm sounds. The choices are Minute, 5 Play Every minutes, 10 minutes, and 30 minutes.
-
Page 139: Chapter 12: Using Memo Pad
Drag and drop memos into popular computer applications like Microsoft Word when you synchronize using Palm™ Desktop software and HotSync ® technology. Assign memos to categories so that you can organize and view them in logical groups. -
Page 140: Reviewing Memos
Chapter 12 Using Memo Pad Tap New. In the Memo list screen, you can also begin writing in the Graffiti writing area to create a new memo. The first letter is automatically capitalized and begins your new memo. Enter the text you want to appear in the memo. Use the carriage return stroke to move down to new lines in the memo. -
Page 141: Record Menus
Memo Pad menus The Record and Options menus differ depending on whether you’re displaying the Memo list or an individual memo. Record menus Memo list Memo screen Opens MultiMail ® Deluxe and allows you to create a message to Send Category which all memos in a category are attached. - Page 142 Chapter 12 Using Memo Pad...
-
Page 143: Chapter 13: Using Note Pad
Assign notes to categories so that you can organize and view them in logical groups. Copy and paste notes into popular computer applications like Microsoft Word ® using Palm™ Desktop software and HotSync technology. Creating a note To create a new note:... -
Page 144: Reviewing Notes
Chapter 13 Using Note Pad Reviewing notes The note title and the date you created the note appear in the Note Pad list. If you did not assign a title to your note, the time you created the note appears as the note title. -
Page 145: Note Pad Menus
Note Pad menus Tap the Date box. Tap here to select year Tap here to select month Tap here to select date Tap the year, month and date you want the alarm to sound. After you tap the date, the Set Alarm dialog box reappears. Tap OK. -
Page 146: Record Menus
Chapter 13 Using Note Pad Record menus Note Pad list Note screen Options menus Note screen Note Pad list Displays the Note Pad Preferences dialog box, where you define Preferences the sort order for notes and the alarm sound. Displays the Change Security dialog box, where you set a Security privacy option for all notes. -
Page 147: Chapter 14: Using Security
CHAPTER 14 Using Security Your handheld comes with a Security application so that unauthorized users cannot view the entries you wish to protect. Use the Security application to do the following: Lock and turn off your handheld so that it does not operate until you enter the correct password. - Page 148 Chapter 14 Using Security Tap here Tap OK. Enter the same password a second time, and tap OK. Changing or deleting a password Once you define a password for your handheld, you can change or delete it at any time. You must enter the current password before you can change or delete it. To change or delete your password: Tap the Password box.
-
Page 149: Locking Your Handheld
Assigning a password Locking your handheld You can lock your handheld so that it cannot be operated until your password is entered. In the event that your handheld is lost or stolen, this helps protect your data from unauthorized use. You can set your handheld to lock automatically, or you can lock it manually. - Page 150 Chapter 14 Using Security Tap OK. To set your handheld to lock after a period of inactivity: Tap the Applications icon Tap the Security icon Tap the Auto Lock Handheld box, and then enter your password. Tap After a preset delay. Tap to select Minutes or Hours Enter the amount of time Enter the inactive period, then select Minute(s) or Hour(s) from the pick list.
-
Page 151: Recovering From A Forgotten Password
Assigning a password Tap Lock and Turn Tap Off & Lock. To start your handheld, turn it on and then enter the password. Recovering from a forgotten password If you forget your password, your handheld will display the password hint, if you entered one, to help you remember the password. - Page 152 Chapter 14 Using Security lock icon. Hidden records disappear completely from the screen. If you define a password for your handheld, you must enter it to display private records. To hide all private records: Tap the Applications icon Tap the Security icon Tap the Current Privacy pick list and select Hide Record.
- Page 153 Assigning a password To display all private records: Do one of the following: Tap the Applications icon , tap the Security icon, then tap the Current Privacy pick list and select Show Records. If you do not have a password, hidden and masked records become visible. If you have a password, the Show Private Records dialog box appears.
- Page 154 Chapter 14 Using Security...
-
Page 155: Chapter 15: Using To Do List
CHAPTER 15 Using To Do List To Do List is a convenient place to create reminders and prioritize the things that you have to do. Use To Do List for the following: Make a quick and convenient list of things to do. Assign a priority level to each task. -
Page 156: Setting Priority
Chapter 15 Using To Do List Tap anywhere onscreen to deselect the To Do List item. ® If no To Do List item is currently selected, writing in the Graffiti writing area automatically creates a new item. Setting priority The priority setting for items lets you arrange the tasks in your To Do List according to their importance or urgency. -
Page 157: Changing To Do List Item Details
Changing To Do List item details Completed To Do item Changing To Do List item details The To Do Item Details dialog box enables you to change settings for individual items. To display the To Do Item Details dialog box: Tap the text of the item whose details you want to change. -
Page 158: To Do Show Options
Chapter 15 Using To Do List Assigns the date exactly one week from the current One week later date. Removes the due date from the item. No Date Opens the date selector, where you can choose any Choose date date that you want for the item. Tap OK. -
Page 159: To Do List Menus
Changing To Do List item details Displays the due dates associated with items in the To Do List Show Due Dates and displays an exclamation mark next to items that remain incomplete after the due date passes. Shows the priority setting for each item. Show Priorities Shows the category for each item. - Page 160 Chapter 15 Using To Do List...
-
Page 161: Chapter 16: Performing Hotsync
® handhelds and Palm™ Desktop software or another PIM such as Microsoft Outlook. To synchronize data, you must connect your handheld and Palm Desktop software. You can synchronize your data either directly or indirectly. Direct methods include placing your handheld in the cradle attached to your computer, or using infrared communications. - Page 162 Determines the speed at which data is transferred between Speed your handheld and Palm Desktop software. Try the As Fast As Possible rate first, and adjust downward if you experience problems. This setting allows Palm Desktop software and your handheld to find and use the fastest speed.
- Page 163 Selecting HotSync setup options To set the HotSync options on a Mac computer: Double-click the HotSync Manager icon in the Palm folder. Click the HotSync Controls tab and select any of the following options: Activates the serial port monitor and prepares your Mac...
- Page 164 Determines the speed at which data is transferred Speed. between your handheld and Palm Desktop software. Try the As Fast As Possible rate first, and adjust downward if you experience problems. This setting allows Palm Desktop software and your handheld to find and use the fastest speed.
-
Page 165: Customizing Hotsync Application Settings
In general, you should leave the settings to synchronize all files. The only reason you might want to change these settings is to overwrite data on either your handheld or Palm Desktop software, or to avoid synchronizing a particular type of file because you don’t use it. - Page 166 Click the HotSync icon in the Windows system tray (bottom-right corner of the taskbar). You can also click the HotSync command on the Palm Desktop software menu bar. From the HotSync Manager menu, choose Custom. Select the appropriate user name from the list.
- Page 167 Click Done to activate your settings. To customize HotSync application settings on a Mac computer: Double-click the Palm Desktop icon in the Palm folder. From the HotSync menu, choose Conduit Settings. From the User pop-up menu, select the appropriate user name.
-
Page 168: Performing Cradle Hotsync Operations
Performing a cradle HotSync operation: Windows The first time you synchronize your data, you need to enter user information on Palm Desktop software. After you enter this information and synchronize, the HotSync Manager recognizes your handheld and doesn’t ask for this information again. -
Page 169: Performing A Direct Hotsync Operation: Mac Computers
Performing a direct HotSync operation: Mac computers When you installed Palm Desktop software, you entered a user name. This user name is the connection between your handheld and your computer. The first time you perform a HotSync operation the Palm Desktop software:... - Page 170 Chapter 16 Performing HotSync ® Operations Creates a folder for the user name in the Users folder inside the Palm folder. For example, if you entered Jane Garcia as your user name, a folder called Jane Garcia is created in the Users folder.
- Page 171 To perform a local HotSync operation on a Mac computer: Place your handheld on the HotSync cradle. Make sure HotSync Manager is enabled: Double-click the HotSync Manager icon in the Palm folder. Click the HotSync Controls tab and make sure the Enabled option is selected. Press the HotSync button on the cradle.
-
Page 172: Ir Hotsync Operations
Infrared Data Association (IrDA). This means that not only can you beam data to another Palm OS handheld that’s equipped with an IR port, but you can also beam data to a mobile phone and any other device that supports the IrCOMM implementation of the IrDA standards. - Page 173 HotSync Manager to communicate with the port defined for cradle synchronization. To configure HotSync Manager for infrared communication on a Mac computer: Double-click the HotSync Manager icon in the Palm folder. In the HotSync Controls tab, select Enabled. Click the Serial Port Settings tab.
-
Page 174: Performing An Ir Hotsync Operation
Chapter 16 Performing HotSync ® Operations Under Local Setup, select Infrared Port from the Port pop-up menu. Close the HotSync Software Setup window. Performing an IR HotSync operation After you complete the steps to prepare for performing an IR HotSync operation, it is easy to perform the actual operation. -
Page 175: Conducting A Hotsync Operation Via Modem
To return to local serial cradle HotSync operations on a Mac computer: If needed, connect the cradle to a serial port on your computer. Double-click the HotSync Manager icon in the Palm folder. In the HotSync Controls tab, select Enabled. -
Page 176: Preparing Your Computer
Determines the speed at which data is transferred. Try the As Speed Fast As Possible rate first, and adjust downward if you experience problems. This setting allows Palm Desktop software and your handheld to find and use the fastest speed. Identifies the modem type or manufacturer. Refer to your Modem modem manual or faceplate for its type or settings. - Page 177 Make sure the computer is disconnected from all online services, such as America Online (AOL). This helps to avoid conflicts with the serial port. Double-click the HotSync Manager icon in the Palm folder. Click the Serial Port Settings tab. Under Check for handheld connection using, click Modem Setup.
-
Page 178: Preparing Your Handheld
Chapter 16 Performing HotSync ® Operations Preparing your handheld There are a few steps you must perform to prepare your handheld for a modem HotSync operation. To prepare your handheld for a modem HotSync operation: Tap the Applications icon Tap the HotSync icon Tap Modem. -
Page 179: Selecting The Conduits For A Modem Hotsync Operation
Conducting a HotSync operation via modem If the phone line you’re using for the handheld has Call Waiting, select the Disable call waiting check box to avoid an interruption during the modem HotSync operation. If you want to use a calling card to place the call, select the check box and enter the calling card number. -
Page 180: Creating A User Profile
Appendix Creating a user profile If you use the File Link feature to configure several Palm OS handhelds with specific information (such as a company phone list) before distributing them to their actual users, you can create a user profile to load the data into a handheld without associating that data with a user name. - Page 181 Creating a user profile To create a user profile on a Mac computer: Open Palm Desktop software. From the User pop-up menu, choose Edit Users. Click New Profile. Enter a unique name for the profile and click OK. Close the Users window.
- Page 182 Chapter 16 Performing HotSync ® Operations The next time you perform a HotSync operation, Palm Desktop software prompts you to assign a user name to the handheld. To use a profile for the first-time HotSync operation on a Mac computer: Connect the new handheld to the HotSync cradle.
-
Page 183: Chapter 17: Setting Preferences For Your Handheld
CHAPTER 17 Setting Preferences for Your Handheld The Preferences screens enable you to customize the configuration options on your handheld, including the following: Assign an application to the Favorite icon. Reassign the Buttons following: different applications to the buttons on the front panel of your handheld and the HotSync ®... -
Page 184: Buttons Preferences
Chapter 17 Setting Preferences for Your Handheld Buttons preferences The Buttons Preferences screen enables you to assign a frequently used application to the Favorite icon, and to associate different applications with the buttons on the front of the handheld. Note Pad is assigned to the Favorite icon by default. But if you use Memo Pad more frequently, you can assign Memo Pad to the icon so that you don’t have to scroll through the Applications Launcher whenever you want to use Memo Pad. -
Page 185: Hotsync Buttons Preferences
Turns off and locks the handheld. You must assign a Turn Off & Lock password to lock the handheld. When locked, you need to enter the password to use your handheld. Beams the current record to another Palm OS ® handheld. Beam Data Tap OK. -
Page 186: Digitizer Preferences
Chapter 17 Setting Preferences for Your Handheld The default setting for each button is the HotSync setting, which means the cradle and optional PalmModem accessories perform their normal HotSync functions. Tap OK. Digitizer preferences The Digitizer Preferences screen opens the digitizer calibration screen. This is the same screen that appears when you start your handheld for the first time. -
Page 187: General Preferences
Viewing Preferences To select the time, date, week start, and numbers format: Tap the Time pick list and select a format. Tap the Date pick list and select a format. Tap the Week starts pick list, and select whether you want the first day of the week to be Sunday or Monday. -
Page 188: Date And Time Preferences
Chapter 17 Setting Preferences for Your Handheld To change the cradle setting: Tap the Stay on in Cradle check box to leave your handheld on when it is in the cradle. System, alarm, and game sounds Your handheld uses a variety of sounds. The System, Alarm, and Game Sound settings enable you to turn the sounds on or off, and to adjust the volume level. - Page 189 Viewing Preferences To set the date: Tap the Set Date box. Tap the arrows to select the current year. arrows select Tap to select Tap to set date Tap to select date Tap a month. Tap the current date. To set the time: Tap the Set Time box.
-
Page 190: Connection Preferences
You can purchase a PalmModem accessory for use with your . See NOTE www.palm.com. You can also create custom configurations, which include the following: A local HotSync connection: the direct PC via Cradle/Cable: handheld connection between your and your desktop computer. -
Page 191: Network Preferences And Tcp/Ip Software
Viewing Preferences To edit the IR to Phone connection: Select the IR to Phone connection and tap Edit. Tap Details. Tap here Tap the Speed pick list and select the appropriate speed. Enter the initialization string supplied by the documentation for the modem attached to your mobile phone, if necessary. - Page 192 TCP/IP provides the ability to connect to your ISP or dial-in server with NOTE applications that allow you to view the transmitted data. Visit the web site www.palm.com for information on third-party applications that take advantage of TCP/IP . Selecting a service Use the Service setting to select the service template for your Internet Service Provider or a dial-in server.
- Page 193 Viewing Preferences To enter a user name: Tap the User Name field. Enter your user name. Enter your user name here Most dial-in servers do not accept spaces in the user name. NOTE Entering a password The Password box identifies the password you use to log into your server or ISP. Your entry in this field determines whether your handheld prompts you to enter a password each time you log into your network: If you do not enter a password, your handheld displays the word “Prompt”...
- Page 194 Chapter 17 Setting Preferences for Your Handheld Selecting a connection Use the Connection setting to select the method you want to use to connect to your Internet Service Provider or a dial-in server. See “Connection preferences” earlier in this chapter for information about creating and configuring connection settings. To select a connection: Tap the Connection pick list.
- Page 195 Viewing Preferences To enter a prefix: Tap the Dial Prefix check box to select it. Select this Enter your box if you prefix here need to use a prefix Enter the prefix. Tap OK. Disabling Call Waiting Call Waiting can cause your session to terminate if you receive a call while you are connected.
- Page 196 For information about third-party applications that support TCP/IP , check the web site www.palm.com. To establish a connection: Tap Connect to dial the current service and display the Service Connection Progress messages.
- Page 197 Viewing Preferences To add a new service template: Tap the Menu icon Tap Service, and then tap New. An Untitled service template is added to the Service pick list. To duplicate an existing service template: Tap the Service pick list. Tap the predefined service template you want to duplicate.
- Page 198 Chapter 17 Setting Preferences for Your Handheld To set the Idle timeout: Tap the Idle timeout pick list and select one of the following options: Waits one minute for you to open another application before it 1 minute drops the connection. Waits two minutes.
- Page 199 Viewing Preferences If your IP address is permanently assigned, you need to get that information from your System Administrator. If you are not sure, select Automatic. To identify dynamic IP addressing: Tap the IP Address check box to select it. Tap to select automatic IP address To enter a permanent IP address:...
- Page 200 Chapter 17 Setting Preferences for Your Handheld Tap here to see the list of available commands You can also use non-ASCII and literal characters in your login script. NOTE Creating a login script on your handheld You can create login scripts by selecting commands from the Command pick list in the Login Script dialog.
- Page 201 Created using a development environment that supports Palm OS software, such as Metrowerks CodeWarrior for Palm Platform. For additional information on creating plug-in applications, send e-mail to Palm Developer Support at devsupp@palm.com. Deleting a service template There is only one way to delete a service template: use the Delete command from...
- Page 202 Chapter 17 Setting Preferences for Your Handheld To delete a service template: Tap the Service pick list. Tap the service template you want to delete. Tap the Menu icon Tap Service, and then tap Delete. Tap OK. Network preferences menu commands The Network Preferences screen includes menu commands to make it fast and easy to create and edit service templates.
-
Page 203: Owner Preferences
Viewing Preferences To view the Network Log: Tap Options, and then tap View Log. Tap the up and down arrows of the scroll bar to see the entire Network Log. Tap Done. Adding a DNS number If your ISP or dial-in server requires a DNS number and you did not enter that information in the Network Preferences screen, it will appear that you successfully logged into your network. -
Page 204: Shortcuts Preferences
Chapter 17 Setting Preferences for Your Handheld ShortCuts preferences The ShortCuts Preferences screen enables you to define abbreviations for entering text with Graffiti strokes. This section describes how to create, edit, and delete a ShortCut. Creating a ShortCut You can create a ShortCut for any words, letters, or numbers. All ShortCuts you create appear on the list in the ShortCut Preferences screen. - Page 205 Viewing Preferences To edit a ShortCut: Tap the ShortCut you want to edit. Tap Edit. Make the changes you want and tap OK. Deleting a ShortCut If you no longer need a ShortCut, you can delete it from the list of ShortCuts. To delete a ShortCut: Tap the ShortCut you want to delete.
- Page 206 Chapter 17 Setting Preferences for Your Handheld...
-
Page 207: Appendix A: Maintaining Your Handheld
APPENDIX A Maintaining Your Handheld This chapter provides information on the following: Proper care of your handheld Prolonging battery life Resetting your handheld Caring for your handheld Your handheld is designed to be rugged and reliable and to provide years of trouble-free service. -
Page 208: Resetting Your Handheld
Appendix A Maintaining Your Handheld Under normal conditions, your handheld battery should remain charged by placing it in the cradle for just a few minutes each day. You can conserve battery life by minimizing the use of the backlight feature, and changing the Auto-off setting that automatically turns the handheld off after a period of inactivity. -
Page 209: Performing A Hard Reset
(or similar object without a sharp tip) to gently press and release the reset button. ™ Wait for the Palm Powered logo to appear; then release the power button. When a message appears on the handheld screen warning that you are about to erase all the data stored on your handheld, do one of the following: –... - Page 210 Click the HotSync icon ™ in the Windows system tray (bottom-right corner of the taskbar). You can also click the HotSync command on the Palm Desktop software menu bar. From the HotSync Manager menu, choose Custom. Select the appropriate user name from the list.
- Page 211 Resetting your handheld From the Users pop-up menu, select the appropriate user name. Select an application from the list. Click Conduit Settings, and do one of the following: Set update options. Enter your Username and The MyPalm Update conduit: Password, and select the check box to set these options as a default. Click Macintosh overwrites handheld.
- Page 212 Appendix A Maintaining Your Handheld...
-
Page 213: Appendix B: Frequently Asked Questions
The README file located in the folder where you installed the Palm™ Desktop software on Windows your computer or on your installation CD for Macintosh... -
Page 214: Software Installation Problems
Appendix B Frequently Asked Questions Software installation problems The Palm Desktop Installer Menu Click the Start button. did not appear when I inserted the CD-ROM into my Windows Choose Run from the Start menu. computer. Click Browse. Locate your CD-ROM drive and select the Setup.exe file. -
Page 215: Operating Problems
Operating problems Operating problems Try each of these in turn: I don’t see anything on my handheld’s screen. Press an application button to ensure your handheld is turned on. Tap the Contrast icon in the upper-right corner of the Graffiti ®... -
Page 216: Tapping And Writing Problems
Appendix B Frequently Asked Questions Check the Alarm Vibrate setting. See “Alarm vibrate and My handheld does not vibrate when alarms occur. indicator light settings” Chapter Perform a soft reset. See “Resetting your handheld” My handheld has frozen. Appendix Tapping and writing problems Calibrate the screen. -
Page 217: Wireless Problems
Wireless problems Wireless problems You can monitor the transmission signal strength using the The signal strength is weak. Signal Strength bar graph and text message on the Wireless Preferences screen. See “Monitoring the transmission signal” Chapter 4 for more information. Monitor the signal strength while you try the following solutions: Move away from your original location, five to ten feet in any direction. -
Page 218: Application Problems
Memo Preferences setting. Make sure that Sort by is set to Manual. If you choose to view your memos alphabetically on Palm Desktop software and then perform a HotSync operation, the memos on your handheld still appear in the order defined in the Memo Preferences setting. -
Page 219: Hotsync Problems
HotSync Manager on the HotSync Controls tab. If you are using the optional serial cradle, double-click the HotSync Manager icon in the Palm folder and then click the Serial Port Settings tab. Make sure Local is selected and that the port selection matches the port where your HotSync cradle is attached. - Page 220 Check the connection between the HotSync cradle and the USB or serial port on your computer. Make sure the user name you selected in Palm Desktop software matches the user name assigned to your handheld. Make sure the date on your computer matches the date on your handheld.
- Page 221 HotSync problems Check the following on your computer: I tried to do a modem HotSync operation, but it did not complete successfully. Make sure your computer is turned on and that it does not shut down automatically as part of an energy-saving feature.
- Page 222 Appendix B Frequently Asked Questions Make sure your modem resets before you try again. (Turn I tried to do a modem HotSync operation, but it did not complete off your modem, wait a minute, then turn it back on.) successfully. (continued) Check the following on your handheld: Confirm that the telephone cable is securely attached to...
-
Page 223: Beaming Problems
If you have performed a HotSync operation successfully, When I perform a HotSync operation, my information does not but you cannot find the data from your handheld on Palm transfer to Palm Desktop software. Desktop software, check to see you have the correct user name selected for viewing data. -
Page 224: Recharging Problems
Then, you can follow these steps to restore your private entries: – Use the Palm Desktop software and the cradle or infrared communication to synchronize your data. – Tap Forgotten Password in Security to remove the password and delete all private records. -
Page 225: Technical Support
Thousands of third-party add-on applications have been written for the NOTE Palm OS handhelds. Unfortunately, we are not able to support such a large number of third-party applications. If you are having a problem with a third- party application, please contact the developer or publisher of that software. - Page 226 Appendix B Frequently Asked Questions...
-
Page 227: Product Regulatory Information
U.S. and international standards bodies. The design of this product complies with the FCC guidelines and these international standards. Responsible Party: Palm i700 Series Product Family Palm, Inc. 5470 Great America Parkway... -
Page 228: Battery Warning
Product Regulatory Information Battery Warning Do not mutilate, puncture, or dispose of batteries in fire. The batteries can burst or explode, releasing hazardous chemicals. Discard used batteries according to the manufacturer’s instructions and in accordance with your local regulations. -
Page 229: Index
Index Application buttons 11, 73, 99, 115, 174 Applications ABA (Address Book archive file) 28 Address Book 99 Accented characters beaming 26–27 Graffiti writing 24 Calculator 105 Activation 7 Card Info 109 Activation key 7 categories 75 Add-on applications 93–97 Clock 111 Address Book Date Book 115... - Page 230 Index recharging 5 opening 111, 112 recycling 198 Combining categories 86 warning 218 Comma delimited files, importing data Beaming from 28 information 26–28 Command location of IR port 10 buttons 15 pen stroke to activate 175 equivalents (Graffiti writing) 78 problems with 213 stroke 28 See also Infrared...
- Page 231 Index Cutting text 81 Default Cycling through views 99, 115 categories 83 Deleted data, saving in archive files 82 Deleting Data entry. See Entering data applications 97 Date Desktop software 97 displaying in Clock 113 filter 70 setting current 179, 208 Graffiti characters 20 Date Book passwords 138...
- Page 232 Index using the computer keyboard 28 using the onscreen keyboard 17 Games 178 Entries. See Address Book General preferences 173 Euro alarm LED setting 178 in Graffiti writing 23 alarm sounds 178 in onscreen keyboard 18 alarm vibrate setting 178 Events.
- Page 233 Index local operation 152, 158, 210 Internet local operation on Mac 161 browsing using URL 39 modem operation 152, 165–170, 211–212 reviewing queries 43 modem settings 166 submitting queries 41 operations using cradle 164, 180 web clipping information from 36 operations using IR port 162–164, 180–...
- Page 234 Index conduit for synchronizing 155 described 38 creating records 80 updating 8 deleting records 81, 121 dragging memos into other applications 129 Network fonts 91 connecting 186 menus 106, 130 idle timeout 187 opening 129 login scripts 189–191 overview 129 password 183 private records 143 phone settings 184...
- Page 235 Pages (web clipping application) Protection. See Security application saving text of 44 Proxy server changes 46 sending e-mail from 45 Punctuation marks Palm MultiMail Desktop Link 49 Graffiti writing 22 Passwords 137–141 onscreen keyboard 17 changing 138 Purging creating 137 records 82–83...
- Page 236 Index scheduling 121 data. See Beaming information Rescheduling events 119 Serial Resetting handheld port 152, 154, 155, 166, 167 hard reset 199, 205 Service location of reset button 12, 198 selecting for network 182 soft reset 198 templates 186, 191 Restoring data Settings.
- Page 237 Index format 176 User profiles 170 setting current 179 setting event 116 start and end for Date Book Day VCal 28 view 127 vCard 28 Tips, online 16 Vibrate alarm 178 To Do List Views adding Address Book data to Web Clipping Preferences 45 records 88–89 archive files (.tda) 28...
- Page 238 Index...
Need help?
Do you have a question about the i700 Series and is the answer not in the manual?
Questions and answers