Foster Multifunction steam S4000, cod. 7135 080 User Manual
Multifunction steam built-in oven
Hide thumbs
Also See for Multifunction steam S4000, cod. 7135 080:
- User manual (39 pages) ,
- User manual (31 pages) ,
- User manual (22 pages)
Table of Contents
Advertisement
USER'S MANUAL FOR BUILT-IN OVEN
Multifunction steam S4000, cod. 7135 080
Foster
spa
via M.S. Ottone, 18/20
42041 Brescello (RE) - Italy
tel. +39.0522.687425 - tel. Servizio Assistenza +39.0522.684450
fax +39.0522.686019 - fax Servizio Ricambi +39.0522.962166
e-mail: service@fosterspa.com
www.fosterspa.com
Advertisement
Table of Contents

Related Manuals for Foster Multifunction steam S4000, cod. 7135 080


Summary of Contents for Foster Multifunction steam S4000, cod. 7135 080
- Page 1 USER'S MANUAL FOR BUILT-IN OVEN Multifunction steam S4000, cod. 7135 080 Foster via M.S. Ottone, 18/20 42041 Brescello (RE) - Italy tel. +39.0522.687425 - tel. Servizio Assistenza +39.0522.684450 fax +39.0522.686019 - fax Servizio Ricambi +39.0522.962166 e-mail: service@fosterspa.com www.fosterspa.com...
-
Page 2: Table Of Contents
CONTENTS warnings installation connection to the mains power supply technical data oven dimensions oven and accessories description control panel description the first start-up cooking cycles available how to select a cooking function how to change the cooking temperature how to use the alarm function how to program the oven cooking with the food probe saving a cooking cycle... - Page 3 INTRODUCTION OVEN DESCRIPTION Combination oven suitable for cooking food in ordinary homes for non-professional purposes combining, in a single product, traditional cooking with the advantages of steam to obtain excellent results for each meat, fish, vegetable and dessert dish while at the same time retaining the taste, freshness, aromas and above all the nutritional properties of the food.
-
Page 4: Warnings
WARNINGS This appliance is designed to be used by adults who are familiar with these user instructions. Make sure that the power cord of the electrical appliances is not crushed by the oven door. The electrical insulation could be damaged. If the power cord has been damaged, it must be replaced by customer service to prevent danger. - Page 5 x When using or cleaning the oven, be careful not to place your fingers in the door hinges or in the door itself in order to avoid crushing or injuries. Be especially careful of this when children are present. x Leave the oven door open in the supported position only. x When the door is open, there is a risk of tripping or crushing fingers.
-
Page 6: Installation
INSTALLATION Remove the appliance from the package and check that the product and power cord are NOT damaged. Otherwise, contact the retailer before operating the appliance. Do not lift the product by the door handle. Packaging (e.g. paper, polystyrene) may be hazardous to children (danger of suffocation). Keep packaging out of the reach of children. - Page 7 Oven preparation and pre-use N.B. Disconnect the oven from the mains power, or move the omnipolar switch to OFF, before cleaning the oven. Before using the oven, thoroughly clean the inside using a soft cloth or non-abrasive sponge dampened with warm water and washing-up liquid. Insert the grill and drip pan in their respective tracks.
-
Page 8: Technical Data
INSTRUCTIONS FOR CORRECT INSTALLATION TECHNICAL DATA x Water tray capacity: 1.2 L. x Usable volume (cooking chamber): 27 L. x Gross volume (cooking chamber): 31 L. x Connection voltage: 220-240V~ 50/60Hz x Maximum pickup voltage: 2.2kW... -
Page 9: Oven Dimensions
Oven dimensions... -
Page 10: Oven And Accessories Description
DESCRIPTION OF THE OVEN AND ACCESSORIES 1 Control panel and data display 8 Perforated pan 2 Pitcher compartment 9 Grill 3 Pitcher 10 Handle 4 Filter compartment 11 Door 5 Filter cap 12 Cooking chamber 6 Food or temperature probe 13 Side grills 7 Drip pan 14 Food probe connector... -
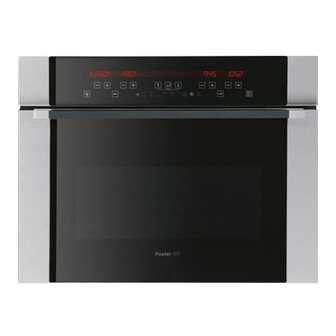
Page 11: Control Panel Description
DESCRIPTION OF THE CONTROL PANEL Description of the keys 1. Keys for setting the cooking chamber temperature and display area for the temperature indication ( + to increase, - to decrease, min. 30C°-max. 230°C * depending on the cycle selected, see page 15 ) 2. -
Page 12: The First Start-Up
FIRST START-UP When the oven is connected to the mains power supply for the first time, a wait message ( WAIT ) and some product identification information appear on the display. Do not touch the keypad during this brief period. N.B. -
Page 13: Cooking Cycles Available
COOKING CYCLES AVAILABLE Min-Max. Food Function name Chamber Function description probe T and symbol temp. default T default During steam cooking, the steam coming from the boiler flows STEAM COOKING into the cooking chamber. 40 – 100 The steam heats the cooking chamber and cooks the food. This cooking mode is ideal for cooking any type of vegetables, and it preserves the colour, taste and above all the organoleptic properties of the food. -
Page 14: How To Select A Cooking Function
HOW TO SELECT A COOKING FUNCTION Press one of the two direction keys: (7) to select the desired cooking cycle. See function explanation in the table above. (cooking cycles available) N.B. If no selection is made within 5 minutes, the oven will turn off automatically. USING A COOKING FUNCTION THAT INCLUDES STEAM x Fill the water container (pitcher) with distilled water or, if this is unavailable, drinking water. -
Page 15: How To Change The Cooking Temperature
HOW TO CHANGE THE COOKING CHAMBER TEMPERATURE Press one of the two keys (1) to change, with steps of 5°C, the preset temperature. The cooking chamber temperature is always displayed on the left side of the letter N.B. The degree symbol “°”... -
Page 16: How To Program The Oven
HOW TO DISPLAY OR CHANGE THE ALARM STATUS Press one of the two keys (4) and the display immediately shows the information regarding the time status of the alarm. The symbol begins to flash. Press one of the two keys (4) to set a new time for the alarm. - Page 17 HOW TO PROGRAM THE START AND STOP OF THE OVEN Turn on the oven, select a cooking function and set the desired cooking temperature. Use the keys (3) to set the cooking time. The maximum time that can be set is 10 hours. (9), select the item END OF COOKING with key Then press the key: (8).
-
Page 18: Cooking With The Food Probe
COOKING WITH THE FOOD PROBE The oven is supplied with a food and temperature probe, which is an accessory shaped like a large pin inserted in a grip that ends with a cable and a plug. The food probe connected to the electronics allows to measure the temperature inside the meat or other food that is being cooked. - Page 19 HOW TO CHANGE THE FOOD PROBE TEMPERATURE Press one of the two keys (2) to change, with steps of 1°C, the food probe temperature. Maximum temperature that can be set: 90°C Minimum temperature that can be set: 30°C The food probe temperature value is displayed with the following graphic symbol to the left: Notes: x The chamber temperature must be higher than the food probe temperature.
-
Page 20: Saving A Cooking Cycle
SAVING A COOKING CYCLE The oven electronics offers the possibility to store your cooking settings in appropriate memory areas. This information may be retrieved at a later time in order to cook with the same previous settings, obtaining consistent and unfailing results. The following can be stored in the memory: x cooking cycle x cooking chamber temperature... -
Page 21: How To Add Steam In The Cooking
HOW TO ADD STEAM IN THE HOT AIR + STEAM COOKING MODE The hot air + steam cooking cycle allows the user to add steam at any time during the cooking. In this manner the right degree of humidity inside the cooking chamber is reached or maintained in order to obtain a more tender dish. -
Page 22: How To Move Around Inside The Menu
HOW TO MOVE AROUND INSIDE THE MENU Turn on the oven. When the following message is displayed: m o SELECT COOKING MENU press the key: (9) to display the first item in the list: “RECIPES” To view the menu structure: press the key: (9) to scroll down the list press the key:... -
Page 23: Menu Structure Flow-Chart
MENU STRUCTURE FLOW-CHART... -
Page 24: Recipe Lists
BREAD/PIZZA recipe list Cooking Food probe Cooking chamber Dish: Cooking time Level temperature temperature cycle * °C °C SAVOURY ’ FOCACCIA BREAD ’ BREAD ’ PIZZA TIMBALES recipe list Cooking Food probe chamber Cooking Dish: temperature Cooking time Level temperature cycle * °C °C... - Page 25 MEAT recipe list The cooking modes listed have been determined for pieces of meat weigthing about 1 Kg. Cooking Food probe chamber Cooking Dish: temperature Cooking time Level temperature cycle * °C °C HAUNCH OF PORK BEEF RUMP VEAL RUMP ROAST PORK PORK NECK MEDIUM CHOP...
- Page 26 FISH recipe list Cooking Food probe chamber Cooking Dish: temperature Cooking time Level temperature cycle * °C °C MUSSELS AND ’ CLAMS PLAICE FILLET .10’ SCORPION FISH .30’ FILLET PRAWNS AND ’ FLAT LOBSTER ’ TROUT VEGETABLES recipe list Cooking Food probe chamber Cooking...
-
Page 27: How To Customise A Recipe List
DESSERTS recipe list Cooking Food probe chamber Cooking Dish: temperature Cooking time Level cycle temperature * °C °C ’ BISCUITS YOGURT .15’ BISCUITS ’ PLUM CAKE SOUFFLES .35’ ’ APPLE PIE ’ SPONGE CAKE NOTE: The settings listed in the tables (temperature, cooking time) may be changed to create personalized cooking better suited to your needs. -
Page 28: Practical Cooking Suggestions
HOW TO DELETE YOUR OWN RECIPE Select menu and select the recipes item, with key (8). Scroll the items with key (9) or key (9) until the text YOUR OWN RECIPES is displayed. Confirm the selection with key Use one of the two keys (9) to scroll the items until the following text is displayed: DELETE COOKING CYCLE. -
Page 29: Oven Accessories
ACCESSORIES The accessories supplied with the oven increase the number of cooking modes and possibilities. Level 4 The drip pan and grill accessories can be placed on various levels of the slide guide located Level 3 inside the oven. This allows the user to set the most suitable height (levels) depending on the cooking to be carried out. -
Page 30: How To Customise Your Oven
HOW TO PERSONALIZE YOUR OVEN Turn on the oven. When the following message is displayed: m o SELECT COOKING MENU press the key: (9) to display the first item in the list: “RECIPES”. Press the key (9) and confirm the selection “SETTINGS” with key Move around inside the SETTINGS submenu using the procedures described in section how to move around inside the menu... -
Page 31: Setting Keypad Lock
x SET TIME Allows to set the current time. Keep one of the two keys mentioned previously pressed down to scroll faster. x CLOCK DISPLAYED If NO is selected, the current time is not displayed when the oven is off. x NIGHT MODE Default setting = NO If the setting is changed to YES, when the oven is off, during the time between 22.00 and 06.59.59... -
Page 32: Buzzer And Lighting
KEYPAD LOCK DETAILS The key allows to turn on / off the light in the cooking chamber regardless of the oven state. The key allows to turn the oven off. BUZZER Allows to select one of the 3 levels (low, medium, high) for the intensity of the buzzer that sounds during a warning. -
Page 33: Start Cleaning Cycle
START CLEANING CYCLE Menu items: COOKING CHAMBER BOILER DESCALING COOKING CHAMBER The purpose is to facilitate the removal of any residue of food, grease, etc. after a cooking process. The oven fills the cooking chamber with a certain quantity of steam for a fixed period of time (10 min.). - Page 34 INSTRUCTIONS for boiler descaling process: Dosing: fill the pitcher with water up to the 0.6 L mark , add 5 teaspoons of citric acid monohydrate and dissolve. Insert the pitcher in the appropriate seat and start the descaling process with key (8).
-
Page 35: Reset Settings
RESET SETTINGS This function is used to reset the system in case of problems. Caution: All the system variables are returned to the original values and your own recipes are deleted. Select the item : “ RESET SETTINGS” with key (8) and follow the instructions provided on the display. -
Page 36: What To Do In Case Of Anomaly Or Black-Out
WHAT TO DO IN CASE OF AN ANOMALY PROBLEM SOLUTION The oven does not work. Check whether the omnipolar switch or any residual-current circuit breaker (cut-out) of the electrical system is off. In case of problems with the electrical system, consult a qualified electrician. If the oven still does not work after resetting the omnipolar switch and/or residual-current circuit breaker, contact an Authorized Service Centre. -
Page 37: Error Codes Table
ERROR CODES TABLE The electronic system continually performs a series of diagnostic tests. If some parameters are incorrect, the control unit deactivates the functions and displays an error code (Err followed by three numerical digits); all the heating elements are turned off, including the fan inside the cooking chamber. -
Page 38: How To Remove And Reassemble The Side Racks
HOW TO DISASSEMBLE THE SIDE GRILLS 1. Unscrew (turning anti-clockwise) the front knurled nuts (D). 2. Extract, one at a time, the side grills (G). HOW TO REASSEMBLE THE SIDE GRILLS Insert the support grills one at a time. (G) Pay attention to the index on the grill. -
Page 39: How To Change The Oven Light Bulb
HOW TO CHANGE THE OVEN LIGHT BULB Disconnect the appliance from the power supply or place the omnipolar switch in the OFF position. Check that the oven is at room temperature, otherwise wait for it to cool. The oven light bulb must have the following characteristics: x Supply voltage 220-240V~ 50/60Hz x power 25 W. -
Page 40: How To Remove And Reassemble The Door
HOW TO DISASSEMBLE THE OVEN DOOR 1. Open the oven door completely. 2. Locate the hinges (C) , see the drawing to the side: 3. Tip back the brackets (A) on the two hinges (C). 4. Grip the door on the two sides and close it slowly halfway, the brackets (A) will hook onto the door of the appliance. -
Page 41: Oven Details
HOW TO REASSEMBLE THE OVEN DOOR 1. Insert the two brackets into the appropriate openings, keeping the door semi-closed. 2. Open the door completely. 3. Tip over the two hinges (C) moving them forward. OVEN DETAILS Touch-Control Keypad This is a particular type of keypad which is touch-sensitive. To give a command to the oven, it is enough to indicate and apply light pressure on the point of the keypad where the symbol corresponding to the instruction is located. -
Page 42: System Warnings
SYSTEM WARNINGS: The meaning of some warning messages. CHECK THAT THERE IS WATER IN THE PITCHER Generally 1L. of water in the pitcher is sufficient for a steam cooking process, nevertheless the message in question may be displayed for two reasons: The water in the pitcher has finished. -
Page 43: Disposal Of Packaging And Appliance
DISPOSAL Packaging The parts of the oven packaging (cardboard, EPS expanded polystyrene, PE plastic bags) should be disposed of in compliance with environmental regulations and using appropriate separated collection channels. Oven: Disconnect the oven from the outlet or, in case of fixed installations, contact an authorized electrician to request uninstallation.
Need help?
Do you have a question about the Multifunction steam S4000, cod. 7135 080 and is the answer not in the manual?
Questions and answers