Advertisement
Quick Links
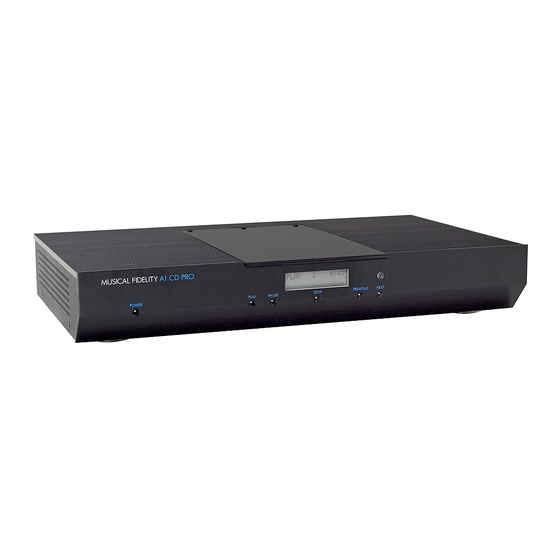
A1 CD PRO
A1 SERIES TOP LOADING COMPACT DISC PLAYER
INSTRUCTIONS FOR USE
Thank you for purchasing the Musical Fidelity A1 CD PRO
This model uses a professional quality top-loading CD transport, ultra low jitter 24 Bit DAC technology and
further jitter reduction techniques to achieve both an excellent technical specification and unparalleled CD
sound quality.
The A1 is a perfect answer to CD requirements in a beautifully engineered package, complementing the A1
series components.
Used properly and carefully, it should give many years of outstanding musical reproduction.
Dust regularly with a soft duster or soft brush, but be careful when using cleaning or polishing agents - they
may harm the surface finish.
If you have any questions about your audio system,
Please consult your dealer who is there to help and advise.
Advertisement

Related Manuals for Musical Fidelity A1 CD PRO


Summary of Contents for Musical Fidelity A1 CD PRO
- Page 1 A1 SERIES TOP LOADING COMPACT DISC PLAYER INSTRUCTIONS FOR USE Thank you for purchasing the Musical Fidelity A1 CD PRO This model uses a professional quality top-loading CD transport, ultra low jitter 24 Bit DAC technology and further jitter reduction techniques to achieve both an excellent technical specification and unparalleled CD sound quality.
-
Page 2: Table Of Contents
A1 PRO CD CONTENTS PAGE Laser product labelling Safety information Laser type Radio-frequency interference Installation precautions General advice User information EU disposal information Item disposal information Introduction Installation Installation Audio connection Notes on using compact discs Cleaning Illustrations - front and rear panels Facilities and connections Operation and illustration Remote control... -
Page 3: Safety Information
A1 PRO CD SAFETY INFORMATION CLASS 1 LASER PRODUCT The A1 is a CD player which has been designed and manufactured according to FDA regulations "title 21, CFR, chapter 1, sub-chapter J, based on the Radiation Control for Health and Safety Act of 1968", and is classified as a Class 1 laser product. - Page 4 Connect the CD player to a mains outlet on a different circuit from the receiver. • Consult a dealer or experienced TV/radio technician for help. If a problem persists, please contact Musical Fidelity's service department. Issue 4: 6 May 2008...
-
Page 5: General Advice
Do not remove any covers or try to gain access to the inside. There are no internal adjustments or fuses you can replace yourself. Refer all service work to an authorised Musical Fidelity agent. Note: Unauthorised opening of the equipment will invalidate any warranty claim. -
Page 6: Item Disposal Information
A1 PRO CD ITEM DISPOSAL INFORMATION DISPOSAL AFVAL The crossed out wheeled bin label that appears on Het label op de achterzijde van dit apparaat, een the back pan el of the product indicates that the product must not afvalbak p wielen met een kruis doorgehaald, geeft aan dat dit be disposed of as normal household waste. -
Page 7: Installation
A1 PRO CD INSTALLATION INTRODUCTION AUDIO CONNECTIONS Congratulations on the purchase of your new A1 CD Outputs: Connect your amplifier inputs to the RCA player. sockets on the back panel marked as LEFT and RIGHT The A1 CD has extremely low jitter, vanishingly low outputs. - Page 8 A1 PRO CD FACILITIES AND CONNECTION FRONT PANEL 1. DISPLAY 5. STOP button 2. POWER on/off switch 6. PREVIOUS button 3. PLAY button 7. NEXT button 4. PAUSE button 8. IR lens REAR PANEL 9. DIGITAL OPTICAL output 11. LEFT AND RIGHT audio outputs 10.
- Page 9 A1 PRO CD REMOTE CONTROL The universal remote control shown below enables functions from this and related units to be operated from a convenient distance. Equivalent buttons on the remote control have the same functions as those on the front panel of the unit. Other functions are only available by remote control.
- Page 10 A1 PRO CD CD BASIC OPERATION If mains power to the unit is switched on with a disc LOADING AND PLAYING COMPACT DISCS already loaded, it will automatically search for the disc. NO DISC TRACK SELECTION (Remote control) Simply press the PLAY button to start a CD playing from the first track.
- Page 11 A1 PRO CD CD BASIC OPERATION PAUSE Pressing the PLAY/PAUSE button on the front or top panel whilst a disc is playing pauses playback of the disc. PAUSE appears in the display windows instead of PLAY. The disc will continue spinning, but the track does not advance and the CD's output is muted.
- Page 12 A1 PRO CD CD SPECIAL FEATURES This function is obtained by pressing SHUFFLE on the REPEAT PLAYBACK The REPEAT button on the remote control allows the remote control with the unit either stopped or playing. If repeated playback of either one track or all tracks on the the A1 is already playing, play will continue in random disc.
- Page 13 A1 PRO CD CD SPECIAL FEATURES Press PROGRAM again on the remote control - the When all programmed tracks have been played, the CD next program step is selected, (program 2) and the track player stops. The same track selection can then be number revert to 0 ready for a new entry.
- Page 14 Never open the case of the unit yourself, as this will invalidate the guarantee. If none of the above actions affect a cure, please contact your dealer or Musical Fidelity service agent. Issue 4: 6...
- Page 15 22¼ lbs Unboxed 12.6 kg 27 ¾ lbs Boxed unit including all accessories Musical Fidelity reserves the right to make improvements which may result in specification or feature changes without notice. Issue 4: 6 May 2008 Page 15 of 16...
- Page 16 A1 PRO CD MANUAL REVISION RELEASE DATE CHANGES Issue 1 January 2008 release Remote control page Issue 2 March 2008 updated Issue 3 April 2008 Magnetic puck added Specification page Issue 4 May 2008 updated Issue 4: 6 May 2008 Page 16 of 16...
Need help?
Do you have a question about the A1 CD PRO and is the answer not in the manual?
Questions and answers