Table of Contents

Related Manuals for Craftsman 351.217680


Summary of Contents for Craftsman 351.217680
- Page 1 CRRFTSMRN o Operator's Manual Bench Top JOINTER/PLANER Model No. 351.217680 CAUTION: Read and follow all Safety Rules and Operating Instructions before First Use of this Product. Sears, Roebuck and Co., Hoffman Estates, IL 60179 U.S.A. 16303.00 Draft (01/04/00)
- Page 2 PREPARE WORK AREA FOR JOB • Keep work area clean. Cluttered work areas invite Warranty accidents........Safety Rules ......• Do not use power tools in dangerous environments. Unpacking ......... • Do not use power tools in damp or wet locations. Do Assembly .........
- Page 3 • Use recommended accessories (refer to page 15). Use of improper accessories may cause risk of injury to persons. Refer to Figure 2. • Handle workpiece correctly. Protect hands from pos- ASSEMBLE FENCE BRACKETTO FENCE sible injury. • Turn machine off if it jams. Blade jams when it digs •...
- Page 4 • This tool is equipped with an approved cord rated at 150V and a 3-prong grounding type plug (see Figure 4) for your protection against shock hazards. The jointer/planer weighs approximately 30 Ibs. when • Grounding plug should be plugged directly into a completely assembled.
-
Page 5: Electrical Connections
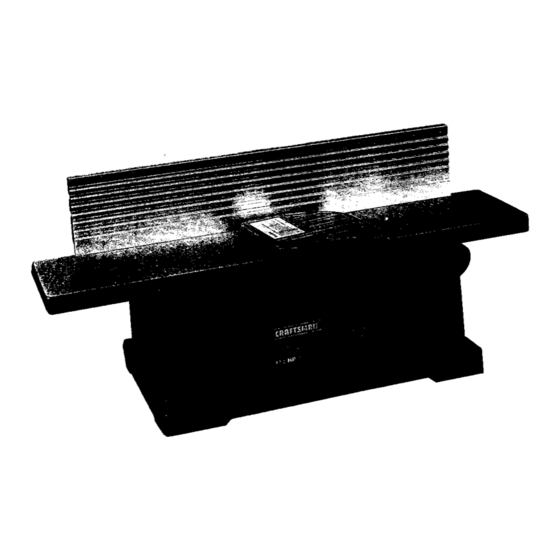
Wires of the extension cord must be of sufficient size DESCRIPTION to carry the current and maintain adequate voltage. Craftsman 6'/8" jointer/planer is used to surface the faces • Use the table to determine the minimum wire size and edges of boards, produce a flat surface on warped (A.W.G.) extension cord. -
Page 6: Depth Of Cut
• Use quality lumber. Blades last longer and cuts are Outteed Max Depth smoother with good quality wood. Table of Cut %" • Do not perform jointing/planing operations on materi- al shorter than 8'!,", narrower than _/,", or _ess than _/4"thick •... -
Page 7: Adjusting Blade Height
• Place a straightedge over the outfeed table and the CAUTION: Do not slide fence away from the jointer blade, body. All sides of the cutterhead must be covered all the time. Back Side of Machine BLADE GUARD The blade guard provides protection over the cutter- Straight_,,,._ head. -
Page 8: Feeding Workpiece
Feed with the grain whenever possible. '_,(_ With the Grain Rotation Figure 11 - On-Off Switch WARNING: Be sure the switch is in "OFF" position Rotation and the cord is unplugged from the power source Figure 14 - Direction of Feed before removing switch key. -
Page 9: Sharpening Blades
= Beveling refers to cutting the entire edge of a board If the blades are nicked they must be replaced or at an angle. Beveling may require several passes reground. They can be reground several times until they due to the depth of cut needed. become _/_6"wide. -
Page 10: Replacing Timing Belt
Blade • Replace with new timing belt by maintaining inward Cutterhead pressure. Blade Lock Screw Replace "_ Figure 19 - Replacing Blades ADJUSTING BLADE GUARD Figure 21 - Replacing Timing Belt CAUTION: Do not lubricate the pivot point of the blade NOTE: Make sure that the full width of belt is on both guard. - Page 11 SYMPiuM POSSIBLE CAUSE(S) CORRECTIVE ACTION Motor does not start 1. Defective switch 1. Have switch replaced. 2. Defective motor 2. Have motor replaced/repaired. NOTE: 1 and 2 must be done t)y a qualified service technician; Consult Sears service, 3. Low line voltage 3, Correct low line voltage condition, Motor stalls (resulting in blown 1.
- Page 12 NOTES...
- Page 13 Model 351.217280 Figure 22 - Replacement Parts Illustration for Motor PART NO. DESCRIPTION QTY. 2856.00 Motor Cover STD315215 6201ZZ Ball Bearing 2857.00 Armature with Fan STD315205 620077 Ball Bearing* 2858.00 Wavy Washer 2859.06 Thread Forming Screw STD852005 5ram Lock Washer* 2860.00 Stator 1413.00...
- Page 14 Model351.217680 Figure 23 - Replacement Parts Illustration for Jointer 41 42 73 1:...
- Page 15 PART NO. DESCRIPTION QTY. PART NO. DESCRIPTION QTY. 2893.01 Base 9725.00 Wavy Washer 4135.00 Foot Pad 2868.00 Trunnion Holder 1553.00 Cord Clamp 1993.00 '/,-20 x W' 2895.00 Socket Head Bolt Thread Forming Screw 0850.00 6-1.0 x 16mm 1903.00 4-0.7 x 10mm Socket Head Bolt Pan Head Screw 9722.OO...
- Page 16 In U.S.A. or Canada for in-home major brand repair service: Call 24 hours a day, 7 days a week 1-800-4-MY-HOME °_(1-800-469-4663) Para pedir servicio de reparaci6n a domicilio - 1-800-676-5811 Au Canada pour tout le service - 1-877-LE-FOYER" (1-877-533-6937) For the repair or replacement parts you need: Call 6 a.m.
Need help?
Do you have a question about the 351.217680 and is the answer not in the manual?
Questions and answers