
Related Manuals for Liebert Liebert Static Transfer Switch


Summary of Contents for Liebert Liebert Static Transfer Switch
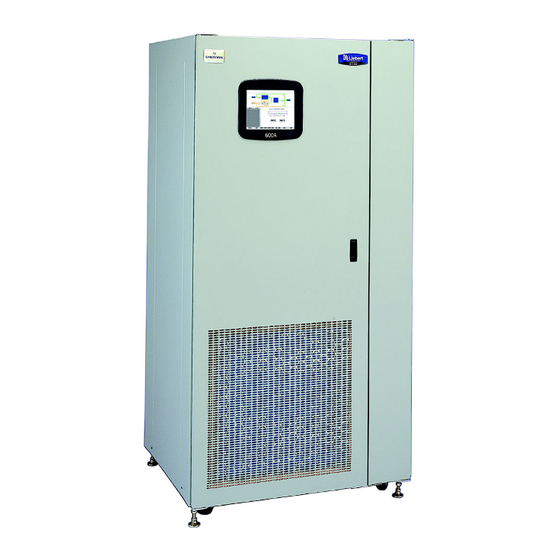
- Page 1 Liebert Static Transfer Switch 2 ® User Manual–100-1000A, 50/60Hz AC Power For Business-Critical Continuity™ ™...
-
Page 3: Table Of Contents
Leveling of the Static Switch Without Anchoring ........ - Page 4 10.5.1 Shutdown in Static Transfer Switch Mode ........
- Page 5 LEDs and Buttons and Key Lockout Switch........
- Page 6 15.2 System Components ............113 15.2.1 Frame and Enclosure .
- Page 7 Typical static transfer switch one-line diagram ........10 Figure 4 Typical one-line diagram of two PDUs and a static transfer switch ..... . . 12 Figure 5 Outline drawing: 100 –...
- Page 8 Figure 63 Key lockout switch........
-
Page 9: Save These Instructions
SAVE THESE INSTRUCTIONS This manual contains important instructions that should be followed during the installation and maintenance of the Liebert Static Transfer Switch 2 (STS2). WARNING The unit is supplied by more than one power source. The unit contains hazardous voltages if any of the input sources are ON, even when the unit is in bypass. -
Page 10: Overview Of Manual
VERVIEW OF ANUAL The Liebert STS2 Installation, Operation and Maintenance Manual is organized in a logical progres- sion so that you can follow the procedures, in the order provided to get your Liebert STS2 installed and running. Read the entire manual before proceeding with the unpacking and installation of the Liebert STS2. The major sections are as follows: Important Safety Instructions—review the instructions on the previous page before proceeding. -
Page 11: Safety Precautions
Under typical operation and with the doors closed, only normal safety precautions are necessary. The area around the static transfer switch should be kept free from puddles of water, excess moisture and debris. The vent grate in the front of the system should not be obstructed in order to ensure a smooth air flow through the unit for cooling. -
Page 12: Unpacking And Inspections
• If any damage as a result of shipping is observed, file a damage claim with the shipper within 24 hours and contact your local Emerson Network Power representative or Liebert Services at 1-800-543-2378 to inform them of the damage claim and the condition of the equipment. -
Page 13: Handling Considerations
2.2.1 Handling Considerations The static switch is bolted to a wooden shipping pallet to allow handling by forklift equipment or a pallet jack. Easily Moved — The unit is furnished with integral castors that allow the unit to be rolled into place after it has reached its location and is removed from the pallet. -
Page 14: Location Considerations
For dimensions of each unit, see Figures 5, 6 and 7 in section 7.0 - Installation Drawings on page 18. If your unit is equipped with an optional key lockout switch, see Figures 8 through 10 for location of that switch. -
Page 15: Altitude
Altitude The standard units are designed for full load operation up to 4000 feet (1200 m) above sea level. See Figure 1 for recommended deratings for altitudes greater than 4000 feet (1200 m). Figure 1 Recommended derating for high altitude operation Operation at full load at a higher altitude can be accommodated in ambient temperatures less than 104°F (40°C) ambient. -
Page 16: Locating The Liebert Sts2
Leveling and Anchoring the Static Switch Using Floor Stand The Liebert STS2 can be installed using the optional floor stand to support the unit instead of using the raised floor. -
Page 17: Power And Control Wiring
CAUTION Risk of unit damage. The input sources to the static switch must be grounded-wye sources. Input sources other than solidly grounded-wye sources may cause damage to the switch. The Liebert STS2 is designed for operation with 3- or 4-wire, solidly grounded sources only. -
Page 18: Input Junction Box Installation-Optional
Figure 3 Typical static transfer switch one-line diagram SOURCE 1 K2 K3 The input and output power wire size should be based on the upstream overcurrent protection device, observing the NEC and local codes. The molded case switches contained in the Liebert STS2 are typically non-automatic circuit breakers that rely on the upstream and/or load overcurrent protection. -
Page 19: Table 4 Input Junction Box Terminal Wire Size Range
For preparation purposes, the following tables provide the dimensions and wire sizes for the input junction boxes. Table 3 Input junction box dimensions Length Switch Rating Inches (mm) 100 amp 16 (406) 250 to 600 amp 30 (762) Table 4... -
Page 20: System Grounding
Where possible, the two power sources should be located in close proximity and a single neutral-to-ground bond made (as shown in Figure 4 on page 12 or as is typical with a double- ended substation). Figure 4 Typical one-line diagram of two PDUs and a static transfer switch SOURCE 1 MICB1 K2 K3... -
Page 21: Remote Source Selection Wiring
A six pin terminal block provides the Remote Source Selection connections. Two pairs of wires are used from the switch to trigger the source selection. You can select the type of switch used for this remote control. Connections are made to four of the connections, using Form A dry contacts. The con-... -
Page 22: Options
Note: Pin 16 not used on TB1, TB2, and TB3. Optimized Transfer When the Liebert STS2 is used as a primary-side switch—on the primary of an isolation trans- former—optimized transfer greatly reduces the transformer magnetization current during automatic transfers through a new transfer control algorithm. The Liebert algorithm (patent pending) optimizes the transfer timing so that the volt-seconds applied to the downstream transformer primary is bal- anced, minimizing peak saturation current. -
Page 23: Distribution Cabinet With I-Line Panelboard-100-600A Units Only
The Comms Board is equipped with a modem interface for remote reporting of the present switch sta- tus information, alarm history information, and the history of status screens that are triggered upon a major alarm event. -
Page 24: Led Display
The alarm silence button is not disabled when in the lockout position. The switch is located behind the front door but can be operated without opening the front door. See Figures 8 to 10 for the key lockout location on each unit. -
Page 25: Input Junction Boxes And Cables
6.11 Input Junction Boxes and Cables Two input power junction boxes and interconnecting cables provide under floor connection for the two input power feeds. Power terminal blocks are provided in each junction box for the connection of the input power conductors and a parity-sized ground conductor. The junction boxes are NEMA 1 enclo- sures. -
Page 26: Installation Drawings
3. Clearance of 36" (914mm) minimum is required in the front for installation and service access. 4. Heat output: 2710 btu/hr (0.80 kW/hr) max. for 100A switch. 4680 btu/hr (1.37 kW/hr) max. for 250A switch. 5. Weight: 780 lb. (354 kg) 6. -
Page 27: Figure 6 Outline Drawing: 400 - 600 Amp Liebert Sts2
Installation Drawings Figure 6 Outline drawing: 400 – 600 amp Liebert STS2... -
Page 28: Figure 7 Outline Drawing: 800 - 1000 Amp Liebert Sts2
Installation Drawings Figure 7 Outline drawing: 800 – 1000 amp Liebert STS2... -
Page 29: Figure 8 Outline Drawing: 100 - 250Amp Liebert Sts2 With A Key Lockout Switch Option
Figure 8 Outline drawing: 100 – 250amp Liebert STS2 with a key lockout switch option Notes: 1. All dimensions are in inches and (millimeters). 2. 18" (457mm) min. clearance above unit required for air exhaust. 3. Clearance of 36" (914mm) minimum is required in the front for installation and service access. -
Page 30: Figure 9 Outline Drawing: 400 - 600 Amp Liebert Sts2 With A Key Lockout Switch Option
Installation Drawings Figure 9 Outline drawing: 400 – 600 amp Liebert STS2 with a key lockout switch option... -
Page 31: Figure 10 Outline Drawing: 800 - 1000 Amp Liebert Sts2 With The Key Lockout Switch Option
Installation Drawings Figure 10 Outline drawing: 800 – 1000 amp Liebert STS2 with the key lockout switch option... -
Page 32: Figure 11 Seismic Anchor Drawing: 100 - 250 Amp Liebert Sts2
Installation Drawings Figure 11 Seismic anchor drawing: 100 – 250 amp Liebert STS2 WALL SIDE... -
Page 33: Figure 12 Seismic Anchor Drawing: 400 - 600 Amp Liebert Sts2
Installation Drawings Figure 12 Seismic anchor drawing: 400 – 600 amp Liebert STS2 WALL SIDE... -
Page 34: Figure 13 Seismic Anchor Drawing: 800 - 1000 Amp Liebert Sts2
Installation Drawings Figure 13 Seismic anchor drawing: 800 – 1000 amp Liebert STS2 WALL SIDE... -
Page 35: Figure 14 Electrical Field Connections Drawing: 100 - 250 Amp Liebert Sts2 With Single
Installation Drawings Figure 14 Electrical field connections drawing: 100 – 250 amp Liebert STS2 with single output breaker... -
Page 36: Figure 15 Electrical Field Connections Drawing: 100 - 250 Amp Liebert Sts2 With Dual
Installation Drawings Figure 15 Electrical field connections drawing: 100 – 250 amp Liebert STS2 with dual output breakers... -
Page 37: Figure 16 Electrical Field Connections Drawing: 400 - 600 Amp Liebert Sts2 With Single
Installation Drawings Figure 16 Electrical field connections drawing: 400 – 600 amp Liebert STS2 with single output breaker... -
Page 38: Figure 17 Electrical Field Connections Drawing: 400 - 600 Amp Liebert Sts2 With Dual
Installation Drawings Figure 17 Electrical field connections drawing: 400 – 600 amp Liebert STS2 with dual output breakers... -
Page 39: Figure 18 Electrical Field Connections Drawing: 800 - 1000 Amp Liebert Sts2 With Single
Installation Drawings Figure 18 Electrical field connections drawing: 800 – 1000 amp Liebert STS2 with single output breaker... -
Page 40: Figure 19 Electrical Field Connections: 800 - 1000 Amp Liebert Sts2 With Dual Output Breakers
Installation Drawings Figure 19 Electrical field connections: 800 – 1000 amp Liebert STS2 with dual output breakers... -
Page 41: Figure 20 Liebert Sts2 Non-Automatic Circuit Breaker Schedule
1. The Liebert STS2 non-automatic breakers are 3-pole, 600VAC rated with magnetic trip only. 2. Upstream devices (by others) must be used to provide overcurrent protection. Upstream overcurrent protection should have ampacity equal to or less than the ampere rating of the static switch. Type... -
Page 42: Figure 21 Control Connection Location Diagram: 100 - 600 Amp Liebert Sts2
Installation Drawings Figure 21 Control connection location diagram: 100 – 600 amp Liebert STS2... -
Page 43: Figure 22 Control Connection Location Diagram: 800 - 1000 Amp Liebert Sts2
Installation Drawings Figure 22 Control connection location diagram: 800 – 1000 amp Liebert STS2... -
Page 44: Figure 23 Control Wiring For Remote Source Selection Option
3. All control wiring (by others) must be run separate from power wiring . Control wiring runs should not be combined in the same conduit. 4. Refer to Static Transfer Switch control diagram for location of remote source selection opt. -
Page 45: Figure 24 Control Wiring For The Programmable Relay Board Option
Installation Drawings Figure 24 Control wiring for the programmable relay board option... -
Page 46: Figure 25 Control Wiring For The Input Contact Isolator Board Option
3. Refer to installation, operation AND maintenance manual for configuring the 4. All control wiring (by others) must be run separate from power wiring. Control 5. Refer to static transfer switch control connection diagram for location of input 6. Signal voltage: 100mA @ 12VDC. -
Page 47: Figure 26 Control Wiring For Comms Board
Control wiring runs should not be combined in the same conduit. 5. Refer to control connection location diagram of static transfer switch for location of COMMS board. 6. All wiring must be in accordance with national and local electrical codes. -
Page 48: Figure 27 Control Wiring For The Liebert Intellislot Web/485 Card With Adapater
Installation Drawings Figure 27 Control wiring for the Liebert IntelliSlot Web/485 Card with Adapater... -
Page 49: Figure 28 Control Wiring For The Rs-232 Port
Figure 28 Control wiring for the RS-232 port See Detail A LCD DISPLAY Front View Upper Half of Unit With Door Open NOTES 1. RS-232 communication through DB9 connector . 2. Connector accessible with front door open . Connector must be removed before closing door . -
Page 50: Figure 29 Outline Drawing For Input Junction Box
Figure 29 Outline drawing for input junction box Recommended Location for Customer Connection of Input Power Raceway (by others) 3-Phase, 3-Wire Plus Ground NOTES: 1. Two junction boxes are supplied, one for each input. 2. Cable(s) are factory-supplied to connect the junction box to the input busbars. -
Page 51: Figure 30 Color Lcd Touch Screen Display
Installation Drawings Figure 30 Color LCD touch screen display... -
Page 52: Figure 31 Led Display
Figure 31 LED display (B) 2 PS211002 Rev. 0 LED DISPLAY LEGEND Symbol Green Source 1 Power is Present Green Source 2 Power is Present Green Source 1 Within Tolerance Green Source 2 Within Tolerance Green Source 1 SCRs is On Green Source 2 SCRs is On Yellow... -
Page 53: Figure 32 Installation Drawing, Seismic Floor Stand 100-250A
Installation Drawings Figure 32 Installation drawing, seismic floor stand 100-250A... -
Page 54: Figure 33 Installation Drawing, Seismic Floor Stand 100-250A
Installation Drawings Figure 33 Installation drawing, seismic floor stand 100-250A... -
Page 55: Figure 34 Installation Drawing, Seismic Floor Stand 100-250A
Installation Drawings Figure 34 Installation drawing, seismic floor stand 100-250A... -
Page 56: Figure 35 Installation Drawing, Seismic Floor Stand 100-250A
Installation Drawings Figure 35 Installation drawing, seismic floor stand 100-250A... -
Page 57: Figure 36 Installation Drawing, Seismic Floor Stand 400-600A
Installation Drawings Figure 36 Installation drawing, seismic floor stand 400-600A... -
Page 58: Figure 37 Installation Drawing, Seismic Floor Stand 400-600A
Installation Drawings Figure 37 Installation drawing, seismic floor stand 400-600A... -
Page 59: Figure 38 Installation Drawing, Seismic Floor Stand 400-600A
Installation Drawings Figure 38 Installation drawing, seismic floor stand 400-600A... -
Page 60: Figure 39 Installation Drawing, Seismic Floor Stand 400-600A
Installation Drawings Figure 39 Installation drawing, seismic floor stand 400-600A... -
Page 61: Figure 40 Installation Drawing, Seismic Floor Stand 800-1000A
Installation Drawings Figure 40 Installation drawing, seismic floor stand 800-1000A... -
Page 62: Figure 41 Installation Drawing, Seismic Floor Stand 800-1000A
Installation Drawings Figure 41 Installation drawing, seismic floor stand 800-1000A... -
Page 63: Figure 42 Installation Drawing, Seismic Floor Stand 800-1000A
Installation Drawings Figure 42 Installation drawing, seismic floor stand 800-1000A... -
Page 64: Figure 43 Installation Drawing, Seismic Floor Stand 800-1000A
Installation Drawings Figure 43 Installation drawing, seismic floor stand 800-1000A... -
Page 65: Introduction To Liebert Sts2 Operations
NTRODUCTION TO System Description A Liebert STS2 provides an automatic, seamless transfer between input power sources to an output load. The Liebert STS2 monitors the input sources, to ensure each source is operating within set parameters, as well as ensure that each source is within acceptable tolerances for a transfer between sources to be completed. -
Page 66: Reliability And Agency Requirements
For a transfer to be completed between input sources, the sources must meet certain parameters, or the transfer cannot take place. Uninterrupted transfer between sources is inhibited due to input source failure, sources out of sync, switch failure, or the unit is in bypass mode. Introduction to Liebert STS2 Operations... -
Page 67: Bypass
8.2.4 Bypass The static transfer switch can be manually bypassed to allow the power from a source to directly flow to the output load. This bypass allows the unit’s electronics to be serviced without dangerous voltages being present. The Liebert STS2 includes key-interlocked maintenance bypass breakers that allow either input source’s electronics to be bypassed for maintenance without interruption of power to the load. -
Page 68: Theory Of Operation
9.1.1 Liebert STS2 Static Transfer Switch The Liebert STS2 is a 3-pole, double-throw, solid state automatic transfer switch that is fed from two sources. The Preferred source is the input source that normally carries the load when both sources are available. -
Page 69: Emergency Transfer
Liebert STS2 automatically triggers an alarm and trips open the other source isolation breaker. In the event of an open SCR, the switch automatically triggers an alarm and transfers the load to the other source. All open and shorted SCR alarm conditions are latched and require the system to be repaired and reset to restore normal operation. -
Page 70: Circuit Breakers
All switches in the Liebert STS2 are plug-in types, which allows any switch to be replaced without de- energizing the output bus. The Merlin Gerin breakers have an interlock in the plug-in base, which prevents the switch from being withdrawn in the CLOSED position. -
Page 71: Logic Modules
9.2.4 Logic Modules The logic contains three separate redundant logic modules. The modules contain the logic necessary to run the Liebert STS2 and control transfers and shunt trips under all circumstances, without any outside assistance once set-up and started properly. 9.2.5 Audible Alarm An audible alarm is installed on the control board. -
Page 72: Operating Instructions For The Touch Screen Interface
Contact your local Emerson Network Power representative or Liebert Services at 1-800-543-2378 to arrange for equipment inspection and startup. -
Page 73: Normal System Turn-On
8. Verify that boxes for the preferred source and corresponding static transfer switch are highlighted on the Mimic screen, indicating which side of the Static Transfer Switch is on. 9. Close Output Breaker CB3 (and CB3A in redundant output configurations). -
Page 74: Manual Transfer / Preferred Source Selection
Without using bypass, if a failure occurs in the switch components for remaining source, the Liebert STS2 does not have a second source to switch to and the load would not receive power. See Maintenance Bypass on page 67 for bypass instructions. -
Page 75: Enabling Remote Source Selection
The Liebert STS2 is equipped with two key-interlocked, bypass breakers, CB4 and CB5, to allow man- ual bypass of the switch electronics for either input source in the event of switch failure or for mainte- nance of the switch. Refer to the static transfer switch one-line diagram (Figure 3). While operating on maintenance bypass, all voltages are removed from the Liebert STS2 electronics to facilitate safe repair, without de-energizing the load using a make-before-break switching sequence. -
Page 76: Figure 47 Gate Board Viewing Slot Locations
Figure 47 Gate board viewing slot locations Viewing Slot for the Source 2 Gate Drive Board GREEN LEDS ON THE GATE DRIVER BOARD ARE VIEWABLE THROUGH THIS SLOT INDICATE THAT THE STS IS ON SOURCE 2 If the Color Graphical Display is not available, you can still use the following bypass procedures, ignore the steps to check the display and check the LEDs. -
Page 77: Bypass Procedures For Source 1
To bypass the switch for Source 1: NOTE If you wish to bypass the Source 1 static transfer switch but Source 2 is presently active, you must first transfer to Source 1. See Manual Transfer / Preferred Source Selection on page 66. -
Page 78: Bypass Procedures For Source 2
To bypass the switch for Source 2: NOTE To bypass the Source 2 static transfer switch when Source 1 is presently active, you must first transfer to Source 2. See Manual Transfer / Preferred Source Selection on page 66. 1. Verify Source 2 is supplying power via the Mimic. -
Page 79: Alarm And Faults
These events can provide a warning or trigger the system to make a change, such as switch sources or the recording of a history log. -
Page 80: Event And History Logs
The History Log allows you to replay the events leading up to the alarm and the events right after the alarm to see the status of the switch at that time and diagnose the cause of the alarm. The History Log is triggered when certain events are tripped that have the Freeze option enabled. -
Page 81: Alarm Notes
These events indicate a device failure. The device must be replaced and the system must be restarted for the fault to clear. A shorted SCR automatically trips open a source input switch (CB1 or CB2) to prevent transfers in the event of an SCR failure. The SCR failure must be investigated and repaired before returning the switch to normal operation. -
Page 82: Table 8 Event Messages
Table 8 Event messages Alarm Message S1 SCR SHORT S2 SCR SHORT S1 SCR OPEN S2 SCR OPEN PRIMARY FAN FAIL CONTROL MODULE FAIL PWR SPLY DC A FAIL PWR SPLY DC B FAIL PWR SPLY S1 AC FAIL PWR SPLY S2 AC FAIL PWR SPLY LOGIC FAIL OUT VOLT SENSE FAIL S1 VOLT SENSE FAIL... - Page 83 Table 8 Event messages (continued) Alarm Message CB1 (S1) OPEN CB2 (S2) OPEN CB4 (S1 BYP) CLOSED CB5 (S2 BYP) CLOSED CB3 (OUTPUT) OPEN CB3A (OUTPUT) OPEN S1 PHASE ROT ERROR S2 PHASE ROT ERROR TRANSFER INHIBITED OUTPUT UV INPUT CONTACT #1 INPUT CONTACT #2 INPUT CONTACT #3 INPUT CONTACT #4...
-
Page 84: C Ommunication I Nterfaces
12.0 C OMMUNICATION NTERFACES The Liebert STS2 monitoring system offers several choices for communications. The RS-232 terminal port is standard on all units. The port is located inside the front door, to the left of the touch screen/LED front panel mounting as shown in Figure 28. This port is primarily used as an alternate user interface to configure, control, and diagnose the system, especially for systems that do not include the HMI touch screen. -
Page 85: Connecting And Using A Terminal
12.1.1 Connecting and Using a Terminal An RS-232 connection can be used to connect the Liebert STS2 to either a terminal or a PC running terminal emulation software. If you are unsure of the cable pin out, see 15.2.10 - Terminal Port Connections. -
Page 86: Configuring The Liebert Sts2 Via The Terminal
Table 9 Terminal commands Keys UPMDR? Displays metering data VER? Displays firmware versions 12.1.2 Configuring the Liebert STS2 via the Terminal The SPT command is used to configure the systems setpoints. The SVT syntax for the setpoints con- sists for four parameters: SPT [group] [item] [value] where the parameters are: •... -
Page 87: Table 10 Value Types
Value Parameter Item settings, depending on what they are, use various value types. Table 10 provides a list of the possible value types and their description. Table 10 Value types Type Numeric An integer numeric value in the units indicated by the item name. For example, a System Voltage Rating of 480 would indicate 480 volts. - Page 88 Table 11 Group settings and values (continued) Group Item: Description SCR1 Fast Undervoltage Setpoint Group 3: SCR1 Slow Undervoltage User Setpoint Settings SCR1 Slow Undervoltage Detect Delay SCR1 Overvoltage Setpoint SCR1 Overvoltage Detect Delay SCR1 I peak Transfer Setpoint SCR2 Fast Undervoltage Setpoint SCR2 Slow Undervoltage Setpoint...
-
Page 89: Setting Bitpacked Options With The Terminal
12.1.3 Setting Bitpacked Options with the Terminal Five sets of options and features settings are available through the terminal to control the system operation. Under System Settings for the SPT command, these items denote which options are INSTALLED: • 6 — Options_1 •... -
Page 90: Table 12 Binary-Hexadecimal Conversions
Critical Option Enabling bit0—EnableManual_IPeakReset bit1—EnableAutoRestart bit2 through bit15 - not used (set to 0) Non-Critical Option Enabling bit0 — EnableAutoReXfer bit1 through bit15 — not used (set to 0) The bits are set in reverse order, from bit 15 on the left to bit 0 (zero) on the right. The bits are grouped in four sets of four bits each, as such: 0000 0000 0000 0000 |...|... -
Page 91: Setting Event Masks With The Terminal
Putting the Terminal Command Together For example, a unit only has the Remote Source Selection and Dual-Output Breaker options installed. Checking the bits list under Options_1 on page 81, bits 7 and 0 each must be set to 1 to indicate that these options are installed. - Page 92 Examples of Event Mask Settings • To latch event #001, S1 SCR SHORT, use SPT 4 1 +L. • To disable event #128, CONFIG MODIFIED, from sounding the horn, use SPT 4 100 -A. • To enable event #012, OUT VOLT SENSE FAIL, to Dial and go into the Event Log, use SPT 4 12 +D+E.
-
Page 93: Liebert Sts2 Touch Screen Display
A touch screen LCD is available through the front of the Liebert STS2. This screen provides a graphi- cal (Mimic) display of the switch’s operation, plus system information including system parameters, alarms and faults. -
Page 94: Menu Overview
13.2 Menu Overview The touch screen menu provides access to configuration settings and more device information. The CONFIG (Configuration) and LOGS menus provide multiple choices through pop-up menus. The SOURCE XFER menu selection allows you to select the preferred source. The other menu choices pro- vide information in the display panel. -
Page 95: 13.2.1 Security
An optional key lockout switch for the Liebert STS2 enables or disables the ability to make changes on the Liebert STS2. The key lockout switch is mounted on the front door. See Figures 8 through 10 for location of the key lockout switch. -
Page 96: Mimic Display
The Mimic display provides a color diagram of the operation of the Liebert STS2. This display imi- tates the power flow through the static transfer switch and indicates source status, breaker status, switch status, source voltage and current readings, output power measurements, and active alarm messages. -
Page 97: Figure 52 Event Mask Dialog Box
3. Select SAVE to keep the settings. Figure 52 Event mask dialog box User Settings The User Settings choice allows you to adjust the user-accessible switch settings. Access is limited to qualified personnel via system security. To access the User Settings dialog box: 1. -
Page 98: Figure 53 User Settings Dialog Box
Figure 53 User settings dialog box Source Set Points The Source 1/2 Set Points allows you to configure trigger points for each input source (1 or 2) for the Liebert STS2 via a keypad dialog or HI/LO dialog box. The source numbers do not designate the source as the preferred or alternate source. -
Page 99: Table 13 Sepoint Parameters
To configure the setpoints for each source: 1. Select SOURCE 1/2 Set Points from the User Settings dialog box. The Source 1/2 Set Points dialog is displayed. Figure 54 Source setpoints 2. Select 1 to configure the settings for Source 1. 3. - Page 100 • Select AUTO to configure the static transfer switch to automatically reset when a fault clears and the voltage and current are normal. • Select MAN to require a manual reset of the static transfer switch when fault clears and the voltage and current are normal.
-
Page 101: System Settings
System Settings The System Settings choice under the Config menu displays another pop-up menu with three choices: • Comm Options • System Options • System ID To access the System Settings menu: 1. Select CONFIG from the menu bar. 2. Select SYSTEM SETTINGS from the Config menu. Comm Options The Comm Options dialog box allows you to configure the communications settings for the Liebert STS2. -
Page 102: Configuring The Modem
Configuring the Modem The Modem dialog box allows you to configure the optional external modem that is connected to the static transfer switch. The dialog box contains a series of choices that access either a keypad or a secondary dialog to config- ure settings. - Page 103 The Input Contact Isolator (ICI) is an optional, eight-channel input board for up to eight external user alarm or message inputs to be routed to the static transfer switch’s alarm network. The contact is set to either be normally open or normally closed. When a contact closes or opens, an event is triggered.
-
Page 104: Figure 57 Input Contact Isolator Dialog Box
These input alarms can also be configured to activate a programmable relay output, which is dis- cussed in Configuring the Programmable Relay Board Settings on page 97. To configure the Input Contact Isolator relays: 1. Select INPUT CONTACT ISOLATOR from the Comm Options menu. The Input Contact Isolator dialog box is displayed. -
Page 105: Table 14 Standard Settings For Programmable Relays
Configuring the Programmable Relay Board Settings The Liebert STS2 can contain up to two Programmable Relay Boards (PRB) that can trigger an exter- nal device when an event occurs in the static transfer switch. For example, if Source 1 fails, an exter- nal light flashes. -
Page 106: Figure 58 Programmable Relay Board Dialog Box
Figure 58 Programmable relay board dialog box 2. Select your configuration settings. • Select STANDARD SET to use the settings configured at the factory. See Go to step 4. • Select USER DEFINED SET to configure your own settings. Go to step 3. If you enter a user-defined setting, record the setting in Programmable Relay Board Settings Record on page 140. -
Page 107: Figure 59 System Options
Liebert SiteScan Configuration An optional RS-422 port, contained in the Comms Board, can be installed in the static transfer switch to provide communications with Liebert’s SiteScan. Liebert SiteScan is Liebert’s system monitoring software that allows you to utilize a PC to monitor the static transfer switch’s status and check alarms. - Page 108 4-Pole Transfer Switch This selection is set at the factory to indicate whether the system is a 3-pole or 4-pole unit. Shunt This selection is set at the factory. Wye Output Transformer The Wye Output Transformer controls the firing of the SCRs on startup, which minimizes the inrush into PDU transformers.
-
Page 109: 13.6.2 Logs
13.6.2 Logs Two types of logs are kept by the Liebert STS2: Event Log and History Log. Event Log The Event Log tracks the alarms and faults of the Liebert STS2. See 11.0 - Alarm and Faults for more information on these events and see 11.2.1 - Event Log for more information on the Event Log and definitions of the fields displayed in the Event Log screen. -
Page 110: Source Transfers
You can select an event in the Event Display to display more information about that event in the Dis- play Panel. This same help is also available in 16.0 - Event Message Help Text. 13.6.7 Logo The Logo menu choice shows the Liebert and Emerson logo in the Display panel. 13.7 Cleaning the LCD Touch Screen If the touch screen requires cleaning, use a pre-moistened towelette designed for cleaning CRTs, or dampen a soft, non-abrasive cloth with a very mild cleaning solution. -
Page 111: O Perating The L Iebert Sts2 Led D Isplay
The LED Display unit is monitored and controlled through a series of LEDs and buttons and an optional key lockout switch. This section includes illustrations of the LEDs, buttons and key lockout switch, plus tables providing definitions of these components. -
Page 112: Led And Push Button Description
Source 2. A green LED is lit if the output breaker/switch is closed. A green LED is lit if the output breaker/switch is closed. CB3A is installed on units with dual output breakers. A yellow LED is lit if the Source 1 bypass breaker/switch is closed. -
Page 113: Event Controls
Figures 8 to 10 for the key lockout switch location on each unit. • To disable the buttons, turn the key to the top of the switch, toward the closed padlock icon. • To enable all of the buttons, except the alarm silence, turn the key to the horizontal position, toward the open padlock icon. -
Page 114: Manual Transfer / Preferred Source Selection
Without using bypass, if a failure occurs in the switch components for remaining source, the Liebert STS2 does not have a second source to switch to and the load would not receive power. See 14.2.3 - Maintenance Bypass on page 108 for bypass instructions. - Page 115 5. Push the Preferred Source button for the desired source. See Table 15 on page 104. The Preferred Source (LED_PREFx) LED turns on for that source. When conditions are correct, the switch transfers the load to the alternate source by selecting the alternate source as the preferred source.
-
Page 116: Maintenance Bypass
The Liebert STS2 is equipped with two key-interlocked, bypass breakers, CB4 and CB5, to allow man- ual bypass of the switch electronics for either input source in the event of switch failure or for mainte- nance of the switch. Refer to the static transfer switch one-line diagram (Figure 3). While operating on maintenance bypass, all voltages are removed from the Liebert STS2 electronics to facilitate safe repair, without de-energizing the load using a make-before-break switching sequence. - Page 117 The LED for CB2 is turned off. 8. Rotate the interlock key and remove it to lockout the breaker. 9. Open output breakers CB3 and CB3A (if supplied) to remove power from static switch. The LEDs for CB3 and CB3A (if supplied) turn off.
-
Page 118: Normal System Shutdown
14.2.4 Normal System Shutdown The Liebert STS2 can be shut down from either the static switch mode or the bypass mode. Shutdown in Static Transfer Switch Mode When the Static Transfer Switch is operating on static transfer switch mode (not mainte- nance bypass mode): 1. -
Page 119: Specifications
The Liebert STS2 models are available to handle various voltages. The input voltage must be three-phase AC (3 or 4 wire-plus-ground). The Liebert STS2 is designed to accept an input neutral from each source. The neutral is switched in the 4-pole static transfer switch only. -
Page 120: Table 19 Unit Short Circuit Withstand Capability
15.1.4 Grounding Refer to 5.3 - System Grounding for specifications and instructions regarding grounding. 15.1.5 Electrical Requirements Table 18 Electrical requirements Item Maximum Continuous Current Load Power Factor Range Load Crest Factor Source Voltage Distortion Overload Capability Table 19 Unit short circuit withstand capability Unit Voltage Unit Amps 100-250A... -
Page 121: System Components
15.2 System Components All Liebert STS2 models provide two static transfer switches within one enclosure, with the ability to transfer between two input sources to a single output. All Liebert STS2s are configured with either an LCD Color Graphical Interface touch screen display or LEDs for monitoring and configuring the unit. -
Page 122: 15.2.4 Access
Mechanical interlocks are provided on the breakers to prevent improper maintenance bypassing of the solid-state switch. A bypass breaker cannot be closed unless the solid-state switch is connected to the same input source and only one bypass breaker can be closed at a time. All breakers are equipped with N.O. -
Page 123: 15.2.9 Rs-232 Port
15.2.9 RS-232 Port The unit is equipped with an RS-232 port for connecting a terminal or PC. See Figure 28 for the port’s location. See 12.1 - Using the RS-232 Port for instructions on using a PC terminal with the unit. 15.2.10 Terminal Port Connections The system has an asynchronous serial port configured as Data Terminal Equipment for terminal access only (half duplex). -
Page 124: Rs-232 Interface Parameters
See 6.0 - Options for more information. Setting RS-232 Using EIA Voltage Levels 9600 None <CR> <LF> Not supported Full duplex LED Display Liebert IS-WEB485ADPT Seismic Floor Stand - 18", 24", 30" and 36" Export Crating Remote Source Selection Key Lockout Switch Specifications... -
Page 125: Event Message Help Text
16.0 E VENT ESSAGE Key: ALL CAPS = event message displayed in the Event Display panel in the lower left corner of the LCD display. Indented text = help text shown in the Display Panel in the lower right corner of LCD display. BOLD = commands that are sent through the RS-232 port. - Page 126 S2 SCR OPEN Source 2 SCR Open. One or more SCRs on Source 2 is open. Transferring between sources has been inhibited. Liebert STS2 output has been transferred to Source 1. Contact Liebert for technical support at 1-800-LIEBERT (800-543-2378). Press SILENCE on the touch screen to turn off the audible alarm, if so configured. If you are accessing the Liebert STS2 system from a terminal, type SH and press RETURN on your keyboard to turn off the audible alarm.
- Page 127 PWR SPLY DC A FAIL Power Supply DC Bus A Failed The primary power supply is no longer providing DC power to the control board and the touch screen. Contact Liebert for technical support at 1-800-LIEBERT (800-543-2378). Press SILENCE on the touch screen to turn off the audible alarm, if so configured. If you are accessing the Liebert STS2 system from a terminal, type SH and press RETURN on your keyboard to turn off the audible alarm.
- Page 128 PWR SPLY S2 AC FAIL Power Supply Source 2 AC Failed The AC input power to the power supplies from Source 2 has failed. The power supplies are now operating on AC power from Source 1. The AC input from Source 2 is still good. Contact Liebert for technical support at 1-800-LIEBERT (800-543-2378).
- Page 129 S1 VOLT SENSE FAIL Source 1 Voltage Sense Module Failed The module contained on the snubber monitoring the input voltage from Source 1 has failed. Press SILENCE on the touch screen to turn off the audible alarm, if so configured. If you are accessing the Liebert STS2 system from a terminal, type SH and press RETURN on your keyboard to turn off the audible alarm.
- Page 130 S2 SCR SENSE FAIL Source 2 SCR Sense Module Failed The module contained on the snubber monitoring the SCRs for Source 2 has failed. Press SILENCE on the touch screen to turn off the audible alarm, if so configured. If you are accessing the Liebert STS2 system from a terminal, type SH and press RETURN on your keyboard to turn off the audible alarm.
- Page 131 S2 GATE DRIVE FAIL Source 1 Gate Drive Failure The gate drive module for an SCR for Source 2 has failed. This module is contained on the left side gate driver board. Press SILENCE on the touch screen to turn off the audible alarm, if so configured. If you are accessing the Liebert STS2 system from a terminal, type SH and press RETURN on your keyboard to turn off the audible alarm.
- Page 132 CB1 SHUNT TRIP FAIL Circuit Breaker 1 Shunt Trip Failure Circuit Breaker 1 failed to trip open when the control issued a command for the circuit breaker to trip. Press SILENCE on the touch screen to turn off the audible alarm, if so configured. If you are accessing the Liebert STS2 system from a terminal, type SH and press RETURN on your keyboard to turn off the audible alarm.
- Page 133 S1 UV Source 1 Under Voltage (fast detection). The input voltage from Source 1 dropped below a set percentage of the nominal voltage, as set in the Fast UV set point under the User Settings. An S1 Fail alarm was also issued and source transfer has been inhibited. The load of the Liebert STS2 has been transferred to Source 2.
- Page 134 S1 OF/UF Source 1 Over Frequency/Under Frequency The frequency for Source 1 is running outside the acceptable operating range, as set in the Frequency Trip Point under User Settings. An S1 Fail alarm was also issued and source transfer has been inhibited. Press SILENCE on the touch screen to turn off the audible alarm, if so configured.
- Page 135 S2 UV (RMS) Source 2 Under Voltage (slow detection). The input voltage from Source 2 remained below a set percentage of the nominal voltage for a designated period, as set in the Slow UV Setting and Slow UV Detection Delay set points configured under the User Settings. An S2 Fail alarm was also issued and source transfer has been inhibited.
- Page 136 S2 FAIL Source 2 Failure Source 2 has failed due to under voltage (UV), over voltage (OV), or running with an over or under frequency (OF/UF). This alarm is a companion to S2 UV, S2 UV (RMS), S2 OV and S2 OF/UF. The load of the Liebert STS2 has been transferred to Source 1.
- Page 137 S1 I-PEAK Current Peak on Source 1 The peak current from Source 1 has exceeded the set point as defined in the I-PK Xfer Lockout setting under User Settings. Transferring to Source 2 has been inhibited. Press SILENCE on the touch screen to turn off the audible alarm, if so configured. If you are accessing the Liebert STS2 system from a terminal, type SH and press RETURN on your keyboard to turn off the audible alarm.
- Page 138 LOAD ON ALT SOURCE Liebert STS2 load on the alternate source. The static transfer switch is running on the alternate power source. Check the Event Log to determine the reason for the transfer from the preferred source. Another event has caused the system to transfer to the alternate source. The system returns the load to the preferred source either automatically or manually, depending on how the system is configured.
- Page 139 Circuit Breaker 4 (Source 1 Bypass Breaker) Closed Circuit breaker 4 is not open. The input from Source 1 is bypassing the static transfer switch. Press SILENCE on the touch screen to turn off the audible alarm, if so configured. If you are accessing the Liebert STS2 system from a terminal, type SH and press RETURN on your keyboard to turn off the audible alarm.
- Page 140 Circuit breaker 3A is not closed. This circuit breaker is assigned to the output load. The power flow to the load cannot flow through the static transfer switch. Press SILENCE on the touch screen to turn off the audible alarm, if so configured. If you are accessing the Liebert STS2 system from a terminal, type SH and press RETURN on your keyboard to turn off the audible alarm.
- Page 141 TRANSFER INHIBITED Transfer Inhibited Uninterrupted transfer between sources is inhibited due to input source failure, sources out of sync, switch failure, or the unit is in bypass mode. Check the Event Log for the event or events that may have caused the alarm.
- Page 142 INPUT CONTACT #2 Input Contact Isolator #2 Occurrence of the indicated external event has been detected by Input Contact Isolator #2 of the Open Comms Digital Input option board. Press SILENCE on the touch screen to turn off the audible alarm, if so configured. If you are accessing the Liebert STS2 system from a terminal, type SH and press RETURN on your keyboard to turn off the audible alarm.
- Page 143 INPUT CONTACT #6 Input Contact Isolator #6 Occurrence of the indicated external event has been detected by Input Contact Isolator #6 of the Open Comms Digital Input option board. Press SILENCE on the touch screen to turn off the audible alarm, if so configured. If you are accessing the Liebert STS2 system from a terminal, type SH and press RETURN on your keyboard to turn off the audible alarm.
- Page 144 CONFIG MODIFIED Configuration Modified A set point has been updated and saved. Press SILENCE on the touch screen to turn off the audible alarm, if so configured. If you are accessing the Liebert STS2 system from a terminal, type SH and press RETURN on your keyboard to turn off the audible alarm. The event was written to the Event Log, if so configured.
- Page 145 EVENT LOG CLEARED Event Log Cleared All past alarms and faults are no longer recorded in the system’s event log. Press SILENCE on the touch screen to turn off the audible alarm, if so configured. If you are accessing the Liebert STS2 system from a terminal, type SH and press RETURN on your keyboard to turn off the audible alarm.
-
Page 146: Maintenance
17.0 M AINTENANCE WARNING Only qualified service personnel should perform maintenance on the static switch. Lethal voltages exist inside the unit during normal operation. The unit is supplied by multiple AC power sources. Disconnect and lock-out all power sources before working inside unit. -
Page 147: Support Information
UPPORT NFORMATION To contact Emerson Network Power Liebert Services for information or repair service in the United States, call 1-800-LIEBERT (1-800-543-2378). Liebert Services is available to assure fast repair of your unit with minimal downtime. Liebert Services offers a complete range of start-up services, repair services, preventive maintenance plans, and service contracts. -
Page 148: Programmable Relay Board Settings Record
ROGRAMMABLE ELAY The optional Programmable Relay Board (PRB) has eight channels to report events to an external device. Up to ten (10) events can be programmed to each channel. See 6.1 - Programmable Relay Board for more information on the PRB. If your Liebert STS2 has the PRB option installed, list the settings below for future reference. - Page 149 Maintenance Channel 8: Channel 9: Channel 10: PRB Notes:...
-
Page 150: Input Contact Isolator Settings
The Input Contact Isolator board (ICI) provides an Liebert STS2 module interface for up to eight external user alarm or message inputs to be routed through the static transfer switch’s alarm net- work. See 6.4 - Input Contact Isolator Board for more information on the ICI. - Page 152 Embedded Computing Connectivity Embedded Power DC Power Monitoring Business-Critical Continuity, Emerson Network Power and the Emerson Network Power logo are trademarks and service marks of Emerson Electric Co. ©2008 Emerson Electric Co. Technical Support / Service monitoring@emersonnetworkpower.com Outside the US: 614-841-6755 upstech@emersonnetworkpower.com...
Need help?
Do you have a question about the Liebert Static Transfer Switch and is the answer not in the manual?
Questions and answers