
Related Manuals for Emerson MS3100


Summary of Contents for Emerson MS3100
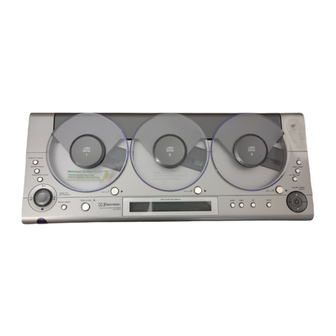
- Page 1 HOME AUDIO SYSTEM with 3 CD CHANGER and DIGITAL AM/FM RECEIVER OWNER'S MANUAL MS3100 Visit our web site at www.emersonradio.com...
- Page 2 This product was manufactured using the highest quality components and standards of workmanship. It was tested by Emerson inspectors and found to be in perfect working order before it left our factory. However, there is always the chance that some problem may occur because of rough handling during shipment to the retail store or to the final consumer.
- Page 3 IMPORTANT NOTES CLASS 1 LASER PRODUCT CLASS 1 LASER PRODUCT APPAREIL Á LASER DE CLASSE 1 PRODUCTO LASER DE CLASE 1 This product contains a low power Laser Device. • Avoid installing this unit in places exposed to direct sunlight or close to heat radiating appliances such as electric heaters, on top of other stereo equipment that radiates too much heat,...
- Page 4 PREPARATION FOR USE 2. Insert the plug into any convenient 120V 60Hz AC outlet. BATTERY PRECAUTIONS...
-
Page 5: Installation
Installation Connections e.g. e.g. -
Page 6: Installing The Remote Control Batteries
FM antenna wire Installing the remote control batteries Note–Most functions can be operated by the remote. However, the controls are also present on the front panel (below the flap). In general you shouldn't need to lower the flap unless you lose the remote. FM antenna. -
Page 7: Cleaning And Maintenance
Ready to switch on y. (S . The – Cleaning & Maintenance... -
Page 8: Setting The Clock
Setting the clock Press Press Note – check the AM / PM indicator (to the left of the hour) to ensure you make the correct setting. Note–If ever you find the whole time display is flashing, this means that the clock needs to be reset (possibly due to the unit having been disconnected from the AC outlet, or a power interruption). -
Page 9: General Use
General use Selecting the sound source ( See page 4.) Volume . (Pr –... -
Page 10: Graphic Equalizer
Headphones Graphic equalizer four FLAT, ROCK, CLASSIC Switching off – standby. -
Page 11: Loading And Removing Discs
CD operation . You Important Loading and removing discs –... -
Page 12: Selecting Tracks
Playing one disc Selecting tracks (Alternatively, press one of the CD buttons on the remote.) -
Page 13: Repeat Play
Searching tracks Pause and stop Repeat play REPEAT ALL DISC REPEAT 1 DISC REPEAT 1 TRACK Random play REPEAT RANDOM ALL DISC RANDOM 1 DISC RANDOM left... - Page 14 Playing all discs Playing a programmed selection of tracks – p - 0 1 TRACK 0 0 P - 0 1...
- Page 15 TRACK AL P - 0 1 P - 0 2, P - 0 3 P - 0 1, P - 0 2 TRACK 0 0 ; REPEAT REPEAT – random...
-
Page 16: Editing The Program
Editing the program Clearing the program – TRACK TRACK TRACK 0 0 TRACK (Alternatively, press one of the CD buttons on the remote.) - Page 17 Additional CD functions Track introductions Track/time displays MODE When a disc is playing, pressing (REMAIN) once to display – TIMER ON TIMER...
-
Page 18: Instant Play
Instant play (Alternatively, press one of the CD buttons on the remote.) -
Page 19: Radio Operation
Radio operation Tuning-in a new radio station To search up or down the band for a station, hold in + or - for two – Storing radio stations in memory .You... -
Page 20: Time Display
MEMORY CH 02 89. 1 MHz FM. Note-Instead of using MEMs the remote. In the above example, you would press Selecting stored radio stations FM mono/stereo Time display Note–pressing you can use the number keys on MEMt followed by 2. MEMORY TIMER ON TIMER... -
Page 21: Timer Operation
Timer operation While setting up the timer, make sure you carry out each step within five seconds, otherwise your entry will not be accepted in the memory and you will have to start again. Note-During timer setup, always check the AM/PM indicator (to the left of the time) to ensure you make the correct settings. -
Page 22: Sleep Timer
TIMER Note–If ever you find the whole time display flashing, the clock needs to be reset (see page 7). This could be due to the unit having been disconnected from the AC outlet, or a power interruption. Cancelling timer operation Sleep timer SLEEP cancel... -
Page 23: Care And Maintenance
FOR ADDITIONAL SET-UP OR OPERATING ASSISTANCE FOR CUSTOMER SERVICE, PLEASE WRITE TO: TO FIND THE LOCATION AND PHONE NUMBER OF YOUR NEAREST SERVICE CENTER PERMITTED TO PERFORM WARRANTY... PLEASE CALL: 1-800-898-9020 Emerson Radio Corp. Consumer Affairs Dept. 1901 Diplomat Drive, Farmers Branch, TX 75234. - Page 24 WALL MOUNTING INSTRUCTIONS MS31 Incorrect Correct Figure 1...
- Page 26 a 3/...
- Page 28 EMERSON RADIO CORP. LIMITED WARRANTY What does this warranty cover ? Any manufacturing defects in original material, including original parts and workmanship, under normal use and conditions. For how long? For a period of ninety (90) days from the date of original purchase in the U.S.
- Page 29 EMERSON RADIO CORP. EMERSON Part No.: 16-2837 110-01 Printed in China...
Need help?
Do you have a question about the MS3100 and is the answer not in the manual?
Questions and answers
Dvd show NoDusk and all disks are in.