
Related Manuals for Electrolux EFP 60241


Summary of Contents for Electrolux EFP 60241
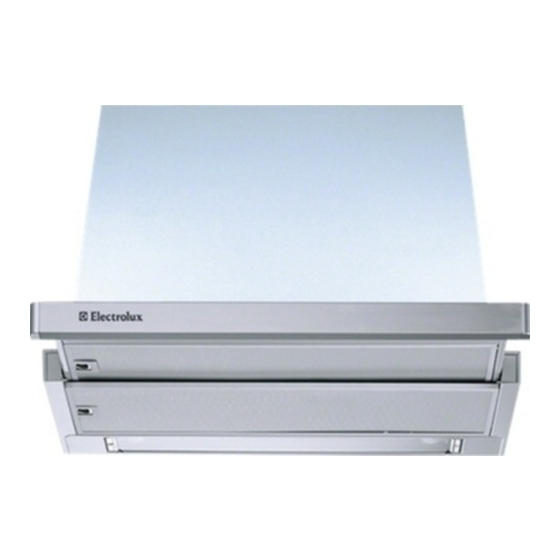
- Page 1 EFP 60241 EFP 90541 Instructions Manual Manuel d’Instructions Bedienungsanleitung Gebruiksaanwijzing...
-
Page 2: Table Of Contents
Instructions Manual INDEX RECOMMENDATIONS AND SUGGESTIONS ........................6 CHARACTERISTICS................................7 INSTALLATION ..................................8 USE.......................................10 MAINTENANCE..................................11... - Page 3 Manuel d’Instructions SOMMAIRE CONSEILS ET SUGGESTIONS ............................12 CARACTERISTIQUES .................................13 INSTALLATION ..................................14 UTILISATION..................................16 ENTRETIEN..................................17...
- Page 4 Bedienungsanleitung INHALTSVERZEICHNIS EMPFEHLUNGEN UND HINWEISE............................18 CHARAKTERISTIKEN................................19 MONTAGE....................................20 BEDIENUNG..................................22 WARTUNG....................................23...
- Page 5 Gebruiksaanwijzing INHOUDSOPGAVE ADVIEZEN EN SUGGESTIES .............................24 EIGENSCHAPPEN................................25 INSTALLATIE ..................................26 GEBRUIK....................................28 ONDERHOUD ..................................29...
-
Page 6: Recommendations And Suggestions
RECOMMENDATIONS AND SUGGESTIONS The Instructions for Use apply to several versions of this appliance. Accord- ingly, you may find descriptions of individual features that do not apply to your specific appliance. INSTALLATION • The manufacturer will not be held liable for any damages resulting from incor- rect or improper installation. -
Page 7: Characteristics
CHARACTERISTICS Dimensions Components Ref. Q.ty Product Components Hood Body, complete with: Controls, Light, Blower, Filters Directional Air Outlet grille Flange ø 150 mm Flange ø 120 mm Adapting ring ø 120-125 mm Closing element Ref. Q.ty Installation Components Screws 3,5 x 16 Screws 2,9 x 12,7 Screws 2,9 x 9,5 Q.ty Documentation... -
Page 8: Installation
INSTALLATION Drilling the Support surface and Fitting the Hood • The Hood can be fitted directly on the lower surface of the Wall Units (650 mm min. above the Cooker Top) using the snap- on Side Supports. • Make an opening on the lower surface of the Wall Unit, as indicated. - Page 9 Connections DUCTING VERSION AIR EXHAUST SYSTEM When installing the hood in ducting version, a rigid or a flexible pipe with the diameter corresponding to the flange diameter is used in order to connect the hood to the air outlet piping. •...
-
Page 10: Use
By pulling out the sliding panel it is possible to automatically activate all the hood functions. By simply closing the sliding panel all the functions are switched off. SWITCH FUNCTIONS Light Switches the lighting system on and off Motor Switches the extractor motor on and off 1. -
Page 11: Maintenance
MAINTENANCE Grease filters CLEANING METAL CASSETTE GREASE FILTERS • The filters must be cleaned every 2 months, or more frequently in case of particularly heavy use of the hood. Filters can be washed in a dishwasher. • Pull out the sliding suction panel. •... -
Page 12: Conseils Et Suggestions
CONSEILS ET SUGGESTIONS La présente notice d'emploi vaut pour plusieurs versions de l'appareil. Elle peut contenir des descriptions d'accessoires ne figurant pas dans votre appareil. INSTALLATION • Le fabricant décline toute responsabilité en cas de dommage dû à une installation non correcte ou non conforme aux règles de l’art. -
Page 13: Caracteristiques
CARACTERISTIQUES Encombrement Composants Réf. Q.té Composants de Produit Corps Hotte équipé de: Commandes, Lumière, Groupe Ventilateur, Filtres Grille orientée Sortie de l’Air Flasque ø 150 mm Flasque ø 120 mm Anneau de raccord Ø 120 - 125 mm Profil fermeture Réf. -
Page 14: Installation
INSTALLATION Perçage du Plan de support et Montage de la Hotte • Il est possible d’installer la Hotte directement sur le plan inférieur des Armoires murales (650 mm. min. par rapport aux Plaques de Cuisson), à l’aide des Supports latéraux par encliquetage. •... - Page 15 Branchements SORTIE AIR VERSION ASPIRANTE En cas d’installation en version aspirante, brancher la hotte à la tuyauterie de sortie utilisant un tube rigide ou flexible avec le même diamètre de la flasque précé- demment installée. • Fixer le tube par des colliers appropriés. Le matériau nécessaire n’est pas fourni.
-
Page 16: Utilisation
UTILISATION Les différentes fonctions de la hotte sont activées automatiquement avec l’ouverture du tiroir. Pour arrêter les fonctions sélectionnées il suffit de fermer le tiroir. TOUCHE FUNCTIONS Lumières Allume et éteint l’éclairage. Moteur Allume et éteint le moteur aspiration 1. Vitesse minimale, pour un rechange d’air permanent particulièrement silencieux en cas de faibles vapeurs de cuisson. -
Page 17: Entretien
ENTRETIEN Filtres anti-graisse NETTOYAGE DES FILTRES ANTI-GRAISSE MÉTALLIQUES AUTOPOR- TEURS • Les filtres peuvent être également lavés au lave-vaisselle; il faut les laver tous les 2 mois d’emploi environ, ou bien plus souvent, en cas d’emploi particulièrement intense. • Sortir le chariot aspirant. •... -
Page 18: Empfehlungen Und Hinweise
EMPFEHLUNGEN UND HINWEISE Diese Gebrauchsanleitung gilt für mehrere Geräte-Ausführungen. Es ist möglich, dass einzelne Ausstattungsmerkmale beschrieben sind, die nicht auf Ihr Gerät zutreffen. FÜR DEN KÜCHENMÖBEL-MONTEUR • Der Hersteller haftet nicht für Schäden, die auf eine fehlerhafte und unsachgemäße Montage zurückzuführen sind. •... -
Page 19: Charakteristiken
CHARAKTERISTIKEN Platzbedarf Komponenten Pos. Produktkomponenten Haubenkörper mit Schaltern, Beleuchtung, Gebläse- gruppe, Filter Luftleitgitter Luftaustritt Flansch ø 150 mm Flansch ø 120 mm Vergrößerungsring Ø 120-150 mm Abdeckprofil Pos. Montagekomponenten Schrauben 3,5 x 16 Schrauben 2,9 x 12,7 Schrauben 2,9 x 9,5 Dokumentation Bedienungsanleitung... -
Page 20: Montage
MONTAGE Bohren der Trägerplatte und Montage der Dunstabzugshaube • Die Haube kann direkt an der Unterseite der Hängeschränke (mindestens 650 mm von der Kochmulde entfernt) mit seitlichen Schnapphal- terungen fixiert werden. • An der Unterseite des Hängeschranks, wie in der Abbildung gezeigt, eine Öffnung anbringen. (Abb.1) •... - Page 21 Anschlüsse ANSCHLUSS BEI ABLUFTBETRIEB Für die Installation der Haube im Abluftbetrieb mit Hil- fe eines Rohres oder Schlauches vom selben Durch- messer wie der zuvor installierte Flansch (ø 150mm, ø 125 mm oder ø 120 mm) am Gebläseaustrittsstutzen anschließen. • Das Rohr mit geeigneten Rohrschellen fixieren. Das hierzu erforderliche Material wird nicht mitgeliefert.
-
Page 22: Bedienung
BEDIENUNG Die verschiedenen Funktionen werden automatisch beim Ausziehen des Wrasenleitschirms eingeschaltet. Um die Funktionen wieder auszuschalten, den Wrasenleitschirm einschieben. SCHALTER FUNKTION L Beleuchtung Schaltet die Beleuchtung ein und aus Motor Schaltet den Gebläsemotor ein und aus 1. kleinste Gebläsestufe, diese Stufe ist für den geräuscharmen Dauerbe- trieb der Haube bei geringer Wrasenentwicklung auf dem Kochfeld ge- eignet. -
Page 23: Wartung
WARTUNG Fettfilter REINIGUNG DER METALLFETTFILTER • Die Filter können im Geschirrspüler gereinigt werden und müssen nach spätestens zwei Monaten Betriebszeit oder, bei besonders intensiver Nutzung, häufiger gereinigt werden. • Den Wrasenleitschirm herausziehen. • Die Verriegelung des Fettfilters zuerst nach hinten, dann nach unten herausnehmen. -
Page 24: Adviezen En Suggesties
ADVIEZEN EN SUGGESTIES Deze gebruiksaanwijzing geldt voor verschillende uitvoeringen van het apparaat. Het is mogelijk dat er een aantal kenmerken worden beschreven die niet van toe- passing zijn op uw apparaat. INSTALLATIE • De fabrikant aanvaardt geen enkele aansprakelijkheid voor schade die voortkomt uit onjuiste of niet overeenkomstig de regels der kunst uitgevoerde installaties. -
Page 25: Eigenschappen
EIGENSCHAPPEN Buitenafmetingen Onderdelen Ref. Productonderdelen Wasemkap compleet met:Bedieningen, Licht, Ventilat- orgroep, Filters Richtingrooster luchtuitlaat Flens ø 150 mm Flens ø 120 mm Aanpassingsring Ø 120-125 mm Sluitprofiel Ref. Installatieonderdelen Schroeven 3,5 x 16 Schroeven 2,9 x 12,7 Schroeven 2,9 x 9,5 Documentatie Gebruiksaanwijzing... -
Page 26: Installatie
INSTALLATIE Boren van gaten in draagvlak en montage wasemkap • De wasemkap kan rechtstreeks op het onderste vlak van het keukenkastje (min. 650 mm van de kookplaat) worden geïnstalleerd met behulp van de zijsteunen met klikbevestiging. • Ga voor de inbouw van de wasemkap op het onderste vlak van het keukenkastje, als volgt te werk. - Page 27 Aansluitingen LUCHTUITLAAT AFZUIGVERSIE In het geval van installatie in afzuigversie, moet u de wasemkap met de uitlaatleiding verbinden door middel van een starre of buigzame leiding die dezelfde diame- ter heeft als de reeds geïnstalleerde flens. • Zet de leiding vast met geschikte leidingklemmen. Het benodigde materiaal wordt niet bij de wasemkap bijgeleverd.
-
Page 28: Gebruik
GEBRUIK De verschillende functies worden automatisch geactiveerd wanneer de slede wordt uitgetrok- ken. Voor het uitzetten van de ingestelde functies is het voldoende de slede weer te sluiten. SCHAKELAAR FUNCTIES Lichten Hiermee schakelt u de verlichting aan en uit Motor Hiermee schakelt u de afzuigmotor aan en uit 1. -
Page 29: Onderhoud
ONDERHOUD Vetfilters REINIGING VAN DE METALEN ZELFDRAGENDE VETFILTERS • Deze filters moeten minstens om de 2 maanden of, bij een bij- zonder intensief gebruik vaker, gereinigd worden. Ze kunnen ook in de vaatwasmachine afgewassen worden. • Trek de rolletjes met de zuiggroep naar voren. •... - Page 32 The symbol on the product or on its packaging indicates that this product may not be treated as household waste. Instead it shall be handed over to the applicable collection point for the recycling of electrical and electronic equipment. By ensuring this product is disposed of correctly, you will help prevent potential negative consequences for the environment and human health, which could oth- erwise be caused by inappropriate waste handling of this product.
Need help?
Do you have a question about the EFP 60241 and is the answer not in the manual?
Questions and answers