Table of Contents
Advertisement
Toll Free Technical Support
1 - 866 - GLOWBOY (456 -9269)
READ THIS ENTIRE MANUAL BEFORE YOU INSTALL AND USE YOUR HEATER.
FAILURE TO FOLLOW INSTRUCTIONS MAY RESULT IN PROPERTY DAMAGE,
Installation shall conform to CAN/CSA B365 Installation Code for Solid-Fuel-Burning Appliances and
Equipment in Canada and NFPA 211 Chimney, Fireplaces, Vents and Solid Fuel Burning Appliances in th e USA
Contact local building or fire officials about restrictions and installation inspection requirement s in your area.
Classic Insert / Built-In
To register your purchase
BODILY INJURY OR EVEN DEATH!
Step Top
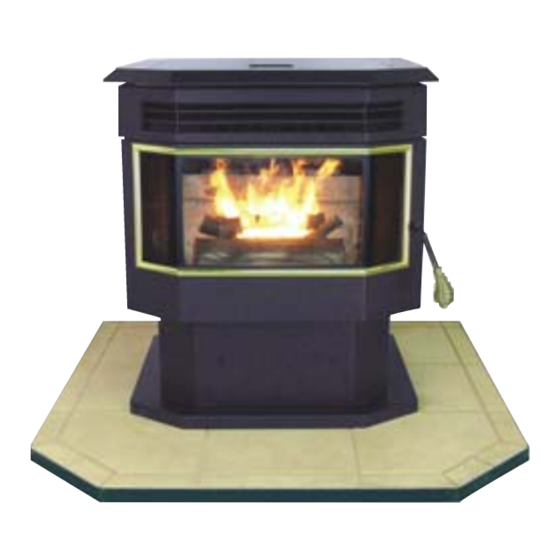
Freestanding
Bay View
Freestanding
Bay View
Insert / Built-In
www.dansons.com/support
or
Memory & Fan Trim
TM
.
Advertisement
Table of Contents

Related Manuals for Dansons Group GLOW BOY FGB

Summary of Contents for Dansons Group GLOW BOY FGB
- Page 1 Memory & Fan Trim Step Top Freestanding Bay View Freestanding Bay View Insert / Built-In Classic Insert / Built-In Toll Free Technical Support 1 - 866 - GLOWBOY (456 -9269) www.dansons.com/support To register your purchase READ THIS ENTIRE MANUAL BEFORE YOU INSTALL AND USE YOUR HEATER. FAILURE TO FOLLOW INSTRUCTIONS MAY RESULT IN PROPERTY DAMAGE, BODILY INJURY OR EVEN DEATH! Installation shall conform to CAN/CSA B365 Installation Code for Solid-Fuel-Burning Appliances and...
- Page 2 Glow Boy Dear Multi-Fuel / Pellet Stove Owner: Glow Boy CONGRATULATIONS on the purchase of your Multi-fuel pellet appliance! You have selected the finest in residential wood pellet heating technology. Let us pass on a few "tips" concerning installing your stove and heating with wood pellets. 1.
-
Page 3: Table Of Contents
ABLE ONTENTS ABLE ONTENTS ENERAL NFORMATION AINTENANCE AFETY RECAUTIONS EQUIRED OUTINE LEANING AFETY ESTING DAYS OR EEKLY PPLIANCE ORKS ERIODIC AINTENACE UTOMATIC AFETY EATURES EASONAL SEASONAL PECIFICATIONS TART LECTRICAL EQUIREMENTS PRING LANNING EARLY AINTENANCE ONTRACTS ROUBLE HOOTING & I LANNING NSTALLATION HECKLIST EPLACEMENT... -
Page 4: Safety Precautions
AFETY RECAUTIONS AFETY RECAUTIONS IMPORTANT: Read, save and follow the instructions in this manual. It contains important safety, operating and maintenance instructions you will need. RECOMMENED: For your and your families protection and well being, Dansons’ highly recommends installing and maintaining both a smoke detector as well as a CO2 detector. •... -
Page 5: Cleaning
• DO NOT operate the stove if the flame becomes dark and sooty or if the firepot overfills with pellets. Push the OFF Touch Pad and inspect the heater. (See Operating Your Stove). Soot or creosote may accumu- late in the exhaust vent system when the stove is operated under incorrect conditions such as an ex- tremely rich burn. -
Page 6: Your Appliance Works
PPLIANCE ORKS PPLIANCE ORKS The operations and maintenance of your Glow Boy Series of multi-fuel appliance are unique and should not be considered to be like a wood, coal, gas, electric, propane or oil heater, stove or appliance. Cautions Do not try to operate your stove with viewing door open. Pellets will not feed under these circumstances and a safety concern may arise from sparks or fumes entering room. -
Page 7: Automatic Safety Features
UTOMATIC AFETY EATURES UTOMATIC AFETY EATURES L120 LOW LIMIT SWITCH This limit switch is mounted on the exhaust blower housing and has 2 main functions: Should the fire happen to go out, for any reason, this limit switch will shut the stove off when the exhaust temperature drops below 120°... -
Page 8: Specifications
PECIFICATIONS PECIFICATIONS HEATING SPECIFICATIONS Approx. Heating capacity (sq. feet) * 800 – 2,000 Approx. Fuel burn rate per hour ** 1.5 – 5 lbs Hopper Capacity - Freestanding Step Top 90 lbs Approx. Burn time at lowest setting 65 hrs Hopper Capacity—... - Page 9 & I & I LANNING NSTALLATION HECK LANNING NSTALLATION HECK Unless you are knowledgeable and experienced in stove installation, we recommend your Glow Boy Appliance receive a Pre-delivery Check and be installed by your local Specialty Retailer, NFI (National Fireplace Institute) Pellet Specialist (USA) or WETT Certified Installer (CAN) .
-
Page 10: Planning
— — LANNING XHAUST YSTEMS LANNING XHAUST YSTEMS PELLET VENT MUST MAINTAIN A MINIMUM 3” CLEARANCE TO ANY COMBUSTIBLE (INSTALL VENT AT CLEARANCES SPECIFIED BY THE VENT MANUFACTURER). DO NOT CONNECT THE PELLET VENT TO A VENT SERVING ANY OTHER APPLIANCE OR STOVE. -
Page 11: Planning
— — LANNING XHAUST YSTEMS LANNING XHAUST YSTEMS … … CONTINUED CONTINUED DETERMINE VENTING SIZE AND DISTANCE: It is recommended that the vent system be installed with a minimum of three (3’) of vertical rise above the appliance exhaust port. Equivalent Vent Length (EVL) is the method of determining vent sizes and lengths, that takes into account the effect of different component parts on air flow. -
Page 12: Planning
— — LANNING XHAUST YSTEMS LANNING XHAUST YSTEMS … … CONTINUED CONTINUED PELLET VENT TERMINATION: (Figures 7 & 8) Termination must be a minimum of 12” above the chase cap (B) (note: the chim- ney must meet local codes for height above the roof or other obstructions) Must have an approved cap (G) (to prevent water from en- tering) or a 45* elbow downturn (F) -
Page 13: Planning
— — LANNING UTSIDE LANNING UTSIDE Outside air is REQUIRED ON ALL MOBILE HOME INSTALLATIONS. Outside air is strongly recommended for all other installations. Failure to install intake air may result in improper combustion as well as the unit smoking during power failures. Metal pipe, ONLY, either solid or flexible, must be used in all outside air installations.(B) NOTE: Non-metallic material, such as PVC or ABS plastic, MUST NOT BE USED for outside air installations. -
Page 14: Stove Placement
— & C — & C LANNING ROTECTION LEARANCES LANNING ROTECTION LEARANCES STOVE PLACEMENT: Stove must be placed so that no combustibles are within, or can swing within (i.e. drapes doors), 36” of the heater. Keep in mind the following placement concerns; venting obstructions, outside air, electrical outlet, wall thermostat, heat distribution, traffic patterns and room use/size. -
Page 15: Alcove Installation
— & C — & C LANNING ROTECTION LEARANCES LANNING ROTECTION LEARANCES . . . C ’ . . . C ’ CLEARANCES – “CORNER INSTALLATION”: 45 C ORNER 45 C ORNER HROUGH HE 12” NTERIOR ERTICAL 2” 6” 6” 6”... - Page 16 OOLS EQUIRED OOLS EQUIRED Before starting your Glow Boy Multi-Fuel install, we recommended you have the following list of tools ready. This is not an exhaustive list, but should go along way in making your installation easier. Power Tools Shop Vacuum WITH Filter Jigsaw or Reciprocating saw Electric drill Extension cord...
-
Page 17: Installation
— — NSTALLATION REESTANDING NSTALLATION REESTANDING THROUGH THE WALL, DIRECT VENT INSTALLATION. (Figure 18) (not preferred) HROUGH Select the location for your stove, design the exhaust system and determine the brand and 12” size of "PL" vent to be used. Position the floor pad. -
Page 18: Home
OBILE NSTALLATION OBILE NSTALLATION CAUTION: DO NOT INSTALL STOVE IN SLEEPING ROOM THE STRUCTURAL INTEGRITY OF THE MANUFACTURED HOME FLOOR, CEILING and ROOF MUST BE MAINTAINED! Glow Boy Your appliance has been tested and listed for mobile home installation. It may be installed in a mobile home as a "Free Standing Stove"... -
Page 19: Installations Options
REESTANDING NSTALLATION REESTANDING NSTALLATION . . . C ’ . . . C ’ These styles of installation are highly recommended, due to possible backpressure in the exhaust caused by airflow around the outside of the structure, snow build-up, or power failure, etc.. These designs will improve venting performance and provide natural draft to help evacuate smoke from the appliance in case of power failure. -
Page 20: Fire
REESTANDING NSTALLATION REESTANDING NSTALLATION . . . C ’ . . . C ’ Main Floor - Class A Tie-In Main Floor - Tie-In Claytile Flue 24” Pipe Adapter 1 “PL” Pipe Adapter Clean Out Tee & Cap “PL” Clean Out Tee & Cap 3 x 60”... - Page 21 IREPLACE NSERT NSTALLATION IREPLACE NSERT NSTALLATION Installing Pellet Inserts into Factory Built or Masonry Fireplaces . . . cont Means must be provided for removal of the insert to clean the chimney liner. Inserts that project in front of the fireplace must be supplied with appropriate supporting means. A permanent metal warning label must be attached to the back of the fireplace stating that the fireplace must be restored to its original condition for safe use without the insert.
- Page 22 UILT NSTALLATION UILT NSTALLATION CAUTION: DO NOT BLOCK ANY VENT OPENINGS PELLET VENT MUST MAINTAIN A MINIMUM 3” CLEARANCE TO ANY COMBUSTIBLE. (INSTALL VENT AT CLEARANCES SPECIFIED BY THE VENT MANUFACTURER). DO NOT CONNECT THE PELLET VENT TO A VENT SERVING ANY OTHER APPLIANCE OR STOVE.
-
Page 23: Vertical Vent Installation
UILT NSERT NSTALLATION UILT NSERT NSTALLATION . . . C ’ . . . C ’ MINIMUM FRAMING DIMENSIONS: The MINIMUM framed opening or clearances to all combustibles are as follows: (Combustibles include drywall or any paper backed product, wood framing, insulation, vapor barrier, or any other product as set out in our local building code.) Minimum Traditional... - Page 24 PERATING NSTRUCTIONS PERATING NSTRUCTIONS COMPLETE THE CHECK LIST (Page 9) PRIOR TO LIGHTING YOUR FIRST FIRE FOLLOW THE ARROWS TO START YOUR APPLIANCE FOR THE FIRST TIME IT IS CRITICAL FOR THE CORRECT OPERATION OF YOUR STOVE THAT THE FOLLOWING STEPS BE PERFORMED! A pellet stove, like most things is life is NOT a plug and play appliance.
- Page 25 PERATING NSTRUCTIONS PERATING NSTRUCTIONS FILL THE HOPPER WITH FUEL: Open the hopper lid by placing your fingers in the recessed handle on the hopper lid and lifting upward. Lift the lid until the lid is fully open, toward the back of the stove, and stays open by itself.
- Page 26 PERATING NSTRUCTIONS PERATING NSTRUCTIONS IMPORTANT: If at anytime your appliance does not seem to be operating as it had, ALWAYS confirm the mode of operation. CHOOSE MODE OF OPERATION: Decide on mode of operation: STEP 1 Manual Operation Thermostat On/Off Thermostat Low/High Find mode of operation: STEP 2...
- Page 27 PERATING NSTRUCTIONS PERATING NSTRUCTIONS TO START … con’t After Pushing the START touch pad: The appliance will automatically start in the #1 or low feed rate, no matter where you set it. When the FEED RATE LED is flashing FAST, this indicates the unit has not reached 120°...
- Page 28 PERATING NSTRUCTIONS PERATING NSTRUCTIONS OPERATING IN THERMOSTAT ON / OFF (Flashing 1 & 2) Feed Rates 1 & 2 This also requires purchasing the optional “Wall Thermostat Add-on Kit” This mode of operation is best suited for those “Take of the Chill” nights of spring, summer , fall..
-
Page 29: Your
— — PERATING NSTRUCTION IGHTING PPLIANCE PERATING NSTRUCTION IGHTING PPLIANCE Before lighting a fire check to ensure the Burn Grate is clean and adjusted and the Ash Tray is not full. For safety reasons use extra caution when lighting a stove that is HOT! Lighting stove manually (No Igniter) Lighting stove with Auto-Ignitor In the NON-Thermostat Mode... -
Page 30: Operation
— — PERATION ERFORMANCE NHANCEMENTS PERATION ERFORMANCE NHANCEMENTS IT IS CRITICAL FOR THE CORRECT OPERATION OF YOUR STOVE THAT THE BURN GRATE, AIR INLET DAMPER, FAN TRIM AND 1 & 4 FUEL RATE BE SET CORRECTLY! HIGH QUALITY FIRE should burn with a brisk, vibrant, yellow to white color flame. When watching the fuel burn in the grate, you should see a slight movement. -
Page 31: Fuel
NOTE: Since Dansons Group Inc. or Canadian Comfort Industries has no control over the quality of pellets, corn or grains that you use, we assume no liability caused by the quality of fuel used. - Page 32 — — PECIFICATIONS HELLED PECIFICATIONS HELLED The performance of your multi-fuel burning appliance is greatly affected by the type, quality, moisture content and consistency of the shelled corn burned. As the heat output of various quality corn differ, so will the performance and heat output of your appliance. CORN QUALITY Your Glow Boy Series appliance, with its “Super Grate”, is designed to burn only dry, clean, quality shelled corn, up to a 50/50 mixture with wood pellets...
- Page 33 — — AINTENANCE OUTINE LEANING AINTENANCE OUTINE LEANING WARNING: Regular maintenance must be conducted for safe and efficient operation. Disconnect power to the stove if maintenance requires the opening of service panels. Conduct maintenance on a COLD appliance only. SERIES Proper care of your Glow Boy pellet appliance is required for peak, sustained performance.
- Page 34 — — AINTENANCE ERIODIC LEANING AINTENANCE ERIODIC LEANING 1 TON, SEASONAL OR BI-SEASONAL The #1 reason for a service call or unit failing is: FAILURE TO DO SIMPLE PERIODIC MAINTENANCE. With proper cleaning and the use of quality pellets, your Glow Boy Series appliance requires very little maintenance.
- Page 35 — — AINTENANCE ERIODIC LEANING AINTENANCE ERIODIC LEANING FAN MOTORS: C lean the in-take on CONVECTION (ROOM AIR) fan as well as the air holes on the motors of both COMBUSTION and CONVECTION fans annually. FRESH AIR INTAKE: Inspect periodically to be sure that it is not clogged with any foreign materials. A plugged screen will restrict or shut off combustion air and cause a fire to die or burn poorly.
- Page 36 EARLY AINTENANCE EARLY AINTENANCE SERVICE CONTRACTS Many Dansons Authorized Dealers as well as NFI or WETT Certified Pellet Specialists offer yearly customer service contracts. The advantages of these are they establish an ongoing, mutually beneficial relationship with a qualified service technician. Many will offer an end of the season service such as a through cleaning and equipment inspection and repair or replacement, if necessary.
- Page 37 ROUBLE HOOTING ROUBLE HOOTING PROBLEM CAUSE SOLUTION 4. Air Inlet Damper setting *Check for proper setting. Too much air or not Stove Will Not Start enough air will effect starting time. (cont….) *Check for blockage in the air intake connector and fresh air intake.
- Page 38 ROUBLE HOOTING ROUBLE HOOTING PROBLEM CAUSE SOLUTION 1. Insufficient combustion air. *Adjust the air inlet damper. Fire burns with a yellow *Check for blockage of air intake both inside as flame. Fuel builds up in well as outside. the burn grate. Window *Confirm proper placement of burn grate.
- Page 39 PTIONAL CCESSORIES PTIONAL CCESSORIES OPTIONAL ITEMS Part No. Description KS5150-1450 Fresh Air Intake Kit 3’ KS5150-1460 Fresh Air Intake Kit 10’ Hopper Extension—12” KS5130-1480 KS5130-1490 Hopper Extension– 24” KS5120-1370 Wall Thermostat Kit Assembly—F REPLACEMENT ITEMS Part No. Description KS5010-1010 Auger Motor Assembly KS5010-1020 Auger Shaft Assembly KS5080-1240...
-
Page 40: L Imited W Arranty
IMITED ARRANTY IMITED ARRANTY The “Glow Boy” wood pellet appliance, carries a five (5) year limited warrant for from the date of sale to the original owner against defects and workmanship on all steel parts, (excluding the burn grate), and one (1) year on electrical components.
Need help?
Do you have a question about the GLOW BOY FGB and is the answer not in the manual?
Questions and answers