
Related Manuals for Emerson MW8999RD


Summary of Contents for Emerson MW8999RD
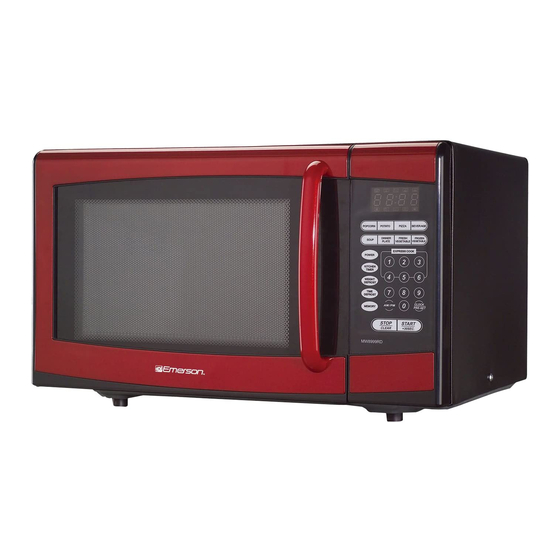
- Page 1 ® 900W MICROWAVE OVEN OWNER’S MANUAL MW8999RD/MW8999SB Visit our web site at “www.emersonradio.com” UNAUTHORIZED MODIFICATIONS TO THIS DEVICE COULD VOID THE USER'S AUTHORITY TO OPERATE IT.
-
Page 2: Table Of Contents
Important Safety Instructions ...2 Safety Precautions ...4 Grounding Instructions ...5 Installation ...5 Care of Your Microwave Oven ...6 How to Use Your Microwave Oven Safely ...6 Location of Controls ...7 Operation ...8 Setting the Clock...8 Weight Defrost ...9 Time Defrost...9 Cooking In One Stage...10... -
Page 3: Precautions To Avoid Possible Exposure To
IMPORTANT SAFETY INSTRUCTIONS When using electrical appliances, basic safety precautions should be followed, including the following: WARNING - To reduce the risk of burns. Electric shock, fire, injury to persons, or exposure to excessive microwave energy: Read all instructions before using this appliance. -
Page 4: Save These Instructions
Do not leave paper products, cooking utensils or food in the cavity when not in use. Do not use this microwave oven to heat corrosive chemicals (for example, sulfides and chlorides). Va p o r s f r o m s u c h c o r r o s i v e... -
Page 5: Safety Precautions
Do not use oil unless specified by the manufacturer. Do NOT attempt to deep fat fry in your oven. HEATED LIQUIDS can ERUPT if not mixed with air. Do not heat liquids in your microwave oven without first stirring. -
Page 6: Grounding Instructions
1. Steady, flat location: When positioning the microwave oven, it should be set on a steady, flat surface. 2. Ventilation: Do not block air vents. If they are blocked during operation, the oven may overheat and eventually cause oven failure. -
Page 7: Care Of Your Microwave Oven
If steam accumulates on both sides of the oven door, wipe with a soft cloth. This may occur when the microwave oven is operated under high humidity conditions and this is not an indication of a malfunction in the unit. -
Page 8: Location Of Controls
Door latch-When the door is closed, it will automatically lock shut. If the door is opened while the oven is operating, the magnetron will automatically shut off. Door screen-Allows viewing of food. The screen is designed so that light can pass through, but not the microwaves. -
Page 9: Power Levels
When a power between level 7-1 is choosen, the low cook indicator is lighted and it will flash in operation. SETTING THE CLOCK When the microwave oven is plugged into an outlet, the oven will display " 0:00 " 1. Press the CLOCK/PRE-SET button; the hour digit will blink and the clock indicator will light. -
Page 10: Weight Defrost
OPERATION(CONTINUED) WEIGHT DEFROST WEIGHT DEFROST lets you easily defrost foods by eliminating guesswork in determining defrosting time. The minimum weight for Auto Weight Defrost is 4 Oz and maximum weight is 100 Oz. Follow the steps below for easy defrosting. 1. -
Page 11: Cooking In One Stage
OPERATION(CONTINUED) COOKING IN ONE STAGE Set a cooking or other operational time/power as follows. The maximum cooking time is 99 minutes 99 seconds. 1. Press the POWER button; the Microwave and High Cook indicators will light and “PL 10” will light in the display. -
Page 12: Cooking In Two Stages
OPERATION(CONTINUED) COOKING IN TWO STAGES Set up to two cooking stages as follows: 1. Press the POWER button; the Microwave and High Cook indicators will light and "PL 10" will light in the display. 2. Press the POWER button different times to set the desired power;... -
Page 13: Defrosting/Cooking In Two Stages
OPERATION(CONTINUED) DEFROSTING/COOKING IN TWO STAGES Set up weight defrosting and cooking in two stages as follows. The minimum weight for Auto Weight Defrost is 4 oz. The maximum weight is 100 oz. 1. Press the WEIGHT DEFROST button; the Microwave and Defrost indicators will light and "dEF 1"... -
Page 14: Auto Cook
OPERATION(CONTINUED) AUTO COOK Auto cook lets you easily cook items in the oven as it will automatically set the times and power levels to give better results than one power only cooking. 1. Press the desired Auto Cook button; the Auto Cook indicator will appear and weight/portion will light in the display (see chart on next page). -
Page 15: Auto Cook Menu Chart
OPERATION(CONTINUED) Auto Cook Menu Chart Press Times Menu POPCORN POTATO PIZZA BEVERAGE SOUP DINNER PLATE FRESH VEGETABLE FROZEN VEGETABLE Weight/Portion Once 1.75 Oz Twice 3.0 Oz Thrice 3.5 Oz Once 1 PCS Twice 2 PCS Thrice 3 PCS Once 1 Slice(6 Oz) Twice 2 Slices(9 Oz) Thrice... -
Page 16: Memory
OPERATION(CONTINUED) MEMORY Memory lets you cook items in your own special style. Totally 5 memory settings are availavle in this model. Set a memory setting as follows: 1. Press the MEMORY button repeatedly to select 1-5 memory. 2. Press the POWER button; the Microwave and High Cook indicators will light and “PL10”... -
Page 17: Kitchen Timer
OPERATION(CONTINUED) KITCHEN TIMER 1. Press " KITCHEN TIMER ". 2. Press the number keys to enter the desired alarming time, for example press 0-2-3-0 for 2 minutes 30 seconds (the maximum alarming time is 99 minutes and 99 seconds.) 3. Press " START/+30SEC. " to confirm setting. Clock indicator will be lighted. -
Page 18: Enquiry
OPERATION(CONTINUED) ENQUIRY Press AM/PM button during standby, the display will show A or P for 3 seconds. (Time must be set before this operation.) Press the POWER button during cooking; the display will show current power level for 3 seconds. Press CLOCK/PRE-SET button during cooking, the display will show the present time for 3 seconds, and AM or PM for 3 seconds. -
Page 19: Cooking Guide
FOOD CHARACTERISTICS Quantity: The amount of food placed in a microwave oven has a direct effect on the cooking time. Small amounts of food or liquid require less cooking time than larger amounts of the same substance. As quantity increases, concentration decreases. -
Page 20: Hot Snacks And Appetizers
Covering: Covering speeds cooking time, retains moisture, tenderizes, insures even cooking and prevents spattering. Casserole lids or plastic wrap are used for a tighter seal. Vent plastic by turning back one edge at the side of dish to form a narrow slot where excess steam can escape. -
Page 21: Meats
Guide for Cooking Meats Roasts, chops, hamburgers and small cuts of tender meat cook beautifully in the microwave oven. Most roasts can be cooked rare, medium rare or even well done in less than one hour. Less tender cuts of meat such as pot roast can be simmered fork tender in a sauce or gravy. -
Page 22: Poultry
Chicken is one of the most popular foods and microwaving chicken is one of the best uses of your microwave oven. Chicken stays juicy and tender in the microwave oven. However, juiciness prevents browning because chicken crisps and browns only when the skin dries out enough to change color. -
Page 23: Eggs & Cheese
Eggs cook differently by microwave. The high fat content of egg yolks absorb energy, so yolks cook faster than whites. It's easy to poach eggs in a microwave oven, but if you want soft yolks, remove eggs from the oven before whites are completely cooked. A brief standing time allows whites to set without overcooking yolks. -
Page 24: Vegetables
Cauliflower pieces (1 head) Mushroom slices (1/2 lb) SOUPS Guide for Cooking Soups Satisfy appetites with savory soups prepared in your microwave oven. Adapt your favorites by using similar cooking times and techniques. Food Canned Condensed Cream style, Bean, Pea... -
Page 25: Sauces
Because of their shorter cooking time, casseroles cooked in the microwave oven generally need less liquid. Casseroles with cream and cheese sauces, or meats which need slower cooking to tenderize, cook best on power level 40. -
Page 26: Sandwiches
Cooked rice and pasta reheat easily in the microwave oven without loss of flavor or texture. No extra water is needed to prevent sticking or drying, so there's no danger of overcooking rice and pasta or thinning sauces. -
Page 27: Cereals
COOKING GUIDE (CONTINUED) CEREALS Microwaveable hot cereals can be cooked directly in the cereal bowl and make cleaning up easy. CONVENIENCE FOODS Frozen Foods A large variety of frozen foods, special dishes and dinners are available and the selections continue to increase. The market is changing rapidly, therefore it is impossible to list the foods and types available and recommend cooking procedures. -
Page 28: Desserts
Breads and rolls should be reheated to the point where they are warm to the touch. Overheating or overcooking makes bread tough and rubbery. • When making yeast bread in a microwave oven, choose a recipe with cornmeal, whole wheat flour, or rye flour to achieve a richer color. WEIGHT & MEASURE CONVERSION CHART •... -
Page 29: Specifications
FOR CUSTOMER SERVICE, PLEASE WRITE TO: Rating Specification 120V~ 60Hz 900W 2450MHz 0.9 cubic feet 19.2 (W) x 15.9 (D) x 11.5 (H) inches (488 x 405 x 293mm) 29.1 Lbs (13.2kgs) Emerson Radio Corp. Consumer Affairs Dept. 5101 Statesman Drive, Irving, TX 75063. -
Page 30: Limited Warranty
NOTE: This warranty does not cover: (a) Damage to equipment not properly connected to the product. (b) Cost incurred in the shipping of the product to and from a Regional Repair Facility permitted by Emerson to perform warranty repairs. (c) Damage or improper operation of unit caused by customer abuse, misuse, negligence or failure to follow operating instructions provided with the product. - Page 31 ® EMERSON PART NO.:11292007-01 Printed in China...
Need help?
Do you have a question about the MW8999RD and is the answer not in the manual?
Questions and answers
Putting food in the microwave and it started arcing there was no metal in it but it was comming from the right panel. It looked like it had a burn mark on it. How can this problem be resolved/fixed. Is it bad?
To resolve the arcing issue and burn mark on the right panel of the Emerson MW8999RD microwave, follow these steps:
1. Stop the Microwave: Press the START/STOP button immediately if arcing occurs.
2. Identify the Cause: Arcing can be caused by:
- Metal or foil touching the oven’s side.
- Foil not molded to food properly (upturned edges).
- Metal objects such as twist-ties, poultry pins, or gold-rimmed dishes inside the microwave.
- Recycled paper towels containing metal pieces.
3. Remove Any Metal Objects: Ensure no metal or foil is touching the oven walls.
4. Clean the Affected Area: Once the microwave is off and unplugged, gently clean any burn marks using a damp cloth and mild detergent.
5. Inspect for Damage: Check if the burn mark has caused structural damage. If the microwave door, hinges, latches, or seals are damaged, do not use the appliance.
6. Seek Professional Service: If the issue persists or damage is found, contact a qualified service technician for repair.
Do not leave the microwave unattended while cooking to prevent future occurrences.
This answer is automatically generated