Table of Contents
Advertisement
Quick Links
Advertisement
Table of Contents

Related Manuals for TRENDnet TEW-684UB


Summary of Contents for TRENDnet TEW-684UB
-
Page 2: Table Of Contents
Contents Introduction ........................... 4 Features ......................... 4 Package Content ......................4 System Requirement ...................... 4 Wireless Performance Considerations ................5 Installation ..........................6 Using the Utility ........................8 Profile ..........................9 Advanced ........................12 Wi-Fi Direct ........................14 Link Information ......................20 Link Status ........................20 Throughput ........................20 Statistics ........................21 About..........................21... -
Page 3: Federal Communication Commission Interference Statement
Federal Communication Commission Interference Statement This equipment has been tested and found to comply with the limits for a Class B digital device, pursuant to Part 15 of the FCC Rules. These limits are designed to provide reasonable protection against harmful interference in a residential installation. This equipment generates uses and can radiate radio frequency energy and, if not installed and used in accordance with the instructions, may cause harmful interference to radio communications. -
Page 4: Introduction
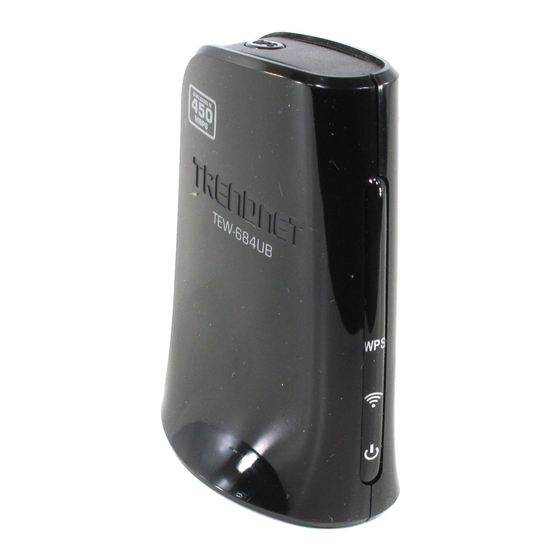
Introduction TRENDnet’s compact 450Mbps Dual Band Wireless N USB Adapter, model TEW-684UB, connects a laptop or desktop computer to an ultra-high performance 450Mbps dual band wireless network. Quickly connect to a 450Mbps 2.4GHz or 5GHz wireless network at the touch of a button with the convenience of one-touch Wi-Fi Protected Setup (WPS). -
Page 5: Wireless Performance Considerations
Wireless Performance Considerations There are a number of factors that can impact the range of wireless devices. 1. Adjust your wireless devices so that the signal is traveling in a straight path, rather than at an angle. The more material the signal has to pass through the more signal you will lose. -
Page 6: Installation
Installation Important! DO NOT install the TEW-684UB in the computer until instructed to do so. Follow the instructions below to install the USB Adapter and Utility. STEP 1 Insert the Driver and Utility CD into CD drive STEP 2 Click “Install Utility” button. If your CD Autorun is enabled, the installation procedures will be started. - Page 7 STEP 5 Select TRENDnet Configuration Tool and click Next. STEP 6 Click Install on it. STEP 7 Click Finish to complete the client utility installation.
-
Page 8: Using The Utility
Using the Utility When starting the utility, a small TRENDnet wireless icon appears in the notifications area of the taskbar. You can double click it to maximize the dialog box if you selected to close it earlier. You may also use the mouse's right button to close the utility. -
Page 9: Profile
Profile The Profile List keeps a record of your favorite wireless settings at home, office, and other public hot-spots. You can save multiple profiles, and activate the correct one at your preference. Icons and buttons: Indicates if a connection made from the currently activated profile. Indicates if the connection has failed on a currently activated profile. - Page 10 The "Add Profile" window will appear. Enter or specify a profile name. Select an AP from the SSID drop-down list. Now the profile which the user set appears in the profile list. Click "Activate" icon to activate the connection.
- Page 11 Pre-logon Connect Field definitions: Pre-logon Connect: Use ID and Password in Profile. ** Recommend: You need to restart the computer when using/non-using Pre-logon connect Adding a Profile to the Network using site survey Select the AP from the list on the Network tab and click the “Add to Profile” button.
-
Page 12: Advanced
Verify the new profile in the profile list and click “Activate”. Advanced 1. Wireless mode: Select wireless mode. 2.4GHz, 5GHz and 2.4GHz+5GHz are supported. 2. Wireless Protection: Users can choose from Auto, On, and Off. (This is not supported by 802.11n adapters.) ... - Page 13 5. Apply the above changes. Certificate Management Install Certificate : 1. Need to install user certificate and issuer certificate for the authentication. 2. Icons and buttons : Indicates to browser the file. Indicates to install the certificate. Certificate List : 1.
-
Page 14: Wi-Fi Direct
Wi-Fi Direct Enable Wi-Fi Direct : 1. Need to double-click the notebook icon. 2. Specify the name of Wi-Fi Direct Device : TRENDnet utility is able to discover other WiFi Direct topologies nearby... - Page 15 : GO : AP- like. : GO with clients in the same group. : configure WPS for GO : Set WPA2PSK AES key Connect to P2P device : 1. Double click the device icon to specify the connection. 2. Select the WPS connection type : ...
- Page 16 Accept one P2P device's connection request : 1. Once someone wants to connect to me, TRENDnet Utility would show a bubble message and pop up the corresponding setting page as follows 2. Press to select the preferred operating channel and whether save profile :...
- Page 17 Switch to Wi-Fi Direct concurrent mode: Switch to Concurrent mode ( legacy Client + WiFi Direct GO ) by right-click TRENDnet utility tray icon Wi-Fi Direct function: Click mouse right button on My Device. 1. Scan : Choose "Scan" to update discovery topology.
- Page 18 2.2 Enter the WPA2-PSK key for GO 2.3 Select the preferred operating channel and whether save profile : the GO will send beacon on the channel.
- Page 19 3. Media sharing: Media Sharing is disabled as default. 3.1 Select sharing folder. (utility would create ”r;Media Sharing” in C:\User\xxx\Document as default) Press to start sharing. After device connected, user can search the media server and play music/video by media player. Press to stop sharing...
-
Page 20: Link Information
4. Manage profile : Choose "manage profile" to open profile page Link Information Link Status The link status page displays detailed information about the current connection as shown in. Throughput The throughput page displays detailed information about the current connection as shown in. -
Page 21: Statistics
Statistics The Statistics page displays detailed counter information based on 802.11 MIB counters. This page translates that MIB counters into a format easier for the user to understand. Transmit Statistics: Receive Statistics: About Click "About" to display the wireless card and driver version information. -
Page 22: Wps
PIN Method The user obtains a device password (PIN Code) from the STA and enters the password into the Registrar. Both the Enrollee and the Registrar use PIN Config method for the configuration setup. The following image outlines the process. 1. - Page 23 If you use Microsoft Window Connection Now as an External Registrar, you must start PIN connection at STA first. After that, search out your WPS Device name and MAC address at Microsoft Registrar. Add a new device and enter PIN Code of STA at Microsoft Registrar when prompted.
-
Page 24: Pbc Method
PBC Method The PBC method requires the user to press a PBC button on both the Enrollee and the Registrar within a two-minute interval called the Walk Time. If there is only one Registrar in PBC mode, the PBC mode selected is obtained from ID 0x0004, and is found after a complete scan. -
Page 25: Security
4. The progress bar as shown in the figure below indicates that scanning progress. Security 1. Select an AP with WEP encryption and click "Connect". 2. The Authentication \ Encryption function will appear as below;... - Page 26 3. Enter in the assigned WEP key in the field. This value is same as our intended AP's setting.
-
Page 27: Wpa-Psk
WPA-PSK 1. Select the AP with a WPA-PSK authentication mode and click "Connect". 2. Authentication \ Encryption function appears. 3. Select WPA-PSK as the Authentication Type. Select TKIP or AES encryption. Enter the WPA Pre-Shared Key as "12345678". -
Page 28: Wpa
4. Click "OK". Be careful, if the WPA Pre-Shared Key entered is not correct, you won’t be able to exchange any data frames, even though the AP can be connected. 1. Select an AP with WPA authentication mode and click "Connect". 2. - Page 29 3. Click "8021X" and the setting page will appear. 4. Authentication type and setting method : PEAP: Select "PEAP" as the Authentication type from the drop-down list. Key-in "wpatest2" for the identity. "Select "EAP-MSCHAP v2" from the drop-down list for tunnel authentication and key-in the tunnel identity as "wpatest2"...
- Page 30 TLS / Smart Card : "Select TLS / Smart Card" from the Authentication type drop-down list. TLS only requires the identification to be set as "wpatest2" for server authentication. TLS must use client certification. Click "Client Certification" and select a certification for server authentication. TTLS : Select TTLS from the Authentication type drop-down list.
- Page 31 EAP-FAST: Select EAP-FAST from the Authentication type drop-down list. Key-in the identity as "wpatest2" and a domain name into the blank field. The tunnel identity is "wpatest2" and password is "test2". These setting are the same as our intended AP's setting.
-
Page 32: Appendix
Appendix Glossary For unfamiliar terms used below, look for entries elsewhere in the glossary. AD-HOC (IBSS) Ad-hoc mode does not require an AP or a wired network. A network that transmits wireless from computer to computer without the use of a base station (access point). Two or more wireless stations communicate directly to each other. -
Page 33: Specification
Specification Hardware Interface USB 2.0 Standards IEEE 802.11a, IEEE 802.11b, IEEE 802.11g and IEEE 802.11n Button WPS button: enables quick wireless connection with WPS function Power Receive mode: 406mA (max.) Consumption Transmit mode : 428mA (max) Supported OS Windows 7 (32/64-bit), Vista (32/64-bit), XP and 2000 Dimensions 72 x 50 x 31 mm (2.8 x 2.0 x 1.2 in.) (LxWxH) -
Page 34: Limited Warranty
RMA number is required in order to initiate warranty service support for all TRENDnet products. Products that are sent to TRENDnet for RMA service must have the RMA number marked on the outside of return packages and sent to TRENDnet prepaid, insured and packaged appropriately for safe shipment. - Page 35 INTERRUPTION OF THE POSSIBILITY OF SUCH DAMAGES, AND LIMITS ITS LIABILITY TO REPAIR, REPLACEMENT, OR REFUND OF THE PURCHASE PRICE PAID, AT TRENDNET’S OPTION. THIS DISCLAIMER OF LIABILITY FOR DAMAGES WILL NOT BE AFFECTED IF ANY REMEDY PROVIDED HEREIN SHALL FAIL OF ITS ESSENTIAL PURPOSE.
Need help?
Do you have a question about the TEW-684UB and is the answer not in the manual?
Questions and answers