
Related Manuals for Clarity E814CC


Summary of Contents for Clarity E814CC
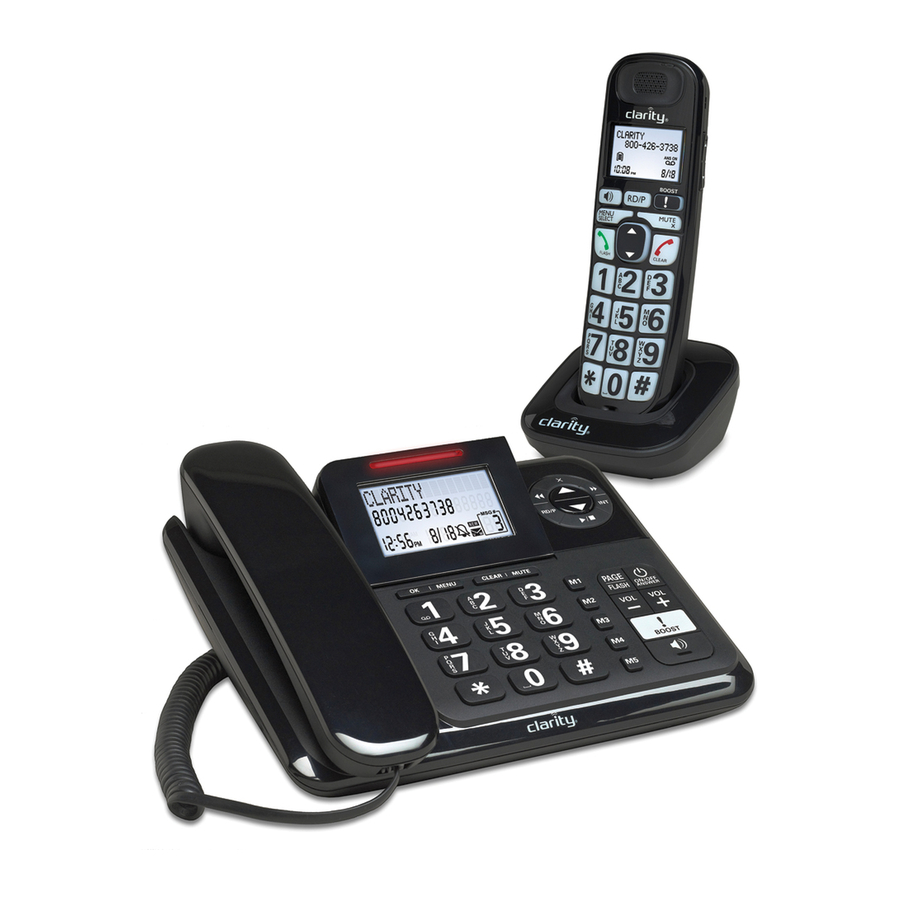
- Page 1 User Guide E814CC – Amplified Big Button Cordless Phone with Corded Digital Answering Machine...
-
Page 3: Important Safety Instructions
imporTanT saFeTy insTruCTions Warnings: Privacy of commUnications may not be ensUred when UsinG this Phone. To maintain the compliance with the FCC’s rF exposure guideline, place the base unit at least 20cm from nearby persons. To reduce the risk of fire or injury to persons, read and follow these instructions. - Page 4 20. Do not attempt to open the AC adapter. There are potentially dangerous voltages inside, and there are no serviceable parts. 21. Discontinue use of product and contact Clarity if the product overheats, has a dam- aged cord or plug, if the product has been dropped or damaged or if the product has come into contact with liquids.
-
Page 5: Battery Safety Instructions
Use the phone on the lowest volume setting as possible. B) Limit the amount of time you use the telephone at high volume levels. 25. If you experience a skin irritation after using this product, discontinue use and contact Clarity. imporTanT saFeTy insTruCTions BaTTery saFeTy insTruCTions Warning: Dispose of used batteries according to the instructions. -
Page 6: Installation Location
paCkaging ConTenTs/loCaTion Package contains the following items: • Answering Machine base station with corded handset • AC power adapter for Answering Machine base station • Telephone line cord for Answering Machine base station • Cordless Handset • Charging base for cordless handset •... - Page 7 ConneCTing CorDeD Base connectinG the answerinG machine base station 1 – Connect the corded handset to the base station as shown below. 2 – Plug the power supply cord into the jack located on the back of the base station. Plug the other end of power supply line cord into an electrical outlet.
- Page 8 geTTing To knoW your CorDeD Base answerinG machine base station...
-
Page 9: Lcd Display
geTTing To knoW your CorDeD Base rinGer indication • Flashes when ringing. • in idle mode: ON if Answering machine is on; OFF if Answering machine is off. Lcd disPLay memory Keys • in dial mode: Long press to store the Store the number entered from idle mode. - Page 10 geTTing To knoW your CorDeD Base rePeat/rediaL/PaUse ( /rd/P) • in idle mode: Press to access the redial list. • in predial or editing mode: Press and hold to insert a pause. • in Tam message playback mode: Press to go back to previous message deLete (X) •...
- Page 11 geTTing To knoW your CorDeD Base 13 fLash/PaGe • During a call: Press to insert a Flash. • in idle mode: Press to page handsets. Press and hold to enter registration mode. 14 answer on/off ( • in idle: Press to switch the answering machine ON or OFF. •...
- Page 12 geTTing To knoW your CorDeD Base Lcd display icons description This will display when there is a new CID entry or if one is being viewed. This will display when you have a new Voice Mail message. Will disappear when all the visual messages have been read.
-
Page 13: Menu Structure
geTTing To knoW your CorDeD Base menu structure In idle mode, press <oK/menU> to access the menu. Press <UP> or <down> to navigate the menu. Refer to the following for the menu structure. <UP/down> Key Press <menU> <UP/down> <UP/down> <UP/down> main menu Play messages answering sys... -
Page 14: Text And Digit Entry Table
geTTing To knoW your CorDeD Base text and digit entry table The following tables show you where each letter and punctuation character can be found. Respective character table will be used when corresponding menu language is selected. This will be helpful when storing a name in the directory and renaming your phone. -
Page 15: Make An External Call
using your CorDeD Base maKe an eXternaL caLL preparatory dialing Enter the phone number and lift up the corded handset or press <sPeaKer- Phone> to dial the number. Press <cLear/mUte> to clear the entry when entering the number. note: To insert a pause in the dialling sequence, press and hold the <RD/P> button, the screen will then show a “P”... -
Page 16: During A Call
using your CorDeD Base answer a Call When there is an incoming ring, pick up the corded handset or press <sPeaKer- Phone> to answer the call. end a Call During a call connection, put the corded handset on the base station to end the call. Or press <sPeaKerPhone>... -
Page 17: Redial A Number From The Redial List
using your CorDeD Base 2. Press and hold any memory key for more than 2 seconds, until you hear the confirmation tone to indicate the number has been stored. note: If there is already a number stored before, the old number will be replaced directly. Dial the number in a memory key In idle mode, press <m1>/ <m2>/ <m3>/ <m4>/ <m5>, the phone will auto- matically dial out the telephone number stored in the selected memory key in... -
Page 18: Delete A Redial Number
using your CorDeD Base 4. Enter the name; edit, then press <oK/menU>to save; display shows “saved”, then returns to Redial list. Delete a redial number 1. Follow steps 1 and 2 in section Redial a number from the redial list. 2. -
Page 19: Edit A Directory Entry
using your CorDeD Base Private PhonebooK (directory) Your phone can store up to 50 private directory entries with names and numbers in the corded base. Each directory entry can have a maximum of 20 digits for the phone number and 15 characters for the name. Directory entries are stored alphabetically by name. - Page 20 using your CorDeD Base 4. Edit the name or press <cLear/mUte> to backspace a character if necessary. 5. Use <down> to move cursor to the left, <UP> to move cursor to the right. 6. Press <oK/menU> to save the number and display shows Enter name. 7.
- Page 21 using your CorDeD Base 4. Display shows “Entries in DIR” briefly, then displays the first entry in alphabetical order; press <UP/down> to select the desired entry to be deleted. 5. Press < X > and display shows “Delete contact?”. 6. Press <oK/menU> to confirm or <cLear/mUte> to cancel. assign speed Dials Your corded base has 9 speed dial available, corresponding to keys “0, 2-9”...
- Page 22 using your CorDeD Base caLLer disPLay (networK dePendent) This feature is available if you have subscribed the Caller Line Identification service with your network service provider. Your phone can store up to 10 received calls with date/ time information in the base CID. The number will be shown on the LCD when the phone is ringing.
-
Page 23: Phone Settings
using your CorDeD Base 4. Press the <oK/menU> button to confirm. 5. Display shows “Edit name”; key in the name using the digit keys (maximum 15 characters). If you make any mistakes, press <cLear/mUte> to backspace a character. Press <UP> or <down> to insert characters. 6. -
Page 24: Ringer Setup
using your CorDeD Base set the Base language In Idle: 1. Press <oK/menU> and <UP/down> to select Settings. 2. Press <UP/down> to seLect Lcd LanGUaGe. 3. Press <oK/menU> to confirm the setting; display shows Saved, you will hear a beep; display goes back to the previous menu. rinGer setUP Change ringer Volume and Tone 1. - Page 25 using your CorDeD Base 4. Press <oK/menU> to confirm; display briefly shows “Saved”, then it returns to previous menu set the key Tone The Key Tone is a confirmation beep when you press any key. It is set on by default, but can be turned off, if desired.
- Page 26 using your CorDeD Base Clear the voicemail icon on your screen note: This feature applies if you have voicemail service from your local phone service pro- vider; it refers to the small envelope icon on your screen. In Idle: 1. Press <oK/menU> and <UP/down> to select Settings. 2.
-
Page 27: De-Register Handsets
using your CorDeD Base 5. When process is finished, handset display shows “Handset registered” briefly, after which it shows “Handset X” (X is the handset number). De-register Handsets You may need to do this if you need to replace a faulty handset. You will need to de- register all handsets, then re-register each handset individually. -
Page 28: Ogm Settings
using your CorDeD Base 3. Press <oK/menU> and <UP/down> to select between ON and OFF. 4. Press <oK/menU> to confirm. oGm settinGs record your outgoing message (announcement) When you record your own announcement, it will be used when the answering machine answers the call. -
Page 29: Using The Menu
using your CorDeD Base the beginning, or press twice to skip back to the previous message during message playback. 4. Press <sKiP forward / int> if you want to skip forward to the next message during message playback. 5. Press < X > if you want to delete the current message being played. note: You cannot delete New Messages, so you will have to play them before trying to delete. -
Page 30: Answering Machine Settings
using your CorDeD Base At any time if you want to pick up the call, you can lift up the corded handset or press <sPeaKerPhone> to intercept the call and talk to the caller directly. The message recording will be stopped automatically. If the answering machine is in the pro- cess of recording, the message already stored will be saved. - Page 31 using your CorDeD Base 4. Press <oK/menU> and <UP/down> to select your desired recording time from the available options 1 min, 2 min (default), 3 min. 5. Press <oK/menU> to confirm; display shows Saved. set the outgoing message language The answering machine announces the outgoing message when it answers a call. There is a pre-set OGM for each of ANS &...
- Page 32 using your CorDeD Base Turn on of off the message alert Tone You can select to turn on or off the message alert (for missed calls). 1. Press <oK/menU> and <UP/down> to select Answering sys. 2. Press <oK/menU> and <UP/down> to select Ans sys setup. 3.
- Page 33 User Guide Amplified Big Button Cordless Handset...
- Page 34 CorDless HanDseT insTallaTion step 1: Connecting the charging base station • Locate the charging station (a) in close proximity to the corded base station and plug the power supply cord into an electrical outlet. step 2: install rechargeable batteries • Remove the battery compartment cover (b) by pushing down with thumb and sliding the cover towards the rear of the handset.
- Page 35 geTTing To knoW your CorDless HanDseT...
- Page 36 • in idle mode: Press repeatedly to view the last numbers dialed. • While entering numbers: Press and hold to insert a dialing pause (P). boost • During a call: Press to enhance the clarity and loudness of your caller’s voice. mUte / X (remove) •...
-
Page 37: Menu / Select
geTTing To knoW your CorDless HanDseT aLPhanUmeric KeyPad, * (star), # (PoUnd) • in idle or editing mode: Press to insert a digit/character. • 0 key: While entering the directory names, press to insert a space. • 1 key: While reviewing a caller ID history entry, press repeatedly to add or remove 1 in front of the telephone number before dialing or saving it in the directory. -
Page 38: Headset Jack
geTTing To knoW your CorDless HanDseT 14 earPiece 15 voLUme UP / directory / scroLL UP • Refer to point 4 for the key instruction 16 voLUme down / directory / scroLL down • Refer to point 6 for the key instruction 17 headset JacK •... - Page 39 geTTing To knoW your CorDless HanDseT The screen display gives you information on the current status of the telephone. icons description The speakerphone is turned on. While reviewing the call list history, missed calls that have not been reviewed. The ringer is switched off. New message in the answering system.
- Page 40 geTTing To knoW your CorDless HanDseT menU strUctUre In idle mode, press <menU/seLect>, then <UP/down> to browse the menu items. Refer to the following for the menu structure. main Play answering caller menu messages system directory id Log intercom Announcement Review Review Delete all old...
-
Page 41: Writing Tips
geTTing To knoW your CorDless HanDseT The following table shows you where each letter and punctuation character can be found. This will be helpful when storing a name in the directory. In editing mode, a cursor is displayed to indicate the current text entry position. It is positioned at the right of the last character entered. -
Page 42: Audio Tone Settings
Natural, Treble 1 or Treble 2, (the default setting is Natural). The tone setting remains set until you change it again. audio Boost Use the audio boost feature to enhance the clarity and loudness of your caller’s voice on the handset earpiece – up to 40dB of amplification. To turn on this feature 1. -
Page 43: Make A Call
using your CorDless HanDseT To mute the call During a call, Press <mUte/X>. When mute is on, the handset screen shows muted for a few seconds and the mUte icon appears until you turn off mute. Or mute is auto- matically canceled when you end the call. - Page 44 using your CorDless HanDseT Call from the CID 1. In idle mode, press <down> to access the CID. Alternatively, press <menU/ seLect> to access the CID from the main menu. 2. Press <UP/down> to select the desired CID entry. 3. Press <taLK on / fLash> or <sPeaKer> to dial out to the selected entry. Call from the Redial List 1.
-
Page 45: Redial List
using your CorDless HanDseT (such as bank account information or access codes) from the directory, CID or redial list. To access a number in the directory while on a call 1. Press <menU/seLect>, then <UP/down> to select Directory. 2. Press <menU/seLect>, then <UP/down> or press the dial pad keys (0 through 9) to find the desired entry. - Page 46 using your CorDless HanDseT 1. Press <menU/seLect> twice, then use the keypad to edit the number if necessary, 2. Press <menU/seLect> and use the keypad to enter the name 3. Press <menU/seLect> to save. To Delete a Redial Number Follow the steps in the section under “Review the redial list entry”. While reviewing a number in the redial list, press <mUte /X>...
- Page 47 using your CorDless HanDseT handset X”. The other handset rings and its screen shows “handset X is calling”. 3. The called handset rings. Press <taLK on/fLash> or <sPeaKer> on the called handset to establish the internal call. Transfer an external Call from Handset to Handset During an external call 1.
-
Page 48: Add A New Directory Entry
using your CorDless HanDseT add a new directory entry In idle mode, press <menU/seLect>, then <UP/down> to select Directory. 1. Press <menU/seLect>, then <UP/down> to select Add contact. 2. Press <menU/seLect>, then use the keypad to enter the number. –OR– Copy a number from redial list <menU/seLect>... -
Page 49: Edit A Directory Entry
using your CorDless HanDseT If you press 5 (JKL) once, J displays. Press <down>. Jessie displays. If you press 5 (JKL) twice, K and then Kevin displays. If you press 5 (JKL) three times, L and then Linda displays. If you press 5 (JKL) five times, J displays and then Jennifer displays again. note: If you press a key (0-9) and no name starts with the letters on that key, the directory shows the entry that matches the next letter in the directory. -
Page 50: Add A Speed Dial Number
using your CorDless HanDseT add a sPeed diaL nUmber 1. In idle mode, press <menU/seLect>, then <UP/down> to select Directory. 2. Press <menU/seLect>, then <UP/down> to select Speed dial. 3. Press <menU/seLect>, then <UP/down> to select an empty speed dial location. 4. - Page 51 using your CorDless HanDseT caLLer id disPLay (networK dePendent) This product supports caller ID services offered by most telephone service providers. If you have subscribed to Caller ID service, and provided the identity of the caller is not withheld, the number of the caller will be displayed together with the date and time of the call (if provided by the network).
-
Page 52: Reasons For Missing Caller Id Information
using your CorDless HanDseT reasons for missing caller iD information screen messaGe reason The caller prefers not to show the name Private name The caller prefers not to show the telephone number. Private number The caller prefers not to show the name and telephone number Private caller Your telephone service provider cannot determine the caller’s name Unknown name... -
Page 53: Handset Settings
using your CorDless HanDseT You may choose the desired number format for local and long distance numbers before dialing or saving it into the directory. The NEW icon is removed once the new call has been viewed. store a CiD number into the Directory Follow Steps 1 and 2 in the View the CID Entries section. - Page 54 using your CorDless HanDseT Voicemail waiting (visual message waiting) indicator If you subscribe to a voicemail service offered by your telephone service provider, this feature provides a visual indication when you have new voicemail messages. New voice- mail and appear on the handset screen. Clear voicemail indication Use this feature when the telephone indicates there is new voicemail but there is none.
-
Page 55: Cid Time Synchronization
using your CorDless HanDseT CiD time synchronization CID time sync is programmed to be on. If you subscribe to caller ID service, the day, month and time are set automatically with each incoming call. You can turn CID time sync off so the system uses the date and time that you set. -
Page 56: Troubleshooting
TrouBlesHooTing If you have difficulty with your corded base or cordless handset, please try the following suggestions. The unit does not record new messages. • Check that the power cord is plugged-in to a working electrical outlet. • Ensure that the answering machine is powered-on. The caller cannot leave a message. - Page 57 TrouBlesHooTing The call does not work. • Service not activated, or wrong operator, or wrong setting. Check your Subscription with network or change the dial mode. no display. • Recharge battery my cordless handset doesn’t work at all • Make sure the power cord to the cordless handset charger base unit is securely plugged into a working electrical outlet.
- Page 58 TrouBlesHooTing i cannot dial out • First try all the suggestions in listed under the “I cannot get a dial tone”. • Make sure you have a dial tone before dialing. The cordless handset may take a second or two to find the telephone base and produce a dial tone. This is normal. Wait an extra second before dialing.
- Page 59 TrouBlesHooTing • Move the cordless handset closer to the telephone base. You might have moved out of range. • Reset the telephone base. Unplug the electrical power. Wait for 15 seconds then plug it back in. Allow up to one minute for the cordless handset and answering machine base station to reset.
- Page 60 TrouBlesHooTing • Charge the battery in the cordless handset for at least 16 hours. For optimum daily performance, return the cordless handset to the telephone base or charger when not in use. • You may have too many extension telephones on your telephone line to allow all of them to ring simultaneously.
- Page 61 TrouBlesHooTing my telephone does not receive caller iD when on a call • Make sure you subscribe to caller ID with call waiting features provided by your tele- phone service provider. Caller ID features work only if both you and the caller are in areas offering caller ID service, and if both telephone service providers use com- patible equipment.
-
Page 62: Technical Specifications
TeCHniCal speCiFiCaTions answerinG machine base station Amplified dB Level: 40dB Dimensions: Base size: 8-1/4” x 6-3/4” x 2-1/4” (H x W x D) Weight: Base Weight: 25.73 oz. (with corded handset) power requirements: – AC Adapter: (Sunstrong, part number SSA-5AP-09 US 060045) –... - Page 64 Tel: 800-426-3738 Fax: 800-325-8871 E-mail: claritycs plantronics.com Website: www.clarityproducts.com ©2012 Clarity, a Division of Plantronics, Inc.All rights reserved. Clarity, E814CC, Smart for Seniors, D703HS and D704HS are trademarks or registered trademarks of Plantronics, Inc. Rev. A (6-12) Printed in China...
Need help?
Do you have a question about the E814CC and is the answer not in the manual?
Questions and answers
HOW DO i REMOVE THE NOTICE OF "MISSED CALLS" ON THE PHONE
To remove the "missed calls" notification on the Clarity E814CC phone, press and hold the button for four seconds when the handset is idle. This marks all caller ID history entries as reviewed, and the missed calls message will go away.
This answer is automatically generated
How do I initiate a conference call with more than one caller? TY!