
Related Manuals for Hanna Instruments HI 4421


Summary of Contents for Hanna Instruments HI 4421
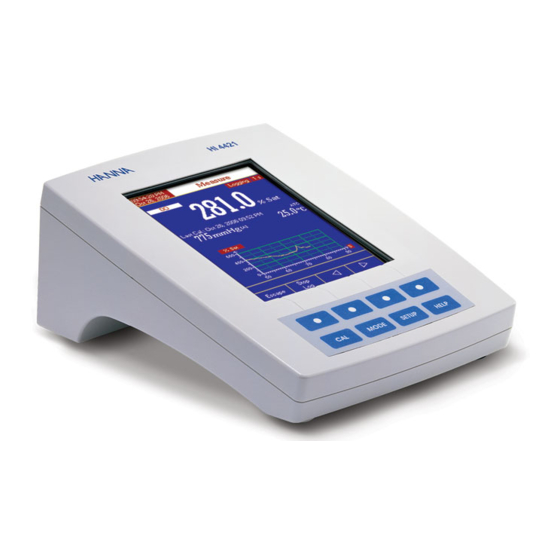
- Page 1 Instruction Manual HI 4421 DO/BOD/OUR/SOUR/Temperature Bench Meter w w w. h a n n a i n s t . c o m...
-
Page 2: Warranty
Dear Customer, Thank you for choosing a Hanna Instruments product. This manual will provide you with the necessary information for correct use of the instrument. Please read this instruction manual carefully before using the instrument. If you need additional technical information, do not hesitate to e-mail us at tech@hannainst.com or see the back side of this manual for our worldwide sales and technical service contacts. -
Page 3: Table Of Contents
TABLE OF CONTENTS TABLE OF CONTENTS TABLE OF CONTENTS TABLE OF CONTENTS TABLE OF CONTENTS WARRANTY ............................2 PRELIMINARY EXAMINATION ......................4 GENERAL DESCRIPTION ........................4 FUNCTIONAL DESCRIPTION ........................ 5 SPECIFICATIONS ..........................7 OPERATIONAL GUIDE ........................8 DISPLAYING MODES ......................... 9 SYSTEM SETUP.......................... -
Page 4: Preliminary Examination
PRELIMINARY EXAMINATION PRELIMINARY EXAMINATION PRELIMINARY EXAMINATION PRELIMINARY EXAMINATION PRELIMINARY EXAMINATION Remove the instrument from the packing material and examine it carefully to make sure that no damage has occurred during shipping. If there is any damage, notify your dealer or the nearest Hanna Service Center. The meter is supplied complete with: •... -
Page 5: Functional Description
FUNCTIONAL DESCRIPTION FUNCTIONAL DESCRIPTION FUNCTIONAL DESCRIPTION FUNCTIONAL DESCRIPTION FUNCTIONAL DESCRIPTION HI 4421 DESCRIPTION FRONT PANEL REAR PANEL 1) Liquid Crystal Display (LCD) 2) Main Keyboard 3) USB connector 4) ON/OFF switch 5) Power adapter socket 6) RS232 serial communication connector 7) DO probe input... - Page 6 KEYBOARD DESCRIPTION FUNCTION KEYS To enter / exit calibration mode. To select the desired measurement mode: DO, BOD, OUR, SOUR. To enter Setup (System Setup, DO Setup, BOD Setup , OUR Setup or SOUR Setup) and to access Log Recall function. To obtain general informations about the selected option / operation.
-
Page 7: Specifications
SPECIFICATIONS SPECIFICATIONS SPECIFICATIONS SPECIFICATIONS SPECIFICATIONS ± ± ° ° ° ° ° ° ± ° ° ° ° ± i f i f i c ) "... -
Page 8: Operational Guide
OPERATIONAL GUIDE OPERATIONAL GUIDE OPERATIONAL GUIDE OPERATIONAL GUIDE OPERATIONAL GUIDE POWER CONNECTION Plug the 12 Vdc adapter into the power supply socket. Note: These instruments use non volatile memory to retain the meter settings, even when unplugged. PROBE CONNECTION For DO, BOD, OUR or SOUR measurements connect a DO probe to the DIN connector located on the rear panel of the instrument. -
Page 9: Displaying Modes
D I S P L A Y I N G M O D E S D I S P L A Y I N G M O D E S D I S P L A Y I N G M O D E S D I S P L A Y I N G M O D E S D I S P L A Y I N G M O D E S For each measurement mode (DO, BOD, OUR or SOUR) the following display configurations are available:... - Page 10 Graph Accessing this option, the online graph with currently logged values (DO, BOD, OUR or SOUR vs. Seconds) could be displayed. If there is no active log, the previously logged data for the selected parameter will be plotted. Notes: • If no data were logged, the graph displaying mode will not be accessible.
- Page 11 Log History Accessing this option, last logged records will be displayed on the LCD. The log history list also contains the appropriate DO / BOD / OUR / SOUR values, the logged temperature, the temperature source, as well as the records time stamp. To access the Log History displaying mode: while in Measure mode.
-
Page 12: System Setup
SYSTEM SETUP SYSTEM SETUP SYSTEM SETUP SYSTEM SETUP SYSTEM SETUP The System Setup menu allows the user to customize the user interface, consult the meter information, set the external serial communication interface and to restore the manufacturer settings. Accessing System Setup while in Measure mode. - Page 13 To set the Beeper: to select the Beeper option. • Use • Press and use to highlight the desired beeper associated event you want to modify. • Press and use to highlight the beeper status option. to confirm your selection and return to the Beeper •...
- Page 14 To set the GLP data: to select the GLP Data option. • Use • Press and use to highlight the desired option. • Press to edit the desired information. The Text Editor menu will be displayed on the LCD. • Enter the desired information by using highlight the desired character.
- Page 15 to select the Date & Time option. • Use • Press and use to highlight the desired option you want to modify. • Press to confirm your selection. Use and then use to modify the value with (for Set Date and Time option). For the other two options press to confirm your selection and select one of the displayed formats with...
- Page 16 Language This option allows the user to choose the desired language for the user interface. To select the Language: • Use to select the Language option. • Press and use to highlight the desired language. • Press to confirm your selection and return to the System Setup menu or press to return to the System Setup menu without changing.
- Page 17 Meter Information This option provides general information about the instrument serial number (each instrument has an unique identification serial number), the software version and the factory calibration date and time (for DO, pressure and temperature). Note: All the instruments are factory calibrated for DO, pressure and temperature. After one year from last factory calibration, the warning will appear at meter startup to inform the user that a new factory calibration is required.
-
Page 18: Do Setup
S E T U P S E T U P D O S E T U P S E T U P S E T U P The DO Setup menu allows the user to set the parameters related to the DO measurement. Accessing DO Setup while in Measure mode and then •... - Page 19 Save Current Profile To save the current profile: • Use to select the Profile option. • Press and then select Save Current Profile option. The text editor box will be displayed on the LCD. • Enter the desired profile name by using highlight the desired character and then press to add it to the text bar.
- Page 20 Delete Profile To delete one of the existing profiles: • Use to select the Profile option. • Press and use to highlight the Delete Profile option. • Press . A list with all customised profiles will appear on the screen. •...
- Page 21 Temperature Units The user can choose from the Celsius , Fahrenheit or Kelvin temperature units. To set the temperature unit: • Use to highlight the Temperature Units option. • Press and then use to select Celsius , Fahrenheit or Kelvin degrees unit . •...
- Page 22 Pressure To set the pressure: to highlight the Pressure option. • Use • Press and then use to increase / decrease the value. • Press to save or press to cancel operation. Pressure Units The user can choose from the mmHg or mbar pressure units. To set the pressure unit: •...
- Page 23 Calibration Using DO standards The meter can be calibrated in a single or multi-points (up to two points), using 2 DO standards (0.0%, 100%) or using the custom standards. The following options are available for calibration: Standard Recognition The user can choose between Automatic recognition (from 2 Hanna standards available) or User Standard . •...
- Page 24 Set Reminder Period Daily reminder - the user can set the time from the day when the reminder is to appear. Periodic reminder - the user can set the time from the last calibration (days, hours and minutes) after which the reminder appears.
- Page 25 Measurement Unit The user can select the desired measurement unit. The available options % Sat and mg/L. are: to highlight the Measurement Unit • Use option. • Press to confirm your selection. or mg/L. • Use to select % Sat •...
- Page 26 Edit Sample ID This option allows the user to edit the sample ID (numeric - auto-increment mode, alphanumeric - user editable). To edit the Sample ID: • Use to select the Sample ID option. • Press and use to highlight the Edit Sample ID option and then press •...
- Page 27 Logging Data Configuration This option allows the user to select the parameters that accompany a logged value: Date/Time, Calibration Data, Sample ID , Instrument ID , Operator ID , Company Name , Aditional Info 1 and Aditional Info 2 . To customise the logging data configuration: •...
- Page 28 Alarm This option allows the user to define two alarm limits for the measurements. Alarm State The following options are available: Disabled – the alarm will be disabled. Inside Limits – the alarm will notify the user when the measured value is inside the preset limits. Outside Limits –...
-
Page 29: Bod Setup
B O D B O D B O D S E T U P S E T U P S E T U P S E T U P B O D B O D S E T U P The BOD Setup menu allows the user to set the parameters related to the resistivity measurements. - Page 30 Barometer - see DO Setup section. Salinity - see DO Setup section. Sample ID - see DO Setup section. Log - see DO Setup section. Alarm - see DO Setup section.
-
Page 31: Our Setup
SETUP SETUP OUR SETUP SETUP SETUP The OUR Setup menu allows the user to set the parameters related to the OUR measurement. Accessing OUR Setup while in Measure mode and then • Press select OUR range. • Press and then to access OUR Setup menu. - Page 32 Barometer - see DO Setup section. Salinity - see DO Setup section. Sample ID - see DO Setup section. Log - see DO Setup section. Alarm - see DO Setup section.
-
Page 33: Sour Setup
SOUR SOUR SOUR SETUP SETUP SETUP SETUP SOUR SOUR SETUP The SOUR Setup menu allows the user to set the parameters related to SOUR measurement and calibration. Accessing SOUR Setup while in Measure mode and then • Press select SOUR range. •... - Page 34 Barometer - see DO Setup section. Salinity - see DO Setup section. Sample ID - see DO Setup section. Log - see DO Setup section. Alarm - see DO Setup section.
-
Page 35: Do Calibration
DO CALIBRATION DO CALIBRATION DO CALIBRATION DO CALIBRATION DO CALIBRATION It is recommended to calibrate the instrument frequently, especially if high accuracy is required. The DO range should be recalibrated: • Whenever the DO probe is replaced. • At least once a week. •... - Page 36 Keep the protective cap on during polarization time and remove it for calibration and measurements. To calibrate the meter: • Insert and rinse the probe in the first beaker in order to decontaminate it; • Insert the probe in the second beaker; •...
-
Page 37: Pressure Calibration
PRESSURE CALIBRATION PRESSURE CALIBRATION PRESSURE CALIBRATION PRESSURE CALIBRATION PRESSURE CALIBRATION If Automatic pressure source is chosen from the Pressure Source menu (see DO Setup ), a pressure calibration in one point can be performed. To perform pressure calibration: • Press to clear the current calibration;... -
Page 38: Do Measurement
D O M E A S U R E M E N T D O M E A S U R E M E N T D O M E A S U R E M E N T D O M E A S U R E M E N T D O M E A S U R E M E N T Make sure the instrument has been calibrated before taking DO measurements. -
Page 39: Salinity Compensation
SALINITY COMPENSATION If the sample contains significant concentration of salinity, the read out values must be corrected, taking into account the lower degree of oxygen solubility in this situation. Before taking any DO measurements remember to set the salinity value from the DO setup menu. The salinity affects the DO concentration, decreasing its value. - Page 40 BAROMETRIC PRESSURE COMPENSATION The dissolved oxygen saturation value varies with pressure, so it is important to compensate the effect that pressure has on DO measurements. i t l º F º 6 . 4 1 . 4 6 . 3 1 .
- Page 41 The meter contains a built-in barometer, and it is able to automatically compensate for changes in barometric pressure. If another pressure value than the barometer’s reading is to be used, then the manual pressure feature must be enabled. (See DO Setup ). The table below contains a conversion altitude (m) to pressure (mmHg) for the altitude values from the previous table.
-
Page 42: Bod Measurement
B O D M E A S U R E B O D M E A S U R E M E N T M E N T B O D M E A S U R E B O D M E A S U R E M E N T B O D M E A S U R E M E N T M E N T... - Page 43 • Press to display the BOD information screen corre- sponding to the selected bottle ID. • Press to load the method data to the measurement screen. • If the time difference between the current reading and the selected reading is more than 1 day, appears in- stead and the BOD value can be calculated.
- Page 44 • From the Available Bottle ID list select the desired bottle ID using and press to add the method to the Selected Bottle ID list. • Press to delete a selected method from the Selected Bottle ID list. • Press to switch between the two lists.
-
Page 45: Our Measurement
OUR MEASURE OUR MEASURE MENT MENT OUR MEASURE OUR MEASURE OUR MEASURE MENT MENT MENT The OUR is used to determine the oxygen consumption or respiration rate. It is defined as the mg/L of oxygen consumed per hour. The following equation is used for OUR determination: where: = Dissolved oxygen level at start of test START... -
Page 46: Sour Measurement
SOUR MEASURE SOUR MEASURE MENT MENT SOUR MEASURE SOUR MEASURE MENT SOUR MEASURE MENT MENT The Specific Oxygen Uptake Rate (SOUR), also known as the oxygen consumption or respiration rate, is defined as the milligram of oxygen consumed per gram of volatile suspended solids (VSS) per hour. This quick measurement has many advantages: rapid measure of influent organic load and biodegradability, indication of the presence of toxic or inhibitory wastes, degree of stability and condition of a sample, and calculation of oxygen demand rates at various points in the aeration basin. -
Page 47: Logging
L O G G I N G L O G G I N G L O G G I N G L O G G I N G L O G G I N G This feature allows the user to log DO, BOD, OUR, SOUR and temperature. The logging behaviour is dependent on the Logging Type and Reading Mode (DO only) options from the parameter setup. - Page 48 • Press to enter log interval edit menu and use to adjust the logging start-stop time or the log sampling. Press to save the current value and use to adjust next / previous parameter. • Press to exit log interval edit menu and then press to save the current log.
- Page 49 LOGGING MODE 3 This logging mode can be used for any sample measurements. By will be available in Measure choosing this logging mode, mode. To log data using this mode: while in Measure mode to manually log a • Press record.
- Page 50 • To stop the logging session, press Notes: • For the automatic logging, if the maximum logging time (24h) has been reached, a warning pop-up will be displayed on the LCD in order to save the current log and start another one in a new lot. •...
- Page 51 • Press to return to the previous menu. To delete lots: • Press while in Log Recall mode. • Press to access delete or delete all mode. Otherwise, press to return to Log Recall view mode. • After selecting one of the deleting modes, use to select one lot and then press to delete the selected lot or all lots.
-
Page 52: Pc Interface
PC INTERFACE PC INTERFACE PC INTERFACE PC INTERFACE PC INTERFACE Data transmission from the instrument to the PC can be done with the HI 92000 Windows compatible ® software (optional). HI 92000 also offers graphing and on-line help feature. Data can be exported to the most popular spreadsheet programs for further analysis. HI 4421 instrument has two available serial interfaces: RS232 and USB. -
Page 53: Troubleshooting Guide
T R O U B L E S H O O T I N G G U I D E T R O U B L E S H O O T I N G G U I D E T R O U B L E S H O O T I N G G U I D E T R O U B L E S H O O T I N G G U I D E T R O U B L E S H O O T I N G G U I D E... -
Page 54: Accessories
A C C E S S O R I E S A C C E S S O R I E S A C C E S S O R I E S A C C E S S O R I E S A C C E S S O R I E S HI 7040M Zero Oxygen Solution, 230 mL... - Page 55 RECOMMENDATIONS FOR USERS Before using these products, make sure they are entirely suitable for the environment in which they are used. Operation of these instruments in residential areas could cause unacceptable interferences to radio and TV equipment, requiring the operator to follow all necessary steps to correct interferences. During operation, ESD wrist straps should be worn to avoid possible damage to the probe by electrostatic discharges.
- Page 56 SALES AND TECHNICAL SERVICE CONTACTS SALES AND TECHNICAL SERVICE CONTACTS SALES AND TECHNICAL SERVICE CONTACTS SALES AND TECHNICAL SERVICE CONTACTS SALES AND TECHNICAL SERVICE CONTACTS Australia: Tel. (03) 9769.0666 • Fax (03) 9769.0699 China: Tel. (10) 88570068 • Fax (10) 88570060 Egypt: Tel.
Need help?
Do you have a question about the HI 4421 and is the answer not in the manual?
Questions and answers