
Related Manuals for Mach Speed Technologies TRIO V2400


Summary of Contents for Mach Speed Technologies TRIO V2400
- Page 2 Thank you for your support and cooperation! Mach Speed Technologies bears no responsibility for any damage or loss of personal data due to misuse of software and/or hardware, damage to the player caused by human factors, replacement of battery, or other unforeseen circumstances.
- Page 3 Avoid using your Trio under extremely hot, cold, dusty or wet environments. Striking, dropping, or severe jolts to your Trio may cause physical damage, battery loosening, or other hardware damage. The following conditions indicates a low battery level and signifies that the player should be charged: The battery icon displays in normal operation...
- Page 4 Appearance Basic operations 1) Power on: Set the ON/OFF switch to the ON position, and press and hold the [>II] (play/stop) button for 3 seconds. 2) Power off: Press and hold the [>II] (play/stop) button for 5 seconds, until the player powers off. You can then set the ON/OFF switch to the OFF position.
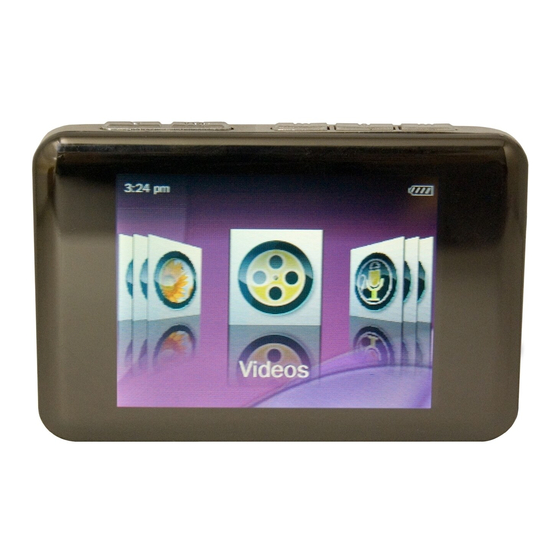
- Page 5 4) Charging the player: To charge your player, set the power switch to the ON position and connect the player to a powered USB port. As a general rule, it will take 4-6 hours to completely charge the battery on the player. Main menu The main menu allows you to access the different modes of your player.
- Page 6 Music Music Mode allows you to play your MP3 and WMA audio files. After entering Music Mode, you will enter the Music selection screen, which allows you to select which file you wish to play. Press [PREV] or [NEXT] to select category and press the [MENU] button to enter the category.
- Page 7 over and over again), Repeat all (plays each file over and over), Shuffle (mix up the order of your audio files) and Shuffle + Repeat Select EQ- Select one of 6 equalizer settings Set Sound- Set up a customized equalizer setting, or one of several sound effects ...
- Page 8 thumbnail of the picture suing [NEXT] or [PREV] and pressing the [MENU] button. While viewing your pictures you can press the [MENU] button to enter the picture submenu, or press [PLAY] to begin showing your pictures as a slideshow Picture Submenu ...
- Page 9 Video Video mode allows you to watch your favorite AVI video files. Please ensure that you convert your video files using the enclosed video conversion software to load the necessary codecs on the file, even if your file is already in AVI video format. When you first enter video mode, you will select either “Tag List”...
- Page 10 one (plays a single file over and over again), Repeat all (plays each file over and over), and Shuffle (mix up the order of your video files) Add Bookmark- Set the current point in your video file as a bookmark which will quickly allow you to access it in the “Tag List”...
- Page 11 recording, pause the file and briefly press the [MENU] button. While in standby mode, you can press [MENU] to enter the Recorder submenu. Recorder Submenu (pictured below) Record Format- allows you to save your voice recordings either in .WAV or .MP3 format ...
- Page 12 E book EBook Mode allows you to view your text files anytime. Please ensure that the files are saved in .TXT format using Unicode encoding. When you enter the EBook mode, you will select either “Tag List” or “Dir List”. Tag list will take you to a list of bookmarks you set for your text files (see the Ebook submenu section).
- Page 13 as a bookmark which will quickly allow you to access it in the “Tag List” item on the EBook selection screen. Delete the file- Delete the current file Tools The Tool mode allows you to access and use several common tools ...
- Page 14 File Navigation File navigation allows you access and play that file you have a need for without having to first enter a specific play mode. use the [NEXT] or [PREV] buttons to highlight an item you would like to access, and press the [PLAY] button to access it. Audio files will play in the music mode, video files in the video mode, etc.
- Page 15 Date & Time- To adjust the date or time you will use [NEXT] and [PREV] to adjust the value of the item, and [MENU] to change the item. When done, press [PLAY] to save the changes Display- Display allows you to change several display settings o Backlight- allows you to adjust the length of time before the backlight will power off to...
-
Page 16: Computer Communication
music as we fall asleep Language- Set your display language Advanced- Settings recommended for Advanced users only. COMPUTER COMMUNICATION Using Windows Media Player (Note: you must use Windows Media Player 10 or later to use this feature.) (Note: this player does not support DRM encrypted audio files, such as those downloaded from the Windows Media Player download service.) (Note: In order to use these features, you must select “Power &... - Page 17 2. Once you have named your MP3 player, select Finish, and your Windows Media Player will open to the Sync tab. 3. Drag your music to the sync list (on the right of the screen) from...
- Page 18 the list on the left. Once you have selected the music you wish to add to the player, press Sync. Windows Media player will load the songs on to your MP3 player.
- Page 19 4. Once all the songs you have added are synced to the unit, and Windows Media Player says that is safe to disconnect your MP3 player, disconnect the device.
-
Page 20: Copy And Paste
COPY AND PASTE 1. Connect the MP3 player to a working USB port. 2. When the unit is connected to your computer, it will create a gray and green icon in the system tray (lower right hand corner of your desktop). The icon will be called safely remove hardware. - Page 21 4. Locate the drive created by the unit, generally just called Removable Disk, with a letter in Parenthesis. Drive letters vary depending on your system configuration. 5. Open the drive by either double left clicking on the drive itself, or by right clicking to open the option menu then left click on the desired drive.
- Page 22 6. Locate the music stored on your computer. Generally this is stored in the “My Music” folder of your computer. NOTE: if you are unable to locate the music on your computer, click on start, search, files and folders, then search for “*.MP3, *.WMA”.
- Page 23 7. Once you have located the song files, you can right click on the song itself, and select “copy”. Open the removable disk drive, right click on in the empty space, and select Paste. This will transfer the song on to your MP3 player.
- Page 24 8. Repeat step 7 for as many songs as you want to copy on to the unit. NOTE: MAC Computers When connected to your MAC computer, the device will act as a removable drive. Simply drag your MP3 files to the device.
- Page 25 Caution Modifications not approved by the party responsible for compliance could void the user’s authority to operate the equipment. NOTE- This equipment has been tested and found to comply with the limits for Class B Digital device, pursuant to part 15 of the FCC rules.
Need help?
Do you have a question about the TRIO V2400 and is the answer not in the manual?
Questions and answers