Table of Contents
Advertisement
Advertisement
Table of Contents

Related Manuals for Gerber GSx Plus


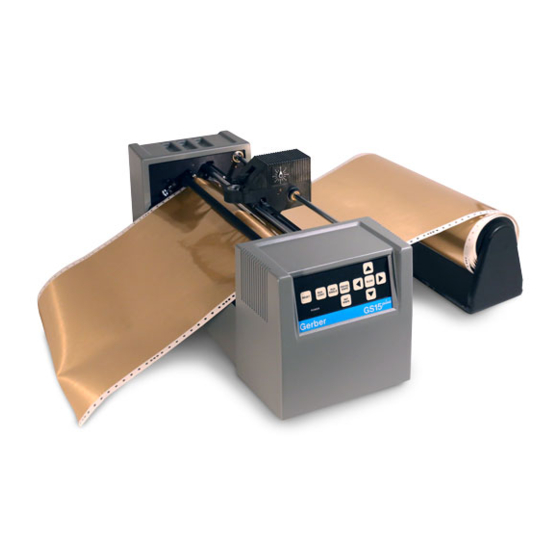
Summary of Contents for Gerber GSx Plus
- Page 1 plus USER'S MANUAL...
- Page 2 PRINTED IN U.S.A. plus , Knife Mode Switching, Corner Correcting Technology, IP Plus, Gerber Mask, and GERBER EDGE are trademarks of Gerber Scientific Products, Inc. GerberCal is a registered trademarks of Gerber Scientific Products, Inc. 3-in-1 is a registered trademark of Boyle-Midway, Inc. HP-GL is a registered trademark of...
- Page 3 FCC NOTICE This equipment has been tested and found to comply with the limits for a Class A digital device, pursuant to Part 15 of the FCC rules. These limits are designed to provide reasonable protection against harmful interference when the equipment is operated in a commercial environment.
-
Page 4: Table Of Contents
Table of Contents Table of Contents.............................3 Chapter 1: Introduction......................5 Description ...............................5 Performance .............................5 Convenience .............................5 Support Information ..........................6 About This Manual ..........................6 Conventions .............................7 Package Contents.............................7 Chapter 2: Installation........................8 Plotter Work Area............................8 Connect to the Plotter..........................9 Communication Parameters ........................9 Power Cords............................10 Power-Up Sequence ..........................10 Chapter 3: Set up ........................11 Plotter Selection .............................11... - Page 5 Chapter 8: Error Conditions.....................34 Chapter 9: Maintenance......................36 Cleaning and Lubrication........................36 Fuse Replacement..........................38 Chapter 10: Plotter Adjustments ...................40 Troubleshooting Guide.........................40 Z Axis (Tool Height) Adjustment......................42 X Axis Belt Adjustment.........................45 Y Axis Backlash Adjustment........................48 Drum End Play Adjustment ........................50 plus Plotter Assembly ........................53...
-
Page 6: Chapter 1: Introduction
It cuts up to 25% faster than comparable plotters for rapid cutting of all but the most demanding materials such as sandblast stencil. Gerber's exclusive Corner Correcting Technology™ assures sharp, easy-to-weed corners... -
Page 7: Support Information
Quick installation. Simple to use keypad requires minimum training Support Information If you require assistance, please contact your Gerber distributor or contact the Gerber Technical Support: phone: 800-828-5406 fax: 860-871-3862 gspservice@gspinc.com www.gspinc.com About This Manual plus This manual explains the installation and operation of the GSx plotter. -
Page 8: Conventions
Conventions The following conventions are used in this manual: Note: A note contains important information which could affect successful completion of a task. CAUTION: A caution statement contains information which, if not observed, could result in damage to the equipment. WARNING: A warning statement contains information which, if not observed, could result in personal injury Package Contents... -
Page 9: Chapter 2: Installation
Note: Should you experience difficulty during installation of the GSx to the OMEGA system, contact Gerber Field Service Department at 800-828-5406. Plotter Work Area plus 1 Carefully remove the GSx from its packaging materials and place it near the OMEGA system. -
Page 10: Connect To The Plotter
Connect to the Plotter CAUTION: Be sure power is turned off and the power cord is unplugged at both the OMEGA system and the plotter. 1 Insert the 9-pin connector at the end of the RS-232 cable into the 9-pin RS-232 connector on the back of the computer system. -
Page 11: Power Cords
Power Cords plus 1 Insert the female connector of the GSx plotter power cord into the socket on the rear panel of the plotter. plus 2 Connect the power cords for both the OMEGA system and the GSx to a multiple outlet strip. The strip should be plugged into a standard, grounded electrical outlet (115V +/- 10% AC, 60 Hz or 230V AC, 50 Hz). -
Page 12: Chapter 3: Set Up
Chapter 3: Set up After connecting the plotter to OMEGA, you will use the GQMgr program in plus plus OMEGA to make the GSx15 accessible. When using the GSx15 with sign design systems other than OMEGA, contact the system manufacturer to obtain a plus driver for the GSx15 , installation instructions, and setup information. - Page 13 4 Click the Com Port to which the plotter is connected Com 1 through 7 in the ports box. 5 Click Add. An Add – Name Device dialog box opens. Read the on line instructions then click OK. plus 6 Select GSx15 in the Installed Plotter/Router(s) box, then click Preference..
-
Page 14: Add Plotters
plus 8 The GSx15 plotter can now be accessed through OMEGA. Add Plotters Multiple plotters can be added to your system. They must be added one by one. 1 Click the plotter you wish to add from the plotters list box. 2 Click the port it will be connected to. -
Page 15: Assign Default Plotter
Assign Default Plotter A default plotter can be assigned if more than one plotter is connected to OMEGA. Note: There must be two or more plotter names in the Ready for Plotting box to select a default plotter. If only one plotter is installed to the OMEGA system, that plotter will automatically be assigned as the default plotter. -
Page 16: Chapter 4: Materials And Tools
Materials plus The GSx uses the same plotting materials as all Gerber plotters. Gerber vinyl products in high performance or intermediate grades are available in translucent, reflective, or metallic finishes and come in a wide range of colors. Also available are direct-cut screenprint stencil, ruby photo film, paint masking material, rubber sandblast stencil material and heat transfer materials. - Page 17 2 Center the carriage spindle preferably by using the slew keys (see "Front Panel" section) or manually, with certain precautions as outlined here. Be sure that the carriage spindle is not located at either extreme end of its travel and that both ends of the rubber drum can be reached easily.
-
Page 18: Helpful Hints
3 Slide the material and the sliding sprocket to reach the fixed sprocket and place the material over these sprocket pins. 4 Center the bail arms over the sprockets. Move the adjustable bail arm at the rear of the plotter slightly forward or backward to accommodate small differences in the material width. -
Page 19: Tool Force Dial
Tool Force Dial The tool force dial on the front of the housing indicates the tool force setting and the amount of tool force, or pressure that is applied to the tool during operation. This pressure ensures uniform cuts and pen lines. Tool force can be adjusted by turning the small knob on the end of the tool force housing, as shown in the illustration below. - Page 20 Knife and tool — Drawing, cutting, and, and blade angle all affect the tool force setting Blade wear — Increase tool force after several thousand cuts. Gerber recommends experimenting with tool force settings as well as keeping a logbook of the settings. Refer to the Plotter User Reference Card for guidelines.
-
Page 21: Chapter 5: Tools And Tool Handling
Chapter 5: Tools and tool handling Storage plus A tool rack is molded into the rear cover of the GSx . The pen holder, knife holder and pounce wheel holder may be removed from the tool kit and stored here for easy access. Tool Holders For quick identification, each tool holder has a different colored cap. -
Page 22: Pen Holder And Pens
Pen Holder and Pens The pen holder is shipped with a black pen installed. After loading the plotting paper, install the pen holder in the carriage spindle as follows: To install the pen holder 1 Select the pen holder with pen installed from the tool rack molded in the rear cover. -
Page 23: Pen Replacement
Pen Replacement Spare pens in blue and red are included in the tool kit. Additional pens are available through a Gerber distributor. To replace a pen 1 Insert a flat-tip screwdriver into the notch at the base of the cone- shaped cap (see below). -
Page 24: Knife Holder And Blades
7 Replace the cap in the barrel. Knife Holder and Blades Gerber blades are extremely wear-resistant. In testing, over 10,000 one-inch letters were cut using a single blade before testing was discontinued with the blade still cutting satisfactorily. Other blade manufacturers have attempted, unsuccessfully, to duplicate this cutting precision and durability. - Page 25 Delux 210 Gold/Silver Dusted Crystal 210 .05-1 35° Florescent 210 Scotchcal 220 Translucent 230 Gerber Cal Gerber IP Plus Gerber Mask I & II 35° Heat Transfer Flock Hot Split Plastisol Metalized Polyester Screen Print 35° Static Cling plus Sandblast 521...
-
Page 26: Blade Replacement
Blade Replacement plus One carbide knife blade is included with the GSx WARNING: The blade is very sharp. Take care when handling the knife holder and blade. CAUTION: Blades are fragile and can break. Do not use tools to handle new blades. To replace and adjust the swivel knife blade 1 Remove the plastic adjustment shoe from the base of the tool holder by... -
Page 27: Chapter 6: Operation
Chapter 6: Operation Power-Up plus When- the GSx is turned on, the following sequence occurs. 1 A short beep sounds, the Power light comes on, and the RUN CONT and RUN SINGLE lights blink. plus 2 As the GSx performs self-check tests, the lights over the RUN keys flash, and one additional beep sounds. - Page 28 Use the SLOW key to access slow slew mode. Slow slew mode moves the platen or tool one step at a time, which simplifies precise registration of artwork produced by the GERBER EDGE™. In normal or slow mode, the platen or tool moves continuously as long as the arrow keys are pressed.
-
Page 29: Init Knife
init knife INIT Use the INIT KNIFE key to initialize the knife so that the blade faces KNIFE 0°. Press the INIT KNIFE key after loading the knife. CAUTION: Pressing INIT KNIFE lowers the knife into the vinyl and cuts very short line. It is important to have material loaded in the plotter so that the knife does not cut the drum surface. - Page 30 2 Using the slew keys, position the carriage spindle approximately 1" from the front edge of the plotting paper. Also, be sure that there are several inches of paper extending past the carriage spindle and to the left of the plotter. plus 3 Send a plot file to the GSx plotter.
- Page 31 3 Prepare two plot files. If using OMEGA to prepare the files, in the Plot Program choose a left Start Position and a right End Position for both plots before sending them to the plotter. This will prevent the files from plotting on top of each other.
-
Page 32: Chapter 7: Special Diagnostics
Beeps indicate a communications error. (A special loop-back test connector is needed for this test. See your Gerber distributor.) ♦ Wagon Wheel Test Plot − Press the left arrow key to access. Used to check X, Y, Z axes in plot mode and to verify operation after adjustments are made. -
Page 33: Wagon Wheel Test Plot
X08 Cut Test - Press the down arrow key to access. Used to test cut quality. Note: If the plotter consistently fails a special diagnostic, contact Gerber Field Service Department at 800-828-5406 or fax at 860-871-3862. Wagon Wheel Test Plot... -
Page 34: X08 Cut Test
2 Load vinyl and install the knife holder. 3 Press the down arrow to access diagnostic. 4 Press RUN SINGLE to plot once or RUN CONT to plot continuously. 5 Compare the test plot to the illustration below. If the plot is different, contact Gerber Field Service. -
Page 35: Chapter 8: Error Conditions
Chapter 8: Error Conditions plus The GSx is programmed to detect several mechanical/electrical error conditions at power-up or during operation. When an error condition occurs, the plotter will turn off power to the stepper motors, flash the RUN lights, and sound a steady tone. - Page 36 Theta home failure Turn off system; check connectors *Error code occurs in Special Diagnostic mode, if axes remain locked more than 30 minutes. If the plotter consistently fails the self-check tests, contact Gerber Field Service Department at 800-828-5406, or fax at 860-871-3862...
-
Page 37: Chapter 9: Maintenance
Chapter 9: Maintenance This section includes instructions for routine cleaning and lubrication, fuse plus replacement, and adjustments to keep the GSx plotter in good working order. Cleaning and Lubrication Routine cleaning and lubrication should be done monthly or after every 160 hours of use, whichever occurs first. - Page 38 Carriage and Ball Bushing 1 Use a lint-free cloth and alcohol to clean any dust or debris from the front way, drive shaft, cam shaft and rear way. Rotate the cam shaft and move the carriage assembly for access to the entire length of these shafts.
-
Page 39: Fuse Replacement
3 After using alcohol to clean them, immediately dry the sprockets and drum with a lint-free cloth. 4 Place one drop of oil in each pin of the sliding sprocket at the front of the plotter. 5 Slide the sprocket back and forth to work the oil into the bushing. 6 Oil the bail arm pins. - Page 40 4 Insert a flat-tip screwdriver into the notch and flip the black plastic plate open. 5 Pull out the light gray fuse carriers one at a time. Note that each carrier has a white arrow on it and that the arrow points downward (as do the two arrows on the black plastic plate).
-
Page 41: Chapter 10: Plotter Adjustments
It also contains a brief description of plotter adjustment problems that should be handled by contacting Gerber Field Service Department at 800-828-5406. Note: Gerber warranties do not cover unauthorized repair. Some service procedures require delicate adjustment of plotter parts. If damage to your... - Page 42 Symptom Recommended Procedure Replace the knife blade. Jagged or Serrated Cutting Edges Closure Problem Check in this order: 1. Material alignment in sprockets 2. Blade position in knife holder. If the condition still occurs in NORMAL mode (see "OMEGA Reference"), perform the Y Axis Adjustment. If the condition occurs when AXIS SWAP in the OMEGA is on, make adjustments in this order: 1.
-
Page 43: Z Axis (Tool Height) Adjustment
Z Axis (Tool Height) Adjustment Symptoms ♦ The tool does not touch the material or touches only between characters. ♦ The knife does not cut deeply enough. ♦ The tool height changes in the middle of a job. Objective To set the height of the lift fork for consistent contact of tool holder with material. - Page 44 CAUTION: Do not rest the plotter on its right side. Do not use the way shaft to lift or turn the plotter. 8 Locate the Z motor collar clamp between the sensor disk and the drive motor at the end of the cam shaft. Use the Allen wrench to ensure that the set screw in the collar clamp is tightened securely.
- Page 45 22 Press the SLOW key to access the Square/Circle Test Plot. Press either RUN key to plot. Inspect your test plot by comparing to the Square/Circle Test Plot illustration. 23 If symptoms persist, return to step 1 or contact the Gerber Field Service Department at 800-828-5406, or fax at 860-871-3862.
-
Page 46: Axis Belt Adjustment
X Axis Belt Adjustment Symptoms Text cut in AXIS SWAP mode has closure problems Objective To adjust the tension of the X motor belt to produce good letter quality in AXIS SWAP mode. Adjustment Procedure 1 Turn the plotter power off. 2 Remove all tools and material from the plotter. - Page 47 6 Locate the X belt. Press gently on the belt. There should be little or no spring. If the belt is loose or springy, go to Step 7. 7 If the X motor belt requires adjustment, locate the four X motor mounting screws (Phillips head screws).
- Page 48 9 Tighten the four screws. 10 Turn on power at the plotter. 11 Load vinyl in the plotter and install the knife holder. Select AXIS SWAP mode and cut a test plot. 12 If symptoms persist, repeat the Adjustment Procedure. 13 Replace the front cover.
-
Page 49: Y Axis Backlash Adjustment
Y Axis Backlash Adjustment Symptoms Text cut in NORMAL mode has closure problems. Objective To adjust the mesh of the jack shaft gear with the Y motor pinion to produce good letter quality in NORMAL mode. Adjustment Procedure 1 Turn the plotter power off. 2 Remove all tools and material from the plotter. - Page 50 5 Locate the jack shaft gear and the Y motor pinion. These two gears are meshed together. Gently attempt to rotate the jack shaft gear. With one finger on the motor pinion, notice if the jack shaft gear moves while the pinion remains stationary.
-
Page 51: Drum End Play Adjustment
.005 inch and all check procedures in this section have failed to reveal the cause of the plotter's symptoms, contact Gerber Field Service Department at 800-828-5406, or fax at 860-871-3862. 5 If there is more than .003 to .005 inch of play, remove the front cover. - Page 52 7 Locate connector R728 at the end of the X motor cable. Disconnect connector R728 8 Locate the three Phillips head screws which hold the X motor bracket against the standoffs on the side plate. Remove these screws. 9 Remove the X motor. 10 Locate the outside drum clamp on the X axis gear.
- Page 53 12 Slowly rotate the X axis gear two revolutions. Then rotate the X axis gear a quarter turn in the opposite direction. 13 Gently try to push the drum from end to end. If the adjustment is correct, the play will be between .003 and .005 inch. 14 Spin the drum.
-
Page 54: Gsx Plus Plotter Assembly
plus Plotter Assembly The numbers refer to drawings on subsequent pages. Spacer 45 Screw (Bracket to Standoff), Screw Washer, Nut Special Motor to Bracket Motor Bracket – Y Axis 47 Cam Motor Bracket Assembly Motor, Connector and Pinion Y Axis 48 Sensor Disk and Cam Assembly Jackshaft Pulley and Bracket 49 Standoff... - Page 56 Index Drum end play adjustment....50 Adjustment drum end play......50 X axis backlash ......45 Error Y axis backlash ......48 codes.......... 35 Z axis (tool height) ....42 conditions ........34 Arrow keys........27 signal ......... 34 signal ......... 10 Bail arms ........
- Page 57 RUN SINGLE....... 28 Light (s), front panel ....31, 34 Lubrication, routine ...... 37 Slew keys ........ 27, 28 SLOW SLEW ....... 27 Sprockets..... 16, 17, 37, 38 Maintenance Square/Circle Test Plot ... 31, 32 carriage and ball bushing ..37 Stop, controlled .......
- Page 58 Z axis tool height adjustment ....42...
- Page 59 plus plotter user reference card Key/Function Description RUN SINGLE key plus Plot Press RUN SINGLE to plot single jobs. The GSx returns to the off-line status (as at power-up) after each job and waits for the operator to press RUN SINGLE key again to plot the next job. Controlled Stop Press either RUN key to stop plotting at the next logical break in the program and check current job.
Need help?
Do you have a question about the GSx Plus and is the answer not in the manual?
Questions and answers