Table of Contents
Advertisement
CAUTION! PLEASE READ THIS MANUAL CAREFULLY
CONTENTS
Safety Rules ............................................................. 2
Carton Inventory ....................................................... 3
Features of Your Opener........................................... 3
Specifications ........................................................... 3
Accessories .............................................................. 4
Completed Installation Illustration ............................. 5
Installation Information ............................................. 5
Operation of Your Opener......................................... 6
Care and Maintenance of Your Opener ..................... 7
Assembly.................................................................. 8
Installation................................................................ 10
FASTEN THIS MANUAL NEAR THE GARAGE DOOR AFTER INSTALLATION.
PERIODIC CHECKS OF THE OPENER ARE REQUIRED TO INSURE SATISFACTORY OPERATION.
Owner's Manual
Garage Door Opener
(1100 Series -- Canada)
FOR RESIDENTIAL USE ONLY
The MODEL NUMBER label is located on the front panel of your opener
Chamberlain Manufacturing Canada, Inc. Unit 11,
230 Bayview Drive Barrie, Ontario L4N 5E9
PAGE
CONTENTS
Limit Adjustment ....................................................... 20
Force Adjustment...................................................... 21
Safety Reverse Test.................................................. 22
The Protector System ............................................. 22
Setting/Changing Code ............................................. 23
Having a Problem? ................................................... 24
Repair Parts, Rail Assembly...................................... 26
Repair Parts, Installation ........................................... 26
Repair Parts, Opener Assembly ................................ 27
How To Order Repair Parts ....................................... 28
Warranty................................................................... 28
PAGE
Advertisement
Table of Contents

Related Manuals for Chamberlain 1145-1/3HP


Summary of Contents for Chamberlain 1145-1/3HP
-
Page 1: Table Of Contents
Chamberlain Manufacturing Canada, Inc. Unit 11, 230 Bayview Drive Barrie, Ontario L4N 5E9 Owner's Manual Garage Door Opener (1100 Series -- Canada) FOR RESIDENTIAL USE ONLY CAUTION! PLEASE READ THIS MANUAL CAREFULLY The MODEL NUMBER label is located on the front panel of your opener... -
Page 2: Safety Rules
START BY READING THESE IMPORTANT SAFETY RULES THIS SAFETY ALERT SYMBOL MEANS CAUTION—PERSONAL SAFETY OR PROPERTY DAMAGE INSTRUCTION. READ THESE INSTRUCTIONS CAREFULLY. THIS GARAGE DOOR OPENER IS DESIGNED AND TESTED TO OFFER REASONABLY SAFE SERVICE PROVIDED IT IS INSTALLED AND OPERATED IN STRICT ACCORDANCE WITH THE FOLLOWING SAFETY INSTRUCTIONS. -
Page 3: Carton Inventory
OPENER CARTON INVENTORY: Your garage door opener is packaged in two cartons which contain all parts illustrated below and on page 26. Hardware for assembly and installation are listed below. Light Lenses (2) Remote Control Light Lens (1) Rail Grease Sprocket Model 1160 and Transmitter (1) -
Page 4: Accessories
ACCESSORIES Many useful accessories are available for your garage door opener. They are illustrated below with model numbers and descriptions. Model 61LM STANDARD REMOTE CONTROL Model 1710 10-FT T-RAIL: TRANSMITTER: Fully assembled 10-ft. T-rail with full Single-Function with visor clip chain. -
Page 6: Operation Of Your Opener
Operation of Your Opener CAUTION • BEFORE YOU PROCEED, PLEASE READ THE SAFETY • DO NOT PERMIT CHILDREN TO PLAY IN DOOR AREA. RULES ON PAGE 2 AND OPERATING INSTRUCTIONS ON THIS PAGE CAREFULLY. • OPERATE ONLY WHEN OPENER IS PROPERLY •... -
Page 7: Care And Maintenance Of Your Opener
CARE OF THE OPENER When properly installed, opener will provide high CHAIN TENSION ADJUSTMENT: After installation of the performance with a minimum of maintenance. The opener opener and adjustment of forces and limits, the chain may does not require additional lubrication. appear loose. -
Page 8: Assembly
TO AVOID INSTALLATION DIFFICULTIES, ASSEMBLY STEP 1 DO NOT RUN OPENER UNTIL YOU ARE INSTRUCTED TO DO SO. Attach T-Rail To Opener USE ONLY THOSE SCREWS MOUNTED IN TOP OF OPENER. FAILURE TO DO SO WILL CAUSE SERIOUS DAMAGE TO THE DOOR OPENER. - Page 9 ASSEMBLY STEP 3 Tighten the Chain Assembly CAUTION: Keep the chain from twisting as nuts are turned PROCEDURE: Thread inner nut on the trolley in the direction shown. Loosen outer nut, if necessary. Tension is correct when the chain is approximately 1/2" above the base of the T-rail, midway between the pulley bracket and the opener.
-
Page 10: Installation
INSTALLATION STEP 1 THE HEADER BRACKET MUST BE RIGIDLY Position and Install Header Bracket FASTENED TO HEADER WALL. REINFORCE Installation procedures vary according to garage WALL WITH A 2x4 IF NECESSARY. FAILURE TO COMPLY RESULT IMPROPER door types. Follow the instructions which apply to OPERATION OF SAFETY REVERSE SYSTEM your door. - Page 11 ONE-PIECE DOOR WITHOUT TRACK PLEASE READ AND COMPLY WITH THE WARNINGS ON PAGE 10. THEY APPLY TO THE INSTALLATION OF THE HEADER BRACKET REGARDLESS OF DOOR TYPE. 1. Close door and mark inside vertical centerline of EXAMPLE garage door. Extend line onto header wall above Distance from top of door (at door.
-
Page 12: Position The Opener
INSTALLATION STEP 3 TO PREVENT DAMAGE TO LIGHT WEIGHT DOORS AND/OR DOORS WITH WINDOWS, DO Position the Opener NOT REST THE OPENER ON THE DOOR. Follow instructions which apply to your door type as illustrated. INSTALLATION-SECTIONAL DOOR & 1-PIECE DOOR WITH TRACK PROCEDURE: Raise the opener onto a stepladder. - Page 13 INSTALLATION STEP 4 THE OPENER MUST BE SECURELY FASTENED TO A STRUCTURAL SUPPORT Hang the Opener OF THE GARAGE. Three representative installations are shown. Yours may be different. Hanging brackets should be angled (Fig.1) or crossed (Fig.2) to provide rigid support. On finished ceilings (Fig.3), attach a sturdy metal bracket (not supplied) to ceiling joists before installing opener.
- Page 14 LOCATE DOOR CONTROL BUTTON (OR ANY ADDITIONAL PUSH BUTTONS) WHERE THE GARAGE DOOR IS VISIBLE. AWAY FROM DOOR AND DOOR HARDWARE AND OUT OF THE REACH OF CHILDREN. SERIOUS PERSONAL INJURY FROM A MOVING GARAGE DOOR MAY RESULT FROM MISUSE OF OPENER. ALL OW CHILDREN TO OPERATE DOOR CONTROL BUTTON(S) REMOTE CONTROL TRANSMITTER.
- Page 15 Install Multi-Function Door Control Panel Models 1160 and 1150 ONLY There are 4 screw terminals on the back of the Multi Function Control. Connect bell wire by color; yellow to yellow, white to white, red to red and black to black. Install the Multi-Function Control on an inside garage wall as shown.
-
Page 16: Connect Electric Power
USE MANUAL RELEASE ROPE ONLY TO INSTALLATION STEP 6 DISENGAGE TROLLEY. DO NOT USE ROPE AND HANDLE TO PULL DOOR OPEN OR CLOSED. Attach Manual Release Rope & Handle PROCEDURE: Thread one end of rope through hole in top of red handle so 'NOTICE' reads right side up as shown. - Page 17 INSTALLATION STEP 8 TO PREVENT DAMAGE TO LIGHTWEIGHT AND METAL GARAGE DOORS (OR THOSE Fasten Door Bracket and Plate WITH GLASS PANELS), Follow instructions which apply to your door type ALWAYS REINFORCE THE INSIDE OF DOOR— as illustrated below. BOTH VERTICALLY AND HORIZONTALLY—WITH 2X4 BOARDS OR ANGLE IRON.
-
Page 18: Connect Door Arm To Trolley
INSTALLATION STEP 9 Connect Door Arm to Trolley Follow instructions which apply to your door type as illustrated. SECTIONAL DOORS INSTALLATION Make sure garage door is closed tight. Pull the manual release handle to disconnect the trolley. Manually move outer trolley back to the center of inner trolley as shown in Figures A, B and C. FIG A: Fasten straight door arm section to outer trolley FIG B: Bring arm sections together. - Page 19 ALL ONE-PIECE DOORS ASSEMBLE DOOR ARM: Fasten straight and curved door arm sections together to their longest possible length. With door closed, connect straight door arm section to door bracket with a clevis pin. Secure with a ring fastener. Before connecting door arm to trolley, limits of travel must be adjusted on one-piece doors. Limit adjustment screws are located on left side panel as shown in illustration on Page 20.
-
Page 20: Limit Adjustment
ADJUSTMENT STEP 1 Adjust UP and DOWN Limits LIMIT ADJUSTMENT settings regulate the points at which the door will stop when moving up or down. NOTE: Door STOPS in the UP direction if anything interferes with door travel. Door REVERSES in the DOWN direction if anything interferes with the door travel (including binding or unbalanced doors). -
Page 21: Force Adjustment
DO NOT USE FORCE ADJUSTMENTS TO ADJUSTMENT STEP 2 COMPENSATE BINDING Adjust Force STICKING GARAGE DOOR EXCESSIVE FORCE WILL INTERFERE WITH THE PROPER OPERATION OF THE SAFETY REVERSE SYSTEM OR DAMAGE THE GARAGE DOOR. Force Adjustment Controls are located on rear panel of opener. -
Page 22: Safety Reverse Test
ADJUSTMENT STEP 3 THE SAFETY REVERSE SYSTEM TEST IS IMPORTANT. GARAGE DOOR MUST RE- VERSE ON CONTACT WITH A ONE-INCH Test Safety Reverse System OBSTACLE PLACED ON THE FLOOR. FAILURE TO PROPERLY ADJUST OPENER MAY RESULT IN SERIOUS PERSONAL INJURY FROM A CLOSING GARAGE DOOR. -
Page 23: Setting/Changing Code
ACTIVATE THE OPENER ONLY WHEN Radio Controls DOOR IS IN FULL VIEW, FREE OF OBSTRUCTION AND PROPERLY F.C.C. rules prohibit adjustments to or modification of ADJUSTED. NO ONE SHOULD ENTER OR LEAVE receiver and/or remote control transmitter circuitry GARAGE WHILE DOOR IS IN MOTION. DO NOT except for changing code setting and replacing remote ALLOW CHILDREN TO OPERATE REMOTES OR control transmitter battery. -
Page 24: Troubleshooting
Having a Problem? Review Pages 2 and 3 Before Proceeding SITUATION PROBABLE CAUSE & SOLUTION OPENER DOESN'T OPERATE 1. Have you disengaged all door locks? Review Step 7, page 16. FROM EITHER THE DOOR 2. Does the opener have electric power? Plug a lamp into the outlet. If it doesn't light, check fuse CONTROL BUTTON OR REMOTE box or circuit breaker. - Page 25 Having a Problem? (continued) SITUATION PROBABLE CAUSE & SOLUTION 1. Pull red manual release handle. Operate door manually. If it is unbalanced or binding, call a DOOR REVERSES FOR NO APPARENT REASON garage door serviceman to correct the problem. 2. Clear any ice or snow from garage floor area where garage door closes. 3.
-
Page 26: Repair Parts, Rail Assembly
RAIL ASSEMBLY PARTS LIST INSTALLATION PARTS LIST Lighted Push Button Assembly 41 A2756 Multi-Function Control Panel 41A3586 2 Strand 4 Strand Bell Wire Bell Wire Remote Control Transmitter 217A238 217A241 Case, Cover & Screw Assembly (circuit board not included) 12V Battery 41 A3593 10A14 Door Bracket... -
Page 27: Repair Parts, Opener Assembly
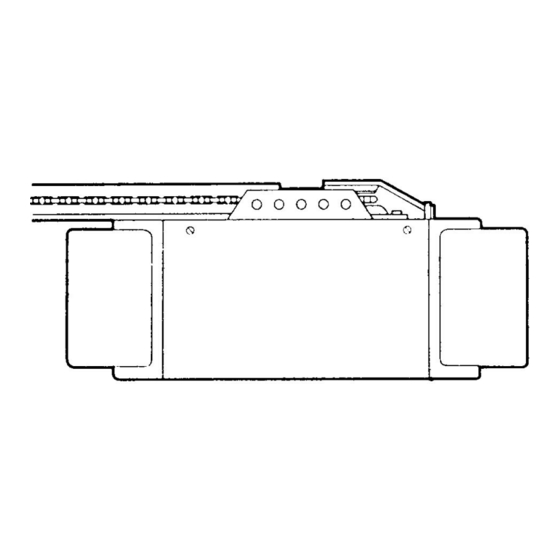
Repair Parts Chassis Assembly Parts List PART PART DESCRIPTION DESCRIPTION 31C290 Sprocket cover 41A3150 Terminal block w/screws 41A2827 Gear and sprocket assy. 41D3058 Universal replacement motor /bracket assy. (Includes Complete with: motor, worm, bracket, bearing Spring washer Thrust washer assy. and RPM sensor) 51R370 Cover (Specify model) Retaining ring... -
Page 28: How To Order Repair Parts
Product under warranty which upon receipt by Chamberlain/LiftMaster is determined to be defective in materials and/or workmanship will be repaired or replaced (Chamberlain's option) at no cost to you and returned pre-paid. Defective parts will be repaired or replaced with new or factory rebuilt parts at Chamberlain's option.
Need help?
Do you have a question about the 1145-1/3HP and is the answer not in the manual?
Questions and answers
How to reset garage door opener
To reset the Chamberlain 1145-1/3HP garage door opener, follow these general steps:
1. Erase all remote codes: Locate the "Learn" button on the garage door opener motor unit. Press and hold it until the LED next to it turns off (usually about 6 seconds). This erases all remote control codes from the memory.
2. Reprogram remotes individually: After erasing, program each remote separately. Do not press buttons already assigned to other doors during this process.
3. Safety reverse system test: Place a one-inch object under the door. Close the door. It must reverse upon contact. If not, adjust the down force or down limit as needed.
4. Reconnect power safely: Ensure the unit is connected to a 120V grounded outlet. Do not use extension cords or 2-wire adapters.
These steps will reset the opener and allow safe reprogramming.
This answer is automatically generated