
Related Manuals for Miele W 980 WPS


Summary of Contents for Miele W 980 WPS
- Page 1 Operating instructions for Washing machine W 980 It is essential to read these operating instructions before installing or using the machine, to avoid the risk of accident, or damage to the machine. M.-Nr. 04 944 960...
-
Page 2: Caring For Our Environment
Caring for our environment Caring for our environment Disposal of the packing Disposal of your old appliance material Old appliances contain materials which can be recycled. Please contact your The transport and protective packing dealer, your local waste collection has been selected from materials centre or scrap merchant about poten- which are environmentally friendly for tial recycling schemes. -
Page 3: Table Of Contents
Contents Contents Caring for our environment Disposal of the packing material ........2 Disposal of your old appliance . - Page 4 Contents Programmes Programme selection ..........22 Sequence .
- Page 5 Contents Cleaning and care Cleaning the washing machine ........35 Extra cleaning .
-
Page 6: Guide To The Machine
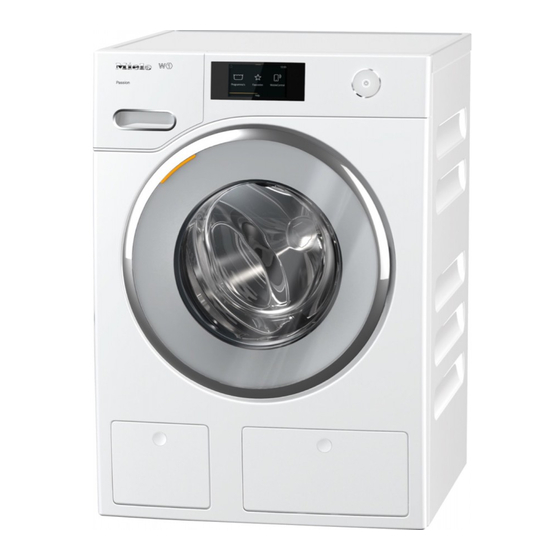
Guide to the machine Guide to the machine General view 1 Electric supply cable 5 Facia panel with controls 2 Inlet hose with "Waterproof" system 6 Door 3 Flexible drain hose (with detachable 7 Access panel for drain filter, drain swivel elbow) pump and emergency door release 4 Detergent dispenser drawer... -
Page 7: Control Panel
Guide to the machine Control panel “I-ON / 0-OFF” button “Spin” button To switch the machine ON or OFF or for spin speed, Rinse hold and With- to interrupt a programme. out final spin “Door” button Indicator lights opens the machine door. showing the selected spin speed. -
Page 8: Warning And Safety Instructions
Repairs should only be undertaken by a Miele approved This appliance should not be oper- engineer. ated by children. Supervise its use Ensure current is not supplied to the ap- by the elderly or infirm. - Page 9 Warning and safety instructions The Miele "Waterproof system" pro- Before using the machine for the tects from water damage provided first time, check that the transit fit- the following conditions have been met: ting at the rear of the machine has been removed (see section on "Installa-...
-
Page 10: Disposal Of Your Old Machine
Accessory parts may only be fitted tomer Service Department. when expressly approved by Textiles which have been pre- Miele. If other parts are used, guaran- treated in solvent based cleaning tee, performance and product liability agents must be thoroughly rinsed in claims may be invalidated. -
Page 11: Washing Environmentally And Economically
Washing environmentally and economically Washing environmentally and economically – Water consumption and energy – Use the "Short" wash option for nor- usage are determined by the size of mally or very lightly soiled laundry. the load. Load to the maximum rec- –... -
Page 12: Before Using For The First Time
Before using for the first time Before using for the first time Before using the machine for the first time ensure that it is correctly in- stalled and connected. See the rele- vant section under "Installation". Also check that the fluff filter is securely tightened. -
Page 13: How To Wash Correctly Brief Guide
How to wash correctly How to wash correctly Dark textiles often contain excess dye Brief guide and should be washed separately sev- The headings numbered ( ,...) eral times before being included in a show the operating sequence and can mixed load. -
Page 14: To Start A Programme
How to wash correctly Press the “Door” button. To start a programme Load the drum. Press in the “I-ON/0-OFF” button. Unfold washing and load loosely in the – The programme selector should be drum. To achieve best results it is ad- pointing to Finish, the indicator light visable to make up mixed loads consist- "Anti-crease/Finish"... - Page 15 How to wash correctly Select any additional option Select a spin speed required. Press the “Spin” button enough Press the relevant button. times until the indicator light for the required final spin speed lights up. Indicator light on = selected Indicator light off = not selected In some programmes the maximum spin speed is limited.
-
Page 16: Delay Start
How to wash correctly This starts the programme Delay start After washing Select delay start if required. Press the “Door” button. The start of programmes can be de- Press and release the “I-On/0-Off” layed from 30 minutes up to a maxi- button. -
Page 17: Adding Or Removing Washing After Programme Start
How to wash correctly General exceptions: Adding or removing washing after programme start The door cannot be opened when: Washing can be added or removed – the suds temperature is above 55°C. after the programme has already – the additional option “Water plus” started, when using the following pro- has been selected, grammes. -
Page 18: Programme
How to wash correctly To select a different programme pro- Programme . . . ceed as follows: . . . interruption With the “I-On/0-Off” button switch off the appliance. Press the “I-ON/0-OFF” button. Turn the programme selector to "Fin- To continue with the same pro- ish". -
Page 19: Adding Detergent
Adding detergent Adding detergent All modern detergents produced for Water Hardness automatic washing machines are suit- Hardness Type of able, including liquid, compact (con- range water Hardness °dH centrated), tablets and special applica- (hardness) level in German mmol / l tion detergents. -
Page 20: Adding Detergent
Adding detergent Adding detergent Water softeners A water softener can be used to cut down on the use of detergents in water hardness ranges II-IV. Dispense ac- cording to the amount specified on the packaging. First add detergent and then the water softener. Use a quantity of detergent as for soft water. -
Page 21: Automatic Fabric Conditioners, Texturisers, Or Liquid Starch
Adding detergent Automatic fabric conditioners, tex- Separate fabric conditioner or tex- turisers, or liquid starch turiser Open the lid of compartment Add fabric conditioner or texturiser to the compartment p. Turn the programme selector to “Starch”. Select a spin speed. Press the “Start”... -
Page 22: Programmes
Programmes Programmes Programme selection Programme Fabric Temperature max. spin speed Cottons and linen fabrics, eg bed linen, table 95°C to 30°C 1600 COTTONS linen, towelling, jeans, underwear, T-shirts, nappies. Wash load as for standard tests 60°C 1600 COTTONS (60°C) white nylon, white polyester fabrics (50°C), 60°C to 30°C MINIMUM IRON coloured nylon, polyester, cotton and viscose... - Page 23 Programmes max. load Additional options Notes 5 kg – Soak With heavily soiled items select "Soak" or "Pre-wash". Wash – Pre-wash dark colours in liquid detergent. – Short For normally soiled items select "Short". – Water plus (Option 1,2,3,4) 5 kg For test institutes: Programme setting for tests according to EN 60456 Standard Programme...
-
Page 24: Sequence
Programmes Sequence COTTONS MINIMUM IRON DELICATES WOOLLENS Soak optional optional optional – Pre-wash optional optional optional – Main wash Top-up rinse from 75°C programmable – – – Graduated rinsing – from 40°C – – No. of rinses – normal 3 or 4 –... - Page 25 Programmes QUICK WASH Starch Spin Separate rinse MIXED WASH high cotton high polyester content content – – – – optional optional – – – optional optional – – – – – – – – – – – – – – –...
-
Page 26: Care Symbols
Programmes Tumble dry Care symbols at normal temperature Washing at low temperature Cottons 95°C, 75°C do not tumble dry Cottons 60°C Cottons 40°C Ironing hot iron Cottons 30°C medium hot iron Minimum iron 60°C, 50°C cool iron Minimum iron 40°C do not iron Minimum iron 30°C N.B. -
Page 27: Additional Options
Additional options Additional options To select an additional option to the Deleting soak time basic programme press the button for Keep pressing the “Soak” button, the in- that option. The indicator light for the dicator light goes out. option button comes on. If an additional option is chosen which Adding detergent for the Soak op- is incompatible with the basic pro-... -
Page 28: Water Plus
Additional options Water plus Spin The water level increases in "soak", A final spin is carried out at the end pre-wash", "main wash" and / or of each of the basic programmes, if "rinses", and / or an extra rinse can a spin speed had been selected. -
Page 29: Electronic Programme Locking
Additional options Switching off programme locking Electronic programme locking early Programme locking prevents the ma- Press the “Start” button for at least 5 chine from being opened or the pro- seconds. gramme cancelled during a wash Exception: programme. The indicator light "Anti-crease/Finish" Switching on programme locking in the Sequence display flashes. -
Page 30: Display
Display Display Soak The time left shows in the display, or the time left plus soak time or the If a time is selected for soaking, this is delay start period. added to the prescribed running time In addition it serves as a display for for the programme and the total shown the programmable functions. -
Page 31: Programmable Functions
Programmable functions Programmable functions The programmable functions enable Option 2 the user to introduce further features as Increase in the water level in soak, pre- required. The programmable functions wash, main wash and rinses for Cot- remain stored in memory until they are tons, Minimum iron, Delicates, Quick cancelled by the user. -
Page 32: P9 = Gentle Action
Programmable functions P9 = Gentle action P11 = Memory function For gentle washing of slightly soiled If an additional option is selected for items. Drum action is reduced. a programme, and / or the spin speed is altered, the machine stores Gentle action can be used with the Cot- these changes in memory at the start tons, Minimum iron, Quick Wash, Mixed... -
Page 33: Programming And Storing In Memory
Programmable functions 2. Selecting a programmable function Programming and storing in memory For the programmable function re- quired turn the programme selector The programmable functions are acti- to the setting given: vated using the additional option but- – for P1 High Water level tons and the programme selector in to –... -
Page 34: To Activate Or Deactivate A Programmable Function
Programmable functions 3. To activate or deactivate a pro- 4. Storing the programmable func- grammable function. tion in memory Switch the machine off with the For the programmable functions P1, “I-ON/0-OFF” button. P4, P9, P10, P11. Now you can start the wash pro- Pressing the “Start”... -
Page 35: Cleaning And Care
Cleaning and care Cleaning and care Cleaning the washing machine Extra cleaning Clean the casing with a mild non-ab- Carrying out a hot wash (70°C or rasive detergent or soap and water. above) with powder detergent approx. Wipe dry with a soft cloth. once every six weeks will help to en- sure that no deposits build up in the Clean the facia panel and flap with a... -
Page 36: Cleaning The Detergent Dispenser Drawer
Cleaning and care Cleaning the detergent dispen- ser drawer Pull out the detergent dispenser drawer until a resistance is felt. Clean the dispenser compartments and conditioner channel. Regularly remove any detergent residues. Press down the red release catch and at the same time pull the drawer right out of the machine. -
Page 37: Cleaning The Fluff (Drain) Filter And Pump
Cleaning and care Cleaning and care Cleaning the fluff (drain) filter and pump Check the fluff (drain) filter initially after 3-4 washes to ascertain how often it is likely to require cleaning. With normal cleaning approx. 2 litres of water run out. If the drain outlet is clogged, more water will be retained in the machine (up to 25 litres). - Page 38 Cleaning and care Clean the inside of the fluff filter hous- ing. Remove any deposits of lime scale and detergent or foreign objects from the thread of the filter housing and filter unit (as these objects can cause a leakage of water).
-
Page 39: Cleaning The Filter In The Water Inlet
Cleaning and care First turn off the stopcock. Cleaning the filter in the water inlet Unscrew the threaded union con- necting the free end of the inlet hose The washing machine has a filter to pro- to the stopcock. tect the water inlet valve. Remove the rubber seal 1 from the The accessible filter in the union in the recess. -
Page 40: Problem Solving Guide
Problem solving guide Problem solving guide Repair work to electrical appliances should only be carried out by a suitably qualified person in accordance with local and national regulations. Unauth- orised repairs could be dangerous. What to do, if . . . Cause . - Page 41 Problem solving guide What to do, if . . . Cause . . . Remedy . . . – The water inlet is restricted. The stopcock is not opened . . . the “Water inlet" check far enough. light flashes during the pro- –...
- Page 42 Problem solving guide What to do, if . . . Cause Remedy – The final spin has not taken Loosen and re-distribute the . . . the indicator light “Final place. The machine detected washing. spin” flashes. an imbalance. – Select the programme Spin or Drain.
- Page 43 Problem solving guide What to do, if . . . Cause Remedy – The water supply pressure is Clean the filter in the water . . . large residues of deter- too low. inlet system. gent remain in the dispenser –...
-
Page 44: Opening The Drum Door In The Event Of A Power Failure
Problem solving guide Opening the drum door in the To check water pressure event of a power failure Place a bucket under the stopcock. Switch off the washing machine. Turn on the stopcock. Open the fluff (drain) filter flap and If 5 litres of water flow into the bucket in drain the water as described in 15 seconds the water pressure is cor-... -
Page 45: After Sales Service Customer Contact
PC is reserved for the service engineer, for updates to your machine – Your Miele Dealer or in future years. – Your nearest Miele Service depart- When for example technological devel- ment (see back cover for the ad- opments offer advanced modifications dress). -
Page 46: Installation Surface
The most stable part of the floor is usually in the corner. If the machine is installed on a raised plinth, it has to be secured Turn the left-hand transit bar 90°. against slippage during spin using retaining clips (available from the Miele Spare Parts Dept). - Page 47 Installation Turn the right-hand transit bar 90°. Plug the two holes with the plastic caps supplied. The machine should not be moved with- out the transit fitting in place. The transit fitting should be stored in a safe place for future use. It must be re-fitted if the machine is to be moved again.
-
Page 48: Levelling The Machine
Installation With a screwdriver loosen and turn Levelling the machine the foot 1 together with the counter- The machine must stand perfectly level nut 2 to the left, (see illustration on all four feet to ensure safe and below) and screw out. proper operation. -
Page 49: Building Under
Installation Washer and Dryer stack Building under A Miele tumble dryer can be stacked To build this appliance under a con- with the washing machine. A stacking tinuous worktop / in a kitchen run: kit* is necessary and can be pur-... -
Page 50: Connection To Water Supply
Installation Connection to water supply Fitting The machine should be connected to a The Miele Waterproof-System con- mains water supply in accordance with nected between the stopcock and the standard regulations. In Germany the machine offers the safest protection washing machine is not required to against water leaks. - Page 51 4.5 metres is avail- the electricity supply. able as an optional extra from your Miele dealer or the Spare Parts Depart- Only use a genuine Miele "Waterproof ment. system" able to withstand pressure of up to 70 bar, should you ever need a replacement.
- Page 52 Installation The "Waterproof system" must only be connected to its own stopcock. It must not be connected to mixer taps or similar. Important! The plastic casing of the water connec- tion contains an electric component. Do not dip into any liquid!
-
Page 53: Connection To The Drainage System
If required, the drain hose can be ex- tended to a length of 5 m. The necess- ary parts can be purchased from the Miele Spare Parts Department, or your Miele dealer. For a delivery head of more than 1 m (up to a maximum of 1.8 m) a second... -
Page 54: Electrical Connection U.k
Installation Where it is necessary to change plugs, Electrical connection U.K. if the colours of the wires in the mains All electrical work should be carried out lead of this appliance do not corre- only by a suitably qualified and compe- spond with the coloured markings tent person, in strict accordance with identifying the terminals of your plug,... - Page 55 Installation Electrical connection U.K. Non-rewireable plugs BS 1363 If this machine is fitted with a non-re- wireable plug, the following information applies: If the socket outlets are not suitable for the plug supplied with the product, it must be cut off and an appropriate plug fitted.
-
Page 56: Consumption Data
Consumption data Consumption data Programme Load Consumption data (without any additional op- Energy Water Programme time tions or in kWh litres normal short programmable functions) COTTONS 95°C 5.0 kg 1.70 1 h 54 mins 1 h 22 mins 60°C 5.0 kg 0.95 1 h 58 mins 1 h 16 mins... -
Page 57: Technical Data
Technical Data Technical Data Height......85 cm Width ......59.5 cm Depth . - Page 60 Alteration rights reserved/008 3700 This paper consists of cellulose which has been bleached without the use of chlorine.
Need help?
Do you have a question about the W 980 WPS and is the answer not in the manual?
Questions and answers