Table of Contents
Advertisement
Advertisement
Table of Contents

Related Manuals for Navman F37M


Summary of Contents for Navman F37M
- Page 1 User Manual...
-
Page 2: Important Safety Information
Do not expose your Navman to direct sunlight in an unattended vehicle for prolonged periods. Overheating may damage the unit. Note: To discourage theft, do not leave the Navman, its mounting bracket or any cables in plain view in an unattended vehicle. -
Page 3: Home Charger-Specific Safety Information
Home Charger-specific safety information To charge your Navman from the mains power, use the home charger supplied by Navman as an accessory (may be sold separately). Using other home chargers with your Navman could result in serious injury or property damage. -
Page 4: Caring For Your Navman
LCD panels may be used to help protect the screen from minor scratches. Never clean your Navman with it powered on. Use a soft, lint-free cloth to wipe the screen and the exterior of your Navman. -
Page 5: Table Of Contents
How do I adjust the volume? ........................15 How do I get started? ............................16 How do I turn my Navman on for the first time?.................. 16 What are the main screens I will use? ......................18 Main Menu screen ............................18 Map screens .............................. - Page 6 How do I save a NavPix to a POI?....................60 How do I receive current traffic information? (Select models only) ............61 How does my Navman receive traffic information? ................61 Traffic status ............................61 How will I know when a Traffic Event occurs? ..................62 How do I view a list of all events on my route? ..................63...
- Page 7 Reference ................................72 Troubleshooting............................72 Point of Interest categories........................72 Branded Points of Interest........................72 Point of Interest categories by Navman ..................... 72 Point of Interest categories by subscription ..................72 Traffic and other TMC Events........................72 Safety Camera POIs ............................ 72 Disclaimer ..............................
-
Page 8: Welcome
Navman from first set-up through to continuous use. Please read this manual carefully before using your Navman for the first time. Keep this manual in a safe place and use as your first point of reference. Important information for using the manual It is important to understand the terms and typographical conventions used in this manual. -
Page 9: How Do I Install My Navman
If the car’s windscreen is tinted with a reflective coating, it may be athermic and impact the GPS reception. In this instance, please mount your Navman where there is a “clear area.” To protect your Navman against sudden surges in current, connect the car charger only after the car engine has been started. -
Page 10: F45/F47M Installation
Certain roads with reported traffic will be highlighted and you can choose to avoid those roads and an alternate route will be automatically calculated. For more information, see “How does my Navman receive traffic information?” on page 61. -
Page 11: Getting To Know Your Navman
Getting to know your Navman F35/F37M Power Switch Speaker Socket for in-car charger, USB cable Cradle Socket (sold separately), home charger (sold separately) and TMC accessory kit (may be sold separately) -
Page 12: F45/F47M
F45/F47M Power Switch Cradle Socket Socket for in-car charger, USB cable Speaker (sold separately), home charger (sold separately) and TMC accessory kit (may be sold separately) -
Page 13: Turning On And Off
For normal operation, turn off your Navman by sliding the power switch to the OFF position. Your Navman enters a suspended state. To use it again, slide the power switch to the ON position. Your Navman will be back to where you left off. -
Page 14: Charging The Battery Via The Usb Cable (Sold Separately)
Charging the battery via the USB cable (sold separately) If you intend to charge your Navman in this way, turn off your Navman so that it takes less time to charge the battery. Turn on the computer. Connect the mini-USB end of the USB cable to the bottom of your Navman and the other end to a USB port on your computer. -
Page 15: Navigating On The Screen
Tap and hold your fingertip until an action is complete, or a result or menu is shown. (This is not supported by all applications.) How do I adjust the volume? The volume on your Navman can be adjusted by the volume control on the Volume preference screen. To mute the volume from the map screens, tap and then tap . -
Page 16: How Do I Get Started
How do I get started? Note: The first time you use your Navman, it may take up several minutes to establish a GPS connection. For more information about GPS, refer to the GPS Frequently Asked Questions guide on the enclosed DVD. - Page 17 When you have finished the Tutorial, the 3D Map screen will display. If you have a GPS fix, your current location will be displayed on the map.
-
Page 18: What Are The Main Screens I Will Use
Note: The Main Menu screens may differ from those displayed above, depending on your Navman model. Map screens There are five map screens used to view the route to your destination:... - Page 19 For more information on the map screens, see “How do I view my route?” on page 38. For information on using the Map menu from the 3D Map and 2D Map screens, see “How do I use the Map Menu?” on page 48.
-
Page 20: How Do I Navigate With Gps
Your Navman receives GPS signals via the internal GPS antenna. To guarantee the optimum GPS signal strength, ensure your Navman is outdoors, or in a vehicle outdoors, and has an unobstructed view of the sky. GPS reception is not usually affected by weather, however, very heavy rain or snow may have a negative effect on your reception. -
Page 21: How Do I Go From A To B
How do I go from A to B? Your Navman is equipped with maps that provide street-level detail for door-to-door navigation, including Points of Interest (POIs) such as accommodation, parking areas, petrol stations, railway stations and airports. When you ... -
Page 22: How Do I Search For An Address
How do I search for an address? Enter a destination using the Destination Search, Keyboard and Preview screens, which used together form an address-entry wizard. This section provides a case study to help guide you through setting your destination. Note: In some countries, you can search for your destination by postcode or zip code. If you are in the United Kingdom, and you know the postcode of your destination, you can search for it from the Destination Search screen by tapping Postcode, then entering a postcode of up to eight characters. - Page 23 Select the country Note: If you only have the maps of one country installed and selected, that country is selected for your destination by default and cannot be changed. Go to step 3. From the Destination Search screen, tap The Select a map screen will display. Select United Kingdom from the list.
-
Page 24: Using The Keyboard Screen
Keyboard Using the screen The Keyboard screen will display when you are required to enter text, such as when searching for a street name. Search results will be listed in matching order, with the closest matches appearing at the top of the list. A maximum of 99 results will display. - Page 25 Use the Keyboard screen to enter Cheyne Walk as the street name of your destination, then tap the search result. Note: There may be multiple matches for a particular street name. Long streets that run through several neighbouring areas, and common street names will produce search results ordered by their city or area name. Use the Keyboard screen to enter 1 as the house number of your destination, then tap the search result.
-
Page 26: How Do I Create A Trip With Multiple Stops
How do I create a trip with multiple stops? You can use the Multi-stop Trip Planner screen to set multiple stops or waypoints for your trip. Your route will be calculated to go via each of these points in the specified order. Waypoints can be added via the Multi-stop Trip Planner screen or by selecting Location, then Add to Trip from the pop-up Map menu on the 2D Map or 3D Map screen. - Page 27 Tap Add. The Add to Trip Menu will display. Tap Address. The Destination Search screen will open. Note: You can also add waypoints using favourites, recent destinations, POI locations and Navpix Select the country Note: If you only have the maps of one country installed and selected, that country is selected for your destination by default and cannot be changed.
- Page 28 From the Destination Search screen, tap Street Address. The Keyboard screen will display. Use the Keyboard screen to enter Navman Street as the street name of your destination, then tap the search result. Note: There may be multiple matches for a particular street name. Long streets that run through several neighbouring areas, and common street names will produce search results ordered by their city or area name.
-
Page 29: How Do I Skip A Waypoint During A Multi-Stop Trip
Complete the following: If you want to ... Then ... add another waypoint tap Add. The Add To Trip Menu will display. Note: Waypoints added after a multi-stop trip has commenced will not be included in the current route. return to step 1a. navigate to your selected destination The Preview screen will display. -
Page 30: How Do I Search For A Point Of Interest (Poi)
How do I search for a Point of Interest (POI)? A POI is a named site, feature, landmark or public venue which can be displayed as an icon on the map. POIs are grouped by type, such as petrol stations, parking, beaches and museums. Select a POI using the Destination Search, Keyboard and Preview screens, which used together to form a POI-entry wizard. - Page 31 Select the country Note: If you only have the maps of one country installed and selected, that country is selected for your destination by default and cannot be changed. Go to step 3. From the Destination Search screen, tap The Select a map screen will display. Select United Kingdom from the list.
- Page 32 Search for a POI Either tap Search by name to search in all POI categories, or select a category from the list. The Keyboard screen will display. Use the Keyboard screen to search for Waterloo Railway Station as your destination, then tap the search result.
-
Page 33: How Do I Save Favourites And My Home
How do I save Favourites and My Home? You can save up to 200 destinations as favourites, one of which can be saved as My Home. You can save a favourite from the Preview screen after searching for an address, or from the Map Menu on the 3D or 2D Map screens. -
Page 34: How Do I Navigate To A Favourite
Tap the Favourite destination you want to travel to. The Favourite Preview screen will display. Your Navman will calculate the route from your current location. The 3D Map screen will display. How do I navigate to My Home? If you have not set an address as My Home, the first time you try to navigate to My Home you will be prompted to search for an address using the address-entry wizard. -
Page 35: How Do I Edit The Name Of A Favourite
How do I edit the name of a Favourite? From the Favourite Destinations screen, select a favourite to edit. The Favourite Preview screen will display. Tap Edit. The Edit Name screen will display. To edit the name of the favourite, tap After you have edited the favourite name, tap The Edit Name screen will display as shown in point 2. -
Page 36: How Do I Delete A Favourite
How do I delete a Favourite? From the Favourite Destinations screen, select a favourite to delete. The Favourite Preview screen will display. Tap Delete. When the Caution dialog-box opens, tap Yes to confirm. The favourite is deleted. The Favourite Destinations screen will display. -
Page 37: How Do I Navigate To A Recent Location
How do I navigate to a recent location? To make navigating to an address easier, your Navman will automatically save all your start locations and destinations in a list of recent locations. Tap a recent location. The Recent Location screen will display. -
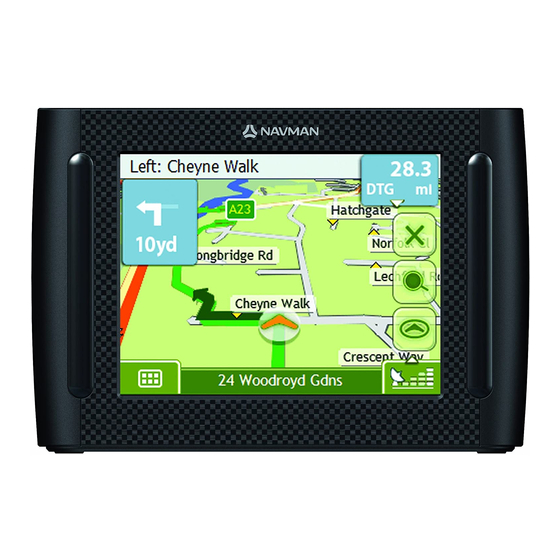
Page 38: How Do I View My Route
How do I view my route? When a route has been calculated, the 3D Map screen will display. You will be directed to your destination by spoken and visual instructions. The Map button cycles through the 3D Map, 2D Map, Traffic Overview (if available on your model), Route Overview and Turn-by-Turn™... - Page 39 Mute/unmute volume information. TMC traffic status indicator. For more information, see “How does my Navman receive traffic information?” on page 61. Battery charge indicator GPS status indicator The icon displays green when a GPS fix is established and red when a GPS fix is unavailable.
-
Page 40: 2D Map Screen
2D Map screen The 2D Map screen shows your current position (if a GPS fix is active) and surrounding street names. If a route has been calculated, the route and turns are highlighted. The 2D Map screen follows your direction of travel unless the Map Display preference is set to North (see “Map Display”... - Page 41 Mute/unmute volume information. TMC traffic status indicator. For more information, see “How does my Navman receive traffic information?” on page 61. Battery charge indicator GPS status indicator The icon displays green when a GPS fix is established and red when a GPS fix is unavailable.
-
Page 42: Traffic Overview Screen (Select Models Only)
Traffic Overview screen (select models only) Note: Traffic information is only available on selected model and in selected countries. The Traffic Overview screen displays a general overview of the traffic situation on your route, including all events in the immediate vicinity. Tap and drag the screen, to move across the map. - Page 43 TMC*, Mute/unmute volume battery and GPS information. TMC traffic status indicator. For more information, see “How does my Navman receive traffic information?” on page 61. Battery charge indicator GPS status indicator The icon displays green when a GPS fix is established and red when a GPS fix is unavailable.
-
Page 44: Route Overview Screen
Route Overview screen The Route Overview screen gives you a bird’s eye view of your trip. Note: A route must first have been calculated for this screen to be available. Tap and drag the screen, to move across the map. Tap the map to view the Map Menu (see “How do I use the Map Menu?”... - Page 45 TMC*, Mute/unmute volume battery and GPS information. TMC traffic status indicator. For more information, see “How does my Navman receive traffic information?” on page 61. Battery charge indicator GPS status indicator The icon displays green when a GPS fix is established and red when a GPS fix is unavailable.
-
Page 46: Turn-By-Turn Screen
Turn-by-Turn screen The Turn-by-Turn screen displays the next four turns of your route, the turn direction, the street name and the distance to the turn. You can view all the turns in the list, using the up and down arrows. Note: A route must first have been calculated for this screen to be available. - Page 47 TMC*, Mute/unmute volume battery and GPS information. TMC traffic status indicator. For more information, see “How does my Navman receive traffic information?” on page 61. Battery charge indicator GPS status indicator The icon displays green when a GPS fix is established and red when a GPS fix is unavailable.
-
Page 48: How Do I Use The Map Menu
The following options are available via the Map Menu: Menu Option Description Navigate To Calculates a route from your current location, if your Navman has a GPS fix. Show Details Displays the Preview screen from where you can: View details of the location... -
Page 49: How Do I Avoid An Area
How do I avoid an area? Your Navman can calculate a route that avoids a specified area on the map. Avoid Areas are displayed as shaded areas. CAUTION: If no alternative route around an Avoid Area exists, the route calculation will fail. -
Page 50: How Do I Preview A Route
How do I preview a route? Route demonstration allows you to: Preview a route. Plan and view a route without a GPS fix, such as when you are inside a building. The following steps will show you how to preview one route. Select a departure point If you have a GPS fix, you do not need to select a departure point unless you want the demonstrated route to start elsewhere. -
Page 51: How Do I View My Route Statistics
How do I view my route statistics? Note: This feature is not available on all models. The Mio provides information on your: distance travelled average speed maximum speed time taken for trip stationary time. Trip information is presented in two different ways. These are: information for the current trip information for all trips to date, or since the tripmeter was last reset. -
Page 52: How Do I View Statistics Of My Trips To Date
How do I view statistics of my trips to date? The Tripmeter - Global screen is used to view statistical information for all of your trips to date, or since the trip meter was last reset. The Tripmeter - Global screen will display. Complete the following: If you want to ... -
Page 53: How Do I View My Trip Logs
How do I view my trip logs? Note: Trip Recorder is only available on some models. The Trip Recorder screen is used to record trip logs of your current trip. The Trip Recorder only records trip logs if you have chosen to record the logs. The Trip Recorder screen will display. -
Page 54: How Do I Use Navpix
Album management The albums contain all your and display them as thumbnails. You can store your NavPix NavPix customizable albums on the Navman internal memory. Element Description Browse Displays the Select an Album screen, from where you can select another album. - Page 55 How do I delete NavPix from an Album? can be deleted from an Album on your Navman internal memory. NavPix Note: When a has been saved as a Favourite destination, you will not delete the Favourite if you subsequently NavPix...
-
Page 56: Navpix Management
Keyboard screen. NavPix Delete Deletes a from the album on your Navman. NavPix Your route will be calculated and displayed on the 3D Map screen. Note: This button is only available if this is a with embedded GPS NavPix coordinates. -
Page 57: How Do I View A Navpix
NavPix How do I view a in full-screen From the Details screen, tap the thumbnail of the NavPix NavPix will appear in full-screen. NavPix Note: The icons disappear after a few seconds; tap the screen to have them reappear. Complete the following: If you want to ... -
Page 58: How Do I Navigate To A Navpix
NavPix The Preview screen will display. Your Navman will calculate the route from your current location. The 3D Map screen will display. How do I navigate to a NavPix I have downloaded, or was preinstalled? -
Page 59: How Do I Save A Navpix To A Favourite
How do I save a to a favourite? NavPix Note: When a is saved to an existing favourite, only the image, and not the GPS coordinates, are associated with the NavPix favourite. From the Album screen, select and tap a NavPix Details screen will display. -
Page 60: How Do Poi Save A Navpix To A Popoi
How do I save a to a POI? NavPix Note: Only a with embedded GPS coordinates can be saved as a POI. NavPix From the Album screen, select and tap a NavPix Details screen will display. NavPix From the Details screen, tap Assign. NavPix The Save Photo screen will display. -
Page 61: How Do I Receive Current Traffic Information? (Select Models Only)
Your Navman or Traffic module is connecting to the TMC service. Your Navman or Traffic module cannot receive TMC data. This may be due to poor radio coverage in the local vicinity. -
Page 62: How Will I Know When A Traffic Event Occurs
Incoming events are handled according to your Traffic preferences. For more information, see “Traffic” on page When travelling through an area in which you can receive traffic status, your Navman will decode these events and display them on-screen. An icon will display at the event location on the map screens, and an audible warning is given if an event is on your route. -
Page 63: How Do I View A List Of All Events On My Route
How do I view a list of all events on my route? Your Navman creates a list of events as they are received, which is displayed on the Event List screen. This screen can only be viewed if the TMC icon is green or orange. -
Page 64: How Do I View Traffic Details
How do I view traffic details? There are several ways to view details of an event received by your Navman. Choose one of the following: Location Option From any of the screens used to Tap the Event message when it appears on screen. -
Page 65: How Do I Know If A Detour Is Recommended
Item Description Tap to initiate a new route to avoid the event. Only available if a detour or re-route is available. Note: Un-avoid area is represented by and is displayed when a re-route has been calculated. How do I know if a detour is recommended? When a Traffic or Clearance event occurs on your route, a detour will always be recommended. -
Page 66: Traffic Messages
If a detour is recommended, one of the following messages will display: Message Description Finding detour… Your Navman is calculating a new route. During calculation, the % complete will display. Recalculating route… Note: Exiting this screen before the new route is calculated will cancel the operation. Detour distance…... -
Page 67: What Can I Customise
What can I customise? There are various customisation options available to enhance your navigation experience. Note: The Preferences screens may differ from those displayed above, depending on your Navman model. To move forward through the Preferences screens, tap To revisit the previous screen, tap... -
Page 68: Route Options
Route Options You can enhance your navigation experience by modifying aspects of your route and route calculation. Route Calculation 1/5 Complete the following: If you want to ... Then ... change the route type move the Route Type slider towards Fastest time to give high priority to the fastest time when calculating a route. -
Page 69: Road Types 2/5
Road Types 2/5 Complete the following: If you want to ... Then... avoid toll roads select the Toll roads check box in the Avoid column. receive a warning if your route select the Toll roads check box in the Warn column. The warning will display at the start includes toll roads of every trip containing a toll road. -
Page 70: Road Types 3/5
Road Types 3/5 This special zone is the restricted area where you can set to avoid when calculating a route. For example, in Greece, you are not allowed to drive in the pollution zone when the air pollution is reached to certain level. Note: The actual use of this special zone varies from country to country. -
Page 71: Driver Alerts 4/5
If you want to ... Then... enable a visual warning if the Main Menu select the Warn me not to operate my Navman while driving check box. screen is accessed in a moving vehicle enable a warning chime when travelling select the Enable speed warning….. -
Page 72: Data Recording 5/5
Data Recording 5/5 Complete the following: If you want to ... Then... record a GPS log of your trips select the Enable GPS data logging check box. record mileage select the Enable trip recording check box. Note: This option is not available on all models. -
Page 73: Map Display
Map Display You can change the look and behaviour of the Map screens by customizing the Map Display preferences. Map Display 1/3 Complete the following: If you want to ... Then... change the map colour scheme select your preferred scheme from the Map Colour Scheme box. set the screen contrast to automatically select the Auto day/night option. - Page 74 Map Display 2/3 Complete the following: If you want to ... Then... enable automatic zooming during select the Auto-zoom on main map screens check box. If selected, the 3D navigation Map screen will automatically zoom in or out, depending on your speed, to allow optimal viewing of your route.
-
Page 75: Select Map 3/3
Select Map 3/3 Complete the following: If you want to ... Then... use maps from a different continent select a different continent from the maps you are currently using. When selected, the maps for the new continent will load and the 3D Map screen will display. Your preferences are automatically saved. -
Page 76: Map Pois
Map POIs Points of Interest (POIs) are grouped into categories. You may choose to either display (or hide) icons of all POI categories on the map screens, or only display the icons from selected categories. For example, you may only be interested in entertainment venues and want to disable other categories such as schools. -
Page 77: Volume
Volume Complete the following: If you want to ... Then... increase or decrease the volume move the Volume slider towards High to increase the volume. move the Volume slider towards Low to decrease the volume. hear a tone when you tap the touch screen select the Audio check box. -
Page 78: Screen
Screen Brightness slider towards Dim to decrease screen brightness. Warning: Your Navman can heat up when the Brightness scale is set above 70% - i.e., when more than seven rectangles are coloured - therefore, use lower brightness whenever acceptable. -
Page 79: Poi Alerts
You may also be able to set warnings to certain POI categories that were preinstalled on your Navman or available by subscription, such as Safety Cameras. If you have a route set, the warnings will occur when you are a certain distance (set by the Warning Distance preference) from the POI on your route. -
Page 80: Gps
GPS Status Signals are transmitted by Global Positioning System (GPS) satellites orbiting the Earth. The GPS Status screen provides a visual representation of the information being received. Latitude and longitude are displayed, along with ground speed and the heading in degrees. The strength of each satellite is displayed on a bar chart. -
Page 81: Setting Your Gps Mode
Setting your GPS mode Complete the following: If you want to ... Then... use GPS select the Normal option. use WAAS select the WAAS (only available in USA) option. use EGNOS select the EGNOS (only available in Europe) option. Note: WAAS - Wide Area Augmentation System is a navigation system developed for civil aviation by the Federal Aviation Administration (FAA), a division of the United States Department of Transportation (DOT). -
Page 82: Language
Language Complete the following: If you want to ... Then... enable voice guidance select the Enable voice guidance check box. change the voice scheme select your preferred voice scheme from the Voice Guidance box. Note: Only voice schemes that are compatible with the chosen language are displayed. change the on-screen language select your preferred language from the Language box and tap Yes. -
Page 83: Traffic
Traffic Note: Traffic information is only available on selected model and in selected countries. You can view your current traffic system status and change options by customizing the traffic preferences. Traffic System Status From the Traffic Overview screen: The Tuner section displays the name and frequency of the radio station currently being used to receive traffic event information. -
Page 84: Traffic Event Notification
Traffic Event Notification From the Traffic Overview screen: Complete the following: If you want to ... Then ... turn on/ off traffic event notification select the Notify me about nearby traffic events check box to receive traffic event notification. clear the Notify me about nearby traffic events check box to turn off traffic event notification. -
Page 85: Select Event Sorting Type
Select event sorting type From the Traffic Overview screen: Complete the following: If you want to ... Then ... sort events by distance select the Distance check box. sort events by road name select the Road name check box. sort events by age select the Age check box only see events that occur on your route select the Only show events on my route check box. -
Page 86: Power
Power The Battery Status bar shows the percentage of power left in the Navman battery; the words External Power will display when the battery is charging from an external power source. To charge the battery, see “How do I charge the battery?” on page 13. -
Page 87: Keyboard
Predictive text allows addresses to be searched by a single key-press for each letter, as opposed to the multiple key- presses. As you enter a letter of an address, your Navman will compare all possible combinations against the maps you have installed and determine which address you intended to type. -
Page 88: Units
Units You can change the units used by your Navman by customizing the measurements preferences. Units 1/2 Complete the following: If you want to ... Then... change the time format select either the 12 hour or 24 hour option. change the distance units select your preferred distance unit type from the Distance Units options. -
Page 89: Units 2/2
Units 2/2 Complete the following: If you want to ... Then ... change the latitude, select either the Decimal degrees or the Degrees, minutes and seconds option. longitude position format Your preferences are automatically saved. -
Page 90: Start-Up
Then... show the Tutorial when you turn on your select the Show the Tutorial checkbox. Navman show the Language Selection screen when you select the Show the Language Selection screen checkbox. turn on your Navman Your preferences are automatically saved. -
Page 91: Saved Info
Saved Info Complete the following: If you want to ... Then... delete recent locations tap Delete Recent Locations. delete favourites tap Delete Favourite Destinations. delete avoid areas tap Delete Avoid Areas. restore factory default settings tap Restore Factory Defaults. Note: The Restore Factory Defaults option does not delete recent locations or saved favourite destinations. -
Page 92: Tutorial
Tutorial The Tutorial displays when you turn your Navman on, unless you have cleared the Show tutorial on start-up check box. You can view the Tutorial at any other time: To prevent the Tutorial from displaying again on startup, clear the Show tutorial on start-up check box to clear it. -
Page 93: About
About This preference contains copyright and trademark information. Shop Demo Complete the following: If you want to ... Then... enable a shop demonstration of tap Shop Demo on the preference screen. After a short delay, a route will be SmartST to be played demostrated. -
Page 94: Reference
The remaining battery power may be too low to run your Navman. Charge the battery power. battery. Screen responds slowly. Make sure that your Navman is not running out of battery power. If the problem still persists, reset your Navman. Screen freezes. Reset your Navman. (See “Shutdown and hardware reset” for information.) Screen is hard to read. -
Page 95: Point Of Interest Categories
Point of Interest categories Icon Description Icon Description Airline Access Airport Amusement Park Beach Camping Ground Car Dealer Car Repair Facility Casino Cemetery Cinema College/University Concert Hall Convention Centre Courthouse Cultural Centre Dentist Doctor Embassy Exhibition Centre Ferry Terminal Frontier Crossing General POI Golf course Government Office... -
Page 96: Branded Points Of Interest
Branded Points of Interest Branded Points of Interest are available on some maps. These include well-known restaurants, accommodation providers, tourist attractions, petrol stations, etc. The icon will usually display the company logo. Point of Interest categories by Navman Icon Description... - Page 97 Traffic Any event that will cause a delay on a route. Weather Weather conditions are adversely affecting a route; for example, there is ice on the road. Warnings Weather conditions are adversely affecting a route; for example, there is ice on the road it is not serious enough to be considered a dangerous situation;...
-
Page 98: Safety Camera Pois
Safety Camera POIs Navman products are designed to be used as an aid to safer driving. You can receive messages to alert you to locations of safety cameras, which will enable you to monitor your speed through these areas. Navman does not warrant that all types and locations of safety camera data are available, as cameras may be removed, relocated or new cameras installed. -
Page 99: Copyright
Back-On-Track, Drive-Away, NavDesk, SmartST, and Turn-by-Turn are either registered trademarks NavPix or trademarks of MiTAC International Corporation and are used under licence by Navman Europe. All rights reserved. Microsoft, Windows, Windows Vista and Internet Explorer are either registered trademarks or trademarks of Microsoft Corporation in the United States and/or other countries. -
Page 100: For More Information
Your Navman contains pre-loaded safety camera information. To extend your safety camera subscription, purchase the NavDesk DVD to install the NavDesk software on your computer. Online support For 24/7 help and support with Navman products, visit our Technical Support website at: www.navman.com.
Need help?
Do you have a question about the F37M and is the answer not in the manual?
Questions and answers