Table of Contents
Advertisement
Quick Links
1. Introduction to RoMI/O _______________________________________________4
2. Description of RoMI/O ________________________________________________4
3. System Requirement __________________________________________________5
4. Hardware Installation _________________________________________________6
1) Hardware Installation ______________________________________________6
2) Driver Installation _________________________________________________7
5. Setting in Applications _______________________________________________14
1) PC______________________________________________________________14
Cubase SX _______________________________________________________14
Logic ____________________________________________________________15
Sonar ____________________________________________________________16
2) MAC____________________________________________________________17
Cubase SX _______________________________________________________17
Nuendo __________________________________________________________18
Reason___________________________________________________________19
All features and specifications subject to change for the better performance without notice.
INDEX
Second Edition, APR. 2004
3
Advertisement
Table of Contents

Related Manuals for ESI RoMI/O


Summary of Contents for ESI RoMI/O
-
Page 1: Table Of Contents
INDEX 1. Introduction to RoMI/O _______________________________________________4 2. Description of RoMI/O ________________________________________________4 3. System Requirement __________________________________________________5 4. Hardware Installation _________________________________________________6 1) Hardware Installation ______________________________________________6 2) Driver Installation _________________________________________________7 5. Setting in Applications _______________________________________________14 1) PC______________________________________________________________14 Cubase SX _______________________________________________________14 Logic ____________________________________________________________15 Sonar ____________________________________________________________16 2) MAC____________________________________________________________17 Cubase SX _______________________________________________________17 Nuendo __________________________________________________________18... -
Page 2: Introduction To Romi/O
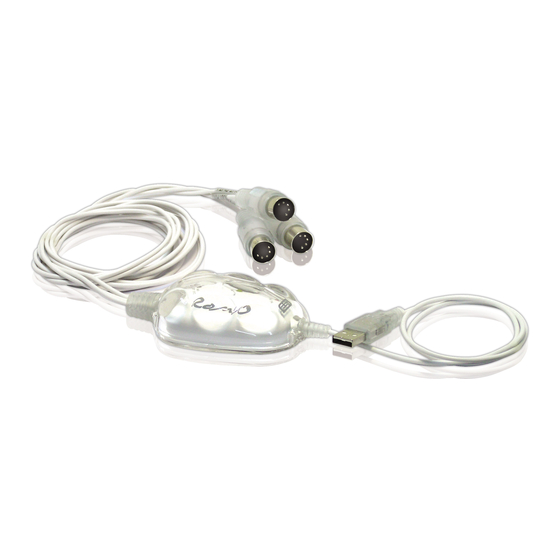
1. Introduction to RoMI/O Thank you for choosing ESI Miditerminal RoMI/O. The RoMI/O is a convenient 1 in 2 out, 32 channels USB MIDI Interface for PC and MAC computer. With the RoMI/O you can obtain perfect MIDI timing and effective audio performance at an extremely affordable price. -
Page 3: System Requirement
1. We don’t recommend using many USB devices with the RoMI/O via USB hub at the same time. It may cause Input data lose. 2. Some old mainboard that using OHCI (open host controller interface) may cause problem. 3. Check our web site http://www.esi-pro.com occasionally for the most recent update information or technical issues. -
Page 4: Hardware Installation
4. Hardware Installation 1) Hardware Installation Before you begin, make sure you have read your computer’s manual on installing USB devices. Your computer’s manual should describe the precautions you should take. Shutting down computer wouldn’t need for installing an USB device to the computer. However, we will take it from the start to make sure you can follow every detail of installation. -
Page 5: Driver Installation
2) Exclusive Driver Installation 1. Windows XP/2003 Just plug the USB device, and Insert ESI installation CD into your CD-Rom drive. Go to ESI folder -> RoMI/O folder And run Romio.exe. 2. Windows 2000/ME Don't plug the USB device before install the driver. - Page 7 With Windows 2000 and XP installations, a message might appear stating “The software has not passed Windows Logo testing to verify its compatibility with Windows XP.” Though the message appeared, the driver is completely tested and verified by ESI and is safe to use. You can ignore the message and just click ‘Yes’.
- Page 8 3) After finishing the driver installation, plug the USB device to your computer. In the case of Windows 2000, you may see this message again. Simply ignore the message and just click ‘Yes’.
- Page 9 4) Go to ‘My computer-> Console -> Sounds and multimedia Properties -> MIDI tab. Select RoMI/O as your playback device.
- Page 10 * In some case of Windows 2000, after rebooting your computer, you may find the following message again. Just ignore and click ‘Yes’.
- Page 11 In Mac OS 10.1 (Jaguar) or later, you can check if your RoMI/O is recognized properly by using Audio MIDI Setup application in Applications/Utilities folder. Launch the Audio MIDI Setup application and click the MIDI Devices tab on the Audio MIDI Setup window. If the RoMI/O is recognized properly, the ESI-RoMI/O icon will be appeared on the window.
-
Page 12: Setting In Applications
5. Setting in Applications * This chapter only contains the basic setup for some of the software. For more detailed information, please refer to the manual of the software. 1) PC Cubase SX In Cubase, set input and output as RoMI/O MIDI. See red circle of below picture. -
Page 13: Logic
Logic In Logic, you can choose a port for a MIDI track in the instrument parameter box in Arrange Window. In addition, go to ‘Synchronization’ -> ‘MIDI’ and uncheck ‘Transmit MIDI clock’ for better performance. -
Page 14: Sonar
Sonar After launching Sonar, Go to Option -> MIDI devices setting and Select RoMI/O MIDI. -
Page 15: Mac
2) MAC As long as the RoMI/O is recognized by Mac OS X with no problem, all the applications that support CoreMIDI should work fine with the RoMI/O. Here are some examples of how to change application settings for using the RoMI/O. -
Page 16: Nuendo
Nuendo In Nuendo, you can choose a port for a MIDI track in the Track List area. -
Page 17: Reason
In Reason, open the Preferences window and you can choose a port for MIDI input in the MIDI Page. * Parts of this manual are continually being updated. Please check our web site www.esi-pro.com occasionally for the most recent update information.
Need help?
Do you have a question about the RoMI/O and is the answer not in the manual?
Questions and answers