
Related Manuals for AEG COMPETENCE D5701-5


Summary of Contents for AEG COMPETENCE D5701-5
- Page 1 COMPETENCE D5701-5 Built-in Electric Multifunction Double Oven Installation and Operating Instructions PERFEKT IN FORM UND FUNKTION...
-
Page 2: Important Safety Information
Do not stand too close to the oven or grill while in use as warm air will exhaust from the grill cavity and the vents on the front frame of the appliance. -
Page 3: Table Of Contents
Hints And Tips Grilling Chart Second Oven Using Second Oven Things to Note To Fit The Second Oven Shelf Hints And Tips Second Oven Cooking Chart Ventitherm ® Precision Fan Cooking Using Ventitherm ® Precision Fan Cooking Things To Note... -
Page 4: Description Of The Appliance
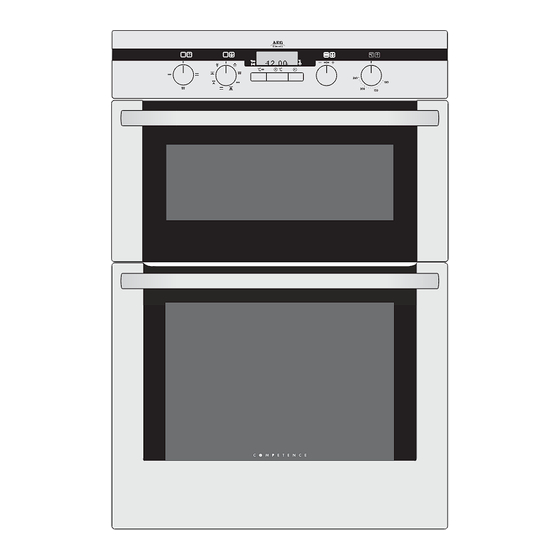
BUILT-IN ELECTRIC MULTIFUNCTION DOUBLE OVEN Electronic Timer Control Panel Second Oven/Grill Main Oven Your built-in oven comprises of a conventional second oven and dual grill in the top compartment. The multifunction oven can be automatically controlled by the electronic timer. -
Page 5: Getting To Know Your Appliance
GETTING TO KNOW YOUR APPLIANCE THE CONTROL PANEL - Second Oven/Grill Function Selector - Second Oven/Grill Function Selector Neon - Multifunction Selector Oven Light Full Width Grill Single Economy Grill Ventitherm ® Precision Fan Cooking Conventional Cooking Rotitherm Roasting Pizza... -
Page 6: Grill And Oven Furniture
GRILL AND OVEN FURNITURE The following items of oven furniture have been supplied with the appliance:- 1 grill pan 2 grill pan handles 1 grill pan grid 1 straight shelf (for grilling and second oven cooking) 3 straight shelves (for main oven... -
Page 7: Before Using The Appliance
WHEN FIRST SWITCHING ON The oven has a 24 hour clock. When the oven is first switched on at the wall the electronic display will automatically show 12.00, and the 'Time' ( will also flash. -
Page 8: Electronic Timer
G TIME SELECTOR BUTTON TIME/TEMPERATURE BUTTON SPEEDCOOK BUTTON NOTE: The time of day must be set before the main oven will operate manually. 1. HOW TO SET THE TIME OF DAY The oven has a 24 hour clock. When the electricity supply is first switched ON, the display will show 12.00 and the 'Time' indicator neon... - Page 9 Ensure the electricity supply is switched ON and that the correct time of day is displayed, e.g. 9.am. as Fig. 6. ii) Set the main oven controls to the required function and temperature. iii) Place food in the oven. iv) To set the length of cooking time, press the Time...
- Page 10 Ensure the electricity supply is switched ON and that the correct time of day is displayed, e.g. 10.00am as Fig. 9. ii) Set the main oven controls to the required function and temperature. iii) Place food in the oven.
-
Page 11: Other Functions
12.00, and all programming will be cancelled. 7. AUTOMATIC COOKING It is advisable to leave food in the oven for as short a time as possible before automatic cooking. Always ensure commercially prepared food is well within its use by date and that home prepared food is fresh and of good quality. -
Page 12: Activating The Child Safety Device
THE MAIN OVEN CHILD SAFETY DEVICE The oven cannot be used from the moment the child safety device has been switched on. ACTIVATING THE CHILD SAFETY DEVICE •... -
Page 13: Full Width Dual Grill
To operate the grill, pop out and turn the second oven/grill function selector for full grill. • Pop out and turn the second oven/grill function selector for centre section only. • Turn the temperature control knob to the right as far as it will go. -
Page 14: The Grill Pan And Handles
THE GRILL PAN AND HANDLES The grill pan is supplied with removable handles. To attach the handles, place the wirework under the cut out in the pan so that the metal plate hooks over the top of the grill pan. Ensure the handles are positively located. -
Page 15: Grilling Chart
• Preheat the grill on full setting for a few minutes to seal meat or for toasting. setting and the shelf position as necessary during cooking. • The food should be turned over during cooking as required. GRILLING CHART FOOD POSITION Bacon Rashers Adjust... -
Page 16: Second Oven
SECOND OVEN The second oven is the smaller of the two ovens. It is heated by elements in the top and bottom of the oven. It is designed for cooking smaller quantities of food. It gives especially good results if used to cook fruit cakes, sweet and savoury flans or quiche. -
Page 17: Hints And Tips
• Stand dishes on suitably sized baking trays on to prevent spillage onto the oven base and to help reduce cleaning. • The material and finish of the baking tray and... -
Page 18: Second Oven Cooking Chart
Soufflés Vegetables: Baked Jacket Potatoes Roast Potatoes Yorkshire Puddings: Large Individual * = Shelf on the oven base Note: Shelf positions are counted from the bottom of the oven upwards. SECOND OVEN SHELF COOKING POSITION TEMP°C 170 - 190 200 - 220... -
Page 19: Ventitherm ® Precision Fan Cooking
5 – 10 minutes on the recommended cooking times. For recipes needing high temperatures, e.g. bread, pastries, scones, soufflés etc., best results are achieved if the oven is preheated first. For best results when cooking frozen or cooked chilled ready meals always preheat the oven first. -
Page 20: To Fit The Main Oven Shelves
A slight increase in cooking time may be necessary. • Do not place baking trays directly on the oven base as it interferes with the oven air circulation and can lead to base burning; use the lower shelf position. -
Page 21: Conventional Cooking
It is particularly suitable for dishes which require extra base browning such as pizzas, quiches and flans. Gratins, lasagnes and hotpots which require extra top browning also cook well in the conventional oven. For best results cook on one level. -
Page 22: Hints And Tips
• Stand dishes on a suitably sized baking tray on the shelf to prevent spillage onto the oven base and to help reduce cleaning. • The material and finish of the baking tray and dishes used will affect the degree of base browning. -
Page 23: Main Oven Cooking Chart
Pastry: Choux Shortcrust Flaky Puff Plate Tarts Quiches/Flans Scones Note: Shelf positions are counted from the bottom of the oven. It may be necessary to increase or decrease the VENTITHERM ® PRECISION FAN COOKING Position Cooking Temp °C Shelf 180 - 190... -
Page 24: Roasting Chart
ROASTING CHART INTERNAL TEMPERATURES – Rare : 50-60°C; Medium : 60-70°C; Well done : 70-80°C MEAT Beef/ Beef boned Mutton/Lamb Pork/Veal/Ham Chicken Turkey/Goose Duck Pheasant Rabbit The roasting temperatures and times given in the chart should be adequate for most joints, but slight adjustments may be required to allow for personal requirements and the shape and texture of the meat. -
Page 25: Main Oven Full Width Grill
Wait 5 seconds until your choice is confirmed. The temperature will automatically set to 250°C. • If you wish to alter the set temperature, you may do so by pushing out and turning the main oven increase/decrease selector ( temperature setting is reached. THINGS TO NOTE •... -
Page 26: Hints And Tips
HINTS AND TIPS • Most foods should be placed on the grid in the grill pan to allow maximum circulation of air to lift the food out of the fats and juices. • Adjust the grid and grill pan runner position to allow for different thicknesses of food. -
Page 27: Pizza
PIZZA This setting can be used for foods such as pizza where base browning and crispness are required. The top and lower elements operate in conjunction with the oven fan. USING PIZZA • Pop out and turn the multifunction selector to Pizza. -
Page 28: Rotitherm Roasting
One of the advantages is that larger loads can be cooked at the same time. The lower part of the oven can be used to cook accompaniments at the same time, e.g. tomatoes and mushrooms with a mixed grill or breakfast. -
Page 29: Hints And Tips
Heating through and Browning, e.g. Au -gratin, Lasagne, Shepherd's Pie. NOTE: Shelf positions are counted from the bottom of the oven. Times quoted above are given as a guide and should be adjusted to sit personal taste. FOOD SHELF TEMP (°C) -
Page 30: Speedcook
SPEEDCOOK Speedcook is ideal for quick preheating of the oven. USING SPEEDCOOK After a cooking function has been selected and the temperature has been adjusted, the cavity will gradually heat up until the selected temperature is reached. This will take from 10 to 15 minutes, depending on selected function and temperature. -
Page 31: Fan Controlled Defrosting
This main oven function enables you to defrost most foods without heat faster than some conventional methods as the oven fan circulates air around the food. It is particularly suitable for delicate frozen foods which are to be served cold e.g. cream filled gateaux, cakes covered with icings or frostings, cheesecakes, biscuits, scones, etc. -
Page 32: Care And Cleaning
REMOVING AND REPLACING WIREWORK RUNNERS Remove all shelves and furniture from the oven. Hold the wirework at the bottom, unclip from the cavity side and gently pull towards the centre of the oven. -
Page 33: Cleaning Inside The Ovens
Stayclean surfaces destroy splashes of food and fats when the oven temperature is raised to around 220°C. It is a good idea to run the oven for an hour or two per week to ensure continued good performance from the Stayclean finish. -
Page 34: Cleaning The Door(S)
• Impregnated pads unsuitable for non- stick saucepans • Brillo/Ajax pads or steel wool pads • Chemical oven pads or aerosols • Rust removers • Bath/Sink stain removers Under no circumstances should the door assembly be detached from the product for cleaning. -
Page 35: To Replace The Inner Glass Door Panel
All removable parts, except the grill pan handle can be washed in the dishwasher. The grill pan, grill pan grid, and oven shelves may be cleaned using a soap impregnated steel wool pad. Soaking first in hot soapy water will make cleaning easier. - Page 36 4. Unscrew the bulb by turning it to the left. 5. Fit a new bulb and then replace the glass bulb cover. 6. Refit the wirework runners and replace the oven shelves. 7. Restore the electricity supply and reset the time of day.
-
Page 37: Something Not Working
Check that the recommended temperatures and shelf positions are being used. The oven light bulb may need replacing. If the Main Oven is set for automatic cooking the light will illuminate when the cook time begins. Check that the oven is level. -
Page 38: Service And Spare Parts
Tel: +353 (0) 1 4090754 Email: service.eid@electrolux.ie CUSTOMER CARE DEPARTMENT For general enquires concerning your AEG-Electrolux appliance, or for further information on AEG-Electrolux products, please contact our Customer Care Department by letter or telephone at the address below or visit our website at www.aeg-electrolux.co.uk... -
Page 39: Guarantee Conditions
3. Should guarantee repairs be necessary the purchaser must inform the nearest customer service office (AEG- Electrolux's service or authorised agent). AEG-Electrolux reserves the right to stipulate the place of repair (i.e. the customer’s home place of installation or AEG-Electrolux workshop). -
Page 40: Technical Details
TECHNICAL DETAILS Voltage: 230-240 Volts AC 50Hz Wattage: 5.8-6.3kW Height: 897 mm Width: 592 mm Depth: 563 mm (excluding handles and knobs) Weight: 59kg This appliance complies with: European Council Directive 73/23/EEC. EMC Directive 89/336/EEC. CE Marking Directive 93/68/EEC. Energy Label Directive 2002/40/EC. -
Page 41: Installation Instructions
(Fig.3). • If your cabinet interior dimension is between 565- 570mm the oven may still be fitted. However, a minor modification to the cabinet will be required to reduce the aperture size down to 560-565 mm, to allow the product to be securely screwed into the cabinet. -
Page 42: Choice Of Electrical Connection
3mm contact separation in all poles and neutral. c) If you wish to connect an oven and a hob to a cooker point you can by connecting the oven and hob separately to the cooker point. Oven and hob units should be separately connected to a cooker point. -
Page 43: Recommended Cabinet Dimensions
RECOMMENDED CABINET DIMENSIONS (IN MILLIMETRES) Cross section through cabinet showing oven positioned Fig. 3 Built In Installation... -
Page 44: How To Finish Unpacking
HOW TO FINISH UNPACKING • Place packed appliance next to the space in which it will be installed. • Remove the appliance packing except for bottom tray which should be left in position until the appliance is ready to be fitted into its cabinet. NOTE: It is imperative that the appliance is left in the base to protect both the appliance and the floor. -
Page 45: Connecting To The Mains Terminal
CONNECTING TO THE MAINS TERMINAL Warning: This appliance must be earthed. • We recommend you use a new length of 6mm twin core and earthed cable to ensure your safety. • Make connection as shown in Fig. 7 by proceeding as follows:- •... -
Page 46: Fitting Into The Cabinet
See Fig. 8. • Take out all oven furniture before installation to reduce the weight you need to lift. The oven door should be taped up to keep it closed whilst lifting. • To place the appliance into the cabinetry follow the procedure below: •... -
Page 47: Notes
NOTES... -
Page 48: Important Notice
In line with our continuing policy of research and development, we reserve the right to alter models and specifications without prior notice. This instruction booklet is accurate at the date of printing, but will be superseded if specifications or appearance are changed. AEG-ELECTROLUX MAJOR APPLIANCES, ADDINGTON WAY, LUTON, BEDFORDSHIRE LU4 9QQ.
Need help?
Do you have a question about the COMPETENCE D5701-5 and is the answer not in the manual?
Questions and answers