Sign In
Upload
Download
Table of Contents
Contents
Add to my manuals
Delete from my manuals
Share
URL of this page:
HTML Link:
Bookmark this page
Add
Manual will be automatically added to "My Manuals"
Print this page
×
Bookmark added
×
Added to my manuals
Manuals
Brands
Asus Manuals
Cell Phone
nuvifone M10
Owner's manual
Asus nuvifone M10 Owner's Manual
Owners manual
Hide thumbs
1
2
3
Table Of Contents
4
5
6
7
8
9
10
11
12
13
14
15
16
17
18
19
20
21
22
23
24
25
26
27
28
29
30
31
32
33
34
35
36
37
38
39
40
41
42
43
44
45
46
47
48
49
50
51
52
53
54
55
56
57
58
59
60
61
62
63
64
65
66
67
68
69
70
71
72
73
74
75
76
77
78
79
80
81
82
83
84
85
86
87
88
89
90
91
92
93
94
95
96
97
98
99
100
101
102
103
104
105
106
107
108
109
110
111
112
113
114
115
116
117
118
119
120
121
122
123
124
125
126
127
128
page
of
128
Go
/
128
Contents
Table of Contents
Troubleshooting
Bookmarks
Table of Contents
Register Your Product
Update the Software
Nümaps Guarantee
Additional Maps
Table of Contents
Get Started
Nüvifone Device Features
Setting up the Device
Install the Battery
Install the Microsd Card
Replace the Battery Cover
Charge the Battery
Turn on Your Nüvifone
Mount the Nüvifone in Your Vehicle
Get to Know Your Nüvifone
Use the Home Screen
Use the Keys
Scroll the Screen
Use the On-Screen Buttons
Use the On-Screen Keyboard
Use the Stylus
Rotate the Nüvifone
Learn more
View the Status
Adjust the Volume
Lock Your Nüvifone
Acquire GPS Satellite Signals
Close Applications
Switch between Applications
Status Bar Icons
Use the Phone
Open the Phone Application
Dial a Number
Use In-Call Options
Receive a Call
End a Call
Set up Voice Mail
Call Voice Mail
Place a Conference Call
View Call History
Turn off the Phone
Turn on Flight Mode
Manage Your Contacts
Add a Contact
Call a Contact
Search for a Contact
Navigate to a Contact
Add a Contact to Favorites
Copy from Contacts to Your SIM Card
Copy Items from Your SIM Card to Contacts
Add Items to Your SIM Card
Search for Locations
Set Your Home Location
Find an Address
Go! Page Options
Find a Nearby Location
Learn about Locations
Send a Found Location
Change the Search Area
Find a Point of Interest
Find a Location Using Local Search
Find Favorites
Find Recently Found Locations
Find a Location Using the Map
Find Cities
Find Intersections
Enter Coordinates
Find Selected Text
Follow Your Route
View the Route Details
See the Next Turn
Junction View
View the Trip Computer
Take a Detour
Stop the Route
Add Points to the Active Route
Save the Active Route
About Traffic
Use the Navigation Tools
Browse the Map
Use the Where am I? Page
Work with Favorites
Work with Routes
Navigate a Saved Route
Edit Avoidances
Work with Tracks
Use Connected Services
About Connected Services
Find Fuel Prices
Find Local Events
Find Movie Times
Find Parking
Download Safety Cameras
Use the White Pages Phone Directory
View Geonews
Send and Receive Messages
Send an Sms/Text Message
Send a Multimedia Message (MMS)
Create a Voice MMS Message
Send a Location Message
Read Messages
Set up an E-Mail Account
Send an E-Mail Message
Read an E-Mail Message
Manually Send/Receive E-Mail Messages
Synchronize E-Mail Messages
Connect with Friends
Use Ciao
Join Ciao
Accept or Decline an Invitation
Change Your Display Name
View Friends
Remove a Friend
Connect with Friends on Facebook
Use Messenger
Use the Browser
Search the Internet
Look up a Term in a Wiki Web Site
Adjust the Web Page View
Save a Web Page to Favorites
Read the News
Use Newstation
Create a New Category
Edit a Channel
Add a Channel
Export Content
Set up SMS Cell Broadcast
Play Music
Play a Song
Use the Headset to Control Playback
Save a Song as a Ring Tone
Take and View Pictures and Videos
Take a Picture
Take a Picture with GPS Information
Record a Video
Send a Picture or Video
Change the Camera and Video Settings
Copy Pictures and Videos to Your Device
View Pictures
Delete a Picture or Video
View a Slideshow
Play a Video
Upload Pictures and Video
Change Media Gallery Settings
Play a Video Stream
Organize Your Life
Use the Calendar
Check Flight Status
Check the Weather
View Stock Information
Use Tasks
Use the Alarms
Add a World Clock
Use the Count-Down Timer
Use the Stopwatch
Convert Currency
Use the Calculator
Type a Note
View Adobe ® Pdfs
Download Applications
Access Your Nüvifone Data Using Your Computer
Use Microsoft Office Mobile
Backup and Restore Files
Search for Files
Synchronize Your Nüvifone
Install and Configure Activesync on Your Computer
Synchronize Using the USB Cable
Synchronize Using Bluetooth ® Technology
Enable the USB Connection Mode Page
Synchronize with an Exchange Server
Synchronize with Your Windows Live Account
Connect with Other Devices
About Bluetooth
Use Internet Sharing
Manage Wireless Connections
Set up a Wi-Fi Connection
Exchange Files Using FTP
Customize Your Nüvifone
Adjust the Screen Settings
Access the System Volume
Rearrange the Start Menu
Customize the Home Screen
Customize the Phone Settings
Adjust Your Regional Settings
Lock the Phone with a Password
Change the Power Settings
Configure Your Phone Network Profile
Adjust the Navigation Settings
Change the Gps Settings
Remove Programs
View Device Information
Restore the Default Settings
Appendix
Reset the Nüvifone
Battery Information
Change the Fuse in the Vehicle Power Cable
Mount on Your Dashboard
Remove the Nüvifone, Cradle, and Mount
Care for Your Device
Specifications
Important Safety and Product Information
Declaration of Conformity
Radio Frequency Exposure
Troubleshooting
Index
Advertisement
Quick Links
Download this manual
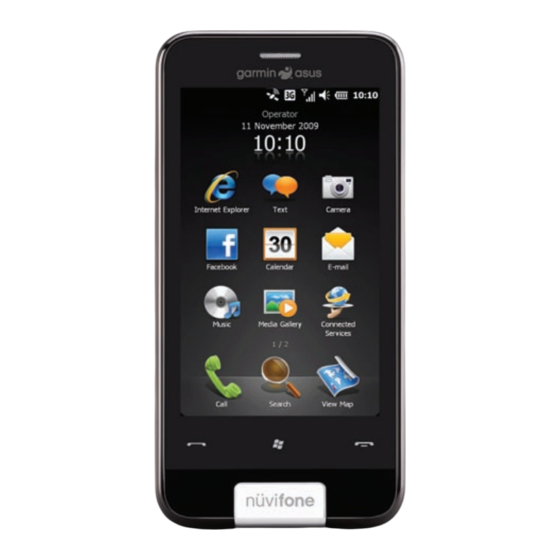
nüvifone
M10
™
owner's manual
Table of
Contents
Previous
Page
Next
Page
1
2
3
4
5
Advertisement
Table of Contents
Need help?
Do you have a question about the nuvifone M10 and is the answer not in the manual?
Ask a question
Questions and answers
Related Manuals for Asus nuvifone M10
Cell Phone Asus M307 M307 Owner's Manual
Asus cell phone owner's manual (78 pages)
Cell Phone Asus M530w User Manual
User manual (145 pages)
Cell Phone Asus M530w Service Manual
Level 3 & level 4 service manual (93 pages)
Cell Phone Asus M530w Quick Start Manual
(86 pages)
Cell Phone Asus M930 User Manual
User manual (138 pages)
Cell Phone Asus M930 Troubleshooting Manual
(67 pages)
Cell Phone Asus M10E Owner's Manual
Owners manual (128 pages)
Cell Phone Asus nuvifone M20 Owner's Manual
Owners manual (114 pages)
Cell Phone ASUS Pasfone mini 4.3 User Manual
(23 pages)
Cell Phone Asus Zenfone Max M1 User Manual
(23 pages)
Cell Phone Asus M303 Basic Information
(50 pages)
Cell Phone Asus M303 Manual
(345 pages)
Cell Phone Asus Zenfone Max M2 User Manual
(76 pages)
Cell Phone Asus Zenfone 4 User Manual
(100 pages)
Cell Phone Asus ZenFone Selfie User Manual
(157 pages)
Cell Phone Asus Zenfone 2 Laser User Manual
(154 pages)
This manual is also suitable for:
M10e
Table of Contents
Print
Rename the bookmark
Delete bookmark?
Delete from my manuals?
Login
Sign In
OR
Sign in with Facebook
Sign in with Google
Upload manual
Upload from disk
Upload from URL


Need help?
Do you have a question about the nuvifone M10 and is the answer not in the manual?
Questions and answers