Table of Contents
Advertisement
Quick Links
Advertisement
Table of Contents

Related Manuals for Akai LCT3785TA


Summary of Contents for Akai LCT3785TA
-
Page 2: Safety Guidelines
Safety Guidelines Caution: Always use a power cable is properly grounded. Please use the AC cords listed below for each area: USA ......UL Canada ....CSA/cUL FCC Information This equipment has been tested and found to comply with the limits for a Class B digital device, pursuant to part 15 of the FCC Rules. -
Page 3: Important Safeguards
IMPORTANT SAFEGUARDS Important Safeguards Before using your TV, please read these instructions completely, and keep this manual for future refer- ence. Carefully observe and comply with all warnings, cautions and instructions placed on the unit or described in the operating instructions or service manual. The User Manual uses the following symbols, to ensure a safe operation and prevent any dam- age to operators or properties: WARNING ----- Ignorance or inappropriate use may cause damage to... - Page 4 Never use a damaged power cord: Heavy objects, heat, or tensile force may damage the power cord and cause fire or electric shock. Never block or cover the slots or openings, in the TV cabinet back, bottom, and sides. Never place the TV: on a bed, sofa, rug, or similar surface;...
- Page 5 IMPORTANT SAFEGUARDS The power cable should be kept away from heat sources: The heat produced by any heat source may melt the covering of the power cable. Unplug the connector Hold the power connector when removing the power cable: Pulling the power cable itself may damage the vires inside the cable and cause fire or electric shock.
-
Page 6: Precaution
Although the LCD screen is made with high-precision technology and has effective pixels of 99.99% or more, black dots may appear or bright points of light (red, blue, or green) may appear constantly on the LCD screen. This is a structural property of the LCD panel and is not a malfunction. -
Page 7: Table Of Contents
CONTENTS BEFORE USE Contents Safety Guidelines ......1 Adjustment of “Balance” ....24 Important Safeguards ......2 Selection of “Surround” ....24 Precaution ......... 5 Using the Setup Menu ......25 1. Before use ........7 Selection of “Language” ....25 Setting of “V-Chip”... -
Page 8: Before Use
1. Before use The product is a 37” WXGA (WXGA resolution) LCD TV Player. It has passed the UL and cUL safety certifications, and is an ideal product for personal and commercial use. The product is a precise electronic product. Users should read the following instructions carefully to maximize the performance and life span of the product: 1.1 Open the Package - The product is packaged in a carton together with other standard accessories. -
Page 9: Product Features
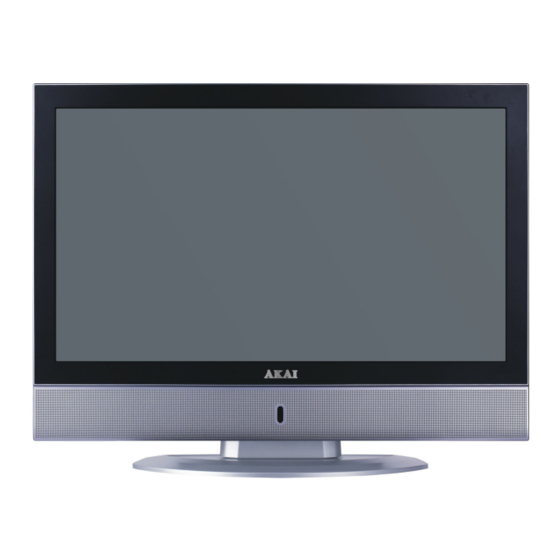
PRODUCT FEATURES PRODUCT FEATURES SIDE VIEW FRONT VIEW 2. Product Features The 37” LCD TV Player provides quality image displays and is suitable for a variety of multi media applications: Available input signals The product provides HDMI input connector. The product provides VGA (D-Sub 15 PIN) input connector. The product supports PC images resolutions up to (1024 x 768@60Hz) with a vertical frequency of 60Hz. -
Page 10: Names And Functions Of Parts
4. Names and Functions of Parts 4.1 Side View The functions of the buttons are described as follows: Sketch map STANDBY: Press (Standby) to turn on and turn off. VOL.+/- A. They are used as buttons in the OSD Menu screen. -
Page 11: Rear View
REAR VIEW REMOTE CONTROL 4.3 Rear View Sketch map Push the power switch (O: Off, I: On). Use the power cord connect to an earthed 120V, 60Hz AC outlet. Signal input and other terminals: ANT1 & ANT2: 75Ω Coaxial connector for Antenna/Cable Network. Note: ANT 1 is for ATSC (DTV), and ANT 2 is for NTSC. -
Page 12: Remote Control
4.4 Remote Control Power ( ): Press to turn on and off. Mute ( ): Press to mute the sound. Press again or press VOL+/- to restore the sound. 0~9 Number Buttons: In TV mode, press 0~9 to select a channel; the channel changes after 2 seconds. - Page 13 REMOTE CONTROL CONNECT ACCESSORY DEVICES Insertion of Batteries - Turn the remote control upside down, press and slide off the battery cover. - Insert two 1.5V (AAA) batteries into the compartment, take care to observe the markings indicated inside. - Replace the cover and slide in reverse until the lock snaps. Sketch map Range of Remote Control - Ensure the remote control is pointed towards...
-
Page 14: Connect Accessory Devices
5. Connect Accessory Devices Connecting a DVD player or other equipment Switch off LCD TV and external equipment before connecting cables. Connect a DVD player or other equipment’s Component Video Out (Y,Pb,Pr/Y,Cb,Cr) to the LCD TV’s corresponding Component In (Y,Pb,Pr/Y,Cb,Cr) terminal on COMP1 or COMP2. - Page 15 CONNECT ACCESSORY DEVICES Connecting the DVD player or HDTV Set-top box using HDMI input Switch off TV and external equipment before connecting cables. Connect the LCD TV to the DVD player or HDTV Set-top box with the HDMI cable. Connect the DVI AUDIO input terminal to the audio output terminal of HDTV Set-top box with DVI output terminal, and a DVI to HDMI conversion cable should be adopted.
- Page 16 Connecting the DVD or VCR player devices Switch off TV and external equipment before connecting cables. Connect a DVD or VCR player’s Video Out to the TV’s Video In terminal by a Video cable. Connect a DVD or VCR player’s S-VIDEO Out to the TV’s S-VIDEO In terminal by a S-VIDEO cable.
- Page 17 CONNECT ACCESSORY DEVICES BASIC OPERATION Connect to antenna ATSC (DTV) & NTSC input connection config 1. There are two Antennas: - ANT 1 is only for ATSC channel of Air. - ANT 2 is only for Air or Cable Signal of NTSC. 2.
-
Page 18: Basic Operation
6. Basic Operation 6.1 Power ON/OFF The Display is in Standby mode. - Press the Power on the remote control or on the control panel to turn on the unit. The power indicator changes from red to green. Power - Press the Power on the remote control or on the control panel again to return the display to standby mode. -
Page 19: Using The Pip/Pbp Feature
USING THE PIP/PBP FEATURE 6.4 Using the PIP/PBP feature The PIP (picture-in-picture) /PBP (picture-in-picture) feature splits the screen into a double window that allows you to watch two programs at the same time. The POP program can come from a TV broadcast or an external source, such as a VCR. To enter the PIP/PBP window: Press PIP for selecting the different PIP modes, such as following;... - Page 20 To display a picture from an external source in the PIP/PBP window: 1. Connect the external source equipment. (refer to Connect Accessory Devices page.) 2. Select the TV program you want to watch. 3. Press PIP to display the PIP/PBP window. 4.
-
Page 21: Osd Option Adjustment
OSD OPTION ADJUSTMENT TV OPERATIONS ---- VIDEO MENU 6.5 OSD Option Adjustment Learning about the menu system After you have installed the batteries into the remote control, you will need to set some preferences on the LCD using the menu system. You can access the menu using the buttons on your LCD TV or remote control. -
Page 22: Using The Video Menu
Using the Video Menu Note: Video Menu is just for TV, AV, S-Video, YPbPr1, YPbPr2, HDMI, and DTV input source mode. It is not available in other input source mode. Adjustment of “Contrast” Press Menu button on the remote control, and then press or until the “Video”... -
Page 23: Adjustment Of "Sharpness
TV OPERATIONS ---- VIDEO MENU Adjustment of “Sharpness” Press Menu button, and then press or button until the “Video” menu appears. Contrast Press or button to highlight the Brightness item. Saturation Press or button to adjust. Sharpness Phase Press Menu or Exit button to return. -
Page 24: Selection Of "Advance Picture Adjust
Selection of “Advance Picture Adjust” Press Menu button, and then press or Contrast Brightness button until the “Video” menu appears. Saturation Press or button to highlight the Sharpness Phase item. Color Temperature Middle Press Enter Press Enter button to confirm for Advance Picture Adjust sub-selection as shown in the table below. -
Page 25: Using The Audio Menu
TV OPERATIONS ---- AUDIO MENU ---- SETUP MENU Using the Audio Menu Adjustment of “Bass” Press Menu button, and then press or button until the “Audio” menu appears. Bass Press or button to highlight the Treble item. -
Page 26: Using The Setup Menu
Using the Setup Menu Selection of “Language” Press Menu button, and then press or button until the “Setup” menu appears. Press or button to highlight the Language English V-Chip Press Enter item. Closed Caption Press or button to choose “English” Blue Back Default Press Enter... - Page 27 TV OPERATIONS ---- SETUP MENU You can press Enter button to display “Input Your Password Please” menu again, then entering the PIN code, or press ,, or button move cursor to “Cancel” and press Enter button to close up this menu. Using the “Change Password”...
- Page 28 For Movie previously shown in theaters: • G (general audience) PG-13 • PG (parental guidance suggested) • PG-13 (13 years and older) NC-17 • R (Restricted) • NC-17 (18 years and older) Blocked Rating Allowed Rating • X (Adult) If you set PG-13: G and PG movies be available, PG-13, R, NC-17, and X will be blocked. Press Menu button to exit the sub-menu.
- Page 29 TV OPERATIONS ---- SETUP MENU Unlocking programs temporarily (In TV signal source) If you try to watch a TV program that V-CHIP BLOCK exceeds the TV Rating you set, the TV TV-PG enters program lock mode. You can either unlock the program temporarily or Enter Password select a non-locked program to watch, _ _ _ _...
-
Page 30: Selection Of "Closed Caption
Selection of “Closed Caption” The closed caption features has two options: Adjustment only for TV, DTV, AV, S-VIDEO input signal. • Captions: An on-screen display of the dialogue, narration, and sound effects of the TV programs and videos that are closed captioned (usually marked as “C/C” in TV listings. -
Page 31: Selection Of "Blue Back
TV OPERATIONS ---- SETUP MENU ---- TV MENU Selection of “Blue Back” Press Menu button, and then press or button until the “Setup” menu appears. Press or button to highlight the Language English V-Chip Press Enter item. -
Page 32: Using The Tv Menu(Analog)
Using the TV Menu(Analog) Note: TV menu is only for TV input source mode, thus it is not available in other input source mode. Using the “Tuner Mode” Press Menu button, and then press or Tuner Mode Cable button until the “TV” menu appears. Searching Press Enter Press ... -
Page 33: Using The "Channel Name
TV OPERATIONS ---- TV MENU ---- GEOMETRIC MENU Using the “Channel Name” Tuner Mode Cable Press Menu button, and then press or Searching Press Enter button until the “TV” menu appears. Channel Skip Press or button to highlight the Channel Name Press Enter item. -
Page 34: Using The Geometric Menu
Using the Geometric Menu Note: If your current input source is “VGA”, push Menu button enter into this menu. It is not available in other input source mode. Using “Contrast” Press Menu button on the remote control, and then press or button until the Contrast “Geometric”... -
Page 35: Using "Auto Setting
TV OPERATIONS ---- GEOMETRIC MENU ---- DTV MENU Using “Auto Setting” Press Menu button, and then press or button until the “Geometric” menu appears. Contrast Brightness Press or button to highlight the Color Temperature User Press Enter Auto Setting item. -
Page 36: Using The Dtv Menu(Digital)
Table of Parental Setting Items Description Use “ ” to “ to select it. H Position Horizontal V Position Use “ ” to “ to move the image Position left or right. Use “ ”... -
Page 37: Using Auto/Manual Scan Item
TV OPERATIONS ---- DTV MENU Using the “Auto Scan” item The TV will begin memorizing all of the General available channels. It will takes about several minutes. Audio Language English Time Zone Eastern Time When enter the “General” menu, select SPDIF Type “Auto Scan”. -
Page 38: Using The "Caption" Menu
Using the “Channel Skip” item General When enter the “General” menu, select “Channel Skip”. Audio Language English Time Zone Eastern Time Press or button to highlight the SPDIF Type “Channel Skip” item. Auto Scan Press <Enter> Manual Scan Press <Enter>... -
Page 39: Setting Of "Parental
TV OPERATIONS ---- DTV MENU If you select “Custom”, you can change these Caption Style settings. Caption Style As Broadcaster • Font Size: This option consists of “Large”, “Small”, and “Medium”. • Font Color: This option consists of “White”, “Green”, “Blue”, “Red”, “Cyan”, “Yellow”, “Magenta”, and “Black”. -
Page 40: Epg(Electronic Program Guide)
Operate the “Channel Block” as below: When enter the “Channel Block” menu. Press or button to select an item. Press Enter button to lock or unlock. * When it display lock, you can not watch the channels. * When it display unlock, you can watch the channels. Press Menu or Exit button to exit. -
Page 41: Selecting Channel
TV OPERATIONS ---- DTV MENU TECHNICAL SPECIFICATION channel. Program Details: Displays the starting time, ending time, presenting date, content advisory of the selected program. Does not display any data when the current channel is block. Program Description: Displays the details program descriptions of the selected program. Page Index: Displays the page index for the program descriptions. -
Page 42: Technical Specification
7. Technical Specification Product Model: LCT3785TA Screen Size: 37” diagonal Screen Area: 819.6mm(H) x 460.8mm(V) Aspect Ratio: 16:9 932mm(W) x 727mm(H) x 102mm(D) (w/o Stand) External Size: 932mm(W) x 661mm(H) x 267.5mm(D) (with Stand) Net Weight: 20kg (with Stand) Resolution: 1366 (H) x 768 (V) pixels (Each pixel has R/G/B 3 color cells) Pixel Dot Pitch: 0.6mm(H) x 0.6mm(V) -
Page 43: Support The Signal Mode
SUPPORT THE SIGNAL MODE CLEAN AND SIMPLE TROUBLESHOOTING 8. Support the Signal Mode A. D-Sub Mode (VGA) Horizontal Vertical Resolution Frequency Frequency (kHz) (Hz) 31.50 60.00 640 x 480 37.86 72.81 35.16 56.25 37.90 60.32 800 x 600 46.90 75.00 48.08 72.19 1024 x 768... - Page 44 3 Cleaning of Screen: - Use a soft cotton cloth to clean the screen gently. - The screen glass is very fragile; so do not scrape it with any sharp object. Do not press or tap the screen to avoid cracking. When the screen is seriously contaminated, use a soft cloth moistened with diluted neutral cleaner to clean the Display.
Need help?
Do you have a question about the LCT3785TA and is the answer not in the manual?
Questions and answers