Table of Contents
Advertisement
Quick Links
Advertisement
Table of Contents

Subscribe to Our Youtube Channel
Related Manuals for Audiovox FPE2706DV - 27" LCD TV


Summary of Contents for Audiovox FPE2706DV - 27" LCD TV
-
Page 1: Operating Instructions
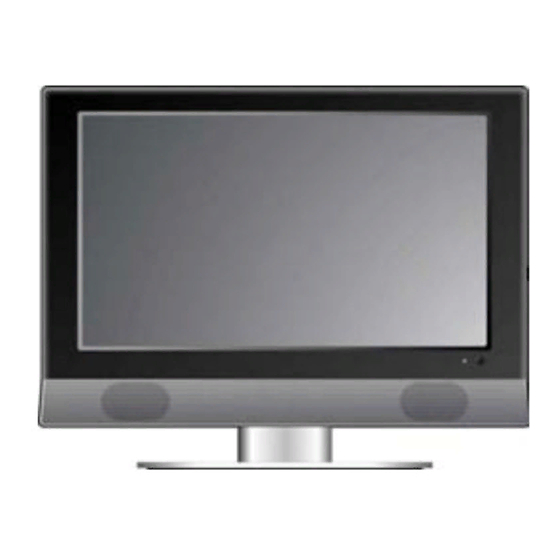
27” LCD TV with DVD Player Operating Instructions Model No. FPE2706DV For assistance, please call: 1-800-645-4994 Or visit us at WWW.AUDIOVOX.COM Before connecting, operating or adjusting this product, please read these instructions completely. Please keep this manual for future reference 128-7726... -
Page 2: Table Of Contents
Table Of Contents Important Safety Instruction ----------------------------------------------------------------------1 Product Features ------------------------------------------------------------------ Disc Information ------------------------------------------------------------------- Front Panel--------------------------------------------------------------------------- Rear Panel---------------------------------------------------------------------------- Remote Control --------------------------------------------------------------------------------- Special features of the DVD Module---------------------------------------- System Connections ----------------------------------------------------------------------- ---------------------------------- Connecting to External AV Signal Source (AV1) ---------------------------------- Connecting to External AV Signal Source (AV2) --------------------------------- Connecting to External AV Signal Source (Video3 /Video4) -------------------------------------------------------------... -
Page 3: Important Safety Instruction
Important Safety Instructions The lightning flash with arrowhead symbol, within an equilateral triangle, is intended to alert the user to the presence of un-insulated “dangerous voltage” within the product’s enclosure that may be of sufficient magnitude to constitute a risk of electric shock to persons. The exclamation point within an equilateral triangle is intended to alert the user to the presence of important operating and maintenance (servicing) instructions in the literature accompanying the appliance. -
Page 4: Important Safety Instructions
Important Safety Instructions IMPORTANT FOR LASER PRODUCTS Note: 1. CLASS 1 LASER PRODUCT 1. Read these instructions. 2. DANGER: Visible laser radiation when open and interlock failed or defeated. Avoid direct exposure to beam. 2. Keep these instructions. 3. CAUTION: Do not open the top cover. There are no user 3. -
Page 5: Product Features
Product Features This product is designed with movable Disc Tray. The Disc Tray can be installed in two different positions. The movable Disc Tray offers you the flexibility to choose which direction to insert your DVD in order to maximize your space. The unit incorporates high-resolution LCD display, DVD player and TV receiver in one system. -
Page 6: Disc Information
Disc Information Discs Formats Supported By This Player DISC LOGO CONTENTS SIZE MAXIMUM TIME 133min(SS-SL) Audio+Video 242min(SS-DL) 12cm (active picture) 266min(DS-SL) 484min(DS-DL) Audio 12cm 74min JPEG Still high resolution 12cm The operating method of some DVD discs is specified by the software maker. Please refer to the instruction manual of the disc. -
Page 7: Front Panel
Front Panel Front and Right View 1. Disc Tray Slot Insert disc into this slot. 2. SD/MS/MMC card port Insert SD/MS/MMC card into this slot. 3. USB Port Connecting to the USB device. 4. 27" Color TFT screen 27" color TFT screen clearly shows your picture. 5. - Page 8 Front Panel (Continued) 7. CH ▲/▼button In TV mode, press to select channels. In setup menu, the same function as ▲/▼ direction buttons. 8. VOL ▲/▼ button Press to decrease or increase the volume, the same function as ◄/► direction buttons in setup menu.
-
Page 9: Rear Panel
Rear Panel Rear View Open the back cover on the right side of the unit’s rear panel, all the jacks will appear, as shown on the figure below: 1. Y/Pr(Cr)/Pb(Cb) and L/R audio Input Jacks Connections for the Y/Pr(Cr)/Pb(Cb) inputs in AV3 (Component) mode. -
Page 10: Remote Control
Remote Control Remote Control Buttons Functions HDMI, DVD, press the Enter button to enter For TV Operation the selected mode. 7. Direction buttons ▲▼◄► In the setup menu, press the ▲▼button to select the desired items, press the ◄► button to adjust or set. 8. -
Page 11: Remote Control Drawing
Remote Control (Continued) button to adjust or set. Remote Control Drawing 7. Enter button For DVD Operation Press to confirm selection or exit the setup in the setup menu. 8. Audio button In DVD mode, press to select audio language when the DVD disc with multiple audio languages is played. -
Page 12: Preparation Of Remote Control
Remote Control(Continued) Preparation of Remote Control Using Remote control Softly push the back cover plastic latch to open Point the remote control from no more than about 20 feet (7m) from the remote control the battery compartment. sensor and at an angle of 60 degrees from the front of the unit. -
Page 13: Special Features Of The Dvd Module
Special Features of the DVD Module Note: before removing or installing the DVD module, unplug the unit from the AC power source. The supports to install the extended functional modules are located in two different positions (above and to the side) and supports the installation of two functional modules at the same time. Please follow the below steps to remove or install a function module. -
Page 14: System Connections
System Connections Do not connect the power cord until all other connections have been made. Ensure that you observe the color cables when connecting audio and video cables. Before connecting, open the cover on the right side of the unit’s rear panel. Connecting To External AV Signal Source (AV1) Use the audio and video cable to connect the input jacks on the right side of the unit’s rear panel to the external AV signal source. -
Page 15: Connecting To External Av Signal Source (Av2)
System Connections Connecting To External AV Signal Source (AV2) Use the audio and video cable to connect the input jacks on the right side of the unit’s rear panel to the external AV signal source. Also use the S-Video cable to connect the S-Video input jack on the right side of the unit’s rear panel to the external AV signal source. -
Page 16: Connecting To External Av Signal Source (Video3 /Video4)
System Connections Connecting to External AV Signal Source (AV3/AV4) Use the audio and video cables to connect the Y/Pb (C b) /Pr (Cr) input Jacks on the right side of the unit’s rear panel to the external AV signal source. After connecting, turn on the power of the unit and the external AV signal source, press the Input button to activate the Input menu, then select AV3 (Component) or AV4 (Component) and press the Enter button to enter the selected mode. -
Page 17: Connecting To Hdmi Output Device
System Connections Connecting to HDMI Output Device This unit can be connected to an AV device with HDMI output. See the below figure for details: After connecting, turn on the power to the unit and the external HDMI output device, press the Input button to activate the Input menu, then select HDMI and press the Enter button to enter the HDMI mode. -
Page 18: Connecting To External Av Device (Av Out)
System Connections Connecting to External AV Device (AV Out) Use the audio/video cables to connect the audio and video output Jacks on the right side of the rear panel to the external AV device. Special Notes: The features of this A/V equipment allows you to connect to other A/V equipment. Care should be taken when connecting the A/V outputs of this device to the A/V inputs of the other device. -
Page 19: Connecting To Digital Amplifier
System Connections Connecting to Digital Amplifier The unit is equipped with an optical digital audio jack that can be connected to a digital amplifier, (see the figure below) - 18 -... -
Page 20: Connecting To Pc
System Connections Connecting to PC The unit can be connected to a PC (personal computer) via a VGA cable. Follow the instructions and figure below to connect to a PC: 1. Connect one end of the VGA cable to the VGA input connector on the right side of the unit’s rear panel. -
Page 21: Connecting To Tv Signal Input
System Connections (Continued) Connecting to TV Signal Input This unit can be connected to a TV signal output source via the 75Ω antenna jack on the rear panel. After connecting, turn on the power to the unit, press the Input button and select TV mode. Connecting to AC Power One end of the AC power cord gets connected to the AC power connector on the rear panel of the unit. -
Page 22: Connecting To Earphone
System Connections (Continued) Connecting to Headphone This unit can be connected to a headphone for private listening. See the below figure for details: Note: Turn down the volume before connecting the headphone. - 21 -... -
Page 23: Input Source Selecting
Input Source Selecting The unit supports multiple video modes, which the user selects via the input menu. Press the Input button to activate the Input menu, the screen will display the following: Press the direction button to select the desired video mode, followed by pressing the Enter button to activate the selected mode. -
Page 24: System Setup
System Setup and Operation Preparations 1. Connect the unit to the required power, antenna and video sources then press the POWER button to turn on the unit. 2. Press the Input button to display the Input menu, then press the button to select TV. -
Page 25: Video Setting
System Setup and Operation (Continued) Manual Ch Search Press the ▲ or ▼ button to select the Manual Ch Search, then press the Enter button to activate the Manual Channel Set Menu, refer to the figure to the right : In the menu, press the direction buttons to select items, press the Enter... - Page 26 System Setup and Operation (Continued) Brightness Press the ▲ or ▼ button to select the Brightness then press the Enter button to activate the adjustment mode. Press the ◄ or ► button to adjust the brightness. Press the Enter button to confirm and return. Sharpness Press the ▲...
-
Page 27: Audio Setting
System Setup and Operation (Continued) Selecting an Audio Parameter for Setup Press the Menu button to activate the main setup menu, as shown on the right: Press the ▲ or ▼ button to select the Audio then press the ◄ or ► button to enter the setup menu. -
Page 28: Feature Setting
System Setup and Operation (Continued) Selecting a Feature for Setup Press the Menu button to activate the main setup menu, as shown on the right: Press the ▲ or ▼ button to select the Feature then press the ◄ or ► button to enter the setup menu. - Page 29 System Setup and Operation (Continued) Selecting an Advanced Video Menu Item for Setup Press the ▲ or ▼ button to select Advanced Video Menu then, press the Enter button to activate the Advanced Video Menu Setup Screen. See the figure to the right.
- Page 30 System Setup and Operation (Continued) Parental Control Menu When the correct password is inputted, the parental control menu will be displayed on the screen, see the below figure: Fantasy violence [FV], adult languages [L], sexual situations [S], violent scenes [V] and suggestive dialogues [D] In the parental control menu, press the direction buttons to position the blue box at the...
-
Page 31: Dvd Player Operation
DVD Player Operation Disc Loading Steps: 1. Press the POWER button to turn on the power. Press the Input button and select DVD mode, press the Enter button to select DVD mode. 2. Insert the disc with its printed side facing you into the disc tray. (Refer to the figure below.) 3. - Page 32 DVD Player Operation (Continued) Pause Press the Pause button once to pause the playback, press it repeatedly to start step-by-step playback, press the Play button to resume normal playback. Previous and Next Press the button to go to the next chapter. Press the button once to return to the beginning of the current chapter, press it twice to go to the previous chapter.
- Page 33 DVD Player Operation (Continued) CD Playback The player will play all tracks on a CD disc by default. You can use the (PREV/NEXT skip) buttons, or number buttons to select a specific track. Stop ■ Press the ■ Stop button once to stop playback and then press Play button to resume.
-
Page 34: Jpeg Playback
DVD Player Operation (Continued) JPEG Playback JPEG is a common picture format that requires small amounts of storage per image and has low loss in resolution. Hundreds of pictures can be stored on a disc in this format. In order to view JPEG photo albums, you can ask your film development company to make a ”PICTURE CD”... -
Page 35: Usb And Sd/Ms/Mmc Card Function
USB and SD/MS/MMC Card Function USB and SD/MS/MMC Card Function Preparation: 1. Press POWER to turn on the unit. 2. Press the Input button and select DVD, press the Enter button to shift to DVD mode. 3. Insert the USB memory stick into the unit’s USB slot, or insert the SD/MS/MMC card into the SD/MS/MMC card slot on the right side of the unit. -
Page 36: Dvd System Setup
DVD System Setup Preparations Press the Input button and select DVD, press the Enter button to activate DVD mode. Press the Setup button on the remote control to display the settings menu. The menu includes General setup, Audio setup, Video setup, Preference. Press the direction buttons on the remote control to select a category. - Page 37 DVD System Setup (Continued) OSD Lang 1. Press the ▲ or ▼ direction buttons to select OSD Lang. 2. Press the Enter button to enter the setup. 3. Use the ▲ or ▼ direction buttons to select a language. 4. Press the Enter button again to confirm selection and return.
-
Page 38: Audio Setup Page
DVD System Setup (Continued) Media Center 1. Press the ▲ or ▼ direction buttons to select Media Center. 2. Press the Enter button to enter the setup. 3. Use the ▲ or ▼ direction buttons to select DVD, USB, SD/MMC or MS. 4. -
Page 39: Video Setup
DVD System Setup (Continued) Dynamic 1. Press the ▲ or ▼ direction buttons to select Dynamic. 2. Press the Enter button to enter the setup, the screen will display as shown on the left: 3. Use the ▲ or ▼ direction buttons to adjust. 4. - Page 40 DVD System Setup (Continued) HD Mode Use the ▲ or ▼ direction buttons to select HD Mode, press the Enter button to enter the menu. The following screen will be displayed: 1. Press the Enter button to enter the setup. 2.
-
Page 41: Preference Setup
DVD System Setup (Continued) Contrast 1. Press the ▲ or ▼ direction buttons to select Contrast. 2. Press the Enter button to enter the setup mode, the screen will display as shown on the left: 3. Use the ◄ or ► direction buttons to adjust the level. - Page 42 DVD System Setup (Continued) Subtitle 1. Press the ▲ or ▼ direction buttons to select Subtitle. 2. Press the Enter button to enter the setup mode, see the left figure: 3. Press the ▲ or ▼ direction buttons to select Subtitle language.
-
Page 43: Troubleshooting
Troubleshooting SYMPTOM CHECK ITEM Make sure disc is loaded in. Make sure disc is loaded with label facing you. Make sure disc is not dirty or warped. The player does not play. Make sure the player’s region code is the same as region code of DVD disc. -
Page 44: Specifications
Specifications TFT-LCD Resolution 1366x768 TFT-LCD Screen Size 27 inches Laser Wavelength 780/650 nm Video System NTSC Frequency Response 20Hz 20kHz ±2.5dB ≥85dB Audio Signal-to-noise Rate ≤ 70dB (1kHz) Audio distortion+noise ≥70dB (1kHz) Channel Separation ≥80dB (1kHz) Dynamic Range Audio Out Analog Audio Out Out Level: 1.5V±...
Need help?
Do you have a question about the FPE2706DV - 27" LCD TV and is the answer not in the manual?
Questions and answers