Table of Contents
Advertisement
Advertisement
Table of Contents

Related Manuals for Nextar N7T-106 - Digital Photo Frame


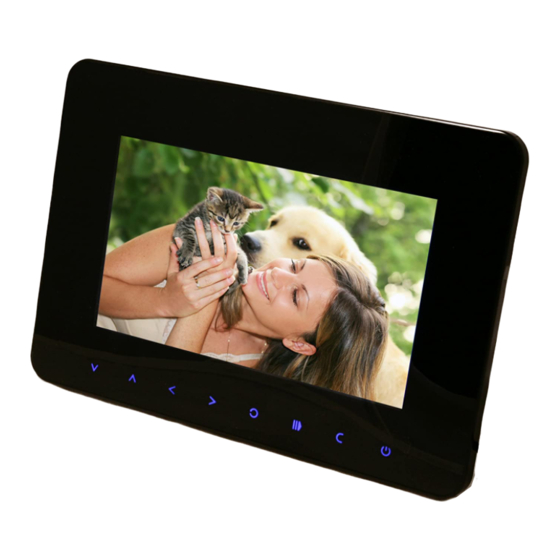
Summary of Contents for Nextar N7T-106 - Digital Photo Frame
-
Page 2: Table Of Contents
Content Introduction ..................2 1.Features ................... 2 2.Packaging Check List ............... 3 3.Specifications ................3 Getting Started ................4 How to Use ..................7 1.Viewing Photos ..............7 2.Listening to MP3s ..............8 3.Displaying Photos with MP3 Background Music ....9 4.Watching Videos .............. -
Page 3: Introduction
Introduction Congratulations on your purchase of the Nextar Digital Photo Frame. Before operating the unit, please read the manual thoroughly, and keep it for future reference. This manual will help you use many of the exciting and useful features of your Digital Photo Frame. -
Page 4: Packaging Check List
be placed horizontally or vertically Utilizes auto light induction, permitting the screen to accommodate external light Starts a slide show automatically upon disk inserting Displays your photos on your TV, along with their accompanying music Note: Video files may not display correctly if stored on a low-speed card. -
Page 5: Getting Started
Getting Started Decide where and how you'd like your Digital Photo Frame displayed: on the wall, on a table, or elsewhere. Swing the Digital Photo Frame stand on the back of the frame to change its position from horizontal to vertical. To mount the Digital Photo Frame on a wall, use the mounting holes on the back of the Digital Photo Frame. - Page 6 Inserting the Memory Cards The Digital Photo Frame is compatible with the following memory cards: Secure Digital Card (SD) Multimedia Card (MMC) Extreme Digital (XD) Memory Stick (MS) USB flash disk Insert the memory card with the front label facing the back of the device.
- Page 7 Note: The digital photo frame will ONLY recognize digital pictures stored in JPEG format. The device will ignore digital pictures stored in other formats. If the card is inserted correctly and you have more than one supported media file on the card, you will see the following menu screen.
-
Page 8: How To Use
How to Use 1.Viewing Photos Use the on-board buttons to control the photo frame. On the menu, press the buttons to select items and then press the button to enter the menu. Press the button to return to the main menu, or press the button and hold it to put the frame in standby mode. -
Page 9: Listening To Mp3S
Use the buttons to rotate the photo. When ready, press the button to display the photos in the slide show. Use and hold the button for 2 seconds to zoom in on the photo, and then use the buttons to navigate the photo while zoomed in. -
Page 10: Displaying Photos With Mp3 Background Music
Use and hold the button for 2 seconds to increase the volume and press and hold the button for 2 seconds to decrease the volume. Use the button to stop the song. Use the button and hold it for 2 seconds to repeat the song. 3.Displaying Photos with MP3 Background Music When photos are displayed on the screen, press and hold button... -
Page 11: Setting The Time
Before you are able to watch videos, you must first store video files on the memory card. Use the buttons to select the video folder. Select the desired video and press the button to start it. Use the button to play the previous video and the button to play the next one. -
Page 12: Clock
5.2 Clock Select Clock and press the button to enter the menu. On the menu, select Display, press the button to select Clock or Clock & Calendar, and press the button to enter. Select Set Time and press the button to enter the menu and set the desired time. -
Page 13: Setup
“On” and set a time for the frame to turn off automatically, or “Off” to turn off the function. Select Set Time and press button to select Power On, and then press the button to enter the menu and set the desired time for the frame to automatically turn on, or select Power Off and press the button to enter the menu and set the desired... -
Page 14: Auto Play
Transition Effect Use the buttons to select Transition Effect, and then press button to enter the menu and set the transition style between the photos of the slide show. Show Type Use the buttons to select Show Type, and then press the button to enter the menu and set the desired type of the slide show. -
Page 15: Display Setup
Music buttons to select “On” to auto play the music when in Use the Music playback mode or select “Off” to have the system enter File Manager mode, where you can press the button to start playing. Movie buttons to select “On” to auto play the movie when in Use the Movie Playback mode or select “Off”... -
Page 16: Custom Setup
Brightness Use this menu to set the brightness of the screen: Normal, Bright and Soft. Contrast Use this menu to set the contrast of the screen, ranging from “-3~ 3”. Saturation Use this menu to set the saturation of the screen, ranging from “-3~ 3”. -
Page 17: Exit
Style3 and Style4. Repeat Mode Use this option to set repeat mode to Off, One, Folder and All. Media Use this option to select the desired media input device: USB, SD+ MMC, MS or XD. Auto Rotate Select “On” to turn on the auto rotate function that will automatically turn photos when the frame is switched between the vertical and horizontal positions;... -
Page 18: Care And Maintenance
Care and Maintenance Technical Notes Your Digital Photo Frame is a sophisticated electronic device. Do not drop it or subject the unit to jarring or strong vibrations. Avoid placing the Digital Photo Frame in areas of high humidity or where it might be exposed to liquids. The panel is made of plastic and can be easily damaged. - Page 19 Answer: Make sure the unit is properly connected to a power source. Then turn it off, reconnect the power and turn it on again. 3.Question: Why is the memory card not recognized? Answer: The memory card might be inserted backwards or not be pushed in far enough.
- Page 20 1. Reorient or relocate the receiving antenna. 2. Increase the separation between the equipment and the receiver. Connect the equipment into an outlet on a circuit different from that to which the receiver is connected. 3. Consult the dealer or an experienced radio/TV technician for help.
- Page 21 Nextar™ a trademark of Nextar (Hong Kong) Limited. Nextar may find it necessary to modify, amend or otherwise change or update this manual. We may reserve the right to do this at any time, without any prior notice. All specifications and features are subject to change without notice.
Need help?
Do you have a question about the N7T-106 - Digital Photo Frame and is the answer not in the manual?
Questions and answers