
Related Manuals for AudioBahn AS69J


Summary of Contents for AudioBahn AS69J
- Page 1 AS69J / AS96J / AS41J / AS65J / AS62J / AS68J / AS50J / AS46J / AS40J / AS31J OWNER’S MANUAL...
- Page 2 Judge for yourself, and remember what it’s all about, “If it’s not Bigger, Bad- der & Better, it’s not Audiobahn.” If audio is your life, Audiobahn is the brand for you! We make you look as good as you sound. People never stop trying to get the best...
-
Page 3: Table Of Contents
Other infor- mation can be located by using the table of contents. We at Audiobahn have worked very hard to make sure that all information in this manual is current, but, as we are con- stantly finding new ways to improve our product, this information is subject to change without notice. -
Page 4: Introduction
Authorized Audiobahn Dealer, as we provide specialized training through our Audiobahn Installer Training Programs. Please read your warranty, keep your receipt, and original carton for possible future use. To get a free brochure on Audiobahn products in the US call (714) 452-1476 or e-mail us at sales@audiobahn.com. WARNING Continuous exposure to sound pressure levels over 100dB may cause permanent hearing loss. -
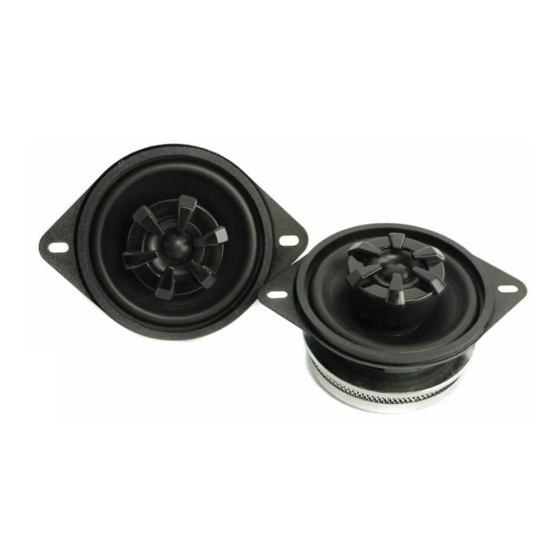
Page 5: Features And Specifications
FEATURES & SPECIFICATIONS FEATURES Carbon Injection Cone Butyl Rubber Surround 2 Layer High-Temp ASV Voice Coil 4 Ohm Impedance Removable Tweeter Polyswitch Tweeter Protection Circuit Standard and Custom Grilles 4” and Up Complete with Mounting Hardware Optional Replacement Silk Dome Tweeter (AST20J) POWER HANDLING MAGNET WEIGHT AS69J:... -
Page 6: Mounting And Setup
Mounting and Setup 2-Way Tweeter Option Hole to line up when replacing plug or tweeter When using one of the AS series 2-way speakers, the tweeter is fully removable. When removing the tweeter, make sure to replace the chrome plug in its place. This is needed for proper operation of the speaker. -
Page 7: Mounting And Setup
Mounting and Setup To mount the tweeter, use the tweeter as a template to mark out and cut a hole the diameter of the tweeter then, insert the tweeter then, place the supplied ring on the back of the tweeter and screw it on clockwise to tighten the tweeter into its mounting position. 3-Way Tweeter Option Removal of the 3-Way tweeter is the same as the 2-Way setup on page 5. -
Page 8: Choosing A Location
As with any car stereo installation, and all work performed should be checked thor- oughly and carefully prior to the operation of the system. The placement of your Audiobahn speakers within your vehicle will greatly affect the overall performance of your audio system. Every vehicle is different, so installation into particular locations of the vehicle may not be possible without modifications. -
Page 9: Installation
Installation NOTE: Audiobahn strongly recommends that you operate your system at low volumes prior to the completed installation of your Audiobahn speakers. This will allow a test of the speaker before securing it to its permanent location. Caution: Make sure that all speaker wiring is fully protected from cuts, tears and possible wear. -
Page 10: Wiring
Installation Wiring Audiobahn recommends using at least 18-gauge wire with your new speaker system. Thinner gauge wire may easily be severed and can cause damage to your system should any bare wires come in contact with the vehicles chassis. Make sure that your audio system is off while installing and connecting your new Au- diobahn speaker. -
Page 11: Securing The Speaker
Installation Securing the Speaker Once you have tested your system and confirmed that it is operating properly, turn off your system and prepare for the mounting of the speaker. 1. Position the speaker into the mounting hole and confirm the correct mounting loca- tion and hole placement. -
Page 12: Troubleshooting
Troubleshooting In the event that your Audiobahn speakers appear to require service we ask that you first do a little troubleshooting to determine if the problem is actually the speaker, or a problem located in a different part of the vehicle such as the amplifier, wiring, fusing or possibly the source unit. -
Page 13: Warning And Disclaimer
Using a fuse of a different type or rating may result in damage to this system which is not covered by the warranty. Disclaimer Specifications are subject to change without notice. For the most updated Specifications call Audiobahn, your local Authorized Audiobahn Dealer, or check the Audiobahn web site. www.audiobahn.com... -
Page 14: Warranty
Because of this we recommend that you have your new products installed by an Au- thorized Audiobahn Dealer. (A list of Authorized Audiobahn Dealers can be found on our web page). Warranty Period: One year from the original date of purchase. - Page 15 Any product found to have a manufacturer defect will be replaced with a new piece of the same or similar model, or repaired at the discretion of Audiobahn. Any product found to have no manufacturer defect will be returned to the sender at their cost.
- Page 16 7050 Village Drive, Bldg G Buena Park, CA 90621 714-452-1476 o ce 888-880-8469 fax info@audiobahn.com PROUD SPONSOR OF Follow us on Facebook and Twitter...
Need help?
Do you have a question about the AS69J and is the answer not in the manual?
Questions and answers