Table of Contents
Advertisement
Quick Links
Advertisement
Table of Contents

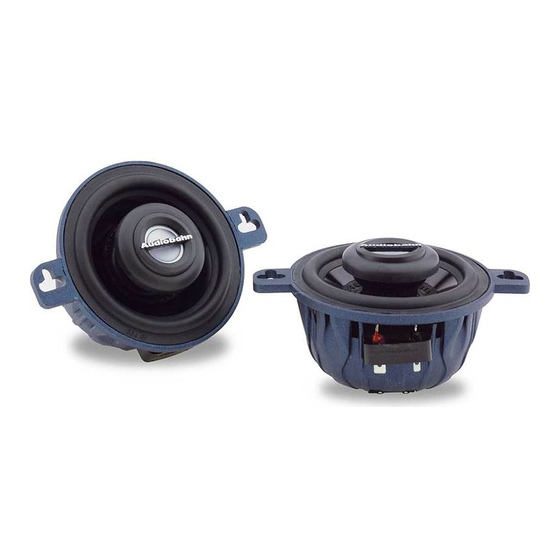
Summary of Contents for AudioBahn ACS2035N
- Page 1 QUALITY, RELIABILITY, & PURE BLISS ACS SERIES FULL-RANGE SPEAKERS ACS2093N / ACS2092N / ACS2068N ACS2063N / ACS2062N / ACS2050N ACS2046N / ACS2041N / ACS2040N / ACS2035N OPERATING INSTRUCTIONS PLEASE RETAIN MANUAL FOR FUTURE USE AND REFERENCE...
-
Page 3: Table Of Contents
Other information can be located by using the table of contents. We at Audiobahn Inc. have worked very hard to make sure that all of the information in this manual is current, but, as we are constantly finding new ways to improve our product, this information is subject to change without notice. -
Page 5: Features And Specifications
ACS2093N: 25Hz-25kHz ACS2093N: 25Hz-25kHz ACS2068N: 30Hz-22.5kHz ACS2063N: 40Hz-25kHz ACS2062N: 40Hz-22.5kHz ACS2050N: 50Hz-22.5kHz ACS2046N: 50Hz-22.5kHz ACS2040N: 40Hz-22.5kHz ACS2040N: 70Hz-22.5kHz ACS2035N: 100Hz-22.5kHz Speaker Size ACS2093N: 6x9" 3-Way ACS2092N: 6x9" 2-Way ACS2068N: 6X8" 2-Way ACS2063N: 6.5" 3-Way ACS2062N: 6.5” 2-Way Specifications Magnet Weight... -
Page 6: Mounting And Setup
Mounting and Setup ACS2093N / ACS2092N ACS2068N All measurements are in millimeters. �... - Page 7 Mounting and Setup ACS2041N ����� ������� ACS2046N All measurements are in millimeters. �...
- Page 8 Mounting and Setup ACS2063N / ACS2062N ACS2050N All measurements are in millimeters. �...
- Page 9 Mounting and Setup ACS2040N ACS2035N �...
-
Page 10: Wiring
Wiring Audiobahn ACS series full-range speakers come with a separate crossover network. The wires are marked for polarity. The solidblue wires are (-) negative, and the blue wires with a silver stripe are (+) positive. If you take the cover off the crossover, you can see that the wires are labeled inside, (IN) for Input, (W) for Woofer, and (T) for Tweeter. -
Page 11: Removing The Tweeter
Removing the Tweeter 1. To remove the tweeter for optional mounting, detach the tweeters wires from their terminals on the basket. Then remove the rubber backing on the speaker. Now you can unscrew the tweeter by turning it counter clockwise. 2. -
Page 12: Choosing A Location
Audiobahn ACS series speakers may reqire minor modifications to fit into stock or factory locations. Again, if at all possible it is recommended that you use a factory location. This applies mostly to later model vehicles. For those earlier models that do not have factory locations or are limited to front locations, it is recommended that you choose an area with sufficient airspace. -
Page 13: Installation
Installation Note: Audiobahn strongly recommends that you operate your system at low volumes prior to the completed installation of your Audiobahn speakers. This will allow a test of the speaker before securing it to its permanent location. Caution: Make sure that all speaker wiring is fully protected from cuts, tears and possible wear. All short circuits developing as a result could severely damage the source unit or possibly the amplifier as well as the speakers themselves. -
Page 14: General Wiring
Make sure that your audio system is off while installing and connecting your new Audiobahn speakers. Failure to do so could result in damaging the speaker beyond repair. This is not something that would be covered under the manufacturer warranty. -
Page 15: Securing The Speaker
Securing the Speaker Once you have tested your system and confirmed that it is operating properly, turn off your system and prepare for the final mounting of the speakers. 1) Position the speaker into the mounting hole and confirm the correct mounting location and hole placement. -
Page 16: Troubleshooting
Troubleshooting In the event that your Audiobahn speakers appear to require service we ask that you first do a little troubleshooting to determine if the problem is actually the speaker, or a problem located in a different part of the vehicle such as the amplifier, wiring, fusing or possibly the source unit.


Need help?
Do you have a question about the ACS2035N and is the answer not in the manual?
Questions and answers