HP TouchSmart 520-1200 Getting Started Manual
Touchsmart pc
Hide thumbs
Also See for TouchSmart 520-1200:
- User manual (27 pages) ,
- Quick setup manual (29 pages) ,
- Manual (14 pages)
Table of Contents
Advertisement
Advertisement
Table of Contents
Troubleshooting

Related Manuals for HP TouchSmart 520-1200


Summary of Contents for HP TouchSmart 520-1200
- Page 1 Getting Started...
- Page 2 HP shall not be liable for technical or Understanding hard disk drive space editorial errors or omissions contained herein. The hard disk drive on the Hewlett-Packard and HP assumes no responsibility for the use or Compaq computers with the Microsoft®...
-
Page 3: Table Of Contents
Table of contents 1 Getting information ..................... 1 2 Features ........................4 3 Setting up your computer ..................6 Protecting your computer ................6 Guidelines for installing software and hardware devices ........ 7 Connecting to the Internet ................7 Transferring files and settings to your new computer ........9 Computer orientation .................. - Page 4 ENWW...
-
Page 5: Getting Information
Getting information Type of information Where to find ● Set up your computer. Setup documentation included with your computer. ● See how-to videos about Visit www.hp.com/supportvideos (English only) using the features of your Tap the Tutorial icon (select models only) in the carousel within the HP computer. - Page 6 Type of information Where to find ● Get up-to-date information www.hp.com/support/consumer-forum and help from the Windows community. ● Connect to a TV. Setup documentation included with your computer. Watching and Recording TV Tap the Start button, tap All Programs, and then tap User Guides. If the guide is not available there, visit www.hp.com/support ●...
- Page 7 WARNING! To prevent direct exposure to a laser beam, do not try to open the enclosure of the CD or DVD drives. NOTE: Some features might not be available on systems that are shipped without a version of Microsoft Windows. ENWW...
-
Page 8: Features
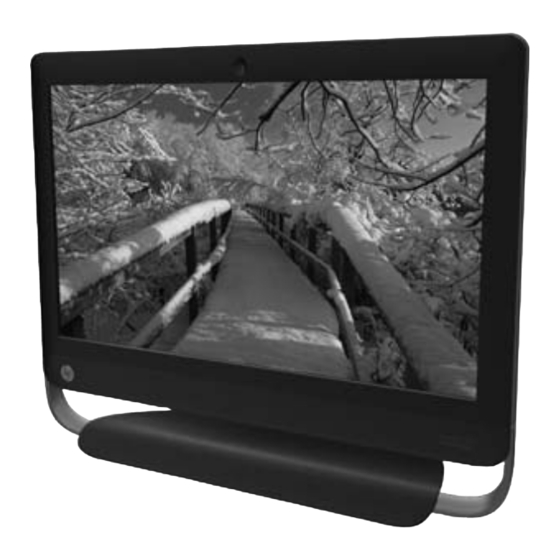
Features Features vary by model. The HP TouchSmart PC is a touch-enabled high-performance computer built into a high-definition widescreen display. The slim computer offers select features, that vary by model, such as an adjustable webcam, a CD/DVD and Blu-ray player and burner, Bluetooth capability, USB ports, a media card reader, Wireless 802.11n networking, full support for Beats Audio™... - Page 9 ◦ View all applications and website shortcuts by tapping the Quick Launch button. ◦ Size application views to full screen, partial screen, or icon. ● Website Tiles Add shortcut tiles to your favorite websites into the carousel. For additional information about HP TouchSmart 5.0, tap the Start button, tap Help and Support, and then tap HP TouchSmart, or tap the Help and Support icon on the Carousel and then tap HP TouchSmart.
-
Page 10: Setting Up Your Computer
Setting up your computer Follow the steps in the setup documentation included with your computer. ❑ Place the computer so that all ventilation openings are unobstructed and cabling is not in a walkway or ❑ where it can be stepped on or damaged by placing furniture on it. Connect all power cords from the computer and accessories to a power surge protection device that is ❑... -
Page 11: Guidelines For Installing Software And Hardware Devices
Computer risk Computer feature Unauthorized access to data Firewall software and ongoing threats to the ● Windows 7 includes firewall software preinstalled on the computer. computer ● The antivirus software, which is preinstalled on the computer, includes firewall software. Computer security Windows 7 critical security updates Microsoft continually updates the Windows 7 operating system. - Page 12 ◦ For a wired network connection, connect an Ethernet cable to the computer and to a network router or LAN device. ◦ For a wireless network connection, use a wireless router with the computer to connect to a WLAN with an Internet connection.
-
Page 13: Transferring Files And Settings To Your New Computer
◦ Sign up with an Internet service provider (ISP). If you already have an account with an ISP, skip this step and follow the instructions provided by the ISP. ◦ If you did not set up the computer for Internet service during the initial setup, do so now by using Online Services: Tap the Start button, tap All Programs, and then tap Get Online. -
Page 14: Computer Orientation
Computer orientation Your HP TouchSmart PC can be tilted from the stand, within the range of –5 degrees to 30 degrees. If the computer is wall-mounted (select HP TouchSmart PC models only), it can be displayed in landscape orientation only. For instructions on wall-mounting your HP TouchSmart PC, refer to the Wall-Mounting your HP TouchSmart user guide. -
Page 15: Connecting A Game Console
Connecting a game console Select HP TouchSmart PC models only Some computer models allow you to use your system as a high-resolution monitor for gaming. An HDMI game console port is located on right side of the computer, at the bottom. You can get audio from the internal speakers, from headphones, or from external speakers connected to the A/V source connector (audio out) (1) located at the back of the computer. -
Page 16: Using The Remote Control In Gaming Mode
Using the remote control in gaming mode Use the A/V source button on your remote control to toggle between source modes: PC mode and gaming mode. If used while your are in gaming mode, the following buttons will still affect PC mode: ●... -
Page 17: Hp My Display Touchsmart Edition
Adjusting settings with onscreen display (game console models only) HP TouchSmart PCs with the game console option include an onscreen display (OSD) button on the right side of the computer, just above the volume buttons. Press the display menu button on the right side of the computer. -
Page 18: Using The Hp Touchsmart With Safety And Comfort
Your HP TouchSmart PC features audio connectors (headphone and Audio Out ) that are optimized for Beats Audio™ headphones and external audio systems (purchased separately). Select HP TouchSmart PC models also include four Beats-optimized internal speakers and a Beats toggle button on the keyboard. - Page 19 Locate the HP TouchSmart PC in the room to minimize glare from the screen. You can also reduce glare by tilting the screen. The HP TouchSmart screen can be used as an input device; therefore, the computer should be placed so that your shoulders and neck are comfortable.
-
Page 20: Troubleshooting And Maintenance
Troubleshooting and maintenance Refer to the documentation provided by the product manufacturer for information about peripheral-specific problems, such as issues with a printer. The following sections present some issues you might encounter while installing, starting up, or using your computer and possible solutions. For more information or for additional troubleshooting options, see Getting information on page 1. -
Page 21: Power
Power Symptom Possible solution Error message: When drive activity stops, remove the disc, and then press the spacebar on the keyboard. Invalid system The computer should start up. disk or Non- System disk or Disk error. Computer does Press and hold the Power button until the computer turns off. Check Power Settings. not turn off when the Power button is pressed. -
Page 22: Keyboard And Mouse (With Cable)
Keyboard and mouse (with cable) Symptom Possible solution Keyboard Use the mouse to turn off the computer, unplug and reconnect the keyboard to the back of commands and your computer, and then restart your computer. typing are not recognized by the computer. - Page 23 Symptom Possible solution Cursor responds For a mouse with a roller ball: slowly, moves ● Clean the roller ball: Remove the roller ball cover from bottom of mouse (rotate it only vertically or counterclockwise), remove the ball, and clean it by using a damp, lint-free cloth (not horizontally, or paper).
-
Page 24: Keyboard And Mouse (Wireless)
Keyboard and mouse (wireless) Symptom Possible solution ● Wireless Ensure that you are using the wireless keyboard or wireless mouse within range of the keyboard or receiver, approximately 10 meters (32 feet) for normal use, and within 30 cm (12 inches) mouse does during initial setup or for re-synchronization. -
Page 25: Speakers And Sound
Speakers and sound Symptom Possible solution Volume is very Ensure that you connected the speakers to the Audio Out connector on the back of the low or computer. (Additional audio connectors are used for multiple-channel speakers.) Detached unsatisfactory. non-powered speakers (speakers without a separate power source, such as batteries or a power cord) do not produce satisfactory sound. -
Page 26: Gaming Mode
Symptom Possible solution Cannot connect to For Windows 7: the Internet. Tap the Start button, tap Control Panel, tap Action Center, and then tap Troubleshooting. Under Network and Internet, tap Connect to the Internet. Verify that you are using the proper cables for your Internet connection type. Your computer might have an Ethernet network adapter (also called a network interface card, or NIC). -
Page 27: Software Troubleshooting
Symptom Possible Solution ● No Signal Ensure that the gaming device is on. message appears ● Make sure the HDMI cable is connected from the gaming device to the computer. on the display. ● Audio drops when The system is on Mute. Press the Volume + or Volume – button on the side of the a video game is computer to get out of Mute state. -
Page 28: Microsoft System Restore
Complete the following procedure to update a driver, or to revert to an earlier version of the driver if the new one does not solve your problem: Tap the Start button. Type Device Manager into the Start Search box, and then tap Device Manager to open the Device Manager window. -
Page 29: Software Program And Hardware Driver Reinstallation
To add restore points manually: Close all open programs. Tap the Start button, tap Computer, tap Properties, and then tap System protection. Under Protection Settings, tap the disk for which you want to create a restore point. Tap Create, and then follow the onscreen instructions. Software program and hardware driver reinstallation If any of your factory-installed software programs or hardware drivers are damaged, you can reinstall it by using the Recovery Manager program (select models only). -
Page 30: Maintenance
To reinstall a program using the Recovery Manager: Tap the Start button, tap All Programs, tap Recovery Manager, and then tap Recovery Manager. Tap Software Program Reinstallation, and then tap Next at the Welcome screen. Choose the program you want to install, tap Next, and follow the onscreen instructions. When you have finished reinstalling, restart the computer. - Page 31 System Recovery In time, your system might still get bogged down, depending on the computer usage. Use System Recovery to wipe your Windows operating system installation clean, restoring it to the original configuration when you first started your system. Make a backup of important data files before proceeding with a System Recovery.
-
Page 32: System Recovery
Cleaning the keyboard and When cleaning the keyboard keys, use a low setting on a battery-powered vacuum mouse cleaner, to avoid removing key caps and springs. Vacuum between the keys of the keyboard and along the grooves. Use a clean, dry cloth and isopropyl (rubbing) alcohol to clean buildup on the keyboard keys and along its edges. -
Page 33: System Recovery Options
NOTE: Some features might not be available on systems that are shipped without a version of Microsoft Windows. You must choose one of the following methods to perform a System Recovery: ● Recovery Image — Run the System Recovery from a recovery image stored on your hard disk drive. The recovery image is a file that contains a copy of the original factory-shipped software. -
Page 34: System Recovery At System Startup
If the computer is working and Windows 7 is responding, use these steps to perform a System Recovery. Turn off the computer. Disconnect all peripheral devices from the computer except the keyboard and mouse. Turn on the computer. Tap the Start button, tap All Programs, tap Recovery Manager, and then tap Recovery Manager. If prompted, tap Yes to allow the program to continue. -
Page 35: System Recovery From Recovery Media
If Windows 7 is not responding, but the computer is working, follow these steps to perform a System Recovery. Turn off the computer. If necessary, press and hold the Power button until the computer turns off. Disconnect all peripheral devices from the computer, except the keyboard and mouse. Press the Power button to turn on the computer. -
Page 36: Recovery Media
To perform a System Recovery using recovery media: If the computer is working, create a backup DVD, or backup USB flash drive, containing all the data files you want to save, and then remove the backup media from the computer. Insert recovery disc #1 into the DVD drive tray, and close the tray;... -
Page 37: Choosing Recovery Media
Choosing recovery media ● To create recovery discs, your computer must have a DVD writer, and you must use only high-quality blank DVD+R or DVD-R discs. NOTE: cannot use CDs or DVD+RW, DVD-RW, DVD+RW DL, DVD-RW DL, DVD+R DL, or DVD-R DL discs to create recovery discs. - Page 38 The power to make a change Thank you for your purchase. HP is dedicated to producing the highest quality, best performing, and easiest to use computers in the world. HP also designed this product with the environment in mind. But to reduce its impact even further, we need your help. Let’s work together to make a change.
Need help?
Do you have a question about the TouchSmart 520-1200 and is the answer not in the manual?
Questions and answers