
Related Manuals for Philips LX8500W/01


Summary of Contents for Philips LX8500W/01
- Page 1 DVD Video/SACD Home Theatre System LX8500W User manual 001-047-LX85-22-Engfinal 7/8/04, 10:01 AM 3139 115 23481...
-
Page 2: How To Connect Plug
Important notes for users in the U.K. DICHIARAZIONE DI CONFORMITA’ Mains plug Si dichiara che l’apparecchio LX8500W, Philips This apparatus is fitted with an approved 13 risponde alle prescrizioni dell’art. 2 comma 1 del Amp plug. To change a fuse in this type of plug D.M. - Page 3 LASER CAUTION Type Semiconductor laser VISIBLE AND INVISIBLE LASER GaAlAs RADIATION WHEN OPEN AVOID Wave length 650~660 nm (DVD) EXPOSURE TO BEAM 784~796 nm (CD) ADVARSEL Output Power 7 mW (DVD) SYNLIG OG USYNLIG 10 mW (VCD/CD) LASERSTRÅLING VED ÅBNING Beam divergence 60 degree UNDGÅ...
- Page 4 English Hereby, Philips Consumer Electronics, B. U. Peripherals & Advarsel: Usynlig laserstråling ved åbning Accessories, declares that this product is in compliance når sikkerhedsafbrydere er ude af funktion. with the essential requirements and other relevant provisions of Directive 1999/5/EC. Undgå utsættelse for stråling.
- Page 5 As DVD technology advances, these enhancement will become common and will be easy to complete. Go to www. p4c.philips.com for software upgarde. En raison de la diversité des formats utilisés par les fabricants, votre système DVD peut nécessiter l'ajout de périphériques ou une mise à...
-
Page 6: Table Of Contents
Contents General Information Getting Started Supplied accessories ........8 Step 1: Inserting batteries into the Care and safety information ..... 8 remote control .......... 19 Using the remote control to operate the system ......19 Connections Step 2: Setting the TV ....... 19 Step 1: Assemble the speakers .... - Page 7 Dimming system’s display screen ... 41 Speaker Setup ........32 Using the remote to operate your CD Upsampling ........32 ‘Philips’ television ........42 Night mode – turning on / off .... 33 Changing wire-less rear speakers Video Setup Menu ........33 transmission channel ........
-
Page 8: General Information
10 cm (4 inches) of free space all around the player for adequate ventilation. Remote control and two batteries 10 cm (4 inches) (12nc: 3139 258 70051) PHILIPS 10 cm 10 cm (4 inches) (4 inches) DVD Home Cinema System Care of disc –... -
Page 9: Connections
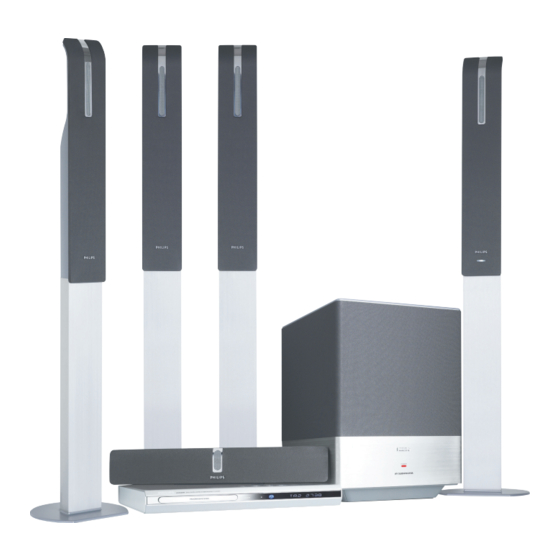
Step 2: Placing the speakers and AV subwoofer speakers Centre speaker DVD System Front speaker Front speaker (Left) (Right) ➠ PHILIPS PHILIPS matching coloured stickers Rear speaker AV Subwoofer Rear speaker (Left) (Right) Look for the matching colour sticker at... -
Page 10: Step 3: Connecting Dvd System, Av Subwoofer And Front Speakers
Connections Step 3: Connecting DVD Step 4: Connecting wire-less system, AV subwoofer rear speakers and front speakers AV Subwoofer DVD System Rear R Rear L (right) speaker (left) speaker TO AV SUBWOOFER TO AV SUBWOOFER Front R Front L Centre Speaker Front Speakers Use the supplied speaker cables to The rear speaker stands (grey and blue... -
Page 11: Step 5: Connecting Tv
Connections Step 5: Connecting TV S-VIDEO AUDIO SCART IN VIDEO IN IMPORTANT! Using Scart jack – You only need to make one video ● Use the supplied scart video cable (black) connection from the following to connect the DVD system’s SCART options, depending on the jack to the corresponding Scart input capabilities of your TV. -
Page 12: Step 6: Connecting A Progressive Scantv
Connections Step 6: Connecting a Step 7: Connecting FM/MW Progressive ScanTV antennas fix the claw into the slot ➠ MW loop antenna antenna IMPORTANT! Connect the supplied MW loop antenna – The progressive scan video quality to the MW jack. Place the MW loop is only available when using Y Pb Pr antenna on a shelf or attach it to a stand connection and a progressive scan TV... -
Page 13: Step 8: Connecting The Power Cord
Connections Step 8: Connecting the power cord DVD system TO AV SUBWOOFER AV Inter-connect cable Rear L (left) speaker S-VIDEO AUDIO ~ AC MAINS SCART IN VIDEO IN AV Subwoofer Organise the cables neatly (optional) After everything is connected This DVD system comes with a cable properly, plug the AC power cord cover, it allows you to organise all the into the power outlet. -
Page 14: Connections (Optional)
Connections (Optional) Connecting a VCR or Cable/Satellite Box S-VIDEO AUDIO SCART IN VIDEO IN ~ AC MAINS VCR or Cable/ Satellite Box TO AV SUBWOOFER Viewing and listening to the Using the VCR for recording DVD playback playback Some DVDs are copy-protected. You Connect the VCR or Cable/Satellite Box cannot record or dub protected discs to the TV as shown. -
Page 15: Connecting Digital Audio Equipment
Connections (Optional) Connecting digital audio equipment (for example) CD Recorder TO AV SUBWOOFER Listening to the playback ● Connect the DVD system’s DIGITAL IN jack to the DIGITAL OUT jack on a digital audio device. Before starting operation, press SOURCE to select “DIGI IN” in order to activate the input source. -
Page 16: Functional Overview
– TUNER: up or down to select auto ∞ tuning. – Confirms a selection. S / T – DISC: *searches backward/forward or selects a track. ≤ – TV: selects previous/next channel (Philips TV only). £ – TUNER: tunes the radio frequency up/ down. ™ Ç ¡... - Page 17 Functional Overview ™ TV VOL +- ANGLE – Select a DVD disc camera angle (if – Adjusts TV volume (Philips TV only). available). £ É SUBTITLE – DISC: starts playback. – Selects a subtitle language. ≤ Å REPEAT – DISC: pauses playback.
-
Page 18: Top And Front Panel
– DISC: *searches backward/forward or SACD indicator selects a track. – Lights up when playing Super Audio CD. – TV: selects previous/next channel (Philips TV only). – TUNER: tunes the radio frequency up/ – Point the remote control towards this down. -
Page 19: Getting Started
Getting Started Step 1: Inserting batteries into Step 2: Setting the TV the remote control IMPORTANT! Make sure you have completed all the necessary connections. (See page 11 “Connecting TV”) DISC Press SOURCE control until “ ” appears on the display panel. Turn on the TV and set to the correct video-in channel. -
Page 20: Selecting The Colour System That Corresponds To Your Tv
Getting Started Selecting the colour system that Setting the TV Display corresponds to your TV Set the aspect ratio of the DVD Player In order for a DVD to play on this DVD according to the TV you have connected. system, the colour system of the DVD, The format you select must be available the TV and the DVD player should match. -
Page 21: Step 3: Setting Language Preferences
Getting Started Step 3: Setting language Audio, Subtitle and Disc menu languages preferences You can select your preferred language Press Ç twice to stop playback (if any), settings so that this DVD system will then press SYSTEM MENU. automatically switch to the language for Press 2 repeatedly to select you whenever you load a disc. -
Page 22: Step 4: Setting The Speakers' Channels
Getting Started {SPEAKERS VOLUME} – Volume level Step 4: Setting the speakers’ setting for individual speakers (-6dB ~ channels +6dB). You can adjust the delay times (centre and surround only) and volume level for individual speakers. These adjustments let you optimise the sound according to your surroundings and setup. -
Page 23: Disc Operations
Disc Operations IMPORTANT! Region Codes – If the inhibit icon (ø or X) appears The regional code ‘X’ (denotes the on the TV screen when a button is number) of this device is shown at pressed, it means the function is not the back panel of this device. -
Page 24: Auto Eco Power Standby Mode
Disc Operations Selecting various repeat/ Auto Eco Power standby mode shuffle functions This is a power-saving feature, the system will automatically switch to Eco Power standby mode if you do not press any Repeat play mode buttons within 30 minutes after a disc has ●... -
Page 25: Other Operations For Video Playback (Dvd/Vcd/Svcd)
Disc Operations Other operations for video Display the disc information and current status playback (DVD/VCD/SVCD) It shows the disc information and its current status (for example, title or chapter number, elapsed playing time, audio/subtitle language). A number of DISPLAY operations can be done without interrupting disc playback. -
Page 26: Zooming In
Disc Operations Zooming in Changing sound track language This function allows you to enlarge the This operation works only on DVDs with picture on the TV screen and to pan multiple soundtrack language, you can through the enlarged picture. change the language you want while playing DVD. -
Page 27: Selecting A Title (Dvd Only)
Disc Operations Selecting a title (DVD only) Some DVDs may contain several titles. If the disc has a title menu recorded on it, you can start playback from the selected movie title. Press RETURN/TITLE. ➜ The disc title menu appears on the TV screen. -
Page 28: Playing Mp3/Jpeg/Divx/ Mpeg-4 Disc
Disc Operations ● Press REPEAT continuously to access Playing MP3/JPEG/DivX/ different ‘Play Mode’. MPEG-4 disc ➜ REPEAT ONE: one file being played repeatedly. This player can playback DivX, MPEG-4, ➜ REPEAT FOLDER: all files in one folder MP3, JPEG, VCD & SVCD files on a being played repeatedly. -
Page 29: Playing Super Audio Cd (Sacd)
Disc Operations Playing Super Audio CD (SACD) Preview Function This function shows the content of the There are three types of SACD discs : current folder or the whole disc. single layer, double layer or hybrid disc. The hybrid disc contains both Super During playback, press Ç. -
Page 30: Dvd Setup Menu Options
DVD Setup Menu Options This DVD system setup is carried out via Programming disc tracks (not for the TV, enabling you to customise the Picture CD/MP3/SACD) DVD system to suit your particular You can play the contents of the disc in requirements. -
Page 31: Osd Language
To start programme playback ® DivX VOD registration code Use 1 2 3 4 keys to highlight {START} Philips provide you the DivX ® on the programme menu, then press OK. (Video On Demand) registration code ➜ Playback will start with the selected that allows you to rent and purchase tracks under the programmed sequence. -
Page 32: Audio Setup Menu
DVD Setup Menu Options Audio Setup Menu Speaker Setup This menu contains setup options for In disc mode, press SYSTEM MENU. your audio output which makes the Press 1 2 to select ‘Audio Setup’ icon. speaker setup system reproduce high quality surround sound. -
Page 33: Night Mode - Turning On/Off
DVD Setup Menu Options Video Setup Menu Night Mode - turning on/off When night mode is activated, the high In disc mode, press SYSTEM MENU. volume outputs are softened and low Press 1 2 to select ‘Video Setup’ icon. volume outputs are brought upward to an audible level (for DVD only). -
Page 34: Progressive Function-Turning On/Off
DVD Setup Menu Options Progressive function - turning on/off Picture Setting The progressive scan display present 60 This DVD system provides three complete frames per seconds, rather than predefined sets of picture colour settings 30 frames per second of interlaced and one personal setting which you can scanning (ordinary normal TV system). -
Page 35: Setting The Video Output
DVD Setup Menu Options CONTRAST Preference Setup Menu Increase the value to sharpen the picture Press Ç twice to stop playback (if any), or vice versa. Choose zero (0) to balance the contrast. then press SYSTEM MENU. Press 1 2 to select the ‘Preference Setup’ TINT icon. -
Page 36: Pbc
DVD Setup Menu Options In ‘PREFERENCE PAGE’, press 34 to Helpful Hints: highlight {PARENTAL}, then press 2. – VCD, SVCD, CD have no level indication, so parental control has no effect on these type of discs. This also applies to most illegal DVDs. -
Page 37: Changing The Password
DVD Setup Menu Options Changing the Password Setting the DivX Subtitle ● The same password is used for both When selecting an embedded Parental Control and Disc Lock. Enter subtitle during DivX disc playback, your six-digit password to play a press SUBTITLE repeatedly to select prohibited disc or if prompted for a available subtitle. -
Page 38: Tuner Operations
Tuner Operations IMPORTANT! Presetting radio stations Make sure the FM and MW You can store up to 20 FM and 10 MW antennas are connected. preset radio stations in the memory. Tuning to radio stations Helpful Hints: – The system will exit presetting mode if no Press SOURCE control to select button is pressed within 20 seconds. -
Page 39: Automatic Presetting
Tuner Operations Automatic presetting Manual presetting You can start the automatic presetting You can choose to store only your from a selected preset number. favourite radio stations. Tune to your desired radio station (see “Tuning to radio stations”). DVD system’s display panel Press PROGRAM. -
Page 40: Sound Controls
Sound Controls IMPORTANT! Selecting digital sound effects For proper surround sound, make Select a preset digital sound effects that sure the speakers and AV subwoofer matches your disc’s content or that are connected (see page 10). optimises the sound of the musical style you are playing. -
Page 41: Volume Control And Other Functions
Volume Control and Other Functions Switching on/off Using the remote to operate your ‘Philips’ television Switching to active mode ● Press the SOURCE control to select : DISC ™ TUNER FM ™ TUNER MW ™ TV ™ AUX ™ DIGI IN ™ DISC .. -
Page 42: Changing Wire-Less Rear Speakers Transmission Channel
Other Functions Changing wire-less rear Setting the Sleep timer speakers transmission The sleep timer enables the system to channel switch to Eco Power standby mode automatically at a preset time. The wire-less rear speaker system will automatically turn on once you power up. Press and hold DIM on the remote until If there is a sound distortion, select “SLEEP XX”... -
Page 43: Specifications
Specifications AMPLIFIER SECTION MAIN UNIT Output power Power Supply Rating 34V DC - Front 100 W RMS / channel Power Consumption 20 W - Rear 75 W RMS / channel Dimensions (w x h x d) 360 mm x 40 mm x 305 mm - Centre 100 W RMS Weight... -
Page 44: Troubleshooting
Do not open the system as there is a risk of electric shock. If a fault occurs, first check the points listed below before taking the system for repair. If you are unable to remedy a problem by following these hints, consult your dealer or Philips for help. Problem Solution No power. - Page 45 Troubleshooting Problem Solution – Insert a readable disc with the playback side The DVD player does not start playback. facing down. The DVD+R/CD-R must be finalised. – Check the disc type, colour system (PAL or NTSC) and region code. – Check for any scratches or smudges on the disc.
-
Page 46: Glossary
Glossary Analogue: Sound that has not been turned into Dolby Surround Pro Logic II: It is an improved numbers. Analogue sound varies, while digital matrix decoding technology that provides better sound has specific numerical values. These jacks spatiality and directionality on Dolby Surround send audio through two channels, the left and programme material;... - Page 47 Glossary Plug and Play: First time power up to the Tuner mode, the system will prompt the user to proceed with the automatic installation of radio stations by simply pressing the PLAY button on the main unit. Progressive Scan: It displays all the horizontal lines of a picture at one time, as a signal frame.
- Page 48 3139 115 23481 001-047-LX85-22-Engfinal 7/8/04, 10:15 AM...
-
Page 49: Language Code
Language code Abkhazian 6566 Inupiaq 7375 Pushto 8083 Afar 6565 Irish 7165 Russian 8285 Afrikaans 6570 Íslenska 7383 Quechua 8185 Italiano 7384 Raeto-Romance 8277 Amharic 6577 Arabic 6582 Ivrit 7269 Romanian 8279 Japanese 7465 Rundi 8278 Armenian 7289 Assamese 6583 Javanese 7486 Samoan... - Page 50 Meet Philips at the Internet http://www.philips.com http://www.p4c.philips.com LX8500W CLASS 1 LASER PRODUCT 3139 115 23481 SgpJP-0428/05-1 3139 115 23481 001-047-LX85-22-Engfinal 7/8/04, 10:15 AM...
Need help?
Do you have a question about the LX8500W/01 and is the answer not in the manual?
Questions and answers