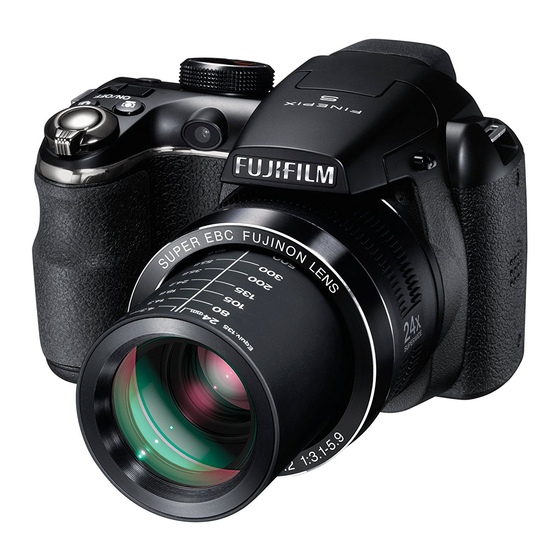
More on Playback Thank you for your purchase of this prod- uct. This manual describes how to use your Movies FUJIFILM digital camera and the supplied software. Be sure that you have read and understood its contents and the warnings Connections in “For Your Safety”...
For Your Safety IMPORTANT SAFETY INSTRUCTIONS • Read Instructions: All the safety and not defeat the safety purpose of the This video product should never be appliance operating instructions should be polarized plug. placed near or over a radiator or heat and cart com- read before the appliance is oper- register.
Page 3
For Your Safety Power Lines: An outside antenna sys- Replacement Parts: When replace- Service Service tem should not be located in the ment parts are required, be sure Cleaning: Unplug this video product Servicing: Do not attempt to service vicinity of overhead power lines or the service technician has used from the wall outlet before clean- this video product yourself as open-...
Circular icons with a diagonal bar tell you that the action indicated is shock. prohibited (“Prohibited”). • If the cord is damaged, contact your FUJIFILM dealer. Filled circles with an exclamation mark tell you an action that must be Do not place the camera on an unstable surface.
Page 5
Memory Card, seek medical attention or call an Build-up of dust in your camera can cause a fire or electric shock. emergency number. • Contact your FUJIFILM dealer to request internal cleaning every 2 years. • Please note this is not a free of charge service.
Page 6
For Your Safety ■ Battery Life If you are using a heating pad, take • Dispose of used battery promptly. Power Supply and Battery care not to place the battery di- At normal temperatures, the bat- • Do not drop the battery or other- * Confirm your battery type before read- rectly against the pad.
Page 7
“memory” suffer from the prob- for which they can be used may be • Turn off the FUJIFILM Digital cam- side your garments before use. lem of only providing power for a shortened as a result.
Page 8
Wipe the area with a cloth and IMPORTANT NOTICE: Read Before working normally. trademarks of SD-3C, LLC. then wash thoroughly with soap • FUJIFILM Corporation cannot ac- Using the Software • HDMI logo is a trademark. and running water. cept liability for any incidental •...
About This Manual Before using the camera, read this manual and the warnings on pages ii–viii. For information on spe- cific topics, consult the sources below. ✔ ✔ Camera Q & A ✔ ✔ Table of Contents Camera Q & A ......................pg.
Page 10
Camera Q & A Find items by task. Camera Setup Camera Setup Question Question Key phrase Key phrase See page See page How do I set the camera clock? Date and time Can I set the clock to local time when I travel? Time difference How do I keep the display from turning off automatically? Auto power off...
Camera Q & A Taking Pictures Taking Pictures Question Question Key phrase Key phrase See page See page How can I avoid blurred pictures? Dual IS mode How can I make good portraits? Intelligent Face Detection M mode Can the camera automatically adjust settings for different scenes? Can I choose my own settings for different scenes? Scene position How can I be sure my subject is smiling when I take a photograph?
Page 12
Camera Q & A Viewing Pictures Viewing Pictures Question Question Key phrase Key phrase See page See page How do I view my pictures? Single-frame playback The b button How can I delete pictures easily? How can I select and delete individual pictures or delete all pictures Deleting pictures at once? Can I zoom in on pictures during playback?
Page 13
Table of Contents For Your Safety ................. ii Basic Photography and Playbac Basic Photography and Playback k IMPORTANT SAFETY INSTRUCTIONS ........ii Taking Pictures in M (Scene Recognition) Mode ...15 Safety Notes ..................iv Viewing Pictures ................20 About This Manual ................. ix More on Photograph More on Photography y Camera Q &...
Page 14
Table of Contents More on Playbac More on Playback k Menu Menus s Playback Options ................46 Using the Menus: Shooting Mode .........74 Using the F-Mode Menu ............74 Playback Zoom ................47 I Favorites: Rating Pictures ............47 F-Mode Menu Options .............75 Viewing Photo Information............48 N ISO ....................75 O IMAGE SIZE ................76 Multi-Frame Playback ..............49...
Page 15
Technical Note Technical Notes s Using the F-Mode Menu ............86 Optional Accessories ..............106 F-Mode Menu Options .............86 Accessories from FUJIFILM ............ 107 I SLIDE SHOW .................87 Caring for the Camera .............. 108 Using the Playback Menu ............88 Troubleshootin Troubleshooting g Playback Menu Options .............88...
Introduction Symbols and Conventions Symbols and Conventions The following symbols are used in this manual: 3 Caution: This information should be read before use to ensure correct operation. 1 Note: Points to note when using the camera. 2 Tip: Additional information that may be helpful when using the camera. Menus and other text in the camera monitor are shown in bold.
Introduction Parts of the Camera Parts of the Camera For more information, refer to the page listed to the right of each item. F (photo mode) button ......74, 86 Strap eyelet ............ 7 Flash pop-up button ......36 Zoom control .......16, 47, 49 Microphone .........
Introduction Camera Displays Camera Displays The following indicators may appear during shooting and playback. The indicators displayed vary with camera settings. ■ ■ Shooting Shooting Number of available frames ... 121 Focus frame ..........81 Image size .............76 Blur warning ......36, 112, 116 Focus warning ...........18 Date and time..........14 DATE...
Introduction The Electronic Viewfinder (EVF) The electronic viewfinder provides the same information as the monitor, and can be used when bright light- ing conditions make the display in the monitor difficult to see. To switch between the monitor and electronic viewfinder, press the EVF/LCD button (your selection remains in effect when the camera is turned off or the mode dial is rotated to another setting).
Introduction The Mode Dial The Mode Dial To select a shooting mode, align the mode icon with the mark next to the mode dial. P, S, A, M: Select for full control over cam- B (AUTO): A simple “point-and-shoot” era settings, including aperture (M and A) mode recommended for first-time users and/or shutter speed (M and S) (pg.
The Strap and Lens Cap Attaching the Strap Attaching the Strap The Lens Cap The Lens Cap Attach the strap to the two strap eyelets as shown Attach the lens cap as shown. below. To avoid losing the lens cap, pass the supplied string through the eyelet ( q ) and secure the lens cap to the strap ( w ).
Inserting the Batteries The camera takes four AA alkaline, lithium, or rechargeable Ni-MH batteries. A set of four alkaline bat- teries is supplied with the camera. Insert the batteries in the camera as described below. Open the battery-chamber cover. Insert the batteries. Slide the battery-cham- Insert the batteries in the ber latch in the direc-...
Page 25
Inserting the Batteries Close the battery-chamber cover. Choosing the Battery Type Close the battery-cham- After replacing the batteries SET-UP GUIDANCE DISPLAY ber cover and slide it in with batteries of a different type, LITHIUM VIDEO SYSTEM CUSTOM RESET ALKALINE select the battery type using until the latch clicks into BATTERY TYPE NI-MH...
■ ■ Compatible Memory Cards Compatible Memory Cards FUJIFILM and SanDisk SD, SDHC, and SDXC memory cards have been approved for use in the cam- era. A complete list of approved memory cards is available at http://www.fujifilm.com/products/digital_ cameras/index.html. Operation is not guaranteed with other cards. The camera can not be used with xD-Picture Cards or MultiMediaCard (MMC) devices.
Page 27
Inserting a Memory Card ■ ■ Inserting a Memory Card Inserting a Memory Card Open the battery-chamber cover. Close the battery-chamber cover. Close the battery-cham- 1 Note ber cover and slide it in Be sure the camera is off until the latch clicks into before opening the bat- place.
Page 28
Inserting a Memory Card 3 Cautions • Do not turn the camera off or remove the memory card while the memory card is being formatted or data are being recorded to or deleted from the card. Failure to observe this precaution could damage the card. •...
Turning the Camera On and Off Shooting Mode Shooting Mode Playback Mode Playback Mode Slide the G switch in the direction shown To turn the camera on and begin playback, press the a button for about a second. below. The lens will extend automatically. Slide the G switch to turn the camera off.
Basic Setup A language-selection dialog is displayed the first time the camera is turned on. Set up the camera as described below (for information on resetting the clock or changing languages, see page 99). Choose a language. 1.1 Press the selector up or down to highlight a language. START MENU ENGLISH FRANCAIS...
Taking Pictures in M (Scene Recognition) Mode This section describes how to take pictures in M mode. Turn the camera on. Slide the G switch to turn the camera In this mode, the camera au- tomatically analyzes the com- position and selects a scene according to shooting condi- tions and the type of subject: Selected scene...
Page 32
Taking Pictures in M (Scene Recognition) Mode Check the battery level. Frame the picture. Check the battery level in the display. Use the zoom control to frame the picture in the display. Select W to zoom out Select T to zoom in Zoom indicator Indicator Indicator...
Taking Pictures in M (Scene Recognition) Mode Holding the Camera Avoiding Blurred Pictures Hold the camera steady with If the subject is poorly lit, blur- SET-UP LCD BRIGHTNESS both hands and brace your ring caused by camera shake EVF/LCD MODE CONTINUOUS SHOOTING ONLY AUTO POWER OFF...
Page 34
Taking Pictures in M (Scene Recognition) Mode Focus. Silent Mode Press the shutter button halfway In situations in which camera sounds or lights may be unwelcome, hold the DISP/BACK button down until to focus. o is displayed (note that silent mode is not available during movie or voice memo playback).
Page 35
Taking Pictures in M (Scene Recognition) Mode Shoot. The Indicator Lamp Smoothly press the shutter button the rest of the way down to take the picture. Indicator lamp 2 Tip: The Shutter Button The indicator lamp shows camera status as follows: The shutter button has two positions.
Viewing Pictures Pictures can be viewed in the monitor. When taking important photographs, take a test shot and check the results. Press the a button. Deleting Pictures To delete the picture currently displayed in the monitor, press the selector up ( The following dialog will be displayed.
Shooting Mode Choose a shooting mode according to the scene or type of subject. To choose a shooting mode, rotate the mode dial to the desired setting (pg. 6). The following modes are available: M SCENE RECOGNITION Press MENU/OK to display the shoot- SCENE RECOGNITION ing menu.
Page 38
Shooting Mode Scene Scene Description Description The camera takes three shots: one at the current zoom ratio, a second zoomed in 1.4 ×, and a third ZOOM BRACKETING zoomed in 2 ×. Get good results with backlit subjects and other difficult lighting. The camera takes two shots: one NATURAL &...
Page 39
Shooting Mode Zoom Bracketing Zoom Bracketing Natural & Natural & Each time the shutter button is pressed, the cam- This mode helps ensure good results with backlit era takes three pictures: one at the current zoom subjects and in other situations with difficult light- ratio with an image size of O, a second zoomed ing.
Shooting Mode N MOTION PANORAMA MOTION PANORAMA In this mode, you can take up to three pictures and join them together to form a panorama. Use of a tripod is recommended to assist in composing overlapping shots. Rotate the mode dial to Frame the next shot to overlap with the previ- ous picture by superimposing y on + so that they form a solid circle (z).
Page 41
Shooting Mode 3 Cautions Framing Panoramas Manually • Panoramas are created from multiple frames. The Follow the steps below if the desired results are not camera may in some cases be unable to stitch the achieved with C AUTO selected for P MODE: frames together perfectly.
Shooting Mode P : PROGRAM AE : PROGRAM AE In this mode, the camera sets exposure automati- Program Shift cally. If desired, you can choose different combi- Press the d button to choose the desired combina- nations of shutter speed and aperture that will tion of shutter speed and aperture.
Shooting Mode S S : SHUTTER PRIORITY AE : SHUTTER PRIORITY AE In this mode, you choose the shutter speed while the camera adjusts aperture for optimal exposure. Press the d button to exit to shoot- Rotate the mode dial to S. ing mode.
Shooting Mode A : APERTURE PRIORITY AE : APERTURE PRIORITY AE In this mode, you choose the aperture while the camera adjusts shutter speed for optimal exposure. Rotate the mode dial to A. Press the d button to exit to shoot- ing mode.
Shooting Mode M M : MANUAL : MANUAL In this mode, you choose both shutter speed and aperture. If desired, exposure can be altered from the value suggested by the camera. Rotate the mode dial to M. Press the d button to exit to shoot- ing mode.
Shooting Mode C : CUSTOM MODE : CUSTOM MODE In P, S, A, and M modes, the K CUSTOM SET option in the shooting menu (pg. 78) can be used to save current camera and menu settings. These settings are recalled whenever the mode dial is rotated to C (cus- tom mode).
Intelligent Face Detection Intelligent Face Detection allows the camera to automatically detect human faces and set focus and exposure for a face anywhere in the frame for shots that emphasize portrait subjects. Choose for group portraits (in horizontal or vertical orientations) to prevent the camera from focusing on the back- ground.
Intelligent Face Detection Blink Detection Blink Detection Intelligent Face Detection Intelligent Face Detection is If an option other than OFF is selected for A IM- 7 7 7 recommended when using AGE DISP. (pg. 102), a warning will be displayed the self-timer for group- or if the camera detects subjects who may have self-portraits (pg.
Focus Lock To compose photographs with off-center subjects: Position the subject in the focus frame. Recompose the picture. Keeping the shutter button pressed halfway, recompose the picture. Focus. Press the shutter button halfway to set fo- cus and exposure. Focus and exposure will Shoot.
Page 50
Focus Lock Autofocus The AF-Assist Illuminator Although the camera boasts a high-precision autofo- If the subject is poorly lit, the AF-assist illuminator will cus system, it may be unable to focus on the subjects light to assist the focus operation when the shutter listed below.
F Macro and Super Macro Modes (Close-ups) For close-ups, press the selector left (F) to choose from the macro options shown below. Choose from F (macro mode), G (super macro mode), or OFF (macro mode off) When macro mode is in effect, the camera focuses on subjects near the center of the frame. Use the zoom control to compose pictures.
N Using the Flash (Intelligent Flash) When the flash is used, the camera’s Intelligent Flash system instantly analyzes the scene based on such factors as the brightness of the subject, its position in the frame, and its distance from the camera. Flash output and sensitivity are adjusted to ensure that the main subject is correctly exposed while preserving the effects of ambient background lighting, even in dimly-lit indoor scenes.
Page 53
N Using the Flash (Intelligent Flash) Focus. Press the shutter button halfway to focus. If the flash will fire, p will be displayed when the shutter button is pressed halfway. At slow shutter speeds, k will appear in the display to warn that pictures may be blurred; use of a tripod is recommended. Shoot.
J Using the Self-Timer The camera offers a ten-second timer that allows photographers to appear in their own photographs, and a two-second timer that can be used to avoid blur caused by the camera moving when the shutter button is pressed. Set the timer.
Page 55
J Using the Self-Timer The self-timer lamp on the front of the camera will blink immediately before the picture is taken. If the two-second timer is selected, the self-timer lamp will blink as the timer counts down. Intelligent Face Detection Because it ensures that the faces of portrait subjects will be in focus, Intelligent Face Detection (pg.
I Continuous Shooting (Burst Mode) Capture motion in a series of pictures. Choose a continuous shooting mode. Press the I button to display continuous shooting options. Press the selec- tor g or h to highlight the desired option and press MENU/OK. Mode Mode Description...
Page 57
I Continuous Shooting (Burst Mode) Focus. Press the shutter button halfway to focus. Shoot. Pictures will be taken while the shutter button is pressed. Shooting ends when the shutter button is released, memory is full, or the selected number of shots has been taken.
c Instant Zoom In instant zoom, the area surrounding the frame is visible in the display. Use to frame erratically moving subjects such as children, pets, and athletes at sporting events. Position the subject in the focus frame. The frame is displayed as Use the zoom control to frame the subject in shown at right.
Page 59
c Instant Zoom ■ ■ Digital Zoom Digital Zoom Enable digital zoom. Frame the picture. Select ON for the D DIGITAL ZOOM op- Use the zoom control to choose the area that tion in the setup menu (pg. 104). will be included in the final photograph. Choose a subject.
d Exposure Compensation Use exposure compensation when photographing very bright, very dark, or high-contrast subjects. Press the d button. Return to shooting mode. Press the d button to return to shooting The exposure indicator will be displayed. mode. Take pictures. Exposure indicator 1 Note F3.1...
Page 61
d Exposure Compensation Choosing an Exposure Compensation Value • Backlit subjects: choose values from + EV to +1 EV (for an explanation of the term “EV”, see the Glossary on page 120) • Highly reflective subjects or very bright scenes (e.g., snowfields): +1 EV •...
Playback Options To view the most recent picture in the monitor, Choosing a Display Format press the a button. Press the DISP/BACK button to cycle through playback display formats as shown below. 100-0001 100-0001 Press the selector right to view pictures 100-0001 100-0001 in the order recorded, left to view pic-...
Playback Options Playback Zoom Playback Zoom Intelligent Face Detection Pictures taken with Intelligent Select T to zoom in on pictures displayed in sin- Face Detection (pg. 31) are in- gle-frame playback; select W to zoom out. When dicated by a g icon. Press the the picture is zoomed in, the selector can be used g button to zoom in on the to view areas of the image not currently visible in...
Playback Options Viewing Photo Information Viewing Photo Information To view or hide the photo Histograms information listed below Histograms show the distribution of tones in the im- age. Brightness is shown by the horizontal axis, the in single-frame playback, number of pixels by the vertical axis. press d.
Playback Options Multi-Frame Playback Multi-Frame Playback To change the number of images dis- Use the selector to highlight images and press played during playback, select W. MENU/OK to view the highlighted image full frame. In the nine- and hundred-frame displays, press the selector up or down to view more pictures.
Viewing Panoramas To view a panorama, display in single-frame view and press the selector down. PLAY STOP PAUSE The following operations can be performed during playback: Operation Operation Button Button Description Description Start/pause Press the selector down to start playback. Press again to pause. playback End playback Press the selector up to end playback.
k PhotoBook Assist Create books from your favorite photos. Creating a PhotoBook Creating a PhotoBook Select k PHOTOBOOK ASSIST in the play- Scroll through the images and press the selec- back menu. tor up to select or deselect the current image for inclusion in the book.
k PhotoBook Assist Press MENU/OK. The new book will be Viewing PhotoBooks Viewing PhotoBooks added to the list in the photobook Highlight a book in the photobook assist menu assist menu. and press MENU/OK to display the book, then press 3 Cautions the selector left and right to scroll through the •...
b Image Search Search for pictures by date, subject, scene, file type, and rating. Select IMAGE SEARCH in the playback Select a search condition. Only pictures that menu. match the search condition will be displayed. To delete or protect selected pictures or to Highlight one of the following options and view the selected pictures in a slide show, press MENU/OK:...
A Deleting Pictures In the playback menu, you can select and delete Deleting One Picture Deleting One Picture individual pictures or delete all pictures at once. Press g or h to select the desired picture and Note that deleted pictures cannot be recovered. then press the MENU/OK button to delete the pic- Copy important pictures to a computer or other ture that is displayed.
A Deleting Pictures Deleting Multiple Pictures Deleting Multiple Pictures All pictures marked with a Select OK and press the MENU/OK checkmark can be deleted button to delete the selected pic- at once. tures. 2 Tip Pictures that have been selected for a DPOF print order and protected pictures are in- dicated by u.
A Deleting Pictures Deleting All Pictures Deleting All Pictures You can delete all the pictures. 2 Tips • You can press the DISP/BACK button to cancel, however, pictures that were deleted before you pressed the DISP/ BACK button cannot be recovered. •...
F Recording Movies Shoot short movies at 30 frames per second. Sound is recorded via the built-in microphone; do not cover the microphone during recording. Rotate the mode dial to F (movie Press DISP/BACK. The camera returns to the movie recording screen. mode).
Page 74
F Recording Movies 3 Caution Press the shutter button all the way The indicator lamp lights while movies are being re- down to start recording. corded. Do not open the battery chamber during shooting or while the indicator lamp is lit. Failure to REC and time observe this precaution could prevent the movie from remaining are dis-...
a Viewing Movies During playback (pg. 46), Progress is shown in the monitor during play- 100-006 100-006 movies are displayed in the back. monitor as shown at right. The following operations 12/31/2050 12/31/2050 10 : 00 AM 10 : 00 AM PLAY can be performed while a Progress bar...
Viewing Pictures on TV Connect the camera to a TV to show pictures to a group. Turn the camera off. Connect the supplied USB-A/V cable as shown below. Insert into USB-A/V Connect yellow plug cable connector to video-in jack Connect white plug to audio-in jack HDMI An HDMI cable (available from third-party suppliers;...
Page 77
Viewing Pictures on TV Tune the television to the video or HDMI input channel. See the documentation supplied with the television for details. Press the a button for about a second to turn the camera on. The camera monitor turns off and pictures and movies are played back on the TV.
Printing Pictures via USB If the printer supports PictBridge, the camera can be connected directly to the printer and pictures can be printed without first being copied to a computer. Note that depending on the printer, not all the functions described below may be supported. Connecting the Camera Connecting the Camera Printing Selected Pictures...
Printing Pictures via USB 2 Tip: Printing the Date of Recording Printing the DPOF Print Order Printing the DPOF Print Order To print the date of recording on pictures, press DISP/ To print the print order created with K PRINT BACK in steps 1–2 to display the PictBridge menu (see ORDER (DPOF) in the playback F-mode menu “Printing the DPOF Print Order,”...
Page 80
Printing Pictures via USB 1 Notes Press MENU/OK to start printing. • Print pictures from a memory card that has been for- matted in the camera. During Printing • If the printer does not support date printing, the The message shown at right PRINT WITH DATE s option will not be available in PRINTING is displayed during printing.
Printing Pictures via USB Creating a DPOF Print Order Creating a DPOF Print Order ■ ■ WITH DATE The K PRINT ORDER (DPOF) option in the play- WITH DATE s/ WITHOUT DATE / WITHOUT DATE back F-mode menu can be used to create a digi- To modify the DPOF print order, select K K PRINT tal “print order”...
Page 82
Printing Pictures via USB Press the selector up or down to Repeat steps 1–2 to complete the choose the number of copies (up to print order. Press MENU/OK to save 99). To remove a picture from the the print order when settings are order, press the selector down until the num- complete, or DISP/BACK to exit with- ber of copies is 0.
Page 83
Printing Pictures via USB ■ ■ RESET ALL 1 Notes RESET ALL • Print orders can contain a maximum of 999 pictures. To cancel the current print RESET DPOF OK? RESET DPOF OK? • If a memory card is inserted RESET DPOF OK? RESET DPOF OK? order, select RESET ALL...
Viewing Pictures on a Computer The supplied software can be used to copy pictures to a computer, where they can be stored, viewed, organized, and printed. Before proceeding, install the software as described below. Do connect the camera to the computer until installation is complete. Installing the Software Installing the Software Two applications are supplied: MyFinePix Studio for Windows and FinePixViewer for the Macintosh.
Page 85
Viewing Pictures on a Computer Start the computer. Log in to an account with administrator privileges before proceeding. Exit any applications that may be running and insert the installer CD in a CD-ROM drive. Windows 7/Windows Vista If an AutoPlay dialog is displayed, click SETUP.EXE. A “User Account Control” dialog will then be displayed; click Yes (Windows 7) or Allow (Windows Vista).
Page 86
PowerPC or Intel (Core 2 Duo or better) * Pre-installed versions of Mac OS X version 10.3.9–10.6 Mac OS X 10.7 is not supported. OS OS (visit http://www.fujifilm.com/support/digital_cameras/compatibility/ for more information) 256 MB or more (1 GB or more) * Free disk space...
Page 87
Viewing Pictures on a Computer Remove the installer CD from the CD-ROM drive. Note that you may be unable to remove the CD if Safari is running; if necessary, quit Safari before removing the CD. Store the installer CD in a dry location out of direct sunlight in case you need to re-install the software.
Viewing Pictures on a Computer Connecting the Camera Connecting the Camera Press the a button for about a second to If the pictures you wish to copy are stored on a memory card, insert the card into the camera turn the camera on. MyFinePix Studio or (pg.
Page 89
Viewing Pictures on a Computer Cautions Disconnecting the Camera • If a memory card containing a large number of images After confirming that the indicator lamp is out, follow is inserted, there may be a delay before the software the on-screen instructions to turn the camera off and starts and you may be unable to import or save im- disconnect the USB cable.
Using the Menus: Shooting Mode The F-mode and shooting menus contain settings for a wide range of shooting conditions. Using the F F -Mode Menu Using the -Mode Menu Press the F button to display the F- Press the selector up or down to mode menu.
Using the Menus: Shooting Mode F -Mode Menu Options -Mode Menu Options Menu item Menu item Description Description Options Options Default Default AUTO / AUTO (800) / AUTO (400) / Adjust ISO sensitivity. Choose higher values when the sub- 6400 / 3200 / 1600 / AUTO...
Using the Menus: Shooting Mode O IMAGE SIZE IMAGE SIZE Choose the size and aspect ratio at which still pic- Aspect Ratio tures are recorded. Large pictures can be printed Pictures with an aspect ratio of 4 : 3 have the same at large sizes with no drop in quality;...
Using the Menus: Shooting Mode P FINEPIX COLOR FINEPIX COLOR Using the Shooting Menu Using the Shooting Menu Enhance contrast and color saturation or take pic- Press MENU/OK to display the shoot- tures in black and white. ing menu. Option Option Description Description...
Using the Menus: Shooting Mode Shooting Menu Options Shooting Menu Options Menu item Menu item Description Description Options Options Default Default / C / D / C /D/K/ M / SCENE POSITION SCENE POSITION Choose a scene for SP mode (pg. 21). / O / H / P / Q / R / S / U / AUTO / AUTO (800) / AUTO (400) / Adjust ISO sensitivity.
Using the Menus: Shooting Mode T IMAGE QUALITY D WHITE BALANCE IMAGE QUALITY WHITE BALANCE Choose how much image files are compressed. For natural colors, choose a setting that matches Select FINE (low compression) for higher image the light source (for an explanation of “white bal- quality, NORMAL (high compression) to increase ance,”...
Using the Menus: Shooting Mode ■ ■ h H SHARPNESS h : Custom White Balance SHARPNESS : Custom White Balance Choose h to adjust white balance for unusual Choose whether to sharpen or soften outlines. lighting conditions. White balance measurement •...
Using the Menus: Shooting Mode C PHOTOMETRY F AF MODE PHOTOMETRY AF MODE Choose how the camera meters exposure when This option controls how the camera selects the Intelligent Face Detection is off. focus area when Intelligent Face Detection is off •...
Using the Menus: Shooting Mode S FACE RECOGNITION • t AREA: The focus position FACE RECOGNITION SELECT AF AREA SELECT AF AREA can be chosen manually by Once personal information is registered with a pressing the selector up, face, the camera recognizes the registered face down, left, or right and press- and prioritizes focus and exposure to that face.
Page 99
Using the Menus: Shooting Mode ■ ■ VIEW & EDIT A Note VIEW & EDIT When the message !CANNOT REGISTER is displayed, Select VIEW & EDIT from S FACE RECOGNI- the camera has failed to register the face. Take a shot TION to display REGISTERED FACE.
Page 100
Using the Menus: Shooting Mode ■ ■ AUTO REGISTRATION AUTO REGISTRATION S FACE RECOGNITION Select AUTO REGISTRATION from S FACE • Up to 8 people’s information can be registered. RECOGNITION and set it to ON. After shooting • When 8 people’s information has already been reg- the same face several times with 3 FACE DE- istered, AUTO REGISTRATION does not function.
Using the Menus: Shooting Mode J AE BKT EV STEPS AE BKT EV STEPS Removing face recognition during playback Select S ERASE FACE RECOG. in the playback menu Choose the size of the exposure bracketing incre- (pg. 88). When this option is selected, the camera will ment used when O (AE bracketing) is selected in zoom in on an area in the current picture that it has continuous shooting mode (pg.
Using the Menus: Playback Mode The F-mode and playback menus are used to manage the pictures on the memory card. Using the F F -Mode Menu F -Mode Menu Options Using the -Mode Menu -Mode Menu Options Press the a button to enter play- Option Option Description...
Using the Menus: Playback Mode I SLIDE SHOW SLIDE SHOW View pictures in an automated slide show. Choose the type of show and press MENU/OK to start. Press DISP/BACK at any time during the show to view on-screen help. When a movie is displayed, movie play- back will begin automatically, and the slide show will continue when the movie ends.
Using the Menus: Playback Mode Using the Playback Menu Using the Playback Menu Playback Menu Options Playback Menu Options Press the a button to enter play- The following options are available: back mode. Option Option Description Description Create books from your favorite photos k PHOTOBOOK ASSIST PHOTOBOOK ASSIST Press MENU/OK to display the play-...
Using the Menus: Playback Mode j MARK FOR UPLOAD MARK FOR UPLOAD You can select images and movies to be queued for upload to YouTube and FACEBOOK. Select j MARK FOR UPLOAD in the playback menu. ■ ■ Add/Remove Items in the Upload Queue Repeat steps 3 and 4 as necessary Add/Remove Items in the Upload Queue and add or remove items.
Page 106
Using the Menus: Playback Mode ■ ■ Removing All Items From the Upload Queue ■ ■ Upload Items Removing All Items From the Upload Queue Upload Items You can remove all items from the upload queue. Items added to the upload queue using the cam- era can be easily uploaded from a computer by Select RESET ALL.
Using the Menus: Playback Mode B RED EYE REMOVAL RED EYE REMOVAL If the current picture is marked with a icon to indicate that it was taken with Intelligent Face De- tection, this option can be used to remove red-eye. The camera will analyze the image; if red-eye is detected, the image will be processed to create a copy with reduced red-eye.
Using the Menus: Playback Mode D PROTECT PROTECT Protect pictures from accidental deletion. The following options are available. ■ ■ FRAME ■ ■ SET ALL FRAME SET ALL Protect selected pictures. Press MENU/OK to protect all SET ALL OK? IT MAY TAKE A WHILE pictures, or press DISP/BACK Press the selector left or right to dis- to exit without changing...
Using the Menus: Playback Mode G CROP CROP To create a cropped copy of a picture, play the picture back and select G CROP in the playback menu (pg. 88). Use the zoom control to zoom in and out and Press MENU/OK to view the copy size.
Using the Menus: Playback Mode O RESIZE RESIZE To create a small copy of a picture, play the picture back and select O RESIZE in the playback menu (pg. 88). Press the selector up or down to Press MENU/OK to select the high- highlight a or b.
Using the Menus: Playback Mode C IMAGE ROTATE IMAGE ROTATE By default, pictures taken in tall orientation are Press the selector down to rotate the displayed in wide orientation. Use this option to picture 90 ° clockwise, up to rotate the picture 90 °...
Using the Menus: Playback Mode F VOICE MEMO VOICE MEMO Press MENU/OK to start recording. To add a voice memo to a still picture, select F VOICE MEMO after displaying the picture in playback mode. RECORDING Time remaining 1 Note Blinks red Voice memos can not be added to movies or protect- ed pictures.
Using the Menus: Playback Mode J DISP. ASPECT DISP. ASPECT Playing Voice Memos Choose how High Definition (HD) devices display Pictures with voice memos are indicated by a q icon during playback. To play the voice memo back, select pictures with an aspect ratio of 4 : 3 (this option is PLAY for F VOICE MEMO in the playback menu.
The Setup Menu Using the Setup Menu Using the Setup Menu Display the setup menu. Adjust settings. 1.1 Press MENU/OK to display the 2.1 Press the selector right to acti- menu for the current mode. vate the setup menu. 1.2 Press the selector left to high- 2.2 Press the selector up or down to highlight a menu item.
The Setup Menu Setup Menu Options Setup Menu Options Menu item Menu item Description Description Options Options Default Default F DATE/TIME DATE/TIME Set the camera clock (pg. 14). — — N TIME DIFFERENCE TIME DIFFERENCE Set the clock to local time (pg. 101). Choose a language (pg.
Page 116
The Setup Menu Menu item Menu item Description Description Options Options Default Default J LCD BRIGHTNESS LCD BRIGHTNESS Control the brightness of the display (pg. 104). –5 – +5 Choose 30 fps to increase battery life, 60 fps for improved dis- E EVF/LCD MODE EVF/LCD MODE 30 fps / 60 fps...
The Setup Menu N TIME DIFFERENCE TIME DIFFERENCE When travelling, use this option to switch the camera clock instantly from your home time zone to the local time at your destination. Specify the difference between local time Switch between local time and your home and your home time zone.
The Setup Menu K FORMAT A IMAGE DISP. FORMAT IMAGE DISP. Format a memory card. Highlight OK and press Choose an option other than OFF to display pic- MENU/OK to begin formatting. tures in the monitor after shooting. Pictures can be displayed for 1.5 s (1.5 SEC), 3 s (3 SEC), or until 3 Cautions the MENU/OK button is pressed (ZOOM (CONTIN-...
The Setup Menu B FRAME NO. FRAME NO. Blink Detection (pg. 32) New pictures are stored in At settings other than OFF, a warning will be dis- Frame number Frame number played if the camera detects subjects who may have image files named using a 100-0001 100-0001...
The Setup Menu I PLAYBACK VOLUME D DIGITAL ZOOM PLAYBACK VOLUME DIGITAL ZOOM Press the selector up or down to choose volume If ON is selected, selecting T at the maximum for movie and voice memo playback and press optical zoom position will trigger digital zoom, MENU/OK to select.
The Setup Menu P DISCHARGE (Ni-MH Batteries Only) DISCHARGE (Ni-MH Batteries Only) S DATE STAMP DATE STAMP The capacity of rechargeable Ni-MH batteries may To add shooting date and time, choose T + U. be temporarily reduced when new, after long pe- To add only shooting date, choose T.
Optional Accessories The camera supports a wide range of accessories from FUJIFILM and other manufacturers. ■ ■ Audio/Visual Audio/Visual Standard TV (available from third-party suppliers) FINEPIX S4500 Series USB-A/V cable FINEPIX S4400 Series FINEPIX S4300 Series ■ ■ Computer Related...
Optional Accessories Accessories from FUJIFILM Accessories from FUJIFILM The following optional accessories are available from FUJIFILM. For the latest information on the acces- sories available in your region, check with your local FUJIFILM representative or visit http://www.fujifilm. com/products/digital_cameras/index.html. AC power adapter...
Any remaining stains can be removed by wiping ter, motor, transformer, or magnet gently with a piece of FUJIFILM lens-cleaning pa- • in contact with volatile chemicals such as pesti- per to which a small amount of lens-cleaning fluid cides has been applied.
Troubleshooting Power and Battery Problem Problem Possible cause Possible cause Solution Solution Page Page The batteries are exhausted. Insert fresh or fully-charged spare batteries. The batteries are not in the correct orienta- Re-insert the batteries in the correct orienta- tion. tion.
Page 126
Troubleshooting Menus and Displays Problem Problem Possible cause Possible cause Solution Solution Page Page Menus and displays are English is not selected for the L a Select ENGLISH. 14, 99 not in English. option in the setup menu. Shooting Problem Problem Possible cause Possible cause...
Page 127
Troubleshooting Problem Problem Possible cause Possible cause Solution Solution Page Page Face detection Intelligent Face Detection is not available in Choose a different shooting mode. not available. the current shooting mode. The subject’s face is obscured by sunglasses, a Remove the obstructions. hat, long hair, or other objects.
Page 128
Troubleshooting Problem Problem Possible cause Possible cause Solution Solution Page Page The lens is dirty. Clean the lens. The lens is blocked. Keep objects away from the lens. Pictures are s is displayed during shooting and the fo- blurred. Check focus before shooting. cus frame is displayed in red.
Page 129
Troubleshooting Playback Problem Problem Possible cause Possible cause Solution Solution Page Page Pictures are The pictures were taken with a different make or — — grainy. model of camera. Pictures The picture has been resized or cropped to Playback zoom a / b or is from another make or model of —...
Page 130
Troubleshooting Connections Problem Problem Possible cause Possible cause Solution Solution Page Page Monitor is off. The camera is connected to a TV. View pictures on the TV. The camera is not properly connected. Connect the camera correctly. An A/V cable was connected during movie Connect the camera once movie playback 59, 60 playback.
Page 131
AC power adapter/ Temporary camera malfunction. function as expected. DC coupler. If the problem persists, contact your FUJIFILM dealer. The AC power adapter can be used with volt- I want to use an AC ages of 100–240 V and power frequency of power adapter and DC Check the label on the AC power adapter.
The memory card contacts require cleaning. is repeated, format the memory card (pg. 102). If the message persists, replace the memory card. Camera malfunction. Contact a FUJIFILM dealer. PROTECTED CARD The memory card is locked. Unlock the memory card (pg. 10).
Page 133
Incompatible memory card. Use a compatible memory card. Camera malfunction. Contact a FUJIFILM dealer. The memory card is full; pictures can not be Delete pictures or insert a memory card with more free MEMORY FULL recorded.
Page 134
Voice memo file is corrupt. The voice memo can not be played back. ERROR Camera malfunction. Contact a FUJIFILM dealer. CAN NOT CROP An attempt was made to crop a a picture. These pictures can not be cropped. The picture selected for cropping is damaged CAN NOT CROP or was not created with the camera.
Page 135
Warning Messages and Displays Warning Warning Description Description Solution Solution Movies and some pictures created with other devices An attempt was made to print a movie, a pic- can not be printed. If the picture was created with the CAN NOT BE PRINTED ture not created with the camera, or a picture camera, check the printer manual to confirm that the in a format not supported by the printer.
Glossary Digital zoom: Unlike optical zoom, digital zoom does not increase the amount of visible detail. Instead, details vis- ible using optical zoom are simply enlarged, producing a slightly “grainy” image. DPOF (Digital Print Order Format): A standard that allows pictures to be printed from “print orders” stored on a memory card.
Memory Card Capacity The following table shows the recording time or number of pictures available at different image sizes. All figures are approximate; file size varies with the scene recorded, producing wide variations in the number of files that can be stored. The number of exposures or length remaining may not diminish at an even rate.
Specifications System Model Digital Camera FinePix S4500/S4400/S4300/S4200 Series Effective pixels 14 million -in., square-pixel CCD with primary color filter Storage media SD/SDHC/SDXC memory cards File system Compliant with Design Rule for Camera File System (DCF), Exif 2.3, and Digital Print Order Format (DPOF) File format •...
Page 139
Specifications System Focus range (distance from Approx. 40 cm (1.3 ft.)–infinity (wide angle); approx. 2.8 m (9.1 ft.)–infinity (telephoto) front of lens) • Macro: approx. 7 cm–3.0 m/2.7 in.–9.8 ft. (wide angle); approx. 2.0 m–3.0 m/6.5 ft.–9.8 ft. (telephoto) • Super macro: approx. 2 cm–100 cm/0.7 in.–3.2 ft. (wide angle) Sensitivity Standard output sensitivity equivalent to ISO 64, 100, 200, 400, 800, 1600, 3200, 6400 (3200 and 6400 available only at image sizes Q);...
Page 140
Specifications System Flash Manual pop-up flash with CCD-metered auto flash control (using monitor pre-flashes); effective range when sensitivity is set to ISO800 is approx. 40 cm–7.0 m/1.3 ft.–22.9 ft. (wide angle) or 2.5 m–3.6 m/8.2 ft.–11.8 ft. (telephoto); effective range in macro mode is approx. 30 cm–3.0 m/0.9 ft.–9.8 ft. (wide angle) or 2.0 m– 3.0 m/6.5 ft.–9.8 ft.
Page 141
Specifications Power supply/other Power sources • AA alkaline batteries (×4) • AA lithium batteries (×4; available from third-party suppliers) • AA rechargeable nickel-metal hydride (Ni-MH) batteries (×4; available from third-party suppliers) • AC-5VX AC power adapter and CP-04 DC coupler (sold separately) Battery life (approximate Battery type Battery type...
Page 142
Specifications Power supply/other Camera weight S4500 series Approx. 448 g/15.8 oz., excluding batteries, accessories, and memory cards S4400 series Approx. 448 g/15.8 oz., excluding batteries, accessories, and memory cards S4300 series Approx. 448 g/15.8 oz., excluding batteries, accessories, and memory cards S4200 series Approx.
Page 143
European countries and China. Notices • Specifications subject to change without notice. FUJIFILM shall not be held liable for damages resulting from errors in this manual. • Although the monitor is manufactured using advanced high-precision technology, small bright points and anomalous colors (particularly in the vicinity of text) may appear.
Page 144
7-3, AKASAKA 9-CHOME, MINATO-KU, TOKYO 107-0052, JAPAN http://www.fujifilm.com/products/digital_cameras/index.html Please contact your local distributor for repairs and technical support. (see Worldwide Network list)
Restrictions on Camera Settings Shooting Mode and Camera Settings Shooting Mode and Camera Settings The options available in each shooting mode are listed below. Shooting mode Shooting mode D C C d d K K M Option Option U V V W A A M M ✔...
Page 146
Restrictions on Camera Settings Shooting mode Shooting mode D C C d d K K M Option Option U V V W A A M M ✔ ✔ ✔ ✔ ✔ ✔ ✔ ✔ ✔ ✔ ✔ ✔ ✔ ✔ ✔ ✔ ✔ ✔ ✔...
Page 147
Restrictions on Camera Settings Shooting mode Shooting mode D C C d d K K M Option Option U V V W A A M M ✔ ✔ ✔ ✔ FLASH FLASH ✔ ✔ ✔ ✔ AE BKT EV STEPS AE BKT EV STEPS ✔...